
Related Manuals for Grundig GCH-K0274P


Summary of Contents for Grundig GCH-K0274P
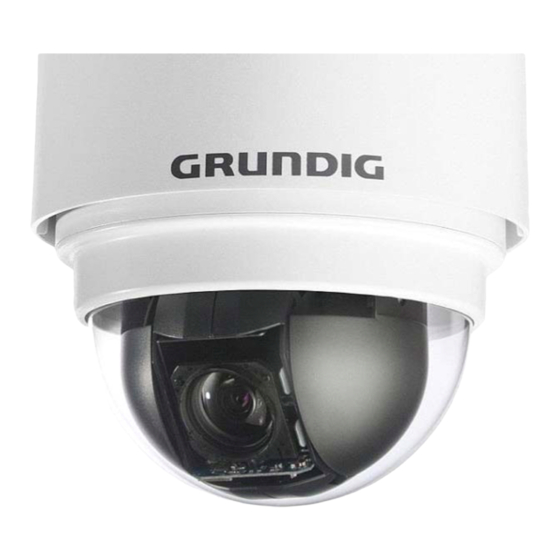
- Page 1 Owner's Manual HD-SDI Cameras & Domes GCH-K0274P 2 Megapixel Full HD Outdoor Motorised Dome SDI-Camera 18x Zoom ICR WDR GCH-K0274P.41.1.20.01.2012 © ASP AG...
-
Page 3: Table Of Contents
Content: 5. Camera Control Protocol Setup 1. Introduction 6. Power Connection 2. Important Safety Instructions 7. Alarm Application 3. Package Contents 8. RS-485 Connector Definition 4. Installation 5. Operation and Configuration 1. Installation Remarks 1. OSD Display Format 2. Switch & Connector Definition 2. -
Page 4: Package Contents
If this product fails to operate normally, contact the nearest service center. Never disassemble or modify this product in any way. (GRUNDIG is not liable for problems caused by unauthorised modifications or attempted repair.) To prevent fire or electric shock, do not expose the inside of this device to rain or moisture. -
Page 5: Switch & Connector Definition
Connect the HD-SDI Motordome Camera to other devices as shown in the diagram to complete a video surveillance solution. 4.2. Switch & Connector Definition Before connecting the Dome Camera to other devices of a CCTV system, please complete first the Dome Camera’s ID and communication switch settings. -
Page 6: Communication Switch Setting
There are various switches and connectors located on the Dome Camera’s back plate as shown in the pictures below. Please refer to the diagram and the table for use of each switch/connector. 4.3. Communication Switch Setting The Dome Camera’s communication switches are specified in the table below. RS-485 is the interface for communication between the Dome Camera and its control device. -
Page 7: Id Configuration
4.4. ID Configuration Please change the Dome Camera’s ID if there is more than one Dome Camera in the same network. Use this switch to change your Motordome Camera’s ID by setting the 10-bit dip switch. For instance, if the camera’s ID is 006, set the SW 8 and SW 9 to “ON”, the rest to “OFF,”... -
Page 8: Alarm Application
4.7. Alarm Application The Camera supports 4 digital alarm inputs and 2 digital alarm outputs. Please make sure the alarm connections are properly wired before starting to configure the alarm related settings. Please refer to the pin definition table below for alarm system wiring. 4.8. -
Page 9: Operation And Configuration
5. Operation and Configuration 5.1. OSD Display Format Regarding information about the OSD display, position and function description, please refer to the table below. English... -
Page 10: Osd Menu Tree
5.2. OSD Menu Tree The OSD setup menu structure is listed in the following section. The star symbol indicates the factory default. For detailed function description, please refer to 5.3. Configuration Menu. English... - Page 11 English...
-
Page 12: Configuration Menu
To enter the OSD menu of the selected camera, use the PTZ menuof the Grundig HD-SDI recorder (see the manual of the GRH series recorder) or use a keyboard that can call the PTZ OSD by the used protocol. - Page 13 During the Motordome Camera’s start-up, the OSD Start Page will display information including the ID number, protocol/baudrate and camera initialising message. Furthermore, when certain camera errors occur, the error message(s) will be shown on the screen. If the problem(s) cannot be solved at once, please contact your supplier for assistance.
- Page 14 - Zoom Trigger Mode (Z. TRIG.): In this mode, AF is activated at the time when zoom is changed. - PTZ Trigger Mode (PTZ TRIG): In this mode, AF is triggered when the Dome Camera is set to pan, tilt or zoom. - EXIT+SAVE: Press <YES>...
- Page 15 5.3.6. WBC MODE To display natural colours, the camera needs to know the reference colour temperature of the light source. Based on this reference colour temperature the camera will calculate the correct values for all colours. The camera can perform a measurement by itself or the user can set up the reference colour temperature manually. The scale unit of the colour temperature is Kelvin [K].
- Page 16 5.3.7. SETUP MENU 1 In Setup Menu 1, users can set functions like Slow Shutter, Noise Reduction, Aperture and Video Type. Please refer to the following description for use of each function. SLOW SHUTTER: The shutter speed determines how long the image sensor is exposed to light. The Dome Camera will automatically adjust the shutter speed based on the light condition of the operating environment.
- Page 17 FLIP: Users can track an object continuously when it passes through underneath the Dome Camera by setting Flip to IMAGE (digital flip) or M.E. (mechanical flip). - IMAGE: IMAGE represents a digital IMAGE FLIP, which enables users to keep tracking objects seamlessly. Under this mode, almost no delay occurs, in contrast to M.E.
- Page 18 - EXIT & SET: Exit the <ANGLE ADJUSTER> menu and go back to <SETUP MENU 2> to set other functions. PT POSITION: PT Position can display the Pan/Tilt position of the Dome Camera on the screen. - PT DISPLAY: Turn the item to <ON> to display the pan/tilt position on the screen. The display format will be “XX YYY/ YY”. - SET PAN ZERO: By using the <SET PAN ZERO>...
- Page 19 PASSWORD: The administrator can activate the OSD Password function for security concerns. Once the function is turned on, the users are required to enter the password every time when accessing the OSD menu. The password setting procedure is like the following: STEP 1: Choose a number with the direction keys and then press the <CAMERA MENU>...
- Page 20 - DEFAULT SYSTEM: This function allows users to restore the camera to its factory default state. Press “ENTER” to start the reset. EXIT: Exit the SETUP MENU 2 and go to MAIN PAGE 2 to set other functions. 5.3.9. ID DISPLAY Press the direction key down to turn the MAIN MENU page from 1 to 2, afterwards the menu item <ID DISPLAY>...
- Page 21 STEP 1: Move the dome to a view area for which you want to set a title. STEP 2: Access the OSD menu, go to MAIN PAGE 2 and select <TITLE SETTING>. STEP 3: Select a number that will represent the view area. STEP 4: Press the <CAMERA MENU>...
- Page 22 EXIT: Exit the PRESET menu and go back to MAIN PAGE 2 to set up a sequence. NOTE: Users can set preset points through a keyboard. Please refer to the control keyboard’s quick guide for further information. 5.3.13. SEQUENCE The function executes the pre-positioning of the pan, tilt, zoom and focus features in a certain sequence for a camera.
- Page 23 5.3.14. AUTOPAN To execute Auto Pan means scanning an area horizontally so that the Dome Camera can catch a horizontal view. The parameters are listed as follows. AUTOPAN LINE: Up to eight auto pan lines can be configured in this Camera. Users can choose to execute a line by using the LEFT/RIGHT direction keys.
- Page 24 RUN AUTOPAN: After all settings related to Auto-Pan are completed, select this item to execute the Auto-pan function. Press the <CAMERA MENU> key (ENTER) to run an Auto-Pan path. EXIT: Exit the AUTOPAN setup menu and go back to MAIN PAGE 2 to set up a cruise. NOTE: Users can execute the Auto Pan function through a keyboard.
- Page 25 5.3.16. HOME SETTING Users are able to set an operation mode to ensure constant monitoring. If the Dome Camera idles for a period of time, the selected function will be activated automatically; this is the HOME function. The HOME function allows constant and accurate monitoring to avoid that the Dome Camera stops or misses events.
- Page 26 EXIT: Exit the HOME SETTING menu. Then go to MAIN PAGE 3 to carry on with other setups. 5.3.17. IR FUNCTION With the IR cut filter, the Dome Camera can still catch a clear image at night time or in a very dark light condition.
- Page 27 ALARM PIN: The dome provides 4 alarm inputs and 2 outputs (N.O. or N.C.). Select an alarm connector of which you want to set the alarm-related parameters, and then set its alarm-related parameters in the Alarm Setting menu. For alarm pin definitions, please refer to chapter 4.7.
- Page 28 DWELL TIME: The DWELL TIME is the duration during which an alarm action is executed. If the PRESET mode is selected when an alarm takes place, the Dome Camera will go to the selected preset position and stay there for a user-defined period of time (1 ~ 127 seconds/Always) when an alarm takes place.
- Page 29 5.3.20. PRIVACY MASK The Privacy Mask function aims to avoid any intrusive monitoring. Users can adjust the camera view position using the joystick, and adjust the mask size and area via the direction keys on the control keyboard. When setting a mask, it is suggested to set it at least twice bigger (height and width) than the masked object.
- Page 30 - H SIZE (00~80): Users can adjust the horizontal size of a privacy mask through this item. Setting the H and V size to 0 can delete the selected mask. - V SIZE (00~60): Users can adjust the vertical size of a privacy mask through this item. Setting the H and V size to 0 can delete the selected mask.
- Page 31 5.3.22. SCHEDULE FUNCTION The schedule function enables users to program the performance of a preset point or function (Sequence/Auto Pan/Cruise) automatically, in a specific period of time. SWITCH: Select <ON> to enable or <OFF> to disable the schedule function. POINT: Users are allowed to arrange 32 sets of schedule points, i.e.
-
Page 32: Switch Settings Index Table
6. Switch Settings Index Table Please refer to the switch settings below for the Dome Camera’s ID and protocol setup. English... - Page 33 English...
- Page 34 English...
- Page 35 English...
- Page 36 English...
- Page 37 English...
- Page 38 English...
- Page 39 Specifications GCH-K0274P Image Sensor 1/2.8" Progressive Scan CMOS, 3 Megapixels Pixels - Total 2144(H) x 1588(V), 3.40M pixels Pixels - Effective 2080(H) x 1553(V), 3.23M pixels Scanning System Progressive Image Size 1920x1080, 1280x720 Frame Rate 25 fps (1920 x 1080),...
-
Page 40: Ec Declaration Of Conformity
EC Declaration of Conformity GCH-K0274P 2 Megapixel Full HD Outdoor Motorised Dome SDI-Camera 18x Zoom ICR WDR It is hereby certified that the products meet the standards in the following relevant provisions: EC EMC Directive 2004/108/EC Low Voltage Directive 2006/95/EC...
Need help?
Do you have a question about the GCH-K0274P and is the answer not in the manual?
Questions and answers