Table of Contents
Advertisement
Quick Links
Advertisement
Table of Contents

Related Manuals for Grundig GCA-B2323T


Summary of Contents for Grundig GCA-B2323T
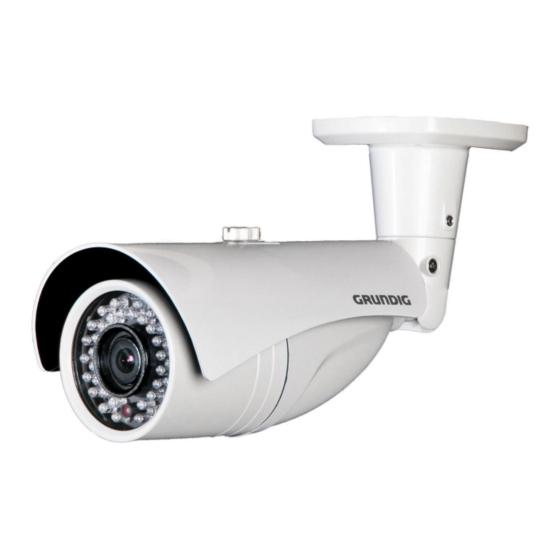
- Page 1 VSS Nederland Video Systems Owner´s Manual Cameras & Domes GCA-B2323T 1/3" Outdoor Varifocal Camera with IR LED GCA-B2323T.8.2.27.10.2010 © ASP AG VSS Nederland B.V. Telfordstraat 11m 8013 RL Zwolle Tel.: +31 38 42 89 420 Fax: +31 38 42 89 429...
-
Page 3: Table Of Contents
Content: 1. Important Safety Instructions 2. Package Contents 3. Installation 1. Parts Name 2. Connections 3. Mounting the camera 4. Zoom & Focus Adjustment 5. IR-LED Brightness Dip Switch 4. OSD Menu 1. OSD Controls 2. Main menu 3. Camera Setup 4. -
Page 4: Package Contents
If this product fails to operate normally, contact the nearest service center. Never disassemble or modify this product in any way. (GRUNDIG is not liable for problems caused by unauthorized modifications or attempted repair.) To prevent fire or electric shock, do not expose the inside of this device to rain or moisture. -
Page 5: Parts Name
3.1. Parts Name 1. Sun-Shield Bolt 2. Sun-Shield 3. Front Case 4. Rear Case 5. Service Monitor Port Cap 6. Bracket 7. Video/Power Cable English... -
Page 6: Connections
3.2. Connections - Power connection: Requires DC 12V or AC 24V input depending on camera model. - All camera models are supplied with service monitor output on the camera module. A service monitor and control cable is included in the package. Note: To set up OSD menu externally, service monitor and control cable is required. -
Page 7: Zoom & Focus Adjustment
3.4. Zoom & Focus Adjustment 1. Unscrew Front Case from the Rear Case. 2. Loosen Zoom & Focus screws and make necessary adjustments as shown. - Field of View: Telephoto (T) to Wide (W) - Focus: Near (N) to Infinity (oo) 3. -
Page 8: Ir-Led Brightness Dip Switch
3.5. IR-LED Brightness Dip Switch 4. OSD Menu 4.1. OSD Controls 4.1.1. OSD Control Keys - SETUP key: Accesses to the menu mode or confirms the setting. - UP (/\) / DOWN (\/): Chooses the desired menu. - LEFT (<) / RIGHT (>): Sets up the value of the selected menu. English... -
Page 9: Main Menu
4.1.2. OSD Icons Exits the menu setting. Before you exit make sure you SAVE your settings, or select QUIT to cancel. Returns to the previous menu. Returns to the main menu. Use this to SAVE your settings of MASK AREA, PRIVACY ZONE and more. Once you saved your settings, they will remain even if you select QUIT in the menu. -
Page 10: Camera Setup
COMMUNICATION: Configures the settings regarding the RS-485 communication. SYSTEM INFO: Displays the system information including the camera version and communication settings. LANGUAGE: Select a preferred language from those listed. 4.3. Camera Setup CAMERA ID [OFF, ON] : It is used to switch on/off the camera id. If camera id is switched ON you can access the CAMERA ID menu to programm the camera text. - Page 11 Note: - If the IRIS menu is set to ELC, the SHUTTER menu will be deactivated as you adjust the brightness using the electronic shutter. - If the SENS-UP menu is set to AUTO, only items of OFF and AUTO are available in the SHUTTER Menu - If the SENS-UP menu is set to FIX, the SHUTTER menu will be deactivated.
- Page 12 DAY & NIGHT [DAY, NIGHT, AUTO, EXT] : - DAY: If set to DAY, it will be fixed to colour mode regardless of the ambient conditions. - NIGHT: If set to NIGHT, it will be fixed to Black-and- White mode regardless of the ambient conditions.
- Page 13 4.3.1. CAMERA ID This menu is used for you to assign a unique name to a camera. You can enter up to 54 Alphanumeric or special characters for the CAMERA ID. Select LOCATION and press the SETUP key to move the display position of the CAMERA ID.
- Page 14 4.3.3. ELC (Electronic Light Control) If you press the SETUP key when the ELC submenu is selected, the corresponding screen appears. You can make the ELC function active or not. Similar to ALC setting, you can specify the BLC area. 4.3.4.
- Page 15 4.3.6. DAY/NIGHT (NIGHT MENU) If set to NIGHT, it will be fixed to BLACK and WHITE mode regardless of the ambient conditions. If you press the SETUP key with a NIGHT submenu selected, you will see a menu where you can set Burst to OFF/ON. If BURST is set to ON, the Burst signal will output together with the BLACK and WHITE composite video signal.
- Page 16 4.3.8. WHITE BALANCE - DAY: In this mode, you can set the colour values of RED and BLUE. The screen will be displayed in colours according to your settings. Note: - You can set the values of R-GAIN and B- GAIN only in AWC mode.
-
Page 17: Intelligence
4.3.9. DIGITAL ZOOM You can set the digital zoom factor and position. When the zoom factor and position are defined, the digital zoom function will operate. - RATIO: Define the zoom factor with the direction keys (< >). - LOCATION: If you press the SETUP key you can change the position of the digital zoom with the direction keys (<... -
Page 18: Privacy Zone
4.4.1. MASK AREA Specify a detection exception area to mask. Select a mask number and specify the size and position. Note: - If BACKLIGHT is set to BLC, the MASK AREA function will be deactivated. 4.5. Privacy Zone The PRIVACY function will protect your privacy by screening the privacy area that you have specified during monitoring. -
Page 19: Other Set
You can specify a pixel that moves as you change the PIXEL LEVEL to set the position. How to set the point: You can set each position of the 4 points. - If you press the SETUP key in <POINT>, you will see the points available in the PRIVACY ZONE. -
Page 20: Communication
4.7. Communication Configure the settings regarding the UART communication. **This related function is not available in this camera version. 4.8. System Info You can view the system information including the type, protocol, address, baud rate, serial number, and camera version. 4.9. - Page 21 Specifications GCA-B2323T Image Sensor 1/3" CCD (Sony Super HAD IT) A1 Digital Signal Processor Motion Adaptive Digital Noise Reduction (DNR), On Screen Menue (OSD), Digital Image Stabilisation (DIS)control over coax and Privacy Zones Scanning System PAL, 50Hz, 625 TVL(V), 2:1 Inter Line Transfer...
- Page 22 Power Consumption Weight 1.14 kg Dimensions (wxhxd) Ø 80 x 178 mm Dimensions English...
- Page 23 EC Declaration of Conformity GCA-B2323T 1/3" Outdoor Varifocal Camera with IR LED It is hereby certified that the products meet the standards in the following relevant provisions: EC EMC Directive 2004/108/EC Low Voltage Directive 2006/95/EC Applied harmonized standards and technical specifications:...
Need help?
Do you have a question about the GCA-B2323T and is the answer not in the manual?
Questions and answers