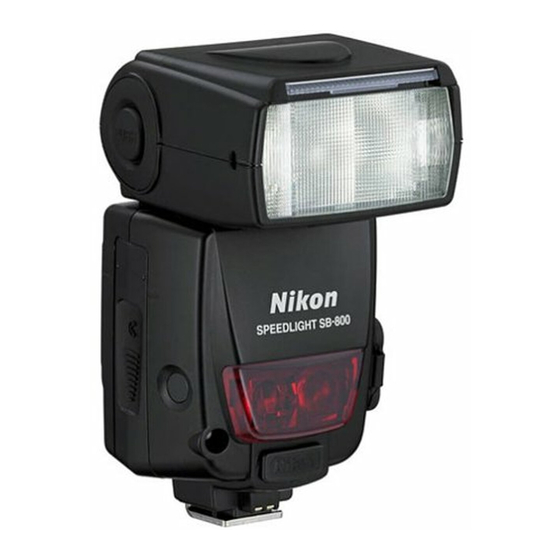
Nikon SB-800 Repair Manual
Hide thumbs
Also See for SB-800:
- Instruction manual (132 pages) ,
- Quick start manual (3 pages) ,
- Specification sheet (2 pages)

Related Manuals for Nikon SB-800


Summary of Contents for Nikon SB-800
- Page 1 FSA03501-R.3613.A 作成承認印 配布許可印 FSA03501 REPAIR MANUAL Copyrigh c 2003 by Nikon Corporation. All Rights Reserved. 無断転載を禁ず !! Printed in Japan DEC 2003...
-
Page 2: Table Of Contents
FSA03501-R.3613.A CONTENTS SPECIFICATIONS / OTHERS Specifications …………………………………………………… M1-M3 Custom functions ……………………………………………… M4-M5 DISASSEMBLY Side-rubber / Cover (E) unit ……………………………………… D1 Fiber ① ………………………………………………………… D2 Separation into each unit ………………………………………… D3 Head unit ………………………………………………………… ... - Page 3 Necessary equipment / Adjustment items ………………………… Points to notice for Inspection & Adjustment of Flash …………… How to connect PC and SB-800 when adjustments are made …… A22-A24 Adjustment software (J18355) …………………………………… Inspection & Adjustment of Focusing ligh ………………………… A26-A27 MECHANISM - ELECTRICAL Block diagram ...
-
Page 4: Specifications
SU-4 type wireless multiple flash No limitation Multiple flash shooting using cords No limitation Group Camera CLS compatible D2H CLS not compatible D1series・D100 A F5・F100・F90series・F80series・F75・F70 B F4・F65・F801series・PRONEA 600i C F601・F601M D F60・F50・F401X E F501・F401S・F401・F301 F FM3A・FA・FE2・FG・NIKONOS V・F3(AS-17) G NewFM2・FM10・FE10・F3・F55 - M1 ・ SB-800 -... - Page 5 50mm 70mm 70mm 85mm 85mm 105mm 105mm *1 With the Nikon Diffusion Dome attached *2 With the built-in wide-flash adapter set Bounce Flash head tilts down to –7 or up to 90 with click-stops at –7 capability 0 , 45 , 60 , 75 , 90 ; flash head rotates horizontally 180...
- Page 6 Power Bracket Unit SK-6 Four AA-type alkaline-manganese Ready-light Lights up when the SB-800 is recycled and ready to fire. Blinks for 3 sec. when flash fires at its maximum output, indicating light may have been insufficient (in TTL Auto Flash, Auto Aperture...
-
Page 7: Custom Functions
Press the [ ] button to adjust the “LCD panel brightness” 4. Press the [ SEL ] button for approx. 2 sec. or press the [ ON/OFF] button to return to the normal setting mode. - M4 ・ SB-800 -... - Page 8 • OFF : Canceled (NO AF-ILL appears on the LCD panel) Canceling flash firing Setting to activate or cancel flash firing of the SB-800. When it is set to OFF, the SB-800 does not fire but the Wide-Area AF-Assist Illuminator still comes on. • ON : Firingactivated •...
-
Page 9: Disassembly
・Take out each screw, and lift the cover (E) unit (#118) up slowly in the direction indicated by the arrow. * Note: Be careful not to cut off the inside wires. #136×2 #161×2 ・The battery lid comes off. #118 Battery lid #103×2 - D1 ・ SB-800 -... -
Page 10: Fiber ①
CN 8 Fiber Fiber retainer Attached with glue ・Detach the fiber retainer. ・Pull the fiber in the direction indicated by the arrow. * Note: Be careful NOT to bend the fiber when disassembling and (re)assembling. - D2 ・ SB-800 -... -
Page 11: Separation Into Each Unit
* Note: Be careful NOT to lose the click post and spring. Battery chamber A-PCB Head unit Head unit Cover (E) unit Leg unit Cover (E) unit A-PCB Click post ・Spring Head unit Cover (E) unit A-PCB +LCD unit B-PCB+Battery chamber Leg unit - D3 ・ SB-800 -... -
Page 12: Head Unit
・Remove the acrylic panel (#43) and fresnel lens (#42). ・Remove the detection SW (#22). #31×2 #31×2 ・Take out 4 screws (#31) of the cover (D) unit. ・Take out 4 screws (#41) and remove the turning plate (#40). Cover (D) - D4 ・ SB-800 -... -
Page 13: Cover (D) Unit / Cover (C) Unit
Cover (C) unit Bounce shaft A ・Detach the cover (C) from the head unit by turn- ing it in the direction indicated by the arrow. ・The bounce shaft A comes off. Cover (C) Head unit - D5 ・ SB-800 -... - Page 14 ・Take out 2 screws (#16). Body C # 16×2 #169 Tape to arrange wires ・Remove the tapes that attach the wires at the above 2 parts, then each unit comes off as shown in the right. - D6 ・ SB-800 -...
-
Page 15: Motor Unit
・Take out 2 screws (#65) to detach the H-PCB. #65×2 Tape ・Take out the screw (#31). K-PCB ・Take out the screw (#183) to detach the K-PCB. #183 ・Take out the screw (#78) to detach the motor unit. Motor unit - D7 ・ SB-800 -... -
Page 16: Xe-Tube / Fiber ②
Xe tube - side Xe tube + side Pink lead solder White lead solder Xe-tube Fiber ② Tape Fiber Attached with glue ・Remove the tape. ・Detach the fiber in the direction indicated by the arrow. - D8 ・ SB-800 -... -
Page 17: Assembly
Reflector side plate ・Attach 2 shade sheets (#185) inside the reflector side plates (#79, #80). ・Attach the reflector side plate to the reflector case. ・Attach 2 screws (#81). #81×2 #185 #185 Mirror surface side Attach #185 inside. - A1 ・ SB-800 -... -
Page 18: Trigger Coil / Xe-Holder Unit
・Attach the trigger coil (#75) with glue and solder black and purple wires. Adhesive: Cemedine 575 Adhesive: Cemedine 575 Black CN-3 Purple CN-3 #73: Direction of insertion ・Attach 2 Xe-rubber bushes (#72) to the Xe-holder (#71) and assemble it into the reflector case. #74: Spring hook - A2 ・ SB-800 -... -
Page 19: Xe-Tube
・Solder the 2 Gray wires on the trigger terminal. (Solder 2 wires on the 1 terminal.) View from A Xe-tube View from A End face of reflector Trigger terminal + Plus pole Gray: Xe-tube trigger Gray: Reflector conductive (Pink wire side ) tape (Lead free solder) (Lead free solder) - A3 ・ SB-800 -... -
Page 20: Motor Unit
⑤ Fix the guide shaft B with E-ring. ⑤ E-ring #56×2 ⑥ Attache the driving mold holder with 2 screws (#56). ⑦ Insert the guide shaft A. ⑧ Attach the tetrone sheet C. ⑥ Driving mold holder ⑦ Guide shaft A - A4 ・ SB-800 -... -
Page 21: H-Pcb
・Check if the lever of the Xe holder is put in the driving mold groove B. ・Attach the motor unit with screws (#78 and #31). ・Attach the K PCB with screw (#183). Driving mold groove B Lever of Xe holder #183 K PCB - A5 ・ SB-800 -... -
Page 22: Fiber ①
TA-0001 ・Attach the tape (TA-0001) on the arranged wires. Both-sided adhesive tape E ・Bundle all wires together on the tape. Be careful so that the wires are NOT piled up as far as possible. TA-0001 - A6 ・ SB-800 -... -
Page 23: Cover (A) Unit
FSA03501-R.3613.A Cover (A) unit SS040-13 SS804-29 SS802-50 SS040-14 SS164-95X2 SS178-45X2 SS060-15 SS164-96 SS178-46 SS095-32 SG022-81X2 SS043-22 SS413-71 SG022-84X2 Lighting unit ・Assemble the lighting unit into the cover (A) unit. Cover (A) unit - A7 ・ SB-800 -... -
Page 24: Head Unit / Cover (C) Unit
Cover (C) unit ・Assemble the lever (#23) into the cover (C) unit by attaching the screw (#24). ・Assemble the pin (#21) into #20, then pass them through the spring (#22) to assemble into the cover (C) unit. - A8 ・ SB-800 -... - Page 25 ・Assemble the L/R bounce shaft into the head unit and attach 4 screws (#36). ・Attach the spring and pin to the L/R bounce shafts. Bounce shaft B Spring Spring Bounce shaft A #36×2 #36×2 - A9 ・ SB-800 -...
-
Page 26: Main C
I n s u l a t i n g SS802-65 sheet Condenser terminal ・Solder each part. BLUE PINK Inductor terminal TA-0012 ・Bundle 3 wires together with tape(TA-0012). ・Attach the insulating sheet B. Insulating sheet B - A10 ・ SB-800 -... -
Page 27: F-Pcb
D PCB. ・Put each wire into the clearance between the main (C) and the cover (C) unit for Protrusion of Cover (C) arrantement. (Fig.B) Groove of #23 Both-sided adhesive tape Fig. A Fig. B - A11 ・ SB-800 -... -
Page 28: Cover (D) Unit
* Note: Do NOT pinch wires. Cover (D) Grease: G7100 Grease: G7100 #31×4 Grease: G7100 ・Attach the spring and pin. Spring ・Attach the turning plate (#40) with 4 screws (#41). ・Bundle wires with tape(TA-0001). TA-0001 - A12 ・ SB-800 -... -
Page 29: Cover (B) Unit
・Insert the switch (#11) into the cover (B) unit. Cover (B) Attach 3 water absorbent sheets (#51). # 16×2 # 36×4 ・Attach the cover (B) unit with 2 screws (#16) and 4 screws (#36). Cover (B) - A13 ・ SB-800 -... - Page 30 SS178-42(5) SS523-55(1) SS043-38x2(5) SS991-61(1) SS025-64(5) SG901-49(5) SS058-68x2(5) SS307-42(1) SS058-71(5) SS058-73(5) SG052-61x6(10) SS058-72(5) SS802-64(5) SS228-47(5) SS802-63(5) SS043-39(5) SS706-70(5) B PCB + Battery chamber unit SS024-70(1) SS209-72(5) SS027-69(1) BLACK SS209-97(5) SS307-43(1) SS209-96(5) SG022-81x2(10) TA-0012 SC014-06(5) ORANGE SS706-65(5) - A14 ・ SB-800 -...
-
Page 31: Cover (E) Unit
Adhesive: Cemedine 575 SS226-10 SG022-84 SS512-23 SS706-66 SS991-60 SS020-20 SS512-34S SS413-81 SS706-63 SG022-81 SS413-80 SS178-50 Adhesive: Screw Lock SS534-90 SG040-23 SG012-88x3 SS171-29 CN-8 SG040-22 SS171-28 SG060-66 SS043-40 CN-16 SS060-29 SS706-69 SS029-07 SG022-84 SS171-30 SS706-67 SG052-61x2 SS028-09 - A15 ・ SB-800 -... -
Page 32: Connectors
* Note: Do NOT forget to attach the below click post and spring! Connectors on the A PCB Connectors on the A PCB Battery chamber Head unit A PCB Head unit Click post Cover (E) unit A PCB Leg unit Cover (E) unit ・Spring - A16 ・ SB-800 -... - Page 33 FSA03501-R.3613.A Connectors P36-(型番) >PAR< - A17 ・ SB-800 -...
-
Page 34: Fiber ②
・Insert the fiber until it stops to reach the photo Fiber diode. * Note: Do NOT bend the fiber. ・Hold down the fiber with the fiber retainer plate. (Fiber) retainer plate Adhesive: Screw Lock Photo diode - A18 ・ SB-800 -... - Page 35 (Battery lib and side rubber). Battery lib ・ Put the battery lid in position. Side Rubber ・Attach the side rubbers (#143 and # 144). #143 #144 Adhesive: Cemedine 575 Both-sided adhesive tape - A19 ・ SB-800 -...
-
Page 36: Adjustment
※ In case the PCB (B) is replaced, be sure to make adjustments of 2 and 4. ※ In case the head unit of lighting unit is disassembled or a part of the head is replaced, be sure to make adjustments of 3 and 4. - A20 ・ SB-800 -... -
Page 37: Points To Notice For Inspection & Adjustment Of Flash
Therefore, be sure to align both the edges of the communication tool (J15405) and stand (desk, etc) as shown below. Flash meter J15405 Standard reflection paper Align the edges of the communication tool (J15405) and stand (desk, etc). - A21 ・ SB-800 -... - Page 38 FSA03501-R.3613.A How to connect PC and SB-800 when adjustments are made * Serial communications 1. Setup of the NEW high-speed communication tool (J15405) ・Set "RS232C ⇔ USB change-SW" to "RS232C". ・Remove 4 screws of the bottom-cover and insert 4 LR6-alkaline dry batteries.
- Page 39 ・Connect the USB port of PC and NEW high-speed communication tool (J15405) via USB cable (product on the market). ・Put SB-800 on NEW high-speed communication tool (J15405). ・Supply power for SB-800. (Stabilized power supply = 5.7V) USB cable Straight type (product on the market) Note: For USB communications, "Set the USB driver"...
- Page 40 ⑨ Close the device manager. Start the adjustment software to check if communications are made or not. (Note that it is impossible to change the port other than COM1-COM4 by the adjustment software.) If it is desired to uninstall this USB driver, perform "Ftdiunin.exe" in the driver's folder. - A24 ・ SB-800 -...
-
Page 41: Adjustment Software (J18355)
Follow the instructions on the next screen that will be shown after pressing the item button. 5. To finish the program, press the "Close (×)" button in the right-hand corner of the screen or "QUIT". - A25 ・ SB-800 -... -
Page 42: Inspection & Adjustment Of Focusing Ligh
AF mode of camera to S. allowable limits Reference ② In case NO AF-ILL is indicated on LCD of SB-800, frame have AF-ILL displayed by the custom setting. ③ Detach the FL cover (SS060-29) of SB-800, and press the release button halfway to lighten AF-Assist illuminator. - Page 43 FSA03501-R.3613.A Chart of inspecting FL for SB-800 * Attention: Be sure to magnify this from A4 to A3-size before use. Frame within the allowable limits Reference frame Center of lens - A27 ・ SB-800 -...
-
Page 44: Mechanism - Electrical
Camera interface circuit Decoder circuit Slave circuit Data correspondence Data communication circuit circuit CPU SW input circuit EEPROM Ready light Motor drive circuit Shoe contacts LCD WITH DRIVER Sync terminal TTL multiple flash terminal - E1 ・ SB-800 -... -
Page 45: Circuitry
This always monitors the voltage of charging the main condenser when batteries are inserted, irrespective of power-supplyof SB-800. In case the voltage reached the given voltage (350V), the light is forced to be emitted in order to prevent damages to the main condenser. - Page 46 AF assist illuminator of SC-29, while the AF assist illuminator of SB does NOT ligtht up. ・Data correspondence circuit: This is the control circuit for sending/receiving signals from camera to communicate data via camera interface. The CPU performs various settings or controls based on this data. - E3 ・ SB-800 -...
- Page 47 This sets the illumination angle of the flash unit. The flash unit is set in position under command of the CPU. ・Switch input circuit: This detects ON/OFF of the push switch on the backside of SB-800 and the mechanically required bounce position, the status of the wide panel setting, etc.
- Page 48 ・External AF assist illuminator contacts: When the TTL Remote Cord SC-29 with the AF assist illuminator function is attached, SB-800 automatically lights up the AF assist illuminator of SC-29 based on the AF light signal from the camera, instead of lighting the AF assist illuminator of SB-800.
-
Page 49: Circuit Diagram
FSA03501-R.3613.A 回路図・CIRCUIT DIAGRAM - E6 ・ SB-800 -... - Page 50 FSA03501-R.3613.A P36-(型番) >PAR< - E7 ・ SB-800 -...
-
Page 51: A-Pcb
FSA03501-R.3613.A A 基板(1) A PCB(1) - E8 ・ SB-800 -... - Page 52 FSA03501-R.3613.A A 基板(2) A PCB(2) - E9 ・ SB-800 -...
-
Page 53: B-Pcb
FSA03501-R.3613.A B 基板(1) B PCB(1) - E10 ・ SB-800 -... - Page 54 FSA03501-R.3613.A B 基板(2) B PCB(2) - E11 ・ SB-800 -...
- Page 55 FSA03501-R.3613.A C 基板 C PCB D 基板 D PCB E 基板 E PCB F 基板 F PCB - E12 ・ SB-800 -...
- Page 56 FSA03501-R.3613.A G 基板 G PCB H 基板 H PCB K 基板 K PCB ターミナル 基板 Terminal PCB - E13 ・ SB-800 -...
-
Page 57: Eeprom Data
Control data D-TTL マニュアル光量 制御用データ 209 ~ 210 Manual out put Control data 制御用データ FP発光 241 ~ 243 Control data FP-flash プリ発光 制御用データ 244 ~ 255 Pre-flash Control data 制御用データ 213 ~ 218 Control data - E14 ・ SB-800 -... -
Page 58: Others
RJ is Not available RS232Cケーブル 汎用品 RS232C cable RJ is Not available 安定化電源(6. 0V 3A ) 汎用品 Power supply(6.0V 3A) RJ is Not available デジタルマルチメータ 汎用品 Digital meter RJ is Not available フラッシュメータ 汎用品 Flash meter RJ is Not available SB-800 T1 ・ -... - Page 59 FSA03501-R.3613.A その他・Others 工具番号 名 称 備 考 Tool No. Name of tool Others EBB0061 グリース G7100 NET = 100g Grease G7100 TA-0001 テープ W= 10mm TA-0012 テープ W= 6mm EDB0011 ネジロック ( 赤) Screw Lock (RED) J67017 セメダイン 575 CEMEDINE 575 SB-800 T2 ・ -...
Need help?
Do you have a question about the SB-800 and is the answer not in the manual?
Questions and answers