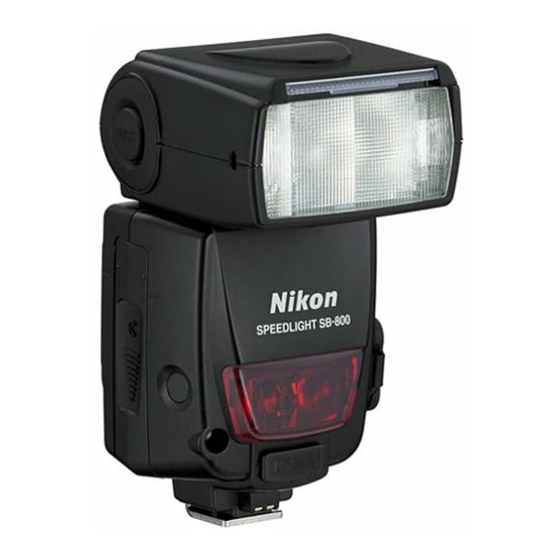
Nikon SB-800 Instruction Manual
Autofocus speedlight
Hide thumbs
Also See for SB-800:
- Repair manual (59 pages) ,
- Instruction manual (25 pages) ,
- Quick start manual (3 pages)
Table of Contents
Advertisement
Advertisement
Table of Contents

Related Manuals for Nikon SB-800


Summary of Contents for Nikon SB-800
- Page 1 Autofocus Speedlight SB-800 Instruction Manual...
-
Page 2: For Your Safety
Before using your product, please read the following safety precautions carefully and thoroughly to ensure correct and safe use and to help prevent damage to your Nikon product or injury to yourself or others. For quick reference by those who use the product, please keep these safety instructions near the product. - Page 3 Allow the flash unit to cool down so that you can safely touch it and remove the batteries. Then bring the unit to your local Nikon dealer or authorized service center for repair.
- Page 4 For your safety 10 Do not fire the unit while the flash head is touching a person or object. Such use can result in the person being burned, and/or their clothes igniting from the heat of the flash’s firing. 11 Keep small accessories out of the reach of children to avoid the possibility of the accessory being swallowed.
- Page 5 5 Remove any batteries from the unit before storing the unit for a long time to prevent the unit from catching on fire or leaking corrosive liquids. WARNINGS for Batteries 1 Never heat or throw batteries into a fire, as this could cause the batteries to leak corrosive liquids, generate heat or explode.
- Page 6 For your safety 11 Never open the casing surrounding batteries or use batteries whose casing has been breached as such batteries could leak corrosive liquids, generate heat or explode. 12 Keep batteries out of the reach of children to help avoid the possibility of them being swallowed.
-
Page 7: Table Of Contents
• Basic operation ...17 1 Installing the batteries ...18-19 2 Test firing (Confirming the exposure) ...20-21 3 Attach the SB-800 to the camera and adjust the flash head ...22-23 4 Setting the ISO sensitivity ...24-25 5 Adjust the zoom-head position...26-27 6 Setting the camera’s exposure mode and... - Page 8 Flash shooting in the 1/300 TTL High-Speed Flash sync mode (F5 only) ...106 • Reference information ...107 · TTL auto flash modes available with the SB-800 ...108-110 · Optional accessories ...111-113 · Tips on Speedlight care...114 · Notes on batteries...115 · Troubleshooting...116-118 ·...
- Page 9 Preparation This section provides preliminary information on using the SB-800. Basic operation Basic procedures to take simple, properly exposed flash photographs in the TTL auto flash mode. Detailed operation A variety of flash modes available with the SB-800 are explained.
-
Page 10: Foreword
■■■ Main features and functions of the SB-800 • The SB-800 is a high-performance Speedlight with a guide number of 38/125 (ISO 100, m/ft.) or 53/174 (ISO 200, m/ft.) (at the 35mm zoom-head position, 20°C/68°F.) According to the camera and lens combination used with the SB-800, you can perform various types of TTL auto flash (p. - Page 11 • i-TTL mode This is a TTL auto flash mode in the Nikon Creative Lighting System. Monitor Preflashes are fired at all times. The subject is correctly exposed by the light from the flash lighting and the exposure is less affected by the ambient light (p.
-
Page 12: Foreword
Marks used in this manual • : Denotes important points to prevent malfunction or shooting failure. • : Useful points that should be remembered for better usage of the SB-800. • : Provides convenient reference information when using the SB-800 ■■■... -
Page 13: Tips On Using The Speedlight
PRONEA 6i, N6006, N6000, N5005, N4004s and N4004 are sold exclusively in the U.S.A. • The Nikon N80-Series, N65-Series are sold exclusively in the U.S.A. and Central and South America. • The Nikon N2020 and N2000 are sold exclusively in the U.S.A and Canada. -
Page 14: Camera Groups And Available Flash Modes
Groups I to VII unless otherwise noted. First, consult the camera group table to see which group your camera belongs to. Then as you read the manual, you will find specific information on how to use the SB-800 with your particular camera. *CLS: Nikon Creative Lighting System (p. 5) - Page 15 The SB-800’s available flash modes vary, depending on the cameras and lenses in use or the camera’s exposure mode and metering system. For more details, refer to “Detailed operation” (p. 35), “TTL auto flash modes available with the SB-800” (p.108) and your camera’s instruction manual.
-
Page 16: Speedlight Parts And Their Functions
Speedlight parts and their functions 1 Control button quick reference (p. 12) 2 Flash head (p. 100) Can be tilted up to 90° or down to –7°, and rotated horizontally 180° to the left and 90° to the right. 3 Flash head tilting/rotating lock release button (p. - Page 17 22 LCD panel 23 Control buttons 24 Ready-light Lights up when the SB-800 is fully recycled and ready to fire. Blinks after the SB-800 fires at its maximum output in various auto flash modes, indicating that the light may be insufficient.
-
Page 18: Control Buttons
Control buttons FLASH button Press to test fire the flash (p. 20). a button Press to set the flash mode (p. 30). e button/f button Press to increase or decrease the values of the highlighted items. b button Press for approx. 0.3 sec. to turn the power on and off. -
Page 19: Icons On The Lcd Panel
(CLS*) The SB-800 automatically fires at faster shutter speeds exceeding the camera’s sync shutter speed (p. 60). *CLS: Nikon Creative Lighting System (p. 5) Auto Aperture flash In addition to Non-TTL auto A flash (see below), the SB-800’s built-in sensor... - Page 20 The wide-area AF-assist illuminator does not come on (p. 62). Flash firing canceled The SB-800 does not fire but the wide-area AF-assist illuminator still comes on (p. 62). Control buttons being locked Control buttons (except the ON/OFF, Modeling illuminator and FLASH buttons) are locked (p.
- Page 21 (p. 72). Wireless remote In the wireless multiple flash mode, the SB-800 is set as a remote flash unit, which fires in sync with the master flash unit (p. 72). Wireless remote...
-
Page 22: Lenses
Lenses In this manual, Nikkor lenses are divided into two types: CPU Nikkor lenses and non-CPU Nikkor lenses. CPU Nikkor lenses Non-CPU Nikkor lenses G-type Nikkor, D-type Nikkor, Non-G/D-type AF Nikkor (except for AF Nikkor for the F3AF), AI-P Nikkor AI-S Nikkor, AI Nikkor, Series E, etc. -
Page 23: Basic Operation
In this section, basic procedures are described when a CPU lens is mounted on cameras compatible with CLS*, digital SLRs not compatible with CLS*, and cameras in Groups I to II. The SB-800’s available functions and the LCD display vary depending on other camera/lens combinations. -
Page 24: Installing The Batteries
• When replacing batteries, replace all four (or five when using the Quick Recycling Battery Pack SD-800) with fresh ones of the same brand. • High-power manganese batteries are not recommended for use with the SB-800. • Always carry extra batteries when traveling. -
Page 25: External Power Sources
If extremely exhausted batteries are used, a strange sound can be heard caused by the flash head zooming back and forth even when the SB-800 is turned off. In this case, replace the SB-800’s batteries even if an external battery source is used. -
Page 26: Test Firing (Confirming The Exposure)
When test firing the Speedlight, never position your eyes close to the flash head. • The SB-800 fires at specified output in the Manual flash mode or at approx. 1/16 output in the TTL auto flash mode. • In Auto Aperture/Non-TTL auto flash operations, the SB-800 fires at a flash output controlled by the ISO sensitivity, aperture, and zoom-head position. - Page 27 • In the standby mode, the R indicator appears on the LCD panel. • When in the standby mode, the SB-800 turns back on again when the SB-800’s b or FLASH button is pressed, or the shutter release button is lightly pressed (when using a camera body that is compatible with TTL auto flash) (p.
-
Page 28: The Flash Head
Attach the SB-800 to the camera and F L A v Turn the mounting foot lock lever securely until it stops To lock the Speedlight in place, turn the lock lever approx. 90° clockwise until it stops. To unlock, turn the lever counterclockwise until it stops. -
Page 29: The Flash Head
adjust the flash head t Warning indication If the flash head is not adjusted to the horizontal/front position, when the power is turned on, this warning appears on the LCD panel. See page 100 for the flash head’s rotating angle. •... -
Page 30: Setting The Iso Sensitivity
• The ISO sensitivity range may become narrower, depending on the cameras in use. For details, see your camera instruction manual. • The flash shooting distance range on the SB-800’s LCD panel varies, depending on the ISO sensitivity. Therefore, be sure to set the ISO sensitivity correctly. - Page 31 For cameras in Groups III to VII, set the ISO sensitivity in the Custom settings mode (p. 67). Turn the SB-800 off once, then turn it back on. After that, turn on the camera body. Press the g button for approx. 2 sec. to display the Custom settings mode.
-
Page 32: Adjust The Zoom-Head Position
■■■ The power zoom function When the SB-800 is used with cameras compatible with CLS, digital SLRs not compatible with CLS, cameras in Groups I to II in combination with a CPU lens, and COOLPIX cameras compatible with i-TTL, the power zoom function activates and the zoom head is automatically adjusted. -
Page 33: Adjust The Zoom-Head Position
■■■ Setting the zoom-head position manually When the SB-800 is used with cameras in Groups III to VII in combination with a non-CPU lens, or you want to change the zoom-head position to one that does not match the focal length, you should adjust the zoom-head position manually. -
Page 34: Setting The Camera's Exposure Mode And Metering System
Exposure mode and metering system The camera’s available exposure mode and metering system vary, depending on the cameras and lenses in use or the SB-800’s flash modes. For details, refer to “Detailed operation” (p. 35), “TTL auto flash modes available with the SB-800”... - Page 35 • If you set a shutter speed faster than the flash sync speed, the camera automatically shifts to its fastest sync speed when the SB-800 is turned on. This is true of all cameras, except mechanical shutter cameras and when using the Auto FP High-Speed sync mode (p.
-
Page 36: Setting The Sb-800'S Flash Mode
• Note that the usable flash modes only appear and vary, and the unavailable flash modes will be skipped and do not appear, when pressing the a button. • The SB-800’s available flash modes vary, depending on the cameras and lenses in use or the camera’s exposure mode and metering system. Refer to “Detailed operation”... - Page 37 ■■■ About the flash shooting distance range The SB-800’s flash shooting distance range is 0.6m to 20m (2 to 66 ft.) and varies, depending on the ISO sensitivity, zoom-head position, and lens aperture in use. Flash shooting distance range in the TTL auto flash mode...
-
Page 38: Compose The Picture And Shoot With Flash
• Refer to the camera’s instruction manual for details on the flash sync mode. Confirm the camera’s sync mode. • For normal flash photography, use the camera’s Front-curtain sync mode. Compose the picture, confirm that the ready-light on the SB-800 or in the camera’s viewfinder is on, then shoot. - Page 39 Group I and COOLPIX cameras compatible with i-TTL in the TTL auto flash mode, the amount of underexposure (0 to –3.0 EV) appears for approx. 3 sec on the SB-800’s LCD panel; at the same time the above ready- lights blink.
-
Page 40: Using The Sb-800 With The Coolpix
SB-800 or another Nikon Speedlight compatible with TTL auto flash to the COOLPIX. Auto flash operation is possible by setting the SB-800’s flash mode to TTL auto flash. The flash output level is controlled by detecting signals from the camera to determine when to start and stop firing. -
Page 41: Detailed Operation
Detailed operation This section provides a variety of flash modes available with the SB-800. Be sure to refer to your camera’s instruction manual for specific information on camera settings and functions. -
Page 42: Sb-800'S Available Flash Modes
COOLPIX cameras compatible with i-TTL, and flash mode is set to TTL auto flash, and (2) when the SB-800 is used with cameras compatible with CLS with a CPU lens, and the flash mode is set to Auto Aperture flash. -
Page 43: Ttl Auto Flash Mode
SLRs” in the D-TTL mode, and “Standard TTL flash” in the TTL (film-based) mode. t Notes on TTL mode indicators Comparison tables are provided on pages 108-110 to show the SB-800’s TTL mode indicators and the corresponding ones used in the instruction manuals of Speedlights featuring no CLS. -
Page 44: Non-Ttl Auto Flash Mode
The SB-800’s built-in sensor measures the flash illumination reflected from the subject and controls the flash output in combination with data automatically transmitted from the camera and lens to the SB-800, including the ISO sensitivity value and exposure compensation value as well as the aperture and focal length of the lens. - Page 45 32 22 16 11 8 32 22 16 11 32 22 16 *1 With the Nikon Diffusion Dome attached and the wide-flash adapter in place *2 With the Nikon Diffusion Dome attached *3 With the wide-flash adapter in place • For example, for an ISO sensitivity of 100, with the zoom-head position adjusted to 35mm, and the subject at a distance of 5m (16.4 ft.), selecting...
- Page 46 Non-TTL auto flash mode Non-TTL auto A flash The SB-800’s built-in sensor measures the flash illumination reflected from the subject, automatically controlling the SB-800’s light output to give the correct exposure. This allows you to make exposure compensation (p. 54) easily by varying the aperture set on the camera or lens.
- Page 47 32 22 16 11 8 32 22 16 11 32 22 16 *1 With the Nikon Diffusion Dome attached and the wide-flash adapter in place *2 With the Nikon Diffusion Dome attached *3 With the wide-flash adapter in place • For example, for an ISO sensitivity of 100, with the zoom-head position adjusted to 35mm, and the subject at a distance of 5m (16.4 ft.), selecting apertures from f/2 to f/5.6...
-
Page 48: Manual Mode
• Refer to your camera’s instruction manual for details on camera and lens aperture settings. • With the SB-800 in the Manual mode, if the camera’s exposure mode is set to other than Aperture-Priority (A) or Manual (M), the shutter may not be released, depending on the cameras in use. - Page 49 ISO sensitivity, flash output level and zoom-head position that are set: f/stop (aperture) = Guide number (GN) x ISO sensitivity factor ÷ Shooting distance (m/ft) • Set the same aperture on both the SB-800 and the camera or lens. To calculate the guide number Calculate the guide number by using this equation, according to the shooting distance and aperture required.
- Page 50 Manual mode Distance-priority manual p flash In this flash operation, the SB-800 automatically controls the light output according to the distance value and aperture set. Enter the distance value and you can take pictures having the same exposure even when shooting at different apertures.
- Page 51 The figure shows that the farthest available flash shooting distance is 2.5m (8.2 ft.). Set the aperture that appears on the SB-800’s LCD panel on the lens or camera. • With cameras in Groups III to VII.
- Page 52 CLS, cameras in Groups I and II with CPU lenses and COOLPIX cameras compatible with i-TTL, set the SB-800’s aperture on the camera. You cannot set the aperture on the SB-800 directly. • For other camera/lens combinations, press the...
- Page 53 • To extend the flash shooting distance, choose a flash output level close to M1/1. Set the same aperture on your camera or lens that is set on the SB-800. • With cameras in Groups III to VII. Confirm that the ready-light comes on, then shoot.
- Page 54 Manual mode Repeating q flash In Repeating flash operation, the SB-800 fires repeatedly during a single exposure, creating stroboscopic multiple-exposure effects. This operation is useful when shooting fast-moving subjects. • In this operation, q appears on the LCD panel. • Be sure to use fresh or fully charged batteries and allow enough time for the flash to recycle between each repeating flash session.
- Page 55 CLS, cameras in Groups I and II with CPU lenses and COOLPIX cameras compatible with i-TTL, set the SB-800’s aperture on the camera. You cannot set the aperture on the SB-800 directly. • If the ISO sensitivity is correctly set, the flash shooting distance appears on the LCD panel, matching the flash output level and aperture as set.
-
Page 56: Manual Mode
To prevent this, set a smaller aperture on the camera. Set the same aperture on the camera or lens that is set on the SB-800. • With cameras in Groups III to VII. Set the shutter speed. -
Page 57: Notes On Continuous Flash Shooting
Lithium NiCd Ni-MH • With fresh batteries of the same type in both the SB-800 and optional Nikon SD-8A or Power Bracket Unit SK-6/SK-6A. • Refer to table “Maximum number of repeating flashes per frame” on page 48 when performing Repeating flash. -
Page 58: Checking The Correct Exposure Before Shooting
Checking the correct exposure before shooting You can determine whether the subject will receive the correct exposure by test firing the SB-800 before actually taking the picture in TTL auto flash, Auto Aperture, and Non-TTL auto flash operations. • In manual flash mode, checking the correct exposure cannot be performed by test firing. -
Page 59: Other Functions
Other functions Detailed information on each function of the SB-800 is provided. -
Page 60: Exposure Compensation And Flash Output Level
For details, see your camera’s instruction manual. • The exposure compensation value set on the camera is not displayed on the SB-800’s LCD panel. • Exposure compensation beyond the usable ISO sensitivity range cannot be performed (p. - Page 61 • In the Non-TTL auto flash mode, the correct exposure can be obtained when the same aperture is set on the camera as that set on the SB-800. Therefore, to make exposure compensation, vary the aperture set on the camera while retaining the aperture set on the SB-800 or vice versa.
-
Page 62: Exposure Compensation And Flash Output Level Compensation
• With SLR cameras that have a built-in Speedlight with an exposure compensation function, you can compensate the flash output level on either the camera or the SB-800. For details, see your camera’s instruction manual. If you use both controls, the exposure is modified by the sum total of both compensation values. -
Page 63: Flash-Shooting Distance Range With Zoom Lenses Having A Variable Aperture
Lock the lens aperture at its minimum. After composing the picture by zooming in or out, read the aperture on the camera’s LCD panel or in the viewfinder. Then set the same aperture on the SB-800’s LCD panel and confirm the flash shooting distance range. -
Page 64: Slow-Sync Flash Mode, Red-Eye Reduction Control
• Available with cameras providing slow-sync. You cannot set the slow-sync function on the SB-800 directly, but must set it on the camera. For more information, refer to your camera’s instruction manual. -
Page 65: And Rear-Curtain Sync
• Available with cameras providing rear-curtain sync. You cannot set this mode on the SB-800 directly, but must set it on the camera. For details, see your camera’s instruction manual. -
Page 66: Auto Fp High-Speed Sync Mode
• Available with compatible cameras. You cannot set the Auto FP High-Speed sync mode on the SB-800 directly, but must set it on the camera. • High-speed flash synchronization is possible exceeding your camera’s sync shutter speed up to your camera’s highest shutter speed. -
Page 67: Flash Value Lock (Fv Lock)
This flash exposure remains locked in, even if you change the aperture or composition, or zoom the lens in and out. • Available with compatible cameras. You cannot set the FV Lock function on the SB-800 directly. Set it on the camera. -
Page 68: Autofocus Flash Operation In Dim Light
Autofocus flash operation in dim light When the light is too dim for normal autofocus operation, the SB-800’s Wide- Area AF-Assist Illuminator enables you to perform autofocus flash photography. • In dim light, the Wide-Area AF-Assist Illuminator turns on automatically when the camera’s shutter release button is lightly pressed, if... - Page 69 Canceling the SB-800’s flash firing but not the Wide-Area AF-Assist Illuminator The SB-800’s Wide-Area AF-Assist Illuminator comes on but the flash unit will not fire when “FIRE” is set to “OFF” (canceled) in the Custom settings mode (p. 67).
-
Page 70: Using The Quick Recycling Battery Pack Sd-800
• Be sure to replace all five batteries, including the one in this pack and WARNING the four inside the SB-800, with fresh ones at the same time. • Do not mix battery brands or types, or use old with new batteries. - Page 71 Align the index mark on the SD-800’s battery chamber lid with the corresponding index mark on the SB-800 and attach the battery pack by sliding it into place. • Be sure to slide the battery pack until the SD-800’s lock switch clicks into place.
-
Page 72: Checking The Illumination Before Actually Taking The Picture (Modeling Illuminator)
When the Modeling illuminator button on the master flash unit or the one on the camera is pressed, the Modeling illuminator of the master unit only fires. • When the SB-800 is set as a remote flash unit, the Modeling illuminator does not fire even when the Modeling illuminator button is pressed. -
Page 73: Custom Functions
Custom functions The SB-800 can easily set, activate, or cancel various operations using the Custom settings as shown below. Icons appearing on the LCD panel vary depending on the settings and the camera/lens combinations. No icon appears when the settings are not available. -
Page 74: Custom Settings
Custom settings ■■■ Setting Custom functions Press the g button for approx. 2 sec. to display the Custom settings mode. Press the e or f button and c or d button on the Multi Selector to choose the desired custom functions to be set, then press the g button. - Page 75 • REMOTE • SU-4 Sound monitor in the wireless flash mode (p. 89) When the SB-800 is used as a wireless remote flash unit, you can activate or cancel the sound monitor function. • ON : Sound on • OFF : Sound off Non-TTL auto flash mode (p.
- Page 76 • OFF : Canceled (NO AF-ILL appears on the LCD panel) Canceling flash firing (p. 62) Setting to activate or cancel flash firing of the SB-800. When it is set to OFF, the SB-800 does not fire but the Wide-Area AF-Assist Illuminator still comes on.
-
Page 77: Advanced Operations
Advanced operations Information on advanced flash shooting techniques using the SB-800 is described in this section. -
Page 78: Overview Of Multiple Flash Operation
All other flash units are called the remote flash units. Usable cameras Usable Speedlights Cameras compatible Only those featuring CLS such with CLS as SB-800 for both the master and remote flash units. No limitation Master flash unit: Speedlights compatible with wireless flash operation, those compatible... - Page 79 Custom settings. • The SB-800’s and SB-80DX’s standby function is canceled while the SB-50DX’s standby duration is prolonged to approx. one hour when they are set to the wireless remote flash mode.
-
Page 80: Wireless Multiple Flash Shooting
Wireless multiple flash shooting Read the following when setting up the SB-800 as a remote flash unit in the Advanced Wireless Lighting and SU-4 type wireless multiple flash modes. ■■■ Flash set-up in the Advanced Wireless Lighting Set up the camera, master flash unit, and remote flash units as shown in the figure below. - Page 81 Use the provided Speedlight Stand AS-19 for stable placement of the remote flash units. • You can also use the stand for setting up your Nikon Speedlight when using it as a remote flash unit in multiple flash shooting using cords (p. 90).
-
Page 82: Flash Shooting In Advanced Wireless Lighting
Setting the SB-800 to Advanced Wireless Lighting You can set the SB-800 to Advanced Wireless Lighting using Custom settings (p. 67). Select “MASTER” to set the SB-800 as the master flash unit in the Custom settings mode. • Select “MASTER(RPT)” in Repeating flash operation. - Page 83 To activate the “Commander function,” set the SB-800 as the master flash unit and set its flash mode to “Flash canceled (---)”. This operation will normally not affect the correct exposure of the subject, although the exposure might be affected if the subject is close and a high ISO sensitivity has been set.
- Page 84 Flash shooting in Advanced Wireless Lighting ■■■ Setting the flash mode, flash output level compensation values, and channel number on the master flash unit Press the g button on the master flash unit to highlight “M”, then press the a button to choose the desired flash mode.
- Page 85 Be sure to set the channel number of the remote flash unit to 3 and set the group of the remote flash unit to Group A when performing wireless multiple flash using the Nikon D70’ s built-in flash as a master flash unit (Commander mode). Otherwise, the SB-800 does not fire.
- Page 86 Remote flash unit B is used with a colored gel filter to create the warmth feeling of a fireplace. Shooting data • Camera: • Focal length: 25mm • Master flash unit M: SB-800 ( output level compensation) • Remote flash unit A: SB-800 ( output level compensation) •...
- Page 87 Set the camera’s exposure mode to Aperture- Priority Auto (A). Set the wireless flash mode of the on-camera SB-800 to MASTER using Custom Settings (p. 67). Press the g button on the master flash unit to highlight “M”, then press the a button to choose D.
- Page 88 Flash shooting in Advanced Wireless Lighting Press the g button on the master flash unit to highlight “B”, then press the a button to set the flash mode to G on the remote flash unit B. Likewise, press the f button on the master flash unit to set the flash output level to 1/16 on the remote flash unit B.
- Page 89 Set the group of the remote flash units A and B. • Set the remote flash unit A to group A and the remote flash unit B to group B. Confirm that all the ready-lights of the master and remote flash units are on, then press the FLASH button on the master flash unit to test fire the units.
-
Page 90: Su-4 Type Wireless Multiple Flash Shooting
SB-800 to the camera. The indicator O appears on the LCD panel telling you that the SB-800 is set as a master flash unit. If you detach the SB-800 from the camera, the indicator automatically changes to P signifying that the SB-800 is set as a remote flash unit. - Page 91 • In the A (auto) mode, the remote flash units start and stop firing in sync with the master flash unit. • The maximum shooting distance of the SB-800’s light sensor is approx. 7m (23 ft.). M (manual) mode • In the M (manual) mode, the remote flash units only start firing in sync with the master flash unit.
- Page 92 Set up all Speedlights as the master and remote flash units. R E A Set the wireless flash mode of all SB-800’s used as master and remote flash units to “SU-4.” Press the a button on the remote flash unit to activate the A mode.
- Page 93 Priority Auto (A) or Manual (M). Set up all Speedlights as the master and remote flash units. Set the wireless flash mode of all SB-800’s used as the master and remote flash units to “SU-4.” Press the a button on the remote flash unit to activate the w (manual) mode.
-
Page 94: Su-4 Type Wireless Multiple Flash Shooting
D is the distance between the remote flash unit and the subject (in meters/feet). For example, with the SB-800’s zoom-head position adjusted to 28mm when using an ISO sensitivity of 100 if a lens aperture (F) of f/4 is used and the subject distance (D) is 2m (6.6 ft.) away, then shooting a subject at a distance of 2m (6.6 ft.), and a lens aperture... -
Page 95: Confirming Wireless Multiple Flash Operation Using The Ready-Light Or The Beeping Sound
■■■ Using the SB-800’s beeping sound in the wireless flash mode When the SB-800 is used as a wireless remote flash unit, you can monitor its operation by listening to the beeping sound (p. 67). This function can be activated or canceled using the Custom settings. -
Page 96: Multiple Flash Shooting Using Cords
Multiple flash shooting using cords The SB-800 can be used with Speedlights compatible with the TTL auto flash mode to perform multiple flash shooting using cords. • Use of the SB-50DX and SB-23 as remote flash units is not recommended, because the standby function cannot be canceled. - Page 97 Speedlights instruction manuals for proper connection. • Use the optional TTL Multi-Flash Sync Cords SC-27, SC-26, SC-19 or SC-18 to connect the SB-800 to more than one remote flash unit. • Use the optional Multi-Flash Adapter AS-10, if the remote flash units are not equipped with multiple flash terminals.
- Page 98 • See page 17 concerning the TTL auto flash mode. • When the flash has fired at its maximum output and underexposure may have occurred, the ready-light on the SB-800 blinks for approx. 3 sec. To compensate, use a wider aperture or move closer to the subject and reshoot.
- Page 99 Turn on the power of all flash units and set the flash mode on all units to Manual flash. • The flash output level can be adjusted on the SB-800, SB-80DX, SB-28, and so forth, if necessary (p. 43). • Repeating flash is not possible.
-
Page 100: System Chart For Ttl Multiple Flash Shooting Using Cords
SB-21B SC-24 SB-20 SB-15 SB-24 SB-25 SB-26 SB-16B SC-17/ SB-16A SB-17 SC-14 AS-17 SB-14 SB-11 SB-140 SB-22 SB-22s SB-23 SB-27 SB-30 SB-50DX SB-28/ SB-29/29s SB-80DX 28DX SB-21A Items marked on page 94 are connected to item on page 95. SB-800... - Page 101 SB-14 SB-140 SB-22 SB-22s SB-27 SB-30 SB-29/29s SB-28/ SB-25 SB-26 28DX SB-21A AS-11 SB-800 SB-80DX SC-18/26 SC-19/27 SB-800 SB-80DX SC-18/26 SC-19/27 Using SC-18/26 or SC-19/27, up to five flash units can be used for multiple flash photography at a total cable length of 10m (33 ft.).
-
Page 102: Flash Shooting With Digital Slrs Cameras
“Incandescent.” • Available with digital cameras featuring white balance. You cannot set the white balance on the SB-800. Choose an appropriate white balance setting on your digital camera. For more details, see your camera’s instruction manual. - Page 103 colored gel filters ■■■ How to use colored gels SHOOTING MENU White bal. Auto Incandescent Fluorescent Direct sunlight Flash Cloudy Shade u Optional Colored Gel Filter Set SJ-1 The optional Colored Gel Filter Set SJ-1 contains a total of 20 filters in 8 models of colored gels for balancing the color of light or adding specific colors to the scene using a Speedlight (p.
-
Page 104: Bounce Flash Operation
Bounce flash operation With the SB-800 mounted on your camera’s hot shoe, you can tilt or rotate the flash head to bounce the light off the ceiling or walls. This is a good technique to use when shooting indoors, because you get more natural-looking pictures of people with softer shadows. - Page 105 Make sure that the ready-light is on, then shoot. • When the flash has fired at its maximum output and underexposure may have occurred, the ready-light on the SB-800 blinks for approx. 3 sec. To compensate, use a wider aperture or move closer to the subject and reshoot.
- Page 106 ■■■ Setting the flash head As shown in the illustrations, tilt or rotate the SB-800’s flash head by holding down the flash head tilting/rotating lock release button and adjusting the flash head to match the shooing environment or your creative preferences.
- Page 107 Using the built-in bounce card In bounce flash photography, use the SB-800’s built-in bounce card to create a highlight in the subject’s eyes, making the eyes look more vibrant. • As shown in the illustrations, pull out the wide-flash adapter and while holding the bounce card, slide the wide-flash adapter back into place inside the flash head.
-
Page 108: Close-Up Flash Operation
When the built-in wide-flash adapter is used, close-up flash shooting can be performed. The built-in wide-flash adapter diffuses the light from the flash to soften shadows. When the SB-800 is used off-camera, you can take more natural-looking close-up pictures. • Be sure to use the wide-flash adapter when taking close-up flash photographs. - Page 109 Press the c or d button to adjust the zoom-head position to 14mm or 17mm. Tilt the flash head down to –7°. • When the SB-800 is attached to the camera and used as the only flash unit, this position is recommended to 7°...
- Page 110 Close-up flash operation ■■■ Setting the built-in wide-flash adapter and adjusting the zoom-head position ■■■ Setting the aperture Calculate the aperture by using this equation and table. To ensure the correct exposure, use an aperture smaller than the one obtained from the equation. ISO sensitivity Coefficient (m/ft) f/stop...
- Page 111 TTL Remote Cord as shown below. Use either the SC-29, SC-28 or SC-17. • In Do flash operation where Monitor Preflashes are fired, when the SB-800 is used with D/G-type CPU lenses, you may not be able to get the correct exposure, because distance information from the lens is used.
-
Page 112: Flash Shooting In The 1/300 Ttl High-Speed Flash Sync Mode (F5 Only)
7/23 10/33 14/46 16.8/55 19.6/64 19.6/64 30.8/101 33.6/110 39.2/129 44.8/147 50.4/165 53.2/174 56/184 ∗ 1 With the Nikon Diffusion Dome attached and the wide-flash adapter in place ∗ 2 With the Nikon Diffusion Dome attached ∗ 3 With the wide-flash adapter in place •... -
Page 113: Reference Information
Reference information Optional accessories, Troubleshooting, Speedlight care, Specifications, etc. are presented here. -
Page 114: With The Sb-800
The available types of TTL auto flash vary, depending on the camera/lens/ exposure mode/metering system in use. The following tables show the SB-800’s TTL mode indicators and the corresponding ones used in the instruction manuals of Speedlights featuring no CLS when the flash unit is used with various cameras not compatible with CLS. - Page 115 Camera Camera TTL mode Group F80-Series/ N80-Series F75-Series/ N75-Series ∗ 1: The camera’s exposure meter cannot be used. Set the aperture using the lens aperture ring. ∗ 2: 3D Multi-Sensor Balanced Fill-Flash is set. F4-Series ∗ 1: The A and M exposure modes cannot be used with a G-type lens. ∗...
-
Page 116: Ttl Auto Flash Modes Available With The Sb-800
N6006 ∗ 1: Only appears on the SB-800’s LCD panel. Matrix Balanced Fill-Flash or Center- Weighted Fill-Flash/Spot Fill-Flash is selected when F appears on the camera’s LCD panel. ∗ 2: Center-Weighted Metering is automatically set when the exposure mode is set to M. -
Page 117: Optional Accessories
TTL Multi-Flash Sync Cord SC-26/18 TTL Multi-Flash Sync Cord SC-27/19 Multi-Flash Sync Cords SC-18/SC-19/SC-26/SC-27 are useful for connecting the SB-800 to the multiple flash terminal of the SC-28, SC-17 or AS-10 for TTL multiple flash operation. TTL Multi-Flash Adapter AS-10... - Page 118 (One AS-E900 Multi-Flash Adapter is included with the SK-E900) Multi-Flash Adapter AS-E900 The SB-800 can be used as a multiple flash unit with Nikon COOLPIX 900-series digital cameras by attaching the COOLPIX to Multi-Flash Bracket Unit SK-E900 and connecting the SB-800 to the multi-flash terminal of the COOLPIX using the Multi-Flash Adapter AS-E900 (p.
- Page 119 AA-type lithium (x 4) ∗ 1 With AA-type alkaline-manganese batteries in the SB-800. ∗ 2 With the same type of batteries in both the external power source and the SB-800. ∗ 3 When fired at an interval of 120 seconds.
-
Page 120: Tips On Speedlight Care
■■■ Cleaning • Use a blower brush to remove dirt and dust from the SB-800 and clean it with a soft, clean cloth. After using the SB-800 near saltwater, wipe the flash unit with a soft, clean cloth moistened slightly with plain water to remove the salt, then dry it using a dry cloth. -
Page 121: Notes On Batteries
Notes on batteries ■■■ Usable batteries Use four (or five) AA-type batteries (1.5V or lower) of any of the following types. • High-power manganese batteries are not recommended. • Using the Quick Recycling Battery Pack SD-800 (p. 64) or an external power source (p. -
Page 122: Troubleshooting
Troubleshooting If a warning indication appears on the SB-800’s LCD panel or inside the camera’s viewfinder, use the following chart to determine the cause of the problem before you take your Speedlight to a Nikon service center for repair. ■■■... - Page 123 If the built-in wide-flash adapter is broken off accidentally If the wide-flash adapter is subjected to a strong impact while set on the flash head, it may be broken off. In this case, visit your nearest authorized Nikon service center for repair.
- Page 124 • Batteries should not be exposed to excessive heat such as strong sunshine, a fire, or the like. • Dry batteries should never be recharged in a battery charger. • Do not expose the SB-800 to water as this may result in an electric shock or cause the unit to catch on fire. Cause The SB-800 is not correctly attached to the camera.
-
Page 125: About The Lcd Panel
• To cancel the LCD panel illumination, go to the Custom settings mode set it off. • Even if the LCD panel illuminator is set to OFF, the SB-800’s LCD panel illuminator turns on when the camera’s LCD panel illuminator is turned on. The LCD panel illuminator also lights up when the Custom settings mode is displayed. -
Page 126: Specifications
Balanced Fill-Flash with D) Auto Aperture flash Non-TTL auto flash Distance-priority manual flash Manual flash Repeating flash Other available functions Test firing, Monitor Preflashes, AF-assist Nikon Creative Lighting System Multiple flash operation Flash exposure control set on the camera Automatic Insulated Gate Bipolar Transistor (IGBT) - Page 127 35mm 50mm 70mm 85mm 105mm ∗1 With the Nikon Diffusion Dome attached ∗2 With the built-in wide-flash adapter set Bounce Flash head tilts down to –7° or up to 90° with click-stops at –7°, capability 0°, 45°, 60°, 75°, 90°; flash head rotates horizontally 180° to the left or 90°...
- Page 128 Specifications External power sources (optional) nLights up when the SB-800 is recycled and ready to fire. Ready-light nBlinks for 3 sec. when flash fires at its maximum output, indicating Flash 1/1050 sec. at M1/1 (full) output duration 1/1100 sec. at M1/2 output (approx.)
-
Page 129: Specifications
Approx. 350g (12.3 oz.) (without batteries) Accessories Quick Recycling Battery Pack SD-800, Speedlight Stand AS-19, Colored Gel Filter Set SJ-800, Nikon Diffusion Dome supplied SW-10H, External power source terminal cap, Soft Case SS-800 These performance specifications are applicable when fresh batteries are used at normal temperatures (20 °... -
Page 130: Index
Index • Refer to the Speedlight parts and their functions (p. 10) and Icons on the LCD panel (p. 13) for each part name and display indications. Symbol e/f button...12 i-TTL mode ...36 AF-ILL...62 AF-ILL ONLY...62 Accessories...111 Advanced Wireless Lighting ...76 Aperture-priority auto exposure (A) ...29 Auto Aperture flash ...38 Auto FP High-Speed sync...60... - Page 131 Monitor Preflashes...36 Mounting foot lock lever...22 Multi Selector...12 Multiple flash operation ...72 Multiple flash shooting using cords ...90 NO AF-ILL ...62 Nikon Creative Lighting System...5 Nikon Diffusion Dome...101 Non-CPU lenses...16 Non-TTL auto flash...40 Non-TTL auto flash mode...38 Number of flashes...19, 48 ON/OFF button ...12...
- Page 132 No reproduction in any form of this manual, in whole or in part (except for brief quotation in critical articles or reviews), may be made without written authorization from NIKON CORPORATION. Printed in Japan TT4I02500801 (S033) 11 8MSA0611-A...
Need help?
Do you have a question about the SB-800 and is the answer not in the manual?
Questions and answers