Table of Contents
Advertisement
Quick Links
Advertisement
Table of Contents

Related Manuals for Nikon SB-102 Nikonos


Summary of Contents for Nikon SB-102 Nikonos
- Page 1 Nikon NIKONOS Speedlighf INSTRUCTION MANUAL...
-
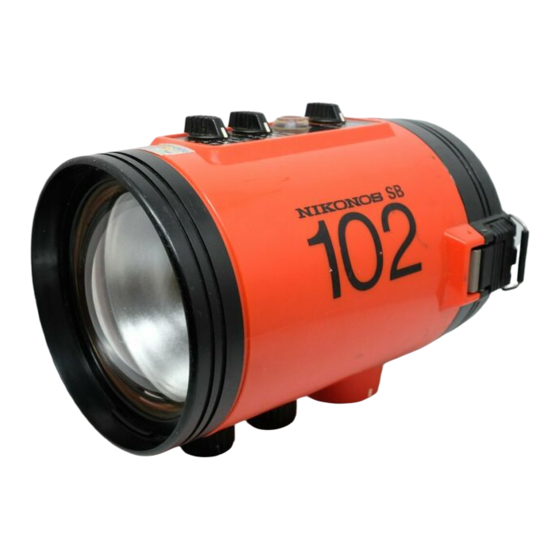
Page 2: Nomenclature
NOMENCLATURE _ _ _ _ _ _ _ Synchro socket index Sensor socket ® socket ® Synchro socket cover Snp,erllinlht ® Camera plug locking ring Sensor holder socket Sensor holder positioning Bracket slot Bracket screw @Bracket Buckle lock/release latch calculation dial ®... -
Page 3: Table Of Contents
CONTENTS _ _ _ _ _ _ _ _ _ NOMENCLATURE FOREWORD .. PREPARATION Examining and lubricating the O-rings The O-rings and their sealing method ... TIPS ON SPEEDLIGHT CARE. BASIC OPERATIONS . CONTROLS IN DETAIL . Bracket ... Joint . Close-Up Shooting the Non-TTL Automatic Mode... -
Page 4: Foreword
FOREWORD _ _ _ _ _ _ _ _ _ The Nikonos 8peedlight 88-102 performance electronic flash unit with a sil trolled rectifier and series circuitry, with the Nikonos-V, Nikonos IV-A, 88-102 can be submerged to a depth of 50 meters (160 feet) and withstand pressure of up to 6kg/cm (85 Ib/in enabling it to be used in environments where... -
Page 5: Examining And Lubricating The O-Rings
PREPARATION-continued Examining and lubricating the O-rings: To remove the O-rings, except those in the socket and sensor socket covers, tween your thumb and forefinger. together as you slide them in the direction of the arrow to create slack in the O-ring. Then grasp the slack portion with your other hand and pull the ring off (see Fig. -
Page 6: Preparation
Reminder: An extra set of O-rings and a tube of lubri- cant are supplied with the flash unit. Additional O-rings and lubricant are available from authorized Nikon dealers and service centers. The O-rings and their sealing method The method used by the O-rings to seal and waterproof... -
Page 7: Tips On Speedlight Care
Nikon dealer or service center regular basis. speedlight is dropped or bumped surface, take it to an authorized Nikon for inspection even if surface damage. speedlight attach the dust-proof caps to the sync and sensor cord plugs ."... - Page 8 OPERATI,;::: O..:...: N~ BASIC Unlock the buckle lock/release latches and unlock the buckles ®> up the buckle lock/release latch push the buckles outward and downward. Note: small numbers in circles identify parts the speedfight as fisted in the NOMENCLATURE section. Remove the C-type •...
- Page 9 Replace the C -type • battery cartridge in the battery chamber. Be sure the speedlight power switch ® is in " OFF" position then align the groove on the battery car- tridge with the notch on the inside of the compartment slide battery cartridge into the...
-
Page 10: Basic Operations
BASIC OPERATIONS-confinued _ _ _ _ Insert the joint plate • into the joint collar While holding the base of the joint knob against the joint, slide the joint plate into the joint collar until it is fully seated. When inserting joint plate into the joint collar,... - Page 11 Loosen the arm • knob @. Turn the arm knob counterclock- wise as far as it will go to loosen it (the two bracket positioning pins on the bottom of the grip will be visible). Attach the cord • fastening hanger ®...
- Page 12 BASIC OPERATIONS-confinued Connect the sync • cord to the camera Remove the dust-proof plastic cap from the sync cord 's camera plug (silver). Insert the camera plug in the camera's flash socket after aligning the white index on the flash sync socket with the red index the camera plug...
- Page 13 Set the ASA/ISO film speed. Turn the exposure calculation dial until the correct shooting situa- tion mark is opposite the ASAIISO speed of the film in the camera. Choose which mark to use accord- ing to the shooting situation: On-land photography : On-land photography with the wide-flash adapter Underwater photography...
- Page 14 BASIC OPERATIONS-confinued _ _ _ _ A·3. Set the f/stop on the lens. When you determined wh ich have flstop to use, set this stop on the lens. In the photograph f/8 is set. B·2. Remove the sensor socket cover@ Turn the sensor socket cover...
- Page 15 with B·5. Select an f/stop exposure calculation dial. Select an aperture by using the non·TTL auto shooting aperture scale non·TTL auto shooting aperture index example, when the shooting situation mark underwater photography) is set to A8AIISO 100, the non-TTL auto shooting aperture index is opposite the fIB on green...
-
Page 16: Basic Operations
BASIC OPERATIONS-confinued • With set of fully recharged NiCd batteries, the ready-light will light approximately 5 seconds; with fresh of alkaline· manganese batteries, it wiff light in approxi· mately seconds. If either the S8-102's or the camera's ready· light does not light, check that: the batteries are properly installed, the camera, sensor unit, and ffash unit are securely... -
Page 17: Controls In Detail
UW-Nikkor 15mm f12.8 If this presents problem you, authorized Nikon service centers can perform the necessary modification. bracket, the rubber side of the bracket facing up, and of the grip perpendicular to the bracket. un~it... -
Page 18: Joint
CONTROLS IN DETAIL-continued Joint The joint connects the arm to the speedlight and allows the flash head to be positioned as required for various shooting situations. The arm can be inserted from either side of the the normal position is shown in the two SB-102 Speedlights and the optional Double Flash Bracket, insert the arm that is next to the camera's film... -
Page 19: Synchro Socket
Synchro Socket ® To connect the sync cord to the ® the synchro socket cover by turning it wise and pulling it Remove the dust-proof plastic cap from the sync cord 's speedlight plug Insert the speedlight plug into the synchro socket after aligning the synchro socket index CD on the speedlight plug... -
Page 20: Sensor Unit Su-101 (Optional)
CONTROLS IN DETAIL-continued Sensor Unit SU-101 (Optional) In combination with the optional Sensor Unit SU-101, the S8-102 provides non-TTL automatic flash control. With the S8-102 shooting ® switch at "AUTO," the Sensor Unit SU-101 reads light reflected back from the subject while the speed- light is firing and tells the speedlight... -
Page 21: Shooting Mode Selector
"AUTO" -Non-TTL Automatic Flash Mode When the optional Sensor Unit SU-101 mode provides non-TTL automatic fl ash mode, the sensor unit reads from subject while the speedlight speedlight to turn itself off when sufficient correct exposure. The se back of the SU -101 allows one of two to be selected according to the flash -to -subject distance... -
Page 22: Exposure Calculation Dial
CONTROLS IN DETAIL-continued Exposure Calculation Dial In flash photography, which apertures can be used is closely related to the flash-to-subject mine the useable apertures align the shooting situation mark on the exposure calculation film speed in use, find the flash-to-subject distance on the distance scale, then follow the corresponding dis-... - Page 23 Example 2: When shooting a subject underwater at 4m (1 3ft) with the wide-flash adapter while using ASAIISO 100 film you must use f/2 When several f/stops are useable at a specific flash to-subject distance make your selection by taking the desired depth of field and speed light recycling time into consideration.
-
Page 24: Non-Ttl Automatic Flash Control
CONTROLS IN DETAIL-continued Non-TTL Automatic Flash Control When using the optional Sensor select one of two useable apertures. useable apertures vary according speed of the film in use, but they can be easily deter- mined with the exposure calculation dial. When the correct shooting situation with... -
Page 25: Manual Flash Control
Manual Flash Control Manual flash operation allows you to control the light output of the SB-102 by setting selector to one of three positions "M1/16." To determine which setting to use, correct shooting situation mark with the correct speed on the ASAIISO film speed scale. Next, Ipcate the flash-to-subject distance on the distance scale and follow corresponding distance line up as it crosses... -
Page 26: Exposure Compensation
CONTROLS IN DETAIL-continued Example 3: Shooting a subject on land 8m (26.2ft) the wide-flash adapter while using ASAIISO 100 "MFULL": The GN for " MFULL" on land is (from the chart below). Divide the GN of by the flash-to-subject distance of 8m to get the correct aperture, f/4. -
Page 27: Ready-Light
Non·TTL Automatic Flash Exposure Compensation When shooting in the non-TTL automatic flash exposure mode, exposure compensation can be made by ping down or opening up the lens. a dark subject 1/2- to 2-step smaller numerically larger f-number). To compensate for a light subject, 1/2- to 2-step... -
Page 28: Test Firing
CONTROLS IN DETAIL-continued Because of these three factors, the ready-light may blink to indicate that the light output was for correct exposure even if the subject coupling distance range. Camera and Speedlight Ready·Lights Camera Shutter Speed Setting (sec .) A, 1/1000 to 1/30 A, 1/1000 to 1/30... -
Page 29: Cord Fastening Hanger
Cord Fastening Hanger This hanger secures the sync cord to the bracket to keep out of the way while shooting To use the cord fastening hanger, attach light bracket as shown photo, sync cord to the hook. Attaching the SW-102 To attach the adapter, align... -
Page 30: Target-Light
45° 7. Replace the C-type battery cartridge. Replace the battery chamber cap. target·light can also be replaced by an authorized Nikon dealer or service center desire. 58 ·102 or 58-101 (master unit) When two more... -
Page 31: Tips On Speedlight Photography
Nikonos IV-A, certain optical finder models for Therefore, older UW-Nikkor 15mm attached. If this presents a problem for you authorized Nikon dealers and service centers can made. perform the necessary overex- One of the benefits of using a speedlight under- water is that it restores natural colors to subjects by removing the water's bluish cast. -
Page 32: Optimum Battery Performance
When installing care should be polarities ones and negative (-) some manufacturers leakage shou ld or take it to an authorized Nikon dealer or service center. SB-102 requires life span of the other bat- NiCd batteries In comparison with regula... -
Page 33: Accessories
ACCESSORIES _ _ _ _ _ _ _ _ Numerous accessories are available to increase the S8-102's versatility. Sensor Unit SU·101 This unit is required when using the S8 -102 in the non-TTL automatic flash mode with the Nikonos IV-A, or Nikonos III. Sensor Holder (for SB·102) When a plastic frame finder or an optical... -
Page 34: Double Sync Cord
ACCESSORIES-continued _ _ _ _ _ _ _ Double 5ync Cord When using Nikonos-V, is co -102 Speedlights used in flash mode • When using two S8-102 Speedlights in the TTL automatic flash mode, the correct shooting situation mark on the exposure calcula- tion dial must be realigned with a 1 higher speed on the ASAIISO film... -
Page 35: Specifications
SPECIFICATIONS Flash Type: High-performance controlled rectifier circuitry Useable Exposure TTL auto Modes: camera) (with optional Sensor Unit SU-101); "M1/4," and "M1/16" settings Guide Numbers With ASAIISO 100 film (underwater), 1/4 output: 16 8(4) Angle of Coverage 79° on land of 28mm water with SW-102,... - Page 36 No reproduction in any form of this manual, in whole or in part (except for brief quotation in critical articles or reviews), may be made without written authoriza- tion from the publishers. (N;lro,,) NIPPON KOGAKU K.K Printed Japan 8&067-A06...
Need help?
Do you have a question about the SB-102 Nikonos and is the answer not in the manual?
Questions and answers