Table of Contents
Advertisement
Advertisement
Table of Contents

Related Manuals for Mamiya RB67 Pro S


Summary of Contents for Mamiya RB67 Pro S
-
Page 2: Table Of Contents
Lens hood/Carrying strap ... Changing the magnifier/Focusing hood ... Changing the focusing screen/Revolving adapter ... 33 Lock system of the camera back (attaching system)... Mamiya RB67 operation diagram ... Special pointers in using the Mamiya RB67 Pro-S ... 39 Lenses ... Accessories ... -
Page 3: Specifications
Accessory shoe is provided. Shutter release button can be locked to prevent releasing the shutter accidentally Standard Lenses: Mamiya Sekor 90mm f/3.8 with lens hood Mamiya Sekor 127mm f/3.8 with lens hood Filter screw diameter: 77mm Aperture: Full automatic diaphragm (with depth-of-field preview lever). -
Page 4: Features
6 x 7cm picture composition. 3. Excellent Mamiya Sekor lenses Mamiya Sekor lenses boast excellent image rendition and color balance. Various types ranging from wide-angle lenses to telepho- to lenses are available. - Page 5 These lenses are rationally grouped in series, whereby those exactly adaptable to one’s particular photographing objectives are optionally selectable with ease. 4. Lens-shutter system suitable for electronic flash photography By adopting the lens-shutter system, electronic flash is synchro- nized with all shutter speeds, making it possible to produce highly impressive photographs.
- Page 6 and 70mm film. The film holders and back adapters are very easily exchanged. 10. Unique mirror shockless mechanism By adopting a unique centrifuged friction governor system, the mirror functions smoothly without sensing shocks. Mirror shock, constituting the most important problem involved in large, single- lens reflex cameras, has been solved.
- Page 7 14. Close-up photography through full use of bellows characteristic features Since the bellows can be extended up to 46mm, photographing small subjects in the frame full size is possible. When auto exten- sion tubes are used, the subject can be further enlarged. When a standard lens is employed, life-size (1 : 1) or larger pictures can be photographed.
-
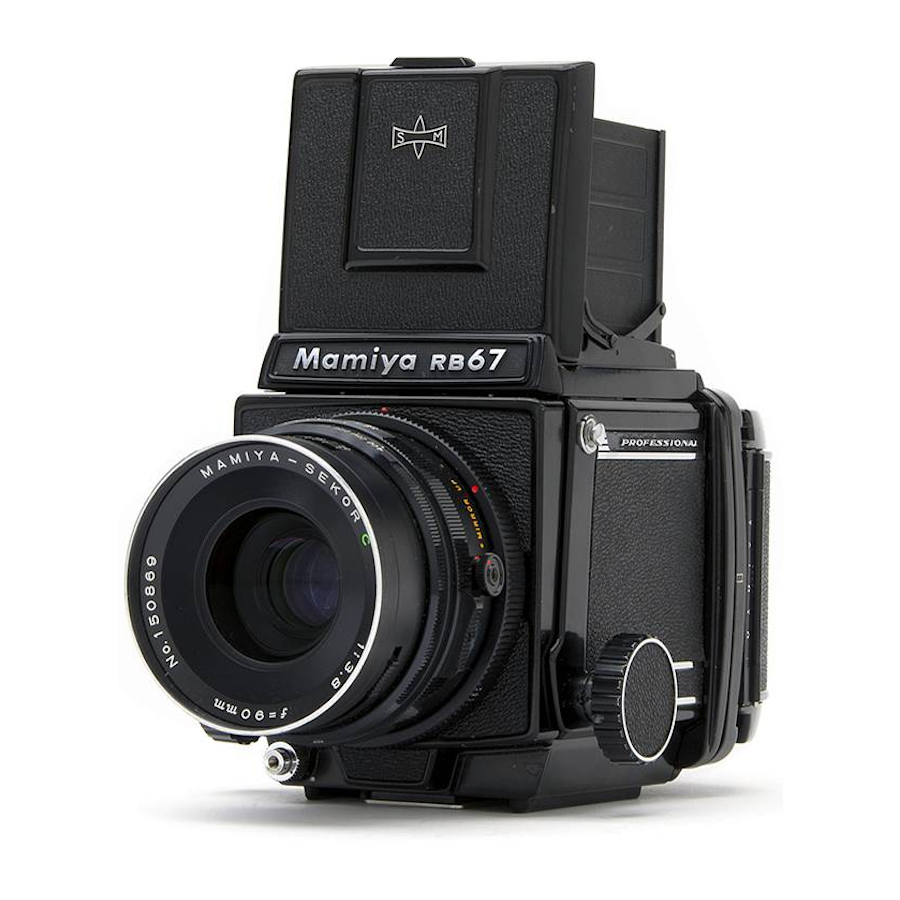
Page 8: Names Of Parts And Outline Of Operating Method
0 Names of Parts and Outline of Operating Method Shutter cocking lever Both the shutter and the mirror are cocked by this lever. Unless they are set, a safety device prevents the shutter release button from being depressed. Dark slide When this dark slide is inserted, a safety device prevents the shutter release button from being depressed. -
Page 9: Multiexposure Lever
Single-action focusing hood Opening and closing is performed by Single action. E x t r a n e o u s l i g h t s h i e l d - ing design is adopted for this focusing hood. -
Page 10: Tripod Socket
Coupling pin for film wind-stop releasing When the shutter is released, the film wind-stop is automatically disengaged by this pin, allowing subsequent film advances. Light baffle Do NOT touch this light baffle with your fingers. Revolving adapter Turning this adapter up to 90D permits change-over between the horizontal and vertical picture format. -
Page 11: Exposure Counter
Back cover latch Film wind-stop release lever The film wind-stop is released manually by this lever only when the Pro-S roll film holder is used for the Mamiya Press. Spool release pin A film spool is attached and detached by pressing down this pin. -
Page 12: Operating Instructions
M-X selector This selector is switched while de- pressing it. Synchroflash terminal Depth-of-field preview lever Distance scale lever for depth-of-field reading Cocking position marks Mirror release operating knob To effect mirror-up photography, pull out and turn the knob clockwise and set it to the MIRROR-UP index, then attach a cable release to the knob. -
Page 13: Attaching And Removing The Lens
q Attaching and Removing the Lens the Lens Attaching A f t e r c o c k i n g t h e c a m e r a b o d y m i r r o r and the lens shutter, mount the lens on the camera body. -
Page 14: Removing The Lens
Removing the Lens R e m o v e t h e l e n s w h i l e t h e m i r r o r a n d the shutter are cocked. Turn the bayonet ring (11) counterclock- wise, aligning its red dot with the lens mounting mark (10) on the body, and remove the lens. -
Page 15: Operating The Focusing Hood
0 Operation of Focusing Hood 0 Raising the focusing hood B y r a i s i n g back side of the hood, the en- tire focusing hood will au- tomatically spring into po- sition. 0 Folding the focusing hood W i t h t h e m a g n i f i e r i n its closed position, fold... -
Page 16: Horizontal And Vertical Picture Format Selective Operation
Changing the Picture Format to Horizontal or Vertical Operating the revolving adapter When the horizontal format mark of the revolving adapter is facing upward, a hori- zontal format will result. To compose a v e r t i c a l p h o t o g r a p h . t u r n t h e r e v o l v i n g adapter clockwise until it stops. -
Page 17: Attaching And Detaching The Roll Film Holder
0 Attaching and Detaching the Roll Film Holder Removing the rear body cap By moving the slide locks (29) on both sides fully to the left, the cap can be removed. * Never push the light baffle (26) on the camera back after removing the rear body cap. - Page 18 Detaching the roll film holder 1. Insert a dark slide in the roll film holder. Two white lines on the side of the holder indicate the position of the inserting slit. 2. Remove the roll film holder by sliding both slide locks (29) in the opposite direc- tion to the arrow mark on the slide lock.
-
Page 19: Loading And Advancing The Roll Film
0 Loading and Advancing the Roll Film Loading the film 1. Open the back cover by pulling out the back cover latch, while slightly pressing the back cover. Remove the film insert from the holder. x; When loading and unloading film, avoid direct sunlight. - Page 20 Aligning the starting mark Move the film advance lever gently, until the starting mark (arrow) of the leader paper aligns with the starting mark of the holder. The film advance lever can be moved in several short, definite strokes. * If the leader paper is pulled too far, the film may become fogged.
- Page 21 The film wind-stop release lever provided for the Pro-S roll film holder is to be used when the holder is used for the Mamiya Universal Press, or when desiring to wind up to the film end while unexposed film remains in the holder.
-
Page 22: Multiple Exposure Photography
0 Multiple Exposure Photography W h e n t h e multiexposure lever of the roll film holder is moved forward, the coupling pin for double-exposure prevention is dis- engaged, and whenever the shutter cocking lever is set, shutter releasing can be re- peated without limit. -
Page 23: Setting The Shutter Speed
Cl Setting the Shutter Speed and the Aperture Setting the Shutter speed Align the desired shutter speed with the red dot on the center of the lens barrel. * Always set the shutter speed to the click stop position. In-between shutter speeds cannot be used. -
Page 24: Focusing Knob Fixing Operation/ Distance Scale
Focusing and Focusing Knob Fixing Focusing When the shutter is cocked, the mirror is cocked simultaneously, and an image is visible on the ground glass of the focusing screen. By turning either the left or right focusing knob, adjust the focus and com- pose the picture. -
Page 25: Depth Of Field
0 Depth-of-field Viewing on the focusing screen 1. Set the desired aperture by turning the aperture scale ring (51); then adjust the focus. 2. Depress the depth-of-field preview lever (47) and the depth-of-field can be observed on the ground glass focusing screen. When removing your finger, the lever will return to its original position and the lens aperture will fully reopen. -
Page 26: Close-Up Photography
+ 1 compensation value to (1/30 sec. at f/16) or (1/60 sec. of f/11). * When using the CdS finder for the Mamiya RB, exposure need not be com- pensated, since the meter reads actual exposure directly. from the front... -
Page 27: Close-Up Photography With Auto Extension Tubes
W h e n u s i n g t h e CdS f i n d e r f o r t h e Mamiya RB. exposure need not be com- pensated, since the meter reads actual... -
Page 29: Flash Photography
0 Flash Photography Connecting the cord Connect the cord of the flash unit to the synchroflash terminal (46). Flash Synchronization Table b M-X selection The M-X selecting lever is internally locked to prevent unintentional switching of the mode. When switching the M-X selector, move the lever to the right or left, until it reaches the end while pressing the lever against the lens barrel. -
Page 30: Mirror-Up Photography (Independent Mirror Release)
0 Mirror-up Photography (Independent Mirror Release) In mirror-up photography, previously release the mirror and operate only the lens shutter at the moment of taking the photograph. This mirror-up photography is recommended When a tripod is employed and the shutter is released at slow speed, when taking close-up photos, or when using a telephoto lens, where avoidance of even a negligible shock is desired, or when curtailment of... -
Page 31: Lens Hood/Carrying Strap
0 Lens Hood This lens hood can be used commonly for the 90mm, 127mm. 180mm. and 250mm lenses. 1. Screw the attachment ring into the front of the Ions mount. Pull the folded rubber hood straight out. using it as the hood for the 127mm. - Page 32 Holding the camera by Detaching the strap detach the strap, slide the After adjusting the length of the a t t a c h i n g m e t a l in r e v e r s e carrying strap, pass your left direction to attaching, while hand through the strap, and...
-
Page 33: Changing The Magnifier/Focusing Hood
0 Magnifier Changing the magnifier While holding both side panels of the focus- ing hood to prevent lowering of the magni- fier base plate, turn the magnifier counter- clockwise, and at the point where the white dot on the magnifier becomes aligned with the while dot on the base plate, remove the magnifier. -
Page 34: Changing The Focusing Screen/Revolving Adapter
Cl Focusing Screen Five types of easily exchangeable focusing screens are available to meet various pho- tographing applications. Attaching and detaching First remove the focusing hood, then take out the focusing screen while holding both sides. To attach it, hold each side and insert the focusing screen into the top of the camera body and press down lightly. - Page 35 When desiring to pull out the dark slide of the roll film holder which has been removed from the body When the roll film holder for the Pro-S is removed from the body, the safety device prevents its dark slide from being pulled out carelessly or accidentally.
- Page 36 When the lens is installed on the camera while the mirror and the shutter are not set. Lens installation is possible even if the mirror and/or the shutter are/is not set; however, operation shown in the table must be followed to obtain a normal set condition. In this case, do not pull out the dark slide of the film holder until the camera is set to a normal condition.
-
Page 37: Lock System Of The Camera Back (Attaching System)
Mamiya a c c e s s o r i e s . W e h a v e n a m e d t h e s e l o c k s t h e R - l o c k , G - l o c k , P - l o c k , and M-lock. - Page 38 When the roll film holder for the Pro-S is used for the Mamiya Universal Press. Use in the same manner as when the roll film holder for the former RB67 is mounted on the Mamiya Universal Press. When the film wind-stop release lever (42) is moved to...
-
Page 39: Mamiya Rb67 Operation Diagram
0 Mamiya RB67 Operation Diagram Shutter setting condition Shutter blade Aperture blade ‘Y Both the shutter blade and the aperture blade are opened. The mirror and the light baffle are lowered to the set position. Mirror-up photography Shutter blade (1) When pressing the shutter... -
Page 40: Special Pointers In Using The Mamiya Rb67 Pro-S
0 Special Pointers on Using the Mamiya RB67 Pro-S Various safety interlock devices are provided for the Mamiya RB67 Pro-S to eliminate failures through care- lessness. When the shutter is not released, or when the lens or the roll film holder cannot be removed, do not hastily concluded that this indicates a camera malfunction.
Need help?
Do you have a question about the RB67 Pro S and is the answer not in the manual?
Questions and answers