Table of Contents
Advertisement
JANUARY 25, 2014
User Manual
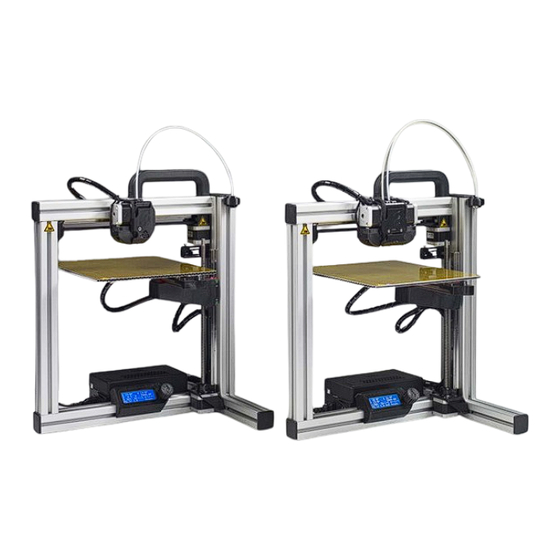
FELIX 3.0, 3d printer
VERSION 4
Copyright Information
This document contains proprietary information that is protected by copyright. No part of this document may be photocopied,
reproduced, or translated to another language without the prior written consent of FELIXrobotics.
FELIXrobotics BV
Gessel 4a
3454MZ, de Meern
The Netherlands
Copyright © 2014 FELIXrobotics BV.
Advertisement
Table of Contents

Related Manuals for FELIXrobotics FELIX 3.0

Summary of Contents for FELIXrobotics FELIX 3.0
- Page 1 VERSION 4 Copyright Information This document contains proprietary information that is protected by copyright. No part of this document may be photocopied, reproduced, or translated to another language without the prior written consent of FELIXrobotics. FELIXrobotics BV Gessel 4a 3454MZ, de Meern The Netherlands Copyright ©...
-
Page 2: Table Of Contents
User manual FELIX 3.0 3d printer Contents CONTENTS _______________________________________________________________________ 1 INTRODUCTION _______________________________________________________________ 2 SPECIFICATIONS ______________________________________________________________ 3 MECHANICAL SETUP __________________________________________________________ 4 Calibration of table ___________________________________________________________________________ 4 3.1.1 Step 1 _____________________________________________________________________________________ 4 3.1.2 Step 2 ____________________________________________________________________________________ 5 Extra calibration for dual extrusion printers _______________________________________________________ 6 SOFTWARE INSTALLATION –... -
Page 3: Introduction
User manual FELIX 3.0 3d printer 1 Introduction First of all, thank you choosing FELIXprinters! To get your Felix printer up and running as fast and painlessly as possible please follow this manual carefully. Don’t compare this product with a television, where a user manual is normally not required to get it working properly. -
Page 4: Specifications
User manual FELIX 3.0 3d printer 2 Specifications Printing Electrical Print Technology Fused Filament Fabrication AC input: 100-240V, 50-60 Hz Build Volume 25.5 x 20.5 x 22 cm Power Requirements 12V DC, 15 Amps Print Quality 250 microns Connectivity Normal... -
Page 5: Mechanical Setup
User manual FELIX 3.0 3d printer 3 Mechanical Setup 3.1 Calibration of table For a successful print it is important that the table is properly calibrated. The distance between the nozzle and table should be the same at every x,y position. The leveling mechanism of the table can be adjusted by turning the 3 M4 nuts underneath the heated bed. -
Page 6: Step 2
User manual FELIX 3.0 3d printer 3.1.2 Step 2 Calibration in x-direction Move the table to the middle of its movement range slowly. Adjustment nut Move the X-axis carriage over its movement range slowly. While moving check the distance between the hot-end and bed. -
Page 7: Extra Calibration For Dual Extrusion Printers
User manual FELIX 3.0 3d printer 3.2 Extra calibration for dual extrusion printers NOTE: his step is only intended for people who bought a dual head DIY kit. Otherwise skip to next subchapter. This subchapter guides you to mechanically calibrate your DUAL head setup. The following checks make sure the hot-ends will have the same height with respect to the just leveled heated bed. -
Page 8: Software Installation - Microsoft Windows
User manual FELIX 3.0 3d printer 4 Software Installation – Microsoft Windows 4.1 Microsoft Windows NOTE: Mac users should go to chapter 4.2 This chapter describes the steps how to make the printer communicate with your PC. Driver installation Firmware installation Repetier-host 4.1.1... -
Page 9: Firmware Installation - Arduino
User manual FELIX 3.0 3d printer 4.1.2 Firmware installation – Arduino NOTE: Only continue with this subchapter if: 1. You have just assembled your DIY kit DUAL extruder 3d printer or 2. You want to update the firmware of your printer because there is new firmware available. -
Page 10: Printer Software - Repetier-Host
User manual FELIX 3.0 3d printer Press the upload button, and wait till the upload is complete. This normally takes between 1 to 2 minutes. The new firmware is now on your printer. 4.1.3 Printer Software – Repetier-Host Repetier-Host provides the following functions: Control your printer, move axes and set temperatures, monitoring etc. - Page 11 User manual FELIX 3.0 3d printer In the configuration window press the Refresh Ports button. Choose the COM-port which belongs to your printer. This is the same COM-port obtained from previous chapter. 6. If you have two extruders, select the PRINTER tab and change the number of extruders.
-
Page 12: Software Installation - Mac Os
User manual FELIX 3.0 3d printer 4.2 Software Installation – Mac OS 1. Plug in the power supply cable. NOTE: The electronics board is NOT USB powered, so without the power cable the electronics won’t work. It needs the voltage of the purple wire to drive the logic of the board. - Page 13 User manual FELIX 3.0 3d printer 10. Open the Repetier-Host Mac Application and go to Printer Settings 11. Configure printer settings: support@FELIXprinters.com www.FELIXprinters.com...
- Page 14 User manual FELIX 3.0 3d printer 12. Configure Skeinforge settings under Preferences -> Slicer -> Skeinforge 13. Click “Browse” to direct to the correct files Application: /Applications/sfact/sfact.py Craft Utility: /Applications/sfact/skeinforge_application/skeinforge_utilities/skeinforge_craft.py Python Interpreter: /usr/bin/pythonw Python Interpreter: /Applications/Repetier-Host Mac.app/Contents/Resources/pypy.app/bin/pypy Profiles Directory: /sfact_profiles/profiles support@FELIXprinters.com...
-
Page 15: Calibrate The Z-Direction/Connect To Printer
User manual FELIX 3.0 3d printer 4.3 Calibrate the Z-Direction/Connect to printer To obtain good quality prints it is essential that the heated bed is level and that the distance between the hot- end and the bed is close enough when printing the first layer. - Page 16 User manual FELIX 3.0 3d printer Make sure the fan which blows air on top of the hot-end is spinning Make sure the leds of the opto-sensors on the electronics board are reacting. Make sure the lights of these opto-sensors go out when they are triggered. So if the switching vanes go into the limit-switch, the light should turn off.
-
Page 17: Prepare Cad File For Printing - Slicing
User manual FELIX 3.0 3d printer 5 Prepare CAD file for printing - Slicing This chapter will prepare a CAD file for printing. It basically converts a STL file to a gcode file. This process is called slicing. To keep things simple for your first print we recommend you get the test file from here: http://shop.FELIXprinters.com/downloads/index.php?path=print_files%2Ftest_print_files/... - Page 18 User manual FELIX 3.0 3d printer The profiles are easy to adjust and tweak yourself for further improvement. To do this just click the configure button This will show a very large number of settings to tweak. Don’t worry: every setting is well documented. If you are interested in knowing more just click the question mark button as indicated in the figure below.
- Page 19 User manual FELIX 3.0 3d printer Press the Load button or in the Object placement tab, Add Object button. Then navigate to the folder where you downloaded the _40x10.STL file or any other STL file. 3. Slice this file and prepare it to print. Press the Slice with SFACT button...
-
Page 20: Your First Print
User manual FELIX 3.0 3d printer 6 Your first print After all the hard work of the assembly and setting up the machine it is time to get some reward with of your first successful print. In the manual control window do the following. - Page 21 User manual FELIX 3.0 3d printer Tensioning bolt, turn counter clockwise for more tension on filament. When these steps above are OK, you are ready to press that print button. If the calibration was done correctly, the print should finish without any problem.
-
Page 22: Dual Head Printing
User manual FELIX 3.0 3d printer 7 Dual head printing This chapter describes how to calibrate your dual extrusion printer and describes additional steps to make a dual extrusion print. Assumed in the following steps is that repetier-host is already installed, that the hot-ends are calibrated correctly to have the same height and that you just finished assembling your DIY kit. - Page 23 User manual FELIX 3.0 3d printer Wall is not straight. Check if hot-end is correctly fastened. Check if pulley is fixed correctly on motor axis Gaps in part. Make sure the extruder arm exerts enough tension on filament. When extruding manually, it should be very hard to hold back the filament by hand.
- Page 24 User manual FELIX 3.0 3d printer b. Fill in these values here: 6. Press the OK button to save the new calibration values and print out the calibration part again to verify calibration values give the desired result. The two squares located at 4,4 (highlighted in blue) should be perfectly aligned on top of each other.
-
Page 25: Kisslicer
User manual FELIX 3.0 3d printer 7.1 Kisslicer Kisslicer is a separate program to generate gcode. It is an extremely fast slicer and generates impressive g- codes. The program can be downloaded here. There is a free version and a paid version, it is important to know that only the paid version is able to generate gcode for dual extrusion. - Page 26 User manual FELIX 3.0 3d printer Press slice Check results If satisfied, press save: support@FELIXprinters.com www.FELIXprinters.com...
-
Page 27: Slic3R - Coming Soon
User manual FELIX 3.0 3d printer Load the just saved .gcode file in repetier-host to print it on your FELIXprinter. 7.2 SLIC3R – Coming soon At the time of writing the slic3r slicer profiles are not available yet. This software alternative is free, however the support material generation is under development and does not result in great results yet. -
Page 28: Printer Control With Optional Display Unit
User manual FELIX 3.0 3d printer 8 Printer control with optional display unit The printer can be fully controlled with the display unit. The menu structure is displayed below. We will describe each block and show some workflows for the most used functions. -
Page 29: Workflow To Start A Print
User manual FELIX 3.0 3d printer 8.1 Workflow to start a print. This subchapter shows how to start a print from the control interface. Before a print can be started it is mandatory to have a microSD card inserted in the SDcard slot of the electronics board of the printer. There must also be at least one correctly sliced .gcode file on it. -
Page 30: Menu Description
User manual FELIX 3.0 3d printer 8.4 Menu description This section describes the existing menu’s in more detail. Top Menu By scrolling through the top menu with the knob, you will get several views. The top menu Line 1, describes the temperatures of the hot-ends in this format... -
Page 31: Printer Accessories
User manual FELIX 3.0 3d printer 9 Printer accessories To improve the user experience, we provide several accessories to the printer. The accessories basically enable a good filament guiding. The basic parts are provided in the kit, but the plastic parts have to be printed (only for the DIY kits). -
Page 32: Filament Roll Off Mechanism
User manual FELIX 3.0 3d printer 9.2 Filament roll off mechanism The function of the roll off mechanism is to have the filament roll off smoothly from the spool and to prevent knots during printing. Steps to install the filament roll off mechanism: Press the large bearing (there are two needed for dual extruder printers) into the printed part first. -
Page 33: Faq
User manual FELIX 3.0 3d printer 10 FAQ Q: Which hot-end nozzle temperature do you recommend? A: For small detailed parts in PLA we recommend printing as cold as possible (180 to 190 degC), but for our production prints we print with as high a temperature as possible (195-200 degC), because that increases the strength of the parts. -
Page 34: Maintenance/Optimal Operational Tips
User manual FELIX 3.0 3d printer 11 Maintenance/Optimal operational tips The FELIXprinter is an easy product to maintain and clean. To keep enjoying your FELIXprinter and ensure optimal print performance, regular maintenance is very important. 11.1 General tips for optimal operation Make sure the filament enters the hot-end is clean from dust. -
Page 35: Troubleshooting
User manual FELIX 3.0 3d printer 12 Troubleshooting This chapter helps to troubleshoot common problems with the printer. Each common issue is described in a table. The tables are organized with the highest probability solutions at the top. PROBLEM: Stopped extrusion after x-layers/Skipped layers/weak strength of parts/Extruder jammed. - Page 36 User manual FELIX 3.0 3d printer issues occur with the PEEK middle isolation part. Try to post drill it with a 2mm drill. PROBLEM: Objects don’t stick to the heated build platform Possible cause Possible solution 1. Is the bed clean? For good bed adhesion of the object the bed must be clean from dirt, dust and grease.
- Page 37 User manual FELIX 3.0 3d printer PROBLEM: Display screen is appearing blank Symptom Possible solution No characters are displayed on Make sure connector is placed correctly on control board. the screen Lighting is on, but no characters Contrast of the display is not set-up correctly. Turn the are displayed.
-
Page 38: Safety
User manual FELIX 3.0 3d printer 13 Safety To safely operate the FELIXprinter, we advise that you keep the following safety recommendations in mind: Keep children under the age of 14 out of reach of the FELIXprinter 2. Caution with any moving parts that move in the X, Y and Z direction. At the end of each moving part there is a pinching hazard. -
Page 39: Appendix: Extra Checks After Assembling Diy Kit For Optimal Operation
User manual FELIX 3.0 3d printer 14 Appendix: Extra checks after assembling DIY kit for optimal operation The following checks are done by our assembly team. The checks are of great importance and ensure optimal operation of your 3d printer. - Page 40 User manual FELIX 3.0 3d printer The following checks are endurance tests which are done before assembled printers are released to our customers. For assembled printers the printed parts generated are supplied with the printer. Printing checks Check All I/O working properly 00_test_thinwall_v3_export.gcode,...
-
Page 41: Appendix: Electronical Schematics
User manual FELIX 3.0 3d printer 15 Appendix: Electronic schematics support@FELIXprinters.com www.FELIXprinters.com... -
Page 42: Appendix: Material Data Safety Sheet
User manual FELIX 3.0 3d printer 16 Appendix: Material Data Safety Sheet 16.1 PLA Hazards Identification Appearance: Clear, translucent, opaque, pellets. Physical state: Solid Odor: Sweet Potential health effects: Eye contact: Contact with eyes may cause irritation. Skin contact: Substance may cause slight skin irritation. - Page 43 User manual FELIX 3.0 3d printer diarrhoea. Long term toxicity: Did not cause skin allergic reactions in skin sensitization studies using guinea pigs. Specific effects: May cause skin irritation and/or dermatitis. Ingestion may cause gastrointestinal irritation, nausea, vomiting and diarrhoea. Inhalation of dust may cause shortness of breath, tightness of the chest, a sore throat and cough.
-
Page 44: Abs
User manual FELIX 3.0 3d printer 16.2 ABS Hazards Identification This product is not classified as dangerous according to EC criteria. First-aid measures Eye Contact: Flush eyes with plenty of water; remove contact lenses after the first 1-2 minutes then continue flushing for several minutes. - Page 45 User manual FELIX 3.0 3d printer protection (EN 407), when needed. Use gloves to protect from mechanical injury. Selection of gloves will depend on the task. Respiratory Protection: In dusty or misty atmospheres, use an approved particulate respirator. Use an approved air- purifying respirator when vapors are generated at increased temperatures or when dust or mist is present.
-
Page 46: Appendix: Symbol- And Indicatorlights Explanation
User manual FELIX 3.0 3d printer 17 Appendix: Symbol- and indicatorlights explanation Symbol/indicator Explanation Warning: High temperatures Pinch hazard. support@FELIXprinters.com www.FELIXprinters.com... -
Page 47: Appendix: Terms Of Service
Third-Party Links Liability "FELIXrobotics" sees it as a duty to deliver you valuable products at reasonable prices. However, all of the products and services we offer are experimental and intended for the “maker” community. These products are not tested by independent laboratories like and should only be used by people who understand the risks. - Page 48 Defective products manufactured in house will be replaced within 10 days of receipt, with the same item. All goods are checked before they are sent out. In the unlikely event that goods are faulty, they must be returned, to the FELIXrobotics store at the address listed on your order invoice.
- Page 49 (including but not limited to the purchase of FELIXrobotics products) shall be in a Dutch court. Any cause of action or claim you may have with respect to the site (including but not limited to the purchase of FELIXrobotics products) must be commenced within one (1) year after the claim or cause of action arises.
- Page 50 User manual FELIX 3.0 3d printer having • You may not need to send it back to us, sending us a photo of the defective item might be enough So we can select a logistics partner of our choice that will handle the package. In this case we can choose to pay for shipping the return support@FELIXprinters.com...
Need help?
Do you have a question about the FELIX 3.0 and is the answer not in the manual?
Questions and answers