Advertisement
Table of Contents
ALL phases of this installation must comply with NATIONAL, STATE AND LOCAL CODES
IMPORTANT — This Document is customer property and is to remain with this unit.
Installer's Guide
OIL FIRED CENTRAL FURNACE
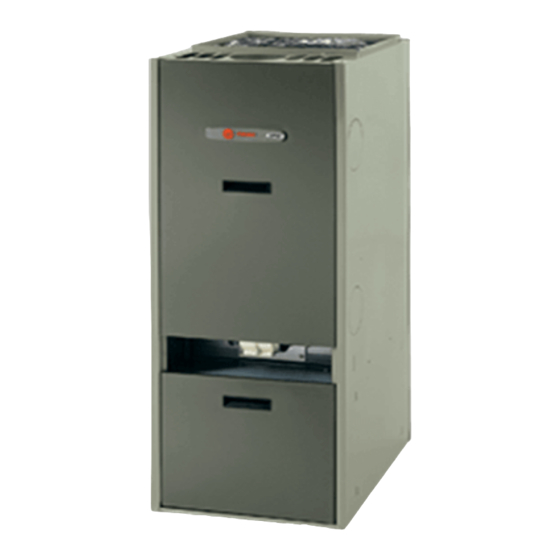
THV1M087A936, 948, 9V3, 9V5SA - Highboy
TLF1M087A936, 948, 9V3, 9V5SA- Lowboy Front Flue
TLR1M087A936, 948, 9V3, 9V5SA - Lowboy Rear Flue
TDF1M087A936, 948, 9V3, 9V5SA - Downflow/ Horizontal
Please return to service information pack upon completion of work.
THV1
Highboy
Vertical
Flue
TLF1
Lowboy
Front
Flue
TDF1
Downflow/
Horizontal
Front Flue
TLR1
Lowboy
Rear
Flue
18-DE01D1-8
AVAILABLE IN FRENCH CANADIAN (FC)
Advertisement
Table of Contents

Related Manuals for Trane THV1M087A936


Summary of Contents for Trane THV1M087A936
- Page 1 18-DE01D1-8 AVAILABLE IN FRENCH CANADIAN (FC) Installer’s Guide OIL FIRED CENTRAL FURNACE THV1M087A936, 948, 9V3, 9V5SA - Highboy TLF1M087A936, 948, 9V3, 9V5SA- Lowboy Front Flue TLR1M087A936, 948, 9V3, 9V5SA - Lowboy Rear Flue TDF1M087A936, 948, 9V3, 9V5SA - Downflow/ Horizontal ALL phases of this installation must comply with NATIONAL, STATE AND LOCAL CODES IMPORTANT —...
-
Page 2: Location
Location” section (page 3), of these instructions. ever certain components including draft regulator and, if supplied, door handle, air filter(s), and air filter rack(s), must be assembled to the furnace, or the vent- ing system, in the field. 18-DE01D1-8 © 2009 Trane All Rights Reserved... -
Page 3: Table Of Contents
Installer’s Guide Contents 8. The furnace may be used for temporary heating of buildings or structures under construction only when the following conditions have been met: CONTENTS a. The furnace venting system must be complete and installed per manufacturers instructions. INSTALLATION GUIDELINES b. -
Page 4: Clearances
Installer’s Guide The minimum clearances from furnace casing CLOSET AND ALCOVE INSTALLATION surfaces to combustible materials are: All furnace models may be installed in a closet or alcove - 3 inches from casing sides and rear on combustible flooring with specified (standard) clear- - 8 inches from front casing of furnace to the closet ances to combustible construction. -
Page 5: Air For Combustion And Ventilation
Installer’s Guide 1) When the furnace is installed in the horizon- AIR FOR COMBUSTION AND VENTILATION tal configuration, the oil burner must be ▲ CAUTION mounted in an upright position. It will be necessary VENTILATION REQUIRED! to remove the burner then cutoff one (1) of the Relief openings in the front or top of the furnace cas- threaded burner-mounting studs before attempting ing should not be obstructed or blocked. - Page 6 Installer’s Guide 18-DE01D1-8...
- Page 7 Installer’s Guide 0.07 0.07 18-DE01D1-8...
-
Page 8: De01D1
Installer’s Guide 18-DE01D1-8... - Page 9 Installer’s Guide 0.63 0.63 18-DE01D1-8...
- Page 10 Installer’s Guide 0.63 0.63 18-DE01D1-8...
- Page 11 Installer’s Guide 18-DE01D1-8...
- Page 12 Installer’s Guide Often, household chemicals contain chloride-bearing b. In buildings of unusually tight construction (e.g. compounds. There are many compounds representative those having continuous water vapor barriers; of this classification of chemicals. A few common ex- tightly-fitting, or weather-stripped, doors and amples are listed below.
-
Page 13: Chimney Inspection
Installer’s Guide If an exhaust fan, additional air consuming machines The inside area of the chimney liner should (e.g. an air compressor), or a return air grill is present equal, at minimum, the area of the vent pipe exiting in the furnace room, there should be increased concern the furnace- EXAMPLE: π... -
Page 14: Flue/ Chimney/ Vent Connector
Installer’s Guide If the roof is flat rather than the normal residential Pitched roof, refer to Figure 6 for proper clearances. FLUE/ CHIMNEY/ VENT CONNECTOR ▲ CAUTION PROPER VENTING REQUIRED! DO NOT install a manual damper in the chimney or vent connector. - Page 15 Installer’s Guide All chimney clean-out doors and flue connections must fit tightly so they will seal to avoid air leaks. If chimney flues are divided or there are multiple flues within one chimney, make sure there are no openings in the partition separating the divided or individual flues.
-
Page 16: Draft Regulator
Installer’s Guide To prevent condensation, it is necessary that the PREVENTION OF CHIMNEY CONDENSING: internal chimney wall temperature always be kept ▲ WARNING above the dew point. If the chimney is a masonry PROPER VENTING REQUIRED! type, it may have to be fitted with a flue liner, when Improper venting may lead to condensation in the the temperature loss is too great for the furnace. -
Page 17: Duct Work And Air Conditioning
Installer’s Guide Two (2) problems typically arise when power venting If the furnace is used in connection with summer air any oil fired appliance: conditioning (cooling), the furnace should be installed in 1) Soot buildup may occur at an accelerated rate on parallel with, or on the upstream side of, the evaporator critical components of the furnace oil burner, e.g. -
Page 18: Combustion Chamber
Installer’s Guide The side casings have each been pre-punched with four The oil burner was installed in the furnace at the fac- (4), square, knockout openings for use in locating the tory. In the field, if it is necessary to adjust the heating proper position for the return air filter rack. -
Page 19: Fuel System Installation
Installer’s Guide - Adjusting the fuel pump pressure Manual venting of the fuel unit is required on initial - Setting the draft control start-up. If connecting a two-pipe fuel supply, install the fuel unit bypass plug. NOTICE: This oil furnace must be installed and ad- The oil supply inlet pressure to the fuel unit cannot justed by qualified oil heating dealers using calibrated exceed 3 psi. -
Page 20: Electrical Connections
Installer’s Guide A disconnect switch equipped with overcurrent protec- tion (e.g. a time delay-type fuse or inverse time, circuit breaker) should be installed in the service line for shut- ting down and protecting the furnace and electrical sys- tem. Since the furnace is entirely pre-wired at the factory, it is only necessary to connect the building electrical ser- SEE TABLE 1 vice lines to the two (2) pigtail wires extending from the... - Page 21 Installer’s Guide Using 18 gauge control wire, connect control wiring to thermostat as shown in the following illustrations. If the thermostat does not have an isolated heating circuit (RH), then install a pilot duty rated, 24 volt, relay (RLY00975, field supplied). This relay is shown as R1 in the illustrations.
- Page 22 Installer’s Guide VARIABLE SPEED OIL FURNACE CONNECTION LOCATIONS AND LOW VOLTAGE HOOK UP DIAGRAMS (SINGLE STAGE COOLING) WITH 24V RELAY VARIABLE SPEED V3, V5 LOW VOLTAGE WIRING VARIABLE SPEED OIL FURNACE SINGLE STAGE COOLING CONNECTIONS LOCATIONS THERMOSTAT SINGLE STAGE ONE STAGE VS Route electrical power circuit through outside OIL FURNACE AIR CONDITIONER...
- Page 23 Installer’s Guide LOW VOLTAGE HOOK UP DIAGRAMS FOR VARIABLE SPEED OIL FURNACE (TWO STAGE/ STEP COOLING) VARIABLE SPEED OIL FURNACE TWO STAGE COOLING VARIABLE SPEED OIL FURNACE TWO STEP COOLING WITH 24V RELAY WITH 24V RELAY ONE STAGE VS TWO STEP ONE STAGE VS TWO STAGE THERMOSTAT...
- Page 24 BAYSUB10ABASEAA DIMENSIONS Down f low Furnace Combustible Sur f ace-Mounting Base Trane 6200 Troup Highway 02/09 Tyler, TX 75707 Since the manufacturer has a policy of continuous product and product data improvement, it reserves the right For more information contact to change design and specifications without notice.
Need help?
Do you have a question about the THV1M087A936 and is the answer not in the manual?
Questions and answers