Bunn G9WD-RH Installation & Operating Manual
Hide thumbs
Also See for G9WD-RH:
- Instructions manual (26 pages) ,
- Installation & operating manual (12 pages) ,
- Specifications (2 pages)
Table of Contents
Advertisement
Quick Links
Download this manual
See also:
Instruction Manual
RELEASED FOR PRODUCTION
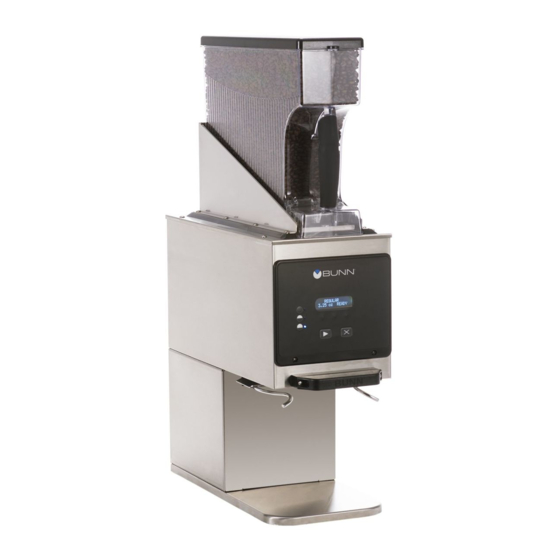
G9WD-RH
INSTALLATION & OPERATING GUIDE
BUNN-O-MATIC CORPORATION
POST OFFICE BOX 3227
SPRINGFIELD, ILLINOIS 62708-3227
PHONE: (217) 529-6601
FAX: (217) 529-6644
To ensure you have the latest revision of the Operating Manual, or to view the Illustrated Parts
Catalog, Programming Manual, or Service Manual, please visit the Bunn-O-Matic website, at
www.bunn.com. This is absolutely FREE, and the quickest way to obtain the latest catalog and
manual updates. For Technical Service, contact Bunn-O-Matic Corporation at 1-800-286-6070.
41451.0001G 10/14 ©2009 Bunn-O-Matic Corporation
DIR Num: 41451.0001
25, November 2014
Advertisement
Table of Contents

Related Manuals for Bunn G9WD-RH


Summary of Contents for Bunn G9WD-RH
- Page 1 To ensure you have the latest revision of the Operating Manual, or to view the Illustrated Parts Catalog, Programming Manual, or Service Manual, please visit the Bunn-O-Matic website, at www.bunn.com. This is absolutely FREE, and the quickest way to obtain the latest catalog and manual updates. For Technical Service, contact Bunn-O-Matic Corporation at 1-800-286-6070.
- Page 2 AS SPECIFIED HEREIN, TO REPAIR, REPLACEMENT OR REFUND. In no event shall BUNN be liable for any other damage or loss, including, but not limited to, lost profits, lost sales, loss of use of equipment, claims of Buyer’s customers, cost of capital, cost of down time, cost of substitute equipment, facilities or services, or any other special, incidental or consequential damages.
-
Page 3: Table Of Contents
RELEASED FOR PRODUCTION CONTENTS Introduction ............................3 User Notices ............................3 Electrical Requirements ........................4 Operating Controls ..........................4 Coffee Grinding ...........................5 Adjustments ............................5 Cleaning ..............................6 Glossary ..............................7 Ground Counter ..........................8 Grinder Scale Calibration ........................8 Batch Size Setting ..........................8 Coffee Calibration ..........................8 Communicating With The Grinder .......................9 Troubleshooting ..........................14 INTRODUCTION This equipment will store up-to six pounds of whole bean coffee in the hopper and grind it to a preset grind... -
Page 4: Electrical Requirements
RELEASED FOR PRODUCTION ELECTRICAL REQUIREMENTS Refer to Data Plate on the Grinder, and local/national electrical codes to determine circuit requirements. This grinder has an attached cordset and requires 2-wire, grounded service rated: 120 volts ac, 15 amp, single phase, 60 Hz, for domestic grinders. 220-240 volts ac, 10 amp, single phase, 50 Hz, for most international grinders. -
Page 5: Coffee Grinding
RELEASED FOR PRODUCTION COFFEE GRINDING 1. Visually inspect the hopper for an ample supply of whole bean coffee. 2. Place a paper filter into the brew funnel. The filter must not be folded-over or tilted to one side. 3. Insert the funnel into the funnel rails until it stops. 4. -
Page 6: Cleaning
PREVENTIVE MAINTENANCE Bunn-O-Matic Corporation recommends that preventive maintenance be performed at regular intervals. Maintenance ® should be performed by a qualified service technician. For Technical Service, contact Bunn-O-Matic Corporation at ® 1-800-286-6070. NOTE: Replacement parts or service caused by failure to perform required maintenance is not covered by warranty. -
Page 7: Glossary
RELEASED FOR PRODUCTION GLOSSARY GRIND OZ: ##.## CENTER SW TARE Adjust current weight setting Allows present weight on scale DONE using (-) and (+) buttons to be tared Allows adjustment of current SET GRIND TIME? OUNCES = #.## Shows current weight on scale time setting EXIT TARE Adjust current time setting us-... -
Page 8: Ground Counter
RELEASED FOR PRODUCTION GROUND COFFEE COUNTER The grinder will keep a running total of the pounds of coffee the grinder has ground. This running total is shown in the “PmBurrsLbs #” menu, under the “SERVICE TOOLS” menu. This running total can be used to determine when the grinding burrs need cleaning or replacement. -
Page 9: Communicating With The Grinder
RELEASED FOR PRODUCTION COMMUNICATING WITH THE GRINDER Press the hidden (copyright) button for 1 second SELECT COFFEE “COFFEE NAME” PREV DONE NEXT Press right hidden ENTER PASSWORD (copyright) button to scroll to next screen Pressing “PREV” scrolls to Pressing “NEXT” scrolls to Press right hidden the previous coffee name the next coffee name... - Page 10 RELEASED FOR PRODUCTION COMMUNICATING WITH THE GRINDER (Continued) from (A) The small batch size will From previous flash, press (-) or (+) to GRIND oz #.## page adjust grind weight. After (-) DONE (+) first batch size is set, FACTORY DEFAULT additional batch sizes can be set by pressing appropriate batch size button.
- Page 11 RELEASED FOR PRODUCTION COMMUNICATING WITH THE GRINDER (Continued) from (B) TEST OUTPUTS GRIND MOTOR NEXT TEST GRIND MOTOR TEST SWITCHES ? Pressing any switch in this PRESS RIGHT mode will display the switch HIDDEN TO EXIT TEST FREQUENCY ? name in the grinder display. This screen may also CENTER SW TARE be reached from home...
- Page 12 RELEASED FOR PRODUCTION COMMUNICATING WITH THE GRINDER (Continued) from (C) SET LANGUAGE? Pressing “NO” scrolls to ENGLISH “REVIEW RECIPES” SELECT (+) in the currect language selected ESPANOL (-) SELECCIONE (+) FRANCAIS (-) SELECTIONN (+) CHANGE LANGUAGE? ARE YOU SURE ? CHANGE LANGUAGE? Pressing “YES”...
- Page 13 RELEASED FOR PRODUCTION COMMUNICATING WITH THE GRINDER (Continued) LEVEL 2 FUNCTIONS: Press the hidden (copyright) button for 3 seconds in “ENTER PASSWORD” menu. MACHINE TYPE WEIGHT TIMED CALIBRATE SCALE ? CALIBRATION OZ 8.00 MODIFY MAXBIT SPREAD? YES CALIBRATE SCALES EXIT TARE SHUToff Bits ## DONE...
-
Page 14: Troubleshooting
RELEASED FOR PRODUCTION TROUBLESHOOTING A troubleshooting guide is provided to suggest probable causes and remedies for the most likely problems encountered. If the problem remains after exhausting the troubleshooting steps, contact the Bunn-O-Matic Technical Service Department. • Inspection, testing and repair of electrical equipment should be performed only by qualified service person- nel. - Page 15 RELEASED FOR PRODUCTION TROUBLESHOOTING (Continued) Problem Probable Cause Remedy Grinder will not start (continued) 5. Relay Check that relay contacts close when start switch is pressed. 6. Motor With a voltmeter, check that 120 volts AC is present across L1 and L2 on the rear of the motor when the Start switch is pressed.
Need help?
Do you have a question about the G9WD-RH and is the answer not in the manual?
Questions and answers