
Related Manuals for Cobra M56SPB


Summary of Contents for Cobra M56SPB
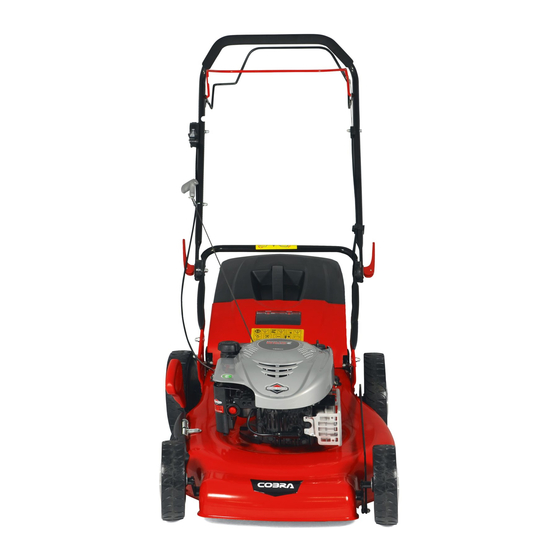
- Page 1 MODEL: M56SPB COBRA LAWN MOWER OWNER’S MANUAL Cobra Garden Machinery Henton and Chattell Ltd., London Road, Nottingham NG2 3HW UK www.cobragarden.co.uk...
-
Page 2: Table Of Contents
CONTENTS SECTION 1 SYMBOL MARKED ON THE PRODUCT......3 SECTION 2 GENERAL SAFETY RULES..........3 SECTION 3 PARTS DESCRIPTION............SECTION 4 TECHNICAL DATA............... 6 SECTION 5 ASSEMBLY................SECTION 6 “3 IN 1” ................SECTION 7 OPERATION INSTRUCTIONS .......... SECTION 8 MAINTENANCE INSTRUCTIONS………………………...… SECTION 9 LUBRICATION.............. -
Page 3: Section 1 Symbol Marked On The Product
1. SYMBOLS MARKED ON THE PRODUCT Fig. A B.1 Read Operator's Manual. B.2 Keep bystanders away. B.3 Pay attention to the operator's hands and feet to avoid injury. B.4 Fuel is flammable, keep fire away. Do not add fuel with running machine. B.5 Toxic fumes;... - Page 4 react or concentrate. 5. Keep in mind that the operator or user is responsible for accidents or hazards occurring to other people or their property. Before you start 1. While mowing, always wear substantial footwear and long trousers. Do not operate the equipment when barefoot or wearing open toed sandals.
- Page 5 - Whenever you leave the lawn mower. - Before refuelling. 21. Reduce the throttle setting during engine shut down and, if the engine is provided with a shut-off valve, turn the fuel valve off at the conclusion of mowing. Maintenance and Storage 1.
-
Page 6: Section 3 Parts Description
14.Fuel cap 15.Lower handle 16. Brake control handle 17. Mulching wedge 18. Side discharge channel Including A: Spark plug wrench 4. TECHNICAL DATA Model M56SPB Engine type Briggs 650E Self-propelled Engine Displacement 190 cm Blade Width 560 mm Rated speed... -
Page 7: Section 5 Assembly
5. ASSEMBLY 5.1 FOLDING HANDLE 1. Fix the lower handlebars into the mower body with a suitable spanner. (Fig. 2A) 2. Lift the two locking levers to release the upper handlebars for folding. (Fig. 2B) 3. Push the locking lever closed to lock the handlebars in the operating position. (Fig. 2C) 4. -
Page 8: Section 6 "3 In 1
5.3 MOUNTING AND DISMOUNTING THE GRASS CATCHER 1. To fit: Raise the rear cover and hitch the grass catcher on rear of mower. 2. To remove: grasp and lift the rear cover, remove the grass catcher Fig. 4A Fig. 4B Fig. - Page 9 Recommendations for mulch-mowing: - Cut your lawn regularly. Cut-back by a maximum of 2cm from grass of 6cm height. - Ensure the blade is sharp for best results - Do not mulch wet grass. - Set maximum engine speed. - Only move at a walking pace. - Regularly clean mulching wedge, housing inner side and mowing blade.
-
Page 10: Section 7 Operation Instructions
Fig. 8C THREE: Mowing with the grass catcher For mowing with the grass catcher, remove the mulching wedge and discharge channel for side discharge and mount the grass catcher. 1. Removing the mulching wedge: -Lift rear cover and remove the mulching wedge. 2. - Page 11 3. Standing behind the unit, grasp the brake control handle and hold it against the upper handle as shown in Fig. 9B. 4. Grasp the start handle as shown Fig. 9B and pull up rapidly. Return it slowly to the rope guide bolt after engine starts.
- Page 12 Fig. 11 CAUTION: your mower is designed to cut normal residential grass of a height no more than 250 mm. Do not attempt to mow through unusually tall dry or wet grass (e.g., pasture) or piles of dry leaves. Debris may build up on the mower deck or contact the engine exhaust presenting a potential fire hazard.
-
Page 13: Section 8 Maintenance Instructions
7.8 DECK The underside of the mower deck should be cleaned after each use to prevent a buildup of grass clippings, leaves, dirt or other matter. If this debris is allowed to accumulate, it will invite rust and corrosion, and may prevent proper mulching. - Page 14 2. Remove the filter cover. 3. Wash filter element in soap water. DO NOT USE PETROL! 4. Air dry filter element. 5. Place a few drops of SAE30 oil on the foam filter and squeeze tightly to remove any excess oil. 6.
-
Page 15: Section 11 Storage Instructions (Off Season)
Possible damage resulting from blade unbalance condition is not the responsibility of the manufacturer. When you change the blade, you must use the original type marked on the blade (Cobra Part No. 263001171) (to order the blade, please contact your local dealer) WARNING: Do not touch rotating blade. -
Page 16: Section 12 Troubleshooting
12. TROUBLESHOOTING PROBLEM PROBABLE CAUSE CORRECTIVE ACTION Engine does not Throttle choke not in the correct position Move throttle choke to the correct position start. for the prevailing conditions. Fuel tank is empty. Fill the tank with fuel: refer to the ENGINE MANUAL. Air filter element is dirty. -
Page 17: Section 13 Warranty
Any damage that occurs from the use of non-genuine Cobra parts will not be covered. We reserve the right to reject any claim where the purchase cannot be verified or when it is clear that the product was not maintained properly. -
Page 18: Section 15 Ec-Declaration Of Conformity
15. EC-DECLARATION OF CONFORMITY EC Declaration of Conformity We herewith declare, Cobra Garden Machinery Henton & Chattell Ltd, London Road, Nottingham NG2 3HW United Kingdom that the following machine complies with the appropriate basic safety and health requirements of the EC Directive based on its design and type, as brought into circulation by us.
Need help?
Do you have a question about the M56SPB and is the answer not in the manual?
Questions and answers