Weber Summit 670 Owner's Manual
Lp gas grill
Hide thumbs
Also See for Summit 670:
- Owner's manual (36 pages) ,
- Assembly instructions and parts list (2 pages) ,
- Assembly instruction (2 pages)
Table of Contents
Advertisement
Quick Links
LP Gas Grill Owner's Guide
Guía del Propietario del Asador de Gas Licuado de Propano - Pg. 37
ESNA
Guide de L'Utilisateur du Grill à Gaz PL - Pg. 73
YOU MUST READ THIS OWNER'S GUIDE
BEFORE OPERATING YOUR GAS GRILL.
DANGER
If you smell gas:
1. Shut off gas to the appliance.
2. Extinguish any open flames.
3. Open lid.
4. If odor continues, keep away from the
appliance and immediately call your gas
supplier or your fire department.
Leaking gas may cause a fire or explosion
which can cause serious bodily injury or
death, or damage to property.
WARNING:
1. Do not store or use gasoline or other
flammable liquids or vapors in the
vicinity of this or any other appliance.
2. An LP cylinder not connected for use
shall not be stored in the vicinity of this
or any other appliance.
WARNING: Follow all leak-check
procedures carefully in this manual prior
to barbecue operation. Do this even if the
barbecue was dealer-assembled.
NOTICE TO INSTALLER: These instructions
must be left with the owner and the owner
should keep them for future use.
THIS GAS APPLIANCE IS DESIGNED FOR
OUTDOOR USE ONLY.
WARNING: Do not try to light this
appliance without reading the "MAIN
BURNER IGNITION" section of this
manual.
Advertisement
Table of Contents

Related Manuals for Weber Summit 670


Summary of Contents for Weber Summit 670
- Page 1 LP Gas Grill Owner’s Guide Guía del Propietario del Asador de Gas Licuado de Propano - Pg. 37 ESNA Guide de L’Utilisateur du Grill à Gaz PL - Pg. 73 YOU MUST READ THIS OWNER’S GUIDE WARNING: Follow all leak-check BEFORE OPERATING YOUR GAS GRILL.
- Page 2 ® Do not use a flame to check for gas leaks. Combustible materials should never be within 24 inches (61 cm) of the back or sides of your Weber gas barbecue. ®...
-
Page 3: Table Of Contents
CHECK FOR GAS LEAKS ......... . 11 REFILLING THE LIQUID PROPANE CYLINDER ......13 WEBER ®... - Page 4 SUMMIT 670_LP_US_010810...
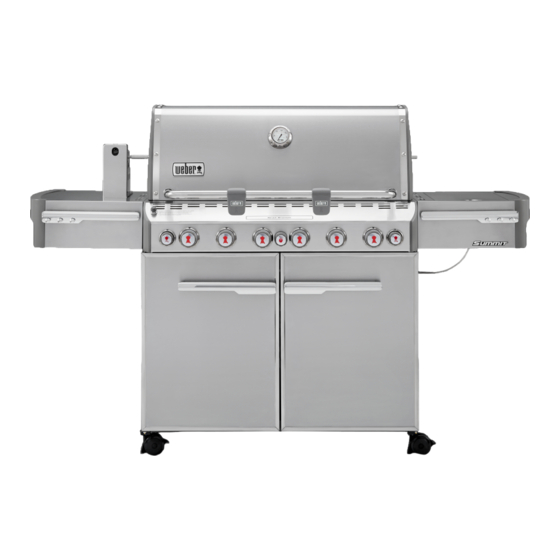
- Page 5 Shroud Hardware Battery Housing Sear Station Burner ® Shroud Water Baffle / Heat Shield Side Burner Thermometer Disposable Drip Pan Cookbox Thermometer Bezel Slide Out Grease Tray Bulkhead Handle Catch Pan Manifold Hose Grill Out™ Handle Light Catch Pan Holder Side Burner Lid Rotisserie Motor Left Door...
- Page 6 Weber does not authorize any person or company to assume for it any other obligation or liability in connection with the sale, installation, use, removal, return, or replacement of its equipment; and no such representations are binding on Weber.
-
Page 7: Canadian Installation
STORAGE AND/OR NONUSE Your Weber ® gas barbecue is a portable outdoor cooking appliance. With the Weber ® gas barbecue you can grill, barbecue, roast and bake with results that are difficult to ® duplicate with indoor kitchen appliances. The closed lid and Flavorizer bars produce ®... -
Page 8: Safe Handling Tips For Liquid Propane Gas Cylinders
® and tested to meet 100% CSA and ANSI requirements. WARNING: Replacement LP tanks must match the regulator connection supplied with this Weber gas appliance. ® Liquid Propane Cylinder Requirements (1), and date tested (2) is within five years of use. -
Page 9: Important Lp Cylinder Information
IMPORTANT LP CYLINDER INFORMATION DANGER NEVER store a spare LP cylinder under or near Weber ® appliances. NEVER fill the tank beyond 80% full. Failure to follow these statements exactly may result in a fire causing death or serious injury. - Page 10 One series of tanks mount with the valve facing front (3). The other tanks mount with the valve facing away from the fuel scale (4). Weber recommends the use of cylinder manufacturer’s Manchester and Worthington, with a 47.6 lb water capacity.
-
Page 11: Check For Gas Leaks
Note: All factory-made connections have been thoroughly checked for gas leaks. The burners have been flame-tested. As a safety precaution however, you should recheck all fittings for leaks before using your Weber® gas barbecue. Shipping and handling may loosen or damage a gas fitting. - Page 12 If a leak persists after re-tightening the fitting, turn off the gas. DO NOT OPERATE THE GRILL. Contact the Customer Service Representative in your area using the contact information on our web site. Log onto www.weber.com ® D) Side burner hose to bulkhead connection (4).
-
Page 13: Refilling The Liquid Propane Cylinder
GRILL OUT™ HANDLE LIGHT ® The Weber Grill Out™ Handle Light has a built-in “Tilt Sensor.” With the power button (1) activated, the light will come on when the grill lid is open. The light will turn off when the lid is closed. -
Page 14: Fuel Level
FUEL LEVEL There are two ways to check the fuel level in your tank; electronically and manually. To check the level using the Electronic Tank Scale, press the tank scale button, located on the right of the control panel, for 2-3 seconds. The LED indicates the fuel level in the tank. - Page 15 Always open the lid before igniting the burners. A) Each control knob has its own igniter electrode built in. To create a spark you must push the control knob in (1) and turn to START/HI (2). B) This action will generate gas flow and a spark to the burner lighting tube (3). You will hear a “snap”...
-
Page 16: Main Burner Ignition
WARNING: Check hose before each use of barbecue for nicks, cracking, abrasions or cuts. If the hose is found to be damaged in any way, do not use the barbecue. Replace using only Weber authorized replacement hose. Contact ® the Customer Service Representative in your area using the contact information on our web site. -
Page 17: Main Burner Manual Ignition
MAIN BURNER MANUAL IGNITION DANGER Failure to open the lid while igniting the barbecue’s burners, or not waiting 5 minutes to allow the gas to clear if the barbecue does not light, may result in an explosive flare-up which can cause serious bodily injury or death. A) Open the lid (1). - Page 18 Note: If grill looses heat while cooking refer to the troubleshooting section of this manual. pieces of meat. Foods on a crowded cooking grate will require more cooking time WARNING: Do not move the Weber gas barbecue when ® more time if grilled in a deep casserole rather than a shallow baking pan.
-
Page 19: Direct Cooking
The most important thing to know about grilling is which cooking method to use for a specific food, Direct or Indirect. The difference is simple: place the food directly over the fire, or arrange the fire on either side of it. Using the right method is the shortest route to great results—and the best way to ensure doneness safety. -
Page 20: Side Burner Ignition
WARNING: Check hose before each use of barbecue for nicks, cracking, abrasions or cuts. If the hose is found to be damaged in any way, do not use the barbecue. Replace using only Weber authorized replacement hose. Contact ® the Customer Service Representative in your area using the contact information on our web site. -
Page 21: Side Burner Manual Ignition
SIDE BURNER MANUAL IGNITION DANGER Failure to open the lid while igniting the side burner, or not waiting 5 minutes to allow the gas to clear if the side burner does not light, may result in an explosive flare-up that can cause serious bodily injury or death. -
Page 22: Sear Station ® Burner Ignition
WARNING: Check hose before each use of barbecue for nicks, cracking, abrasions or cuts. If the hose is found to be damaged in any way, do not use the barbecue. Replace using only Weber authorized replacement hose. Contact ® the Customer Service Representative in your area using the contact information on our web site. -
Page 23: Sear Station Burner Manual Ignition
Food is placed in the area of intense heat between the lit burners USING THE SEAR STATION ® Your Weber ® gas barbecue includes a sear burner for searing meats such as steak, poultry parts, fish, and chops). -
Page 24: Smoker Burner Ignition
Contact the ® Customer Service Representative in your area using the contact information on our web site. Log onto www.weber.com ® A) Open the grill lid (1). B) Open smoker box lid (2). C) Fill smoker with water soaked wood chunks or chips (3). -
Page 25: Smoker Burner Manual Ignition
Contact the ® Customer Service Representative in your area using the contact information on our web site. Log onto www.weber.com ® A) Open the lid (1). DANGER Failure to open the lid while igniting the grill, or not waiting... -
Page 26: Using The Smoker
USING THE SMOKER The smoker uses presoaked wood chips. For best results with faster cooking foods like steaks, burgers and chops, etc., we recommend using finer wood chips because they ignite and create smoke faster. For longer cooking foods such as roasts, chicken and turkeys, etc., we recommend using larger wood chunks because they ignite slowly and provide smoke for a longer period of time. -
Page 27: Rotisserie Burner Ignition
WARNING: Check hose before each use of grill for nicks, cracking, abrasions or cuts. If the hose is found to be damaged in any way, do not use the grill. Replace using only a Weber ® authorized replacement hose. Contact the Customer Service Representative in your area using the contact information on our web site. -
Page 28: Rotisserie Burner Manual Ignition
WARNING: Check hose before each use of grill for nicks, cracking, abrasions or cuts. If the hose is found to be damaged in any way, do not use the grill. Replace using only a Weber authorized replacement hose. Contact the ®... -
Page 29: Before Using Your Rotisserie
Do not touch hot surfaces. Use barbecue mitts. Representative in your area using the contact information This rotisserie is not for use by children. on our web site. Log onto www.weber.com ® To protect against electrical hazards do not immerse cord, C) Slide one of the spit forks towards the right side of the rotisserie shaft, making sure plugs, or motor in water or other liquids. -
Page 30: Rotisserie Cooking
F) Insert the pointed end of the rotisserie shaft into the motor. Lower the rotisserie spit into the grooves on the cookbox (6). G) The rotisserie shaft should rotate so that the heavy side of the meat or poultry rotates down to the bottom. Large cuts may require the removal of the cooking grates and warming rack to allow full rotation of the shaft. - Page 31 Cabinet doors are not aligned. If problems cannot be corrected by using these methods, please contact the Customer Service Representative in your area using the contact information on our web site. Log onto www.weber.com ® Side Burner does not light.
- Page 32 Is the Weber Grill Out™ Handle Light activated? Press the power button. Is the Weber Grill Out™ Handle Light positioned correctly on the handle? If problems cannot be corrected by using these methods, please contact the Customer Service Representative in your area using the contact information on our web site.
-
Page 33: Cleaning
Customer Service Representative in your area using the contact information on openings. our website. Log onto www.weber.com ® We recommend that you inspect the Spider/Insect screens at least once a year. -
Page 34: Replacing Main Burners
REPLACING MAIN BURNERS A) Your Summit ® gas grill must be off and cool. B) Turn gas off at source. C) Disconnect gas supply. D) Remove cooking grates. E) Remove Flavorizer bars. ® F) Remove smoker box (if included in your model). Remove Control Panel G) Parts required: Phillips screwdriver and a towel. -
Page 35: Side Burner Maintenance
Removing The Sear Station Burner ® To remove the Sear Station Burner , pull the burner tube toward you. This removes it ® from the burner tube notch (7). Then rotate the tube clockwise (8), taking care to rotate the burner tube so that the screw at the end of the tube (9) fits through the notch in the heat shield opening (10). -
Page 36: Annual Maintenance
Insect screens and burners are clean replace the burners. If the Spider/Insect screen becomes damaged or cannot be cleaned, please contact the Customer Service Representative in your area using the contact information on our web site. Log onto www.weber.com ® Burner Flame Pattern... - Page 37 ADVERTENCIA: No trate de realizar reparación alguna a los componentes que transporten o quemen gas sin antes ponerse en contacto con el Departamento de Atención al Cliente de Weber-Stephen Products Co. Si no llegase a acatar esta advertencia, sus acciones podrían causar un fuego o una explosión que resulte en lesiones personales serias o la muerte o daños a la propiedad.
Need help?
Do you have a question about the Summit 670 and is the answer not in the manual?
Questions and answers