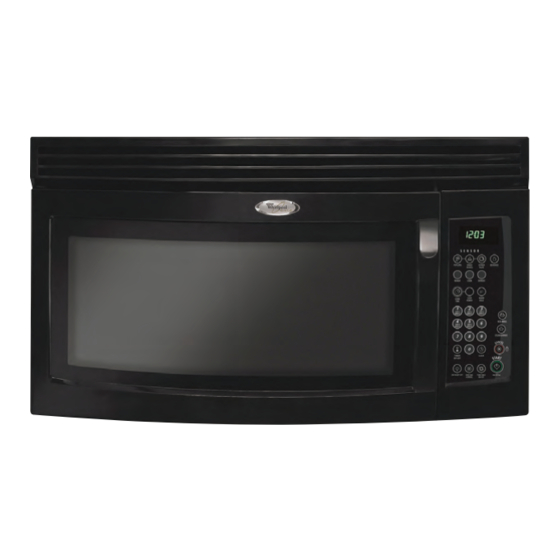
Whirlpool MH3184XPB Service Manual
Microwave oven/hood combination
Hide thumbs
Also See for MH3184XPB:
- Installation instructions manual (12 pages) ,
- Use and care manual (16 pages)

Related Manuals for Whirlpool MH3184XPB


Summary of Contents for Whirlpool MH3184XPB
- Page 1 CONSUMER SERVICES TECHNICAL KM-31 EDUCATION GROUP PRESENTS MICROWAVE OVEN/HOOD COMBINATION Models MH3184XPB, GH4184XSB & GH4814XSS JOB AID Part No. 8178707...
- Page 2 For More Appliance Troubleshooting, Repair Help, & DIY Videos Visit A A pplianceAssistant.com Note: This Page was not included by Whirlpool Corporation ApplianceAssistant.com is not affiliated Whirlpool Corporation Whirlpool Corporation in no way endorses ApplianceAssistant.com...
- Page 3 FORWARD This Whirlpool Job Aid, “Microwave Oven / Hood Combination” (Part No. 8178707) provides the In-Home Service Professional with information on the installation, operation, and service of the Microwave Oven / Hood Combination. For specific information on the model being serviced, refer to the Use and Care Guide or Tech Sheet provided with the Microwave Oven / Hood Com- bination.
-
Page 4: Table Of Contents
TABLE OF CONTENTS Page GENERAL ............. . 1-1 Microwave Oven Safety. - Page 5 Page COMPONENT TESTING ........... 5-1 Thermostats .
-
Page 6: General
GENERAL MICROWAVE OVEN SAFETY Your safety and the safety of others are very important. We have provided many important safety messages in this manual and on your appliance. Always read and obey all safety messages. This is the safety alert symbol. This symbol alerts you to potential hazards that can kill or hurt you and others. -
Page 7: Precautions To Be Observed Before And During Servicing To Avoid Possible Exposure To Excessive Microwave Energy
PRECAUTIONS TO BE OBSERVED BEFORE AND DURING SERVICING TO AVOID POSSIBLE EXPOSURE TO EXCESSIVE MICROWAVE ENERGY Do not operate or allow the oven to be operated with the door open. Make the following safety checks on all ovens to be serviced before activating the magnetron or other microwave source, and make repairs as necessary: 1. -
Page 8: Model And Serial Number Designations
MODEL NUMBER 18 4 X S INTERNATIONAL SALES IND. OR MARKETING CHANNEL IF PRESENT PRODUCT GROUP G = WHIRLPOOL GOLD M = MICROWAVE PRODUCT IDENTIFICATION B = BROWNER C = CONVECTION G = GRILL / CRISPER H = O-T-R HOOD COMBO... -
Page 9: Model And Serial Number Label And Tech Sheet Locations
MODEL AND SERIAL NUMBER LABEL AND TECH SHEET LOCATIONS The Model/Serial Number label and Tech Sheet locations are shown below. Model/Serial Number Label WARNING Electrical Shock Hazard Disconnect power before servicing. Replace all parts and panels before operating. Failure to do so can result in death or electrical shock. -
Page 10: Specifications
SPECIFICATIONS Model MH3184XPQ/B/T/S Control System Sensor Timer Electronic Limits 99 min. 99 sec. Operation Touch Control Display 5 + 2 Digit - Blue-Green Fluorescent - Callouts In Display Type Electronic Range 0% - 100% Scale Digital Levels Operation Direct Entry Exhaust Fan Yes - One Key Operation Number of Speeds... - Page 11 Ventilation System Type Convertible Recirculation or Exhaust Vertical/Horizontal Duct Outlet Size 3 1/4"H x 10"W Recirculation CFM Out Exhaust CFM Out Touch Control 4-Speed Auto On/High Speed Yes: 140°F / 60°C Blower Type Twin Squirrel Cage Shipped Recirculation Mode Exterior Features Cabinet Finish White, Black, Biscuit, Black for Stainless 2 Lamps - 30 Watt Easy Access...
- Page 12 SPECIFICATIONS GH4184XSB and GH4184XSS Model Control System Sensor Timer Electronic Limits 99 min. 99 sec. Operation Touch Control Display 5 + 2 Digit - Blue-Green with filter Fluorescent - Callouts In Display Type Electronic Range 0% - 100% Scale Linear (Digital) Levels Operation Direct Entry...
- Page 13 Ventilation System Type Convertible Recirculation or Exhaust Vertical/Horizontal Duct Outlet Size 3 1/4"H x 10"W Recirculation CFM Out Exhaust CFM Out Touch Control 4-Speed Auto On/High Speed Yes: 140°F / 60°C Blower Type Twin Squirrel Cage Shipped Recirculation Mode Exterior Features 29 7/8"...
-
Page 14: Installation Information
INSTALLATION INFORMATION INSTALLATION REQUIREMENTS INSTALLATION DIMENSIONS PRODUCT DIMENSIONS NOTE: The grounded 3 prong outlet must be inside the upper cabinet. See “Electrical Re- quirements,” page 2-2. 30" (76.2 cm) min. 30" (76.2 cm) typical* 12" (30.5 cm) min. 14" (35.6 cm) max. 66"... -
Page 15: Electrical Requirements
ELECTRICAL REQUIREMENTS GROUNDING INSTRUCTIONS WARNING • For all cord connected appliances: The microwave oven must be grounded. In the event of an electrical short circuit, grounding reduces the risk of electric shock by providing an escape wire for the electric current. The microwave oven is equipped with a cord having a ground- Electrical Shock Hazard ing wire with a grounding plug. -
Page 16: Installation Instructions
INSTALLATION INSTRUCTIONS ROTATE BLOWER MOTOR Rotate blower motor end over end. The microwave oven is set for recirculation installation. For wall or roof venting, changes must be made to the venting system. NOTE: Skip this section if you are using recir- culation installation. -
Page 17: Install The Microwave Oven
Roof Venting Installation Only Reattach damper plate. Make sure tabs at top and back of damper plate are in- Repeat Step 1 from “Wall Venting Instal- serted fully into their respective slots in lation Only.” the microwave oven. Repeat Step 2 from “Wall Venting Instal- lation Only.”... - Page 18 Rotate the microwave oven up toward upper cabinet. NOTE: If venting through the wall, make sure the damper assembly fits easily into the vent in the wall cutout. Push the microwave oven against mount- ing plate and hold in place. NOTE: If microwave oven does not need to be adjusted, skip steps 7-9.
- Page 19 ACCESSORIES For Roof Venting Installation Only Insert damper assembly through the Filler Panel Kits are available from your cabinet cutout so that the long tab of the dealer to use when installing this microwave damper assembly slides under the raised oven in a 36˝...
-
Page 20: Product Operation
PRODUCT OPERATION PARTS AND FEATURES This manual may cover several different mod- The appearance of your particular model els. The model you have purchased may have may differ slightly from the illustrations in this some or all of the features shown here. manual. -
Page 21: Microwave Oven Control
MICROWAVE OVEN CONTROL When the microwave oven is in use, the dis- play shows cooking power, quantities, weights and/or prompts. When the microwave oven is not in use, the display shows the time of day or Timer countdown. 1 2 3 Number Codes The microwave oven is preset with shortcut number codes. - Page 22 cooking cycle may not be resumed if interrupted TIMER by opening the door. The Timer can be set in minutes and seconds, Clock up to 99 minutes 99 seconds, and counts down the set time. This is a standard 12-hour clock (12:00- 11:59) and does not show a.m.
- Page 23 VENT FAN The vent fan has 4 speeds: high, medium-high, medium and low. To protect the microwave oven, if the tem- perature from the range or cooktop below the microwave oven gets too hot, the vent fan will automatically turn on at high speed. It may stay on for up to 1 hour to cool the microwave oven.
-
Page 24: Component Access
COMPONENT ACCESS This section instructs you on how to service each component inside the Microwave Oven/Hood Combination. The components and their locations are shown below. COMPONENT LOCATIONS Humidity Sensor Cavity Thermostat 3 Hood Exhaust Fan Motor Stirrer Motor Motor Capacitor Cavity Thermostat 2 Cavity Thermostat 1 Line Fuse... -
Page 25: Removing A Hood Lamp Socket And Bottom Cover
REMOVING A HOOD LAMP SOCKET AND BOTTOM COVER WARNING Screw Lamp Plate Electrical Shock Hazard Disconnect power before servicing. Replace all parts and panels before operating. Failure to do so can result in death or electrical shock. Unplug microwave oven or disconnect Lamp Holders power. - Page 26 To remove the bottom cover: a) Disconnect the wire connector from the turntable motor terminals. b) Unlatch and disconnect the 6-hole power connector from the microwave oven and unclip the wires from the standoff. c) Unhook the bottom cover assembly from the microwave oven and remove assembly.
-
Page 27: Removing The Cabinet
REMOVING THE CABINET Remove the five flat-head screws from WARNING the top of the cabinet. 5 Top Cabinet Screws Electrical Shock Hazard Disconnect power before servicing. Remove the following screws from the cabinet: Replace all parts and panels before operating. a) One right side screw. -
Page 28: Removing Cavity Thermostat #3 And The Humidity Sensor
REMOVING CAVITY THERMOSTAT #3 AND THE HUMIDITY SENSOR WARNING 2 BU Cavity Thermostat #3 Electrical Shock Hazard Disconnect power before servicing. Replace all parts and panels before operating. Failure to do so can result in death or electrical shock. Locking Tabs To remove the humidity sensor: Unplug microwave oven or disconnect power. - Page 29 b) Unhook and lift the locking arm on the e) Disconnect the 3-wire humidity sen- cavity thermostat and humidity sensor sor cable (red, white and black) from holder from the slot in the oven. humidity sensor connector P1. c) Unhook the cavity thermostat and hu- midity sensor holder from the left side of the top cover, and move the holder to the left.
- Page 30 g) Remove the two screws and the end REASSEMBLY NOTE: When you reinstall the of the green ground wire from the hu- humidity sensor, make sure that you position midity sensor. the sensor cable facing down and the green ground wire at the indicated screw. h) Pull the end of the humidity sensor cable from under the top cover.
-
Page 31: Removing The Hood Exhaust Fan Motor
REMOVING THE HOOD EXHAUST FAN MOTOR Remove the two hood exhaust fan motor WARNING screws from the rear panel. Unlatch and disconnect the hood exhaust fan motor wire connector from the oven. Wire Connector Electrical Shock Hazard Disconnect power before servicing. Replace all parts and panels before operating. -
Page 32: Removing The Cavity Lamp Holder, The Stirrer Motor And Cavity Thermostat #2
REMOVING THE CAVITY LAMP HOLDER, THE STIRRER MOTOR, AND CAVITY THERMOSTAT #2 WARNING Top Subpanel Rear Screws Electrical Shock Hazard Disconnect power before servicing. Lift the right-rear air guide and unhook it Replace all parts and panels before from the right-front air guide. operating. - Page 33 Lift the rear of the top subpanel assembly, Lamp Holder Base pull it back slightly, raise the front, and re- move the wires from the three indicated clips. Connectors Bulb 3 Wire Clips Remove Silastic ™ 12. To remove the stirrer motor and cavity thermostat #2: a) Remove the two screws from the stir- rer motor.
- Page 34 d) Open the microwave oven door. REASSEMBLY NOTES: e) Using a putty knife, pry the stirrer mo- • Be sure to reinstall the stirrer fan blade tor cover, and the plastic nails, off the on the motor shaft before you reinstall the top of the oven cavity.
-
Page 35: Removing Cavity Thermostat #1, The Motor Capacitor, The Ac Line Filter And The Power Supply Cord
REMOVING CAVITY THERMOSTAT #1, THE MOTOR CAPACITOR, THE AC LINE FILTER AND THE POWER SUPPLY CORD To remove cavity thermostat #1: WARNING a) Disconnect the two wire connectors from the cavity thermostat terminals. b) Remove the two cavity thermo- stat bracket nuts and remove the thermostat. - Page 36 To remove the AC line filter: To remove the power supply cord: a) Discharge the AC line filter by touch- a) Discharge the AC line filter by touching ing the leads of a 20,000 Ω resistor the leads of a 20,000 Ω resistor from from each of the filter leads to chassis each of the filter leads to the chassis ground.
-
Page 37: Removing The Electronic Control Board And The Touch Control Assembly
REMOVING THE ELECTRONIC CONTROL BOARD AND THE TOUCH CONTROL ASSEMBLY Disconnect the 3-wire humidity sen- WARNING sor cable (red, white and black) from humidity sensor connector P1. Electrical Shock Hazard Disconnect power before servicing. Humidity Sensor Connector P1 Replace all parts and panels before operating. - Page 38 10. To remove the electronic control board: 11. To remove the touch control assembly: a) Lift the locking arm on ribbon cable a) Remove the electronic control board connector P5 and pull the cable out of (see step 10). the connector. b) Release the two locking tabs and remove b) Remove the four screws from the elec- the metal shield from the control panel.
-
Page 39: Removing The Primary, Secondary And Monitor Interlock Switches
REMOVING THE PRIMARY, SECONDARY, AND MONITOR INTERLOCK SWITCHES WARNING c) While pulling out on the switch, pry up on the locking tab so that it clears the switch. d) Repeat the previous step for the other pin and locking tab, and slide the switch off the holder pins. - Page 40 To remove the primary, secondary or monitor interlock switch: a) Open the microwave oven door. b) Remove three screws from the front of the chassis to remove interlock switch Black (C1) assembly. c) Rotate the switch holder locking cams Brown and White in a clockwise direction.
-
Page 41: Removing The Line Fuse Holder And The Magnetron Thermostat
REMOVING THE LINE FUSE HOLDER AND THE MAGNETRON THERMOSTAT To remove the line fuse holder: WARNING a) Remove the line fuse from the fuse holder. b) Disconnect the two wire connectors from the fuse holder terminals. BRN Wire Electrical Shock Hazard Disconnect power before servicing. -
Page 42: Removing The Cooling Fan Motor And The Exhaust Fan Thermostat
REMOVING THE COOLING FAN MOTOR AND THE EXHAUST FAN THERMOSTAT WARNING GY and WH WIres Pull Electrical Shock Hazard Disconnect power before servicing. Cooling Fan Motor Replace all parts and panels before Mounting Screws operating. Failure to do so can result in death or electrical shock. -
Page 43: Removing High-Voltage Diode And The Power Resistor
REMOVING THE HIGH-VOLTAGE DIODE AND THE POWER RESISTOR To remove the high-voltage diode: WARNING a) Discharge the high-voltage capacitor by touching the leads of a 20,000 Ω re- sistor from each of the capacitor leads to the chassis ground. b) Disconnect the high-voltage diode connector from the high-voltage ca- Electrical Shock Hazard pacitor terminal. -
Page 44: Removing The High-Voltage Capacitor And The Magnetron
REMOVING THE HIGH-VOLTAGE CAPACITOR AND THE MAGNETRON Remove the cooling fan motor from the WARNING oven (see page 4-19 for the procedure). Unclip the wiring from the front of the fan shroud. Remove the two top, front, and bottom screws (6 total) from the fan shroud. Electrical Shock Hazard Top Fan Shroud Screws Disconnect power before servicing. - Page 45 Cut the foam tape at the three indicated 12. Slide the cooling fan motor shroud out of locations on the side of the cooling fan the oven. shroud. Disconnect the red and white wires from the high-voltage transformer terminals. Disconnect the two wires from the power resistor terminals.
- Page 46 13. To remove the high-voltage capaci- 14. To remove the magnetron: tor: a) Discharge the high voltage capacitor a) Discharge the high-voltage capacitor by touching the leads of a 20,000 Ω re- by touching the leads of a 20,000 Ω re- sistor from each of the capacitor leads sistor from each of the capacitor leads to the chassis ground.
-
Page 47: Removing The High-Voltage Transformer
REMOVING THE HIGH-VOLTAGE TRANSFORMER Discharge the high-voltage capacitor by WARNING touching the leads of a 20,000 Ω resistor from each of the capacitor leads to chas- sis ground. Disconnect the high-voltage transformer wires from the following locations: a) The red wire from the magnetron fila- ment terminal. -
Page 48: Removing The Turntable Motor
REMOVING THE TURNTABLE MOTOR Remove the ten screws from the bottom WARNING cover and lower the cover. Electrical Shock Hazard Disconnect power before servicing. Replace all parts and panels before operating. Failure to do so can result in death or Screw (1 of 10) Bottom Cover Assembly electrical shock. -
Page 49: Removing The Oven Door And Components
REMOVING THE OVEN DOOR AND COMPONENTS Place the oven door front side down on a WARNING padded surface. Remove the choke screws from the door frame. Electrical Shock Hazard Disconnect power before servicing. Replace all parts and panels before Choke Screws operating. - Page 50 Starting at the top edge of the door near To remove the door switch actuators from the center and working clockwise, use a the choke, remove the screw from each putty knife, and pry the latching tabs of actuator. the choke out of the door frame slots. Lift the choke as you release the tabs so they do not snap back into the slots.
- Page 51 — NOTES — 4-28...
-
Page 52: Component Testing
COMPONENT TESTING IMPORTANT: Before performing any tests on • Conduct a microwave energy test af- the microwave oven, be sure to observe the ter performing any tests or repairs to the following: microwave oven. • Unplug microwave oven or disconnect •... -
Page 53: Humidity Sensor
WARNING Electrical Shock Hazard Disconnect power before servicing. Replace all parts and panels before operating. Failure to do so can result in death or electrical shock. HOOD EXHAUST FAN MOTOR HUMIDITY SENSOR Refer to page 4-5 for the procedure for access- ing the humidity sensor. -
Page 54: Stirrer Motor
WARNING Electrical Shock Hazard Disconnect power before servicing. Replace all parts and panels before operating. Failure to do so can result in death or electrical shock. STIRRER MOTOR MOTOR CAPACITOR Refer to page 4-12 for the procedure for ac- cessing the motor capacitor. Refer to page 4-9 for the procedure for access- ing the stirrer motor. -
Page 55: Ac Line Filter
WARNING Electrical Shock Hazard Disconnect power before servicing. Replace all parts and panels before operating. Failure to do so can result in death or electrical shock. DOOR INTERLOCK SWITCHES AC LINE FILTER Refer to page 4-16 for the procedure for accessing the door interlock switches. -
Page 56: Line Fuse
WARNING Electrical Shock Hazard Disconnect power before servicing. Replace all parts and panels before operating. Failure to do so can result in death or electrical shock. LINE FUSE COOLING FAN MOTOR Refer to page 4-18 for the procedure for ac- cessing the line fuse. -
Page 57: High-Voltage Diode
WARNING Electrical Shock Hazard Disconnect power before servicing. Replace all parts and panels before operating. Failure to do so can result in death or electrical shock. POWER RESISTOR HIGH-VOLTAGE DIODE H.V. diode Refer to page 4-20 for the procedure for ac- Refer to page 4-20 for the procedure for ac- cessing the high-voltage (H.V.) diode. -
Page 58: High-Voltage Capacitor
WARNING Electrical Shock Hazard Disconnect power before servicing. Replace all parts and panels before operating. Failure to do so can result in death or electrical shock. HIGH-VOLTAGE CAPACITOR MAGNETRON H.V. Capacitor Filament Terminals Refer to page 4-21 for the procedure for ac- Refer to page 4-21 for the procedure for ac- cessing the high-voltage capacitor. -
Page 59: High-Voltage Transformer
WARNING Electrical Shock Hazard Disconnect power before servicing. Replace all parts and panels before operating. Failure to do so can result in death or electrical shock. HIGH-VOLTAGE TRANSFORMER TURNTABLE MOTOR Filament Wire (OR/RD) Primary Terminals Secondary Wires (WH and RD) Refer to page 4-25 for the procedure for ac- cessing the turntable motor. -
Page 60: Diagnostics And Troubleshooting
DIAGNOSTICS AND TROUBLESHOOTING PRIMARY, SECONDARY, AND MONITOR INTERLOCK SWITCH CHECKOUT PROCEDURE Switch Check By Door Open Door Closed Primary 1. Unplug microwave oven or disconnect power. Interlock 2. Disconnect the wires at the Primary Interlock Switch. 3. Check from the common terminal (black wire) to the normally open terminal (brown/white wires). -
Page 61: Failure Code Indications
FAILURE CODE INDICATIONS NOTE: Many of the problems listed in the After one minute, plug in microwave oven or chart below may be solved by power cycling: reconnect power. unplug microwave oven or disconnect power. Failure Codes Indications Display Likely Failure Condition Recommended Repair Procedure Flashing Power failure... -
Page 62: Touch Panel And Electronic Control Test
TOUCH PANEL AND ELECTRONIC Release the CANCEL button and close the door. CONTROL TEST After pressing each button on the control The microwave hood combination is provided panel, “8” will appear in the display to in- with a self-diagnostic routine that can be ac- dicate that the circuits are complete and cessed through the touch keypad. -
Page 63: Microwave Oven Power Output Test
MICROWAVE OVEN POWER OUTPUT TEST Place 1 cup (250 mL) of lukewarm water NOTE: If the water takes longer than 2 min- in the center of the microwave oven. utes to heat, this may indicate either the oper- ating voltage is lower than 110 volts or there is Operate on HIGH power level for 2 min- a problem with the microwave oven. -
Page 64: Wiring Diagram And Strip Circuits
WIRING DIAGRAM AND STRIP CIRCUITS WIRING DIAGRAM 42 R / W 43 Y/G 17 R 18 GY 9 BU 2 GY 45 Y/G 120V/125V 60Hz... -
Page 65: Strip Circuits
STRIP CIRCUITS MICROWAVE COOKING Electronic Control Fuse L.V. 4 Amp Transformer 2P 3 5100 Fuse Fuse Magnetron 4201 0.25 Amp Thermostat Secondary Fuse Cavity High Voltage 6 P 3 MW Relay Interlock 20 Amp Thermostat 3 Filter System 4903 Switch Primary Cavity Interlock... - Page 66 HOOD EXHAUST FAN ON (SPEEDS 4 AND 3 MANUALLY) Cavity Cavity Electronic Control Thermostat 1 Thermostat 3 Fuse Fuse Fuse L.V. 20 Amp 4 Amp Filter Filter 4201 Transformer 5100 Cavity Thermostat 2 HF Triac 7103 Hood Exhaust Motor HF Relay HF Relay Fan Motor Capacitor...
-
Page 67: Cooktop Light On High
DOOR OPEN—OVEN CAVITY LIGHT IS ON Electronic Control Fuse Fuse L.V. 20 Amp Filter Cavity 4 Amp Cavity Transformer Thermostat 1 Thermostat 3 5100 Filter Fuse Fuse Cavity 4201 Cavity Lamp CL/SM/CF Relay Thermostat 2 4901 0.25 Amp Primary Interlock Switch COOKTOP LIGHT ON HIGH Electronic Control... - Page 68 — NOTES —...
- Page 69 — NOTES —...
-
Page 70: Product Specifications
PRODUCT SPECIFICATIONS WARRANTY INFORMATION SOURCES IN THE UNITED STATES: FOR PRODUCT SPECIFICATIONS AND WARANTY INFORMATION CALL: FOR WHIRLPOOL PRODUCTS: 1-800-253-1301 FOR KITCHENAID PRODUCTS: 1-800-422-1230 FOR ROPER PRODUCTS: 1-800-447-6737 FOR TECHNICAL ASSISTANCE WHILE AT THE CUSTOMER’S HOME CALL: THE TECHNICAL ASSISTANCE LINE: 1-800-832-7174...
Need help?
Do you have a question about the MH3184XPB and is the answer not in the manual?
Questions and answers
I am an electronic Engineer and own whirlpool Gold MH3184XP I need the detailed control board schematic that shows the relays coil circuit because the wiring diagram in the tech sheet does not show the relays coil activation circuit. Thanks in advance