Sony KDL-52Z4500 Operating Instructions Manual
Hide thumbs
Also See for KDL-52Z4500:
- Operating instructions manual (195 pages) ,
- Service manual (29 pages) ,
- Brochure (2 pages)

Subscribe to Our Youtube Channel
Related Manuals for Sony KDL-52Z4500


Summary of Contents for Sony KDL-52Z4500
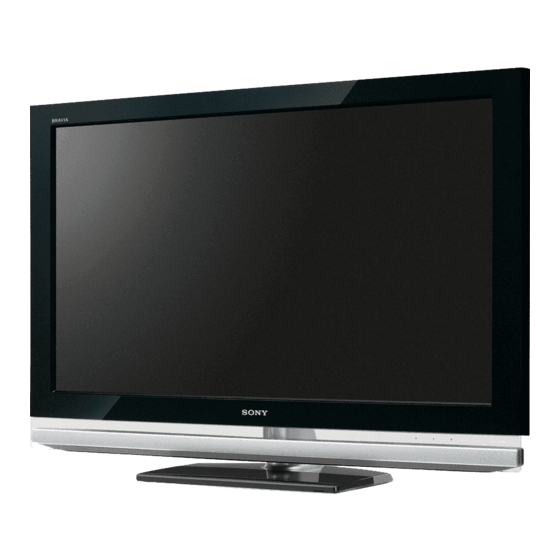
- Page 1 LCD Digital Colour TV Operating Instructions KDL-52Z4500 KDL-46Z4500 KDL-40Z4500 © 2008 Sony Corporation 4-119-599-11(1)
-
Page 2: Trademark Information
Introduction Thank you for choosing this Sony product. Before operating the TV, please read this manual thoroughly and retain it for future reference. Trademark information is a registered trademark of the DVB Project DLNA and DLNA CERTIFIED are trademarks and/or service marks of Digital Living Network Alliance. -
Page 3: Table Of Contents
Table of Contents Start-up Guide Safety Information ..........................9 Precautions .............................10 Remote Control and TV Controls/Indicators ................11 Watching TV Watching TV ............................15 Using the Digital Electronic Programme Guide (EPG) (Australian model only) ....17 Using the Digital Favourite List ....................18 Using Optional Equipment Connecting Optional Equipment ....................19 Viewing Pictures from Connected Equipment ................22 Playing back Photo/Music via USB ....................23... -
Page 4: Start-Up Guide
Start-up Guide 1: Checking the accessories 2: Attaching the stand (for KDL-46Z4500/40Z4500) AC power cord (1) Antenna cable (1) Place the TV onto the stand by aligning Stand (1) and screws (4) (KDL-46Z4500/40Z4500 the screw hole alignment lines over the only) stand as shown. - Page 5 3: Connecting an antenna/ 4: Preventing the TV from toppling over Connecting an antenna Antenna cable (not supplied) Connecting an antenna and VCR Install a wood screw (4 mm in diameter, Antenna not supplied) in the TV stand. cable (not supplied) Install a machine screw (M6 ×...
-
Page 6: Performing The Initial Set-Up
5: Bundling the cables 6: Performing the initial set-up (Australian model only) • Do not bundle the AC power cord together with other cables. Select “Home” for the best TV settings to use the TV in the home. For New Zealand model, the illustration may differ from that of the actual display. -
Page 7: Adjusting The Viewing Angle
Adjusting the viewing angle of the TV This TV can be adjusted within the angles shown below. Adjust the angle left and right (swivel) Make sure that the antenna is connected. Top view The TV starts searching for all available digital channels, followed by all available analogue channels. - Page 8 Detaching the Table-Top Stand from the TV • Remove the screws guided by the arrow marks of the TV. • Do not remove the Table-Top Stand for any reason other than listed below. – To wall-mount the TV. – To put the TV in the carton at time of purchase (KDL-46Z4500/KDL-40Z4500 only).
-
Page 9: Safety Information
Never cover the ventilation holes or insert anything in the cabinet. Information s Leave space around the TV set as shown below. s It is strongly recommended that you use a Sony wall-mount bracket in order to provide adequate air-circulation. Installed on the wall Installation/Set-up... -
Page 10: Precautions
Turn off the TV set and unplug the AC power cord immediately if This symbol is on the remote control. any of the following problems occur. Ask your dealer or Sony service centre to have it checked by qualified service personnel. When: –... -
Page 11: Remote Control And Tv Controls/Indicators
Remote Control and TV Controls/Indicators Remote control and TV controls A button or touch sensor keys on the TV will work the same as those on the remote. *In TV menu, these buttons will work as • The number 5, N, PROG + and AUDIO buttons have a tactile dot. Use the tactile dots as a reference when operating the TV. - Page 12 In digital mode: Displays details of the current — Info/Text and next programme one by one. reveal In analogue mode: Displays information. Press once to display the current channel number and screen mode. Press again to display clock information. Press a third time to remove the display from the screen.
- Page 13 • If you turn the TV off, Theatre Mode is also turned off. • “Control for HDMI” (BRAVIA Sync) is only available with the connected Sony equipment that has the BRAVIA Sync or BRAVIA Theatre Sync logo or is compatible with control for HDMI.
-
Page 14: About The Operation Guide On The Tv Screen
Indicators Indicator Description — Picture Lights up in green when you select “Picture Off” (page 36). Lights up in orange when you set the timer (page 17, 38). Off / Timer indicator 2 1 — Standby Lights up in red when the TV is in standby mode. 3 "... -
Page 15: Watching Tv
Watching TV Press the number buttons or PROG +/– to Watching TV select a TV channel. To select channel numbers 10 and above using the number buttons, enter the next digit quickly. To select a digital programme using the Digital Electronic Programme Guide (EPG), see page 17 (Australian model only). - Page 16 To change the Wide Mode manually Using the Options menu Press repeatedly to select the desired Wide Press OPTIONS to display the following Mode. options when viewing a TV programme. Option Description Wide Zoom* Picture Mode See page 34. Enlarges the centre Sound Mode See page 35.
-
Page 17: Using The Digital Electronic Programme Guide (Epg) (Australian Model Only)
Using the Digital Electronic Programme Guide (EPG) (Australian model only) In digital mode, press GUIDE. Perform the desired operation as shown in the following table or displayed on the screen. * This function may not be available in some regions. Digital Electronic Programme Guide (EPG) Do this Press F/f/G/g to select a programme, then press... -
Page 18: Using The Digital Favourite List
Using the Digital Favourite List You can specify up to four of your favourite channel lists. In digital mode, press Perform the desired operation as shown in the following table or displayed on the screen. (Australian model) * This function may not be available in some regions. (New Zealand model) Digital Favourite List Do this... -
Page 19: Using Optional Equipment
Using Optional Equipment Connecting Optional Equipment You can connect a wide range of optional equipment to your TV. For service use only Digital still camera Audio system DVD player Camcorder USB storage media PC (HDMI-output) Blu-ray disc player Camcorder Camcorder Headphones Broadband router... - Page 20 Input symbol on Description screen 1 USB You can enjoy photo/music files stored in a Sony digital still camera or camcorder through a USB cable or USB storage device on your TV (page 23). 2 HDMI IN 2 HDMI 2...
- Page 21 Connect to Input symbol on Description screen 8 DMPORT DMPORT You can play audio or video (optional cable required) of a portable audio player that is connected to the TV using a DIGITAL MEDIA PORT (DMPORT) adaptor. Depending on the connected DIGITAL MEDIA PORT adaptor, you can operate the connected equipment using the TV as follows;...
-
Page 22: Viewing Pictures From Connected Equipment
Option Description Viewing Pictures from Control Panel (in See page 21. Connected Equipment DIGITAL MEDIA PORT mode only) Turn on the connected equipment, then press Device Control (in See page 25. to display a list of connected HDMI mode only) equipment. -
Page 23: Playing Back Photo/Music Via Usb
You can enjoy photo/music files stored in a Connect a PC (page 19), and make sure that Sony digital still camera or camcorder through images from the PC appear on the screen. a USB cable or USB storage device on your •... -
Page 24: Picture Frame
“Picture Frame” and press The data on the USB device may be damaged. • Sony will not be held liable for any damage to, or The TV is switched to Picture Frame loss of, data on the recording media due to a mode, and the selected photograph is malfunction of any connected devices or the TV. -
Page 25: Using Bravia Sync (Control For Hdmi)
• Adjusts the volume (2 +/–) and mutes the sound (%) of a connected audio system. • You can operate the connected Sony equipment that has the BRAVIA Sync logo by the TV remote by pressing: – N/x/X/m/M to operate the connected equipment directly. - Page 26 To connect the equipment that is compatible with control for HDMI Connect the compatible equipment and the TV with an HDMI cable. When connecting an audio system, be sure to also connect the DIGITAL AUDIO OUT (OPTICAL) jack of the TV and the audio system using an optical audio cable.
-
Page 27: Operating Optional Equipment Using The Tv Remote
Displays the top menu of the TOP MENU BD/DVD disc. Programming the remote This remote is preset to operate Sony TVs, and most Sony Blu-ray disc players, DVD players, DVD/HDD recorders, and audio systems (Home Theatre, etc.). To control such Sony Blu-ray disc players, •... - Page 28 DAV Home Theatre System three-digit manufacturer’s code number Manufacturer Code when the function button flashes. SONY (DAV) 401 – 404 If you do not enter the code within 10 AV receivers seconds, you need to go back to step 1.
-
Page 29: Using Home Network Features
Using Home Network Features With this TV, you can enjoy contents stored in Enjoying Photo/Music Files DLNA-compatible devices on the home network. via the Network Devices that store and provide contents, such You can enjoy photo/music files on the server as photo/music files, are called “server”. - Page 30 To enjoy photographs and music on the (Music) Available OPTIONS TV screen by operating devices Option Description – Renderer Sound Mode See page 35. Renderer is a feature for playing photo files and music files stored in network devices Surround See page 35.
-
Page 31: Checking The Network Connection
Checking the Network Adjusting the Server Connection Display Settings Enter the respective (alphanumeric) values for You can select home network servers to be your router. The items that need to be set may displayed on the Home Menu. Up to 10 servers differ, depending on the Internet service can be displayed on the Home Menu provider or the router. - Page 32 If you cannot connect to your home network The TV can check if the server is being correctly recognised. Press HOME. Press G/g to select “Settings”. Press F/f to select “Network Settings”, then press Select “Server Diagnostics”, then press Select “Yes”, then press The server diagnostic starts.
-
Page 33: Using Menu Functions
Using MENU Functions Navigating through TV Home Menu on XMB™ The XMB™ (XrossMediaBar) is a menu of BRAVIA features and input sources displayed on the TV screen. The XMB™ is an easy way to select programming and adjust settings on your BRAVIA Press HOME to display the XMB™. -
Page 34: Tv Settings Menu
TV Settings Menu Picture Picture Mode Sets the picture mode except for PC input source. “Picture Mode” includes options best suited for video and photographs, respectively. The options that can be selected differ depending on the input source. Vivid Enhances picture contrast and sharpness. Standard For standard pictures. - Page 35 MPEG Noise Reduces picture noise in MPEG-compressed videos. This is effective when Reduction viewing a DVD or digital broadcast. Advanced Settings Allows you to set “Picture” settings in more detail. These settings are not available when “Picture Mode” is set to “Vivid” (or “Photo-Vivid”). Adv.
- Page 36 • Be sure not to put anything over the sensor, as its function may be affected. See page 14 for the location of the light sensor. Logo Illumination Lights up and turns off the Sony logo on the front of the TV. Panel Key Auto Touch sensor keys light up when you touch the sensor keys on the front of the TV or when the TV is on.
- Page 37 Sets the image quality setting most suited to the input source (video or photograph data). Video-A Sets suitable image quality, depending on the input source, video data or photograph data when directly connecting Sony HDMI output-capable equipment that supports “Video-A” mode. Video Produces suitable image quality for moving pictures.
- Page 38 Photo Colour Space Selects an option (sRGB, sYCC, Adobe RGB) to set the picture quality best suited to the colour space of the photograph. If equipment converts the output colour space of a photograph from sYCC or Adobe RGB to x.v.Colour or xvYCC, select “sYCC”. Results in picture quality best suited to the original colour space.
- Page 39 Auto Wide Automatically changes “Wide Mode” to match input signals. If you want to use the setting that you specified in “Wide Mode”, select “Off”. 4:3 Default Selects the default Wide Mode for use with the 4:3 picture. Wide Zoom Enlarges the 4:3 picture to fill the 16:9 screen, keeping the original image as much as possible.
- Page 40 HDMI. When set to “On”, the following menu items can be performed. If the specific Sony equipment that is compatible with control for HDMI is connected, this setting is applied to the connected equipment automatically when the “Control for HDMI”...
- Page 41 • You cannot use “Control for HDMI” if the TV operations are linked to the operations of an audio system that is compatible with control for HDMI. Product Information Displays product information of the TV. Factory Settings Resets all settings to factory settings except for the “Programme Block” setting, “Digital Favourites”...
-
Page 42: Digital Set-Up
Programme/ Presets programme channels manually. TV System/ Press F/f to select “Programme”, then press Frequency Press F/f to select the programme number you want to manually tune (if tuning a VCR, select programme 0), then press Press F/f to select “TV System”, then press Press F/f to select the best received TV broadcast systems, then press Press F/f to select “Frequency”, then press... - Page 43 Programme Allows you to remove or change the order of digital channels Sorting stored in the TV. Press F/f to select the channel you want to remove or move to a new position. For the New Zealand model, you can also select a channel by pressing the number buttons to enter its three-digit channel number.
- Page 44 Parental Lock Sets a parental guidance level. Programmes that exceed the set level can only be watched after entering the correct PIN code. Press the number buttons to enter your PIN code. If you have not already set a PIN code, a PIN code entry screen appears. Follow the instructions in “PIN Code”...
-
Page 45: Network Settings
Network Settings Network IP Address DHCP Automatically acquires the network Settings settings through the Dynamic Host Configuration Protocol server function of the router or Internet service provider. Manual Allows you to set the network settings according to your network environment. Test Diagnoses whether the network is correctly connected. -
Page 46: Additional Information
TV’s weight. Be sure to entrust the attachment of these products to the wall to Sony dealers or licensed contractors and pay adequate attention to safety during the installation. Sony is not liable for any damage or injury caused by mishandling or improper... -
Page 47: Tv Installation Dimensions Table
Model Name SU-WL500 only WL500 WL50B WL500 WL50B WL500 WL50B KDL-52Z4500 1,281 KDL-46Z4500 1,140 KDL-40Z4500 1,005 Figures in the above table may differ slightly depending on the installation. WARNING The wall that the TV will be installed on should be capable of supporting a weight of at least four times that of the TV. - Page 48 Screw and Hook locations diagram/table Screw location Hook location Model Name SU-WL500 SU-WL50B SU-WL500 SU-WL50B KDL-52Z4500/46Z4500/40Z4500 d, g d, i SU-WL500: Screw location Hook location When installing the Mounting Hook on the TV. When installing the TV onto the Base Bracket.
-
Page 49: Specifications
Specifications Model name KDL-40Z4500 KDL-46Z4500 KDL-52Z4500 System Panel system LCD (Liquid Crystal Display) Panel TV system Analogue: B/G, I, D/K Digital: DVB-T Colour/video system Analogue: PAL, PAL60, SECAM, NTSC3.58/4.43 (only video input) Digital: MPEG-2 MP@ML/HL (Australian model), H.264/MPEG-4 AVC (New Zealand model) - Page 50 Model name KDL-40Z4500 KDL-46Z4500 KDL-52Z4500 Optional Wall-Mount SU-WL500/SU-WL50B accessories Bracket Colour CRU-40SG13 CRU-46SG13 CRU-52SG13 Variation Unit Design and specifications are subject to change without notice. PC input signal reference chart for PC IN (RGB) jack Resolution Horizontal Vertical Standard Signals Horizontal ×...
-
Page 51: Troubleshooting
For example, the indicator may flash three times, go off for two seconds, then flash again three times. Press 1 on the TV to turn it off, disconnect the AC power cord, and inform your dealer or Sony service centre of how the indicator flashes (number of flashes). - Page 52 Condition Explanation/Solution No picture from the connected • Turn the connected equipment on. equipment appears on the • Check the cable connection. screen. • Press to display the list of inputs, then select the desired input. • Correctly insert the memory card or other storage device in the digital still camera.
- Page 53 “Speaker” menu (page 40). Not all channels are tuned for • Check the support website for cable provide information. cable. http://www.sony-asia.com/bravia/flash.html The auto tuning procedure • If you have connected the VCR to the TV, we recommend inserting a takes a long time.
- Page 54 Condition Explanation/Solution The speaker grille has come • To attach the speaker grille, first turn off the TV, then unplug the AC power cord. Then follow the procedure below. Orient the speaker grille so that the location of the marks on the speaker grille and TV match, insert the protrusions on the speaker grille into the holes on the TV, and support gently.
- Page 56 Instructions on “Installing the Wall-Mount Bracket” are not supplied in the form of a separate leaflet with this TV. These installation instructions are included within this TV’s instructions manual. Customer Support: 4-119-599-11(1) Printed in Malaysia...
Need help?
Do you have a question about the KDL-52Z4500 and is the answer not in the manual?
Questions and answers