SMART kapp iQ 55 User Manual
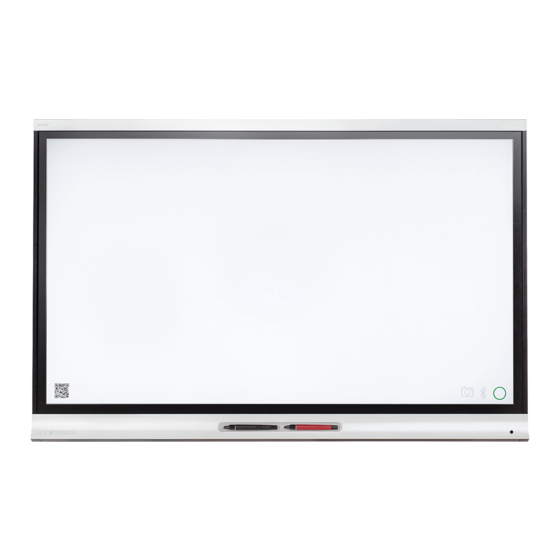
Capture board
Hide thumbs
Also See for kapp iQ 55:
- Administrator's manual (96 pages) ,
- User manual (66 pages) ,
- Administrator's manual (86 pages)

Related Manuals for SMART kapp iQ 55


Summary of Contents for SMART kapp iQ 55
- Page 1 Help us make this document better smarttech.com/docfeedback/170812 USER’S GUIDE FOR MODELS SMART KAPP iQ™ 55" AND SMART KAPP iQ 65"...
-
Page 2: Product Registration
© 2015 SMART Technologies ULC. All rights reserved. No part of this publication may be reproduced, transmitted, transcribed, stored in a retrieval system or translated into any language in any form by any means without the prior written consent of SMART Technologies ULC. Information in this manual is subject to change without notice and does not represent a commitment on the part of SMART. -
Page 3: Important Information
If the capture board requires replacement parts, make sure the service technician uses replacement parts specified by SMART Technologies or parts with the same characteristics as the original. Ensure that any cables that cross the floor to the capture board are properly bundled and marked to avoid a trip hazard. - Page 4 Dust buildup on the camera windows and reflective tape will degrade touch performance. SMART recommends that you inspect the camera windows and reflective tape for dust buildup and clean weekly. Make sure an electrical socket is near the capture board and remains easily accessible during use.
-
Page 5: Federal Communication Commission Interference Statement
IMPORTANT INFORMATION The accessory slot is for use with SMART accessories only. The slot’s maximum available power is 60 W. The slot is not a limited power source. To reduce the risk of fire, make sure that accessories connecting to the slot satisfy the fire enclosure requirements of IEC 60950-1. -
Page 6: Industry Canada Statement
IMPORTANT INFORMATION Radiation exposure statement This equipment complies with FCC radiation exposure limits set forth for an uncontrolled environment. This equipment should be installed and operated with minimum distance 20 cm between the radiator and your body. Note: The country code selection is for the non-U.S. model only and is not available to all U.S. models. Per FCC regulations, all Wi- Fi products marketed in U.S. -
Page 7: Table Of Contents
Turning on the capture board for the first time Chapter 3: Using the capture board Exiting and entering Standby mode Connecting your mobile device to the capture board Writing and erasing notes on the SMART kapp iQ capture board Writing and erasing notes in the app Viewing notes Sharing notes... - Page 8 CONTENTS Preventing condensation Maintaining pens Removing and transporting the capture board Chapter 6: Troubleshooting the capture board What the indicator light means What the indicator icons mean Troubleshooting Appendix A: Using the on-screen display menu Changing settings in the on-screen display menu On-screen display menu options Appendix B: Hardware environmental compliance Waste Electrical and Electronic Equipment (WEEE)
-
Page 9: About This Guide
Security information This chapter introduces the SMART kapp iQ capture board, the SMART kapp app and this guide. About this guide This guide explains how to use the SMART kapp iQ capture board. It includes the following information: How to install the capture board How to use the capture board and the SMART kapp® app How to maintain the capture board for years of use How to troubleshoot issues with the capture board... -
Page 10: Chapter 1 Welcome
Store or Google Play™ store to download the app. After you download and install the app, you can use it to connect to the capture board and share your notes with others. Models The SMART kapp iQ capture board is available in two models: SMART kapp iQ 55" capture board SMART kapp iQ 65" capture board Differences between these models are noted in this guide. -
Page 11: Components
The screen specifications vary by model: Model Diagonal Width Height Aspect ratio SMART kapp iQ 55" 54 1/2" (138.4 cm) 47 5/8" (121 cm) 26 3/4" (68 cm) 16:9 SMART kapp iQ 65" 64 1/2" (163.9 cm) 56 1/4" (142.8 cm) 31 5/8" (80.4 cm) 16:9 For information on cleaning the screen, see Cleaning the screen on page 32. -
Page 12: Cameras And Reflective Tape Channel
CHAPTER 1 WELCOME Cameras and reflective tape channel Cameras in the corners of the screen track pen positions across the display. The screen is bordered by a channel that contains reflective tape. See Cleaning the camera windows and reflective tape on page 32 for more information. CAUTION Keep the reflective tape dry. -
Page 13: Pens With Erasers
CHAPTER 1 WELCOME Pens with erasers The capture board comes with two pens with erasers attached. The capture board’s bottom frame includes magnetic holders for the pens. Removing a pen from the holders activates it and enables you to either draw or erase digital ink. CAUTION When returning the pen to the magnetic holder, make sure it’s centered in its holder to keep it from falling and potentially being damaged. -
Page 14: Connector Panel
CAUTION The accessory slot is for use with SMART accessories only. The slot’s maximum available power is 60 W. The slot is not a limited power source. To reduce the risk of fire, make sure that accessories connecting to the slot satisfy the fire enclosure requirements of IEC 60950-1. -
Page 15: About The Smart Kapp App
The USB Type-B receptacles are for service use only. About the SMART kapp app The SMART kapp app enables you to connect your Apple or Android™ mobile device to the capture board, and then do the following: View notes you write on the capture board on your mobile device... -
Page 16: Support Center And Knowledge Base
WELCOME Support center and knowledge base The Support center (smarttech.com/support) contains a library of documents, including this guide, and a knowledge base that you can search when troubleshooting issues. Security information For details about SMART kapp’s security features, see onlinehelp.smarttech.com/kappiqsecurity. smarttech.com/kb/170812... -
Page 17: Chapter 2: Installing The Capture Board
Review the environmental requirements in the capture board’s specifications (see Specifications on page 7). Save all product packaging so that it’s available if you need to transport the capture board. If the original packaging isn’t available, you can purchase new packaging from your authorized SMART reseller (smarttech.com/where). smarttech.com/kb/170812... -
Page 18: Mounting The Capture Board Vertically
Do not over-tighten the screws. NOTE SMART recommends M8 × 30 mm mounting screws for standard installations where the total wall mount bracket and washer thickness is less than 7 mm. Before turning on the capture board for the first time, clean the camera windows and reflective tape following the instructions in Cleaning the camera windows and reflective tape on page 32. -
Page 19: Connecting Power
CHAPTER 2 INSTALLING THE CAPTURE BOARD Choosing a location Consider the following when choosing a location for the capture board: Do not install the capture board in a location where a door or gate could hit it. Do not install the capture board in an area where it will be subjected to strong vibrations or dust. -
Page 20: Turning On The Capture Board For The First Time
CHAPTER 2 INSTALLING THE CAPTURE BOARD NOTE Refer to the capture board’s specifications for power requirements and power consumption information (see Specifications on page 7). Turning on the capture board for the first time After connecting power, you can turn on the capture board for the first time and run the setup wizard. -
Page 21: Chapter 3: Using The Capture Board
Connecting your mobile device to the capture board About QR codes Installing the app and starting it for the first time Starting a session Writing and erasing notes on the SMART kapp iQ capture board Writing and erasing notes in the app Viewing notes Sharing notes... -
Page 22: Connecting Your Mobile Device To The Capture Board
Before you can share notes on the capture board with others, you need to connect your mobile device to the capture board and install the SMART kapp app. You can connect the following types of mobile devices to the capture board: Device type... -
Page 23: About Qr Codes
Installing the app and starting it for the first time The SMART kapp app enables you to connect your mobile device to a capture board, view notes you write on the capture board on your mobile device and share and save notes. You can install the app on your mobile device by scanning the capture board’s QR code. -
Page 24: Starting A Session
On an Android mobile device, press Menu , press Settings, and then press Tutorial. Starting a session Start a session by connecting your mobile device to the SMART kapp iQ capture board. You can do this by scanning the capture board’s QR code. -
Page 25: Writing And Erasing Notes On The Smart Kapp Iq Capture Board
CHAPTER 3 USING THE CAPTURE BOARD Writing and erasing notes on the SMART kapp iQ capture board You can write and erase notes on the capture board just like you do on a traditional dry erase board. Use the black pen provided with the capture board to write or draw in black ink. -
Page 26: Viewing Notes
CHAPTER 3 USING THE CAPTURE BOARD 3. Press the buttons on the bottom of the screen, and then use your fingers to write, erase, pan or zoom. Write in black ink Write in red ink Erase Pan and zoom using gestures (see Viewing notes below) 4. -
Page 27: Sharing Notes
USING THE CAPTURE BOARD Sharing notes During a session, you can use the SMART kapp app to invite up to five others to view your notes on their devices. When others receive your invitation, they press or click a link to view your session in their Internet browsers;... -
Page 28: Saving Snapshots Of Notes
CHAPTER 3 USING THE CAPTURE BOARD Saving snapshots of notes As you write notes on the capture board, you might want to save snapshots of your notes from time to time during the session. After you save snapshots, you can do the following: View the snapshots Change the order of the snapshots (Apple mobile devices only) Share the snapshots as JPEG or PDF files... -
Page 29: Changing The Order Of Snapshots
CHAPTER 3 USING THE CAPTURE BOARD 3. Press a snapshot’s thumbnail image to view it. You can use the zoom in, zoom out and pan gestures when viewing the snapshot (see Viewing notes on page 18). To view snapshots in previous sessions 1. -
Page 30: Exporting Snapshots
CHAPTER 3 USING THE CAPTURE BOARD Exporting snapshots To export a snapshot 1. View the snapshot you want to export (see Viewing snapshots on page 20). 2. On an Apple mobile device, press Export , and then select Save to Camera Roll or Share as PDF. -
Page 31: Deleting Snapshots
CHAPTER 3 USING THE CAPTURE BOARD 4. On an Apple mobile device, press Export On an Android mobile device, press Menu , and then select Share as PDF. 5. Select the app you want to use to export the snapshots. 6. Use the selected app to export the snapshots. Deleting snapshots To delete a snapshot from a previous session 1. -
Page 32: Disconnecting The App
This icon indicates when the mobile device is connected to the capture board: Connected Disconnected To disconnect the app manually Press Disconnect in the top left corner of the SMART kapp app screen, and then press Disconnect. Hold Bluetooth on the capture board until it turns solid red. -
Page 33: Connecting To Another Session
USING THE CAPTURE BOARD Connecting to another session If another person shares a session with you, you can connect to that session using the SMART kapp app on your mobile device. Once connected, you can do everything in the other person’s session... - Page 34 CHAPTER 3 USING THE CAPTURE BOARD 3. Hold your mobile device’s rear-facing camera still over the capture board’s QR code so that the QR code appears in the center of the app screen. The app connects your mobile device to the capture board. The other person’s share notes appear on the screen.
-
Page 35: Chapter 4: Upgrading To A Plus Subscription
Upgrading to a plus subscription Setting default preferences Changing preferences for an individual session You can upgrade the SMART kapp app to a plus subscription to take advantage of additional features. Upgrading to a plus subscription When you upgrade to a plus subscription, you can:... -
Page 36: Setting Default Preferences
CHAPTER 4 UPGRADING TO A PLUS SUBSCRIPTION 5. On an Apple mobile device, type your password for the App Store. On an Android mobile device, type your password for Google Play. After subscribing successfully, you receive an email receipt with details of your purchase. Setting default preferences After you upgrade to a plus subscription, you can set the following preferences: A password for protecting sessions... -
Page 37: Changing Preferences For An Individual Session
CHAPTER 4 UPGRADING TO A PLUS SUBSCRIPTION To remove the password 1. If you’re currently in a session, disconnect (see Disconnecting the app on page 24). 2. On an Apple mobile device, press Settings On an Android mobile device, press Menu , and then press Settings. 3. -
Page 39: Chapter 5: Maintaining The Capture Board
Chapter 5 Maintaining the capture board Resetting the capture board and AM30 Checking the capture board installation Cleaning the screen Cleaning the camera windows and reflective tape Cleaning the presence detection sensor Maintaining ventilation Preventing condensation Maintaining pens Removing and transporting the capture board Removing the capture board Transporting the capture board This chapter explains how to maintain the capture board for years of use. -
Page 40: Checking The Capture Board Installation
CHAPTER 5 MAINTAINING THE CAPTURE BOARD Checking the capture board installation Inspect the capture board installation frequently to ensure that it remains securely installed. Check the mounting location for signs of damage or weakness that can occur over time. Check for loose screws, gaps, distortions or other issues that could occur with the mounting hardware. -
Page 41: Cleaning The Presence Detection Sensor
CAUTION Dust buildup on the camera windows and reflective tape will degrade touch performance. SMART recommends that you inspect the camera windows and reflective tape for dust buildup and clean weekly. Do not use compressed air to clean the camera windows or borders. -
Page 42: Preventing Condensation
3. Remove any moisture from the capture board with a smooth, dry cloth. 4. Leave the capture board turned off for 48 hours. Maintaining pens To prevent damage to the capture board’s anti-glare coating, replace a pen if its nib becomes worn. You can purchase replacement pens from the Store for SMART Parts (see smarttech.com/Support/PartsStore). smarttech.com/kb/170812... -
Page 43: Removing And Transporting The Capture Board
CHAPTER 5 MAINTAINING THE CAPTURE BOARD Removing and transporting the capture board On occasion, you might need to remove the capture board from its current location and transport it to another location. Removing the capture board To remove the capture board safely, use two or more professional installers. WARNING Do not attempt to move the capture board by yourself. -
Page 44: Transporting The Capture Board
This packaging was designed to provide the best possible protection against shock and vibration. If the original packaging isn’t available, you can purchase the same packaging directly from your authorized SMART reseller (smarttech.com/where). CAUTION Transport the capture board only in original or replaced packaging. Transporting the capture board without correct packaging can lead to product damage and voids the warranty. -
Page 45: Chapter 6: Troubleshooting The Capture Board
Capture Troubleshooting This chapter helps you solve simple issues that can occur with the capture board. If issues persist or aren’t covered in this chapter, contact SMART Support (smartkapp.com/support). What the indicator light means The Standby button on the front control panel also functions as an indicator light. You can use the indicator light to resolve common issues with the capture board. -
Page 46: What The Indicator Icons Mean
Standby mode. What the indicator icons mean SMART kapp iQ capture boards include three indicator icons in the bottom left corner of the screen. You can refer to the indicator icons to see the capture board’s status and to diagnose common issues. -
Page 47: Troubleshooting
What it means: The capture board is connected to a mobile device. Troubleshooting The following are issues that you might encounter while using the SMART kapp app. Your mobile device Make sure no other mobile devices are connected to the doesn’t connect to the capture board. - Page 48 Ensure the portion of the capture board screen that displays the QR code is clean and fully visible. Position your mobile device so that your capture board’s QR code appears in the center of the SMART kapp app screen. When you write on the Ensure the capture board’s cameras and frame are clean.
-
Page 49: Appendix A: Using The On-Screen Display Menu
Appendix A Using the on-screen display menu Changing settings in the on-screen display menu On-screen display menu options You can access the on-screen display menu using the menu control panel located on the side of the capture board. Name MENU [Up] [Down] [Left] [Right]... -
Page 50: On-Screen Display Menu Options
APPENDIX A USING THE ON-SCREEN DISPLAY MENU 4. Press the left and right arrows to change the menu option’s setting. Press the right arrow to open the menu option’s submenu. (Repeat steps 3 and 4 to change settings in the submenu.) 5. - Page 51 APPENDIX A USING THE ON-SCREEN DISPLAY MENU Option Values Function Notes (if any) Movie Mode Sets the brightness, contrast, black level, color and sharpness for movie watching Middle High [N/A] Resets all options in the Picture Picture Reset menu to their default values Sound Sound Mode Treble...
- Page 52 (OPS/HDMI2) when there are no computers or other devices connected. Lync® Room Reset [N/A] Resets options in all menus to their default values (for a SMART Room System™ for Microsoft® Lync) Setup Reset [N/A] Restores the setup settings to their default value [N/A]...
-
Page 53: Appendix B: Hardware Environmental Compliance
Appendix B Hardware environmental compliance SMART Technologies supports global efforts to ensure that electronic equipment is manufactured, sold and disposed of in a safe and environmentally friendly manner. Waste Electrical and Electronic Equipment (WEEE) Electrical and electronic equipment contain substances that can be harmful to the environment and to human health. -
Page 55: Index
AM30, 6 control panels Android mobile devices, 14, 19 front, See front control panel angle (mounting), 10 menu, See menu control panel app, See SMART kapp app Apple mobile devices, 14, 19 aspect ratio, 3 audio configuring, 43 DPMS mode, 38... - Page 56 11 humidity, 34 notes sharing, 19 viewing in the app, 18 viewing on a SMART kapp iQ capture board, 25 indicator icons, 38 viewing snapshots of, 20 indicator light, 37 writing and erasing in the app, 17...
- Page 57 36 reflective tape channel, 4, 32 treble, 43 requirements tutorial, 15 for the hardware, 9 for the SMART kapp app, 14 reset, 31 vacuum cleaners, 33 ventilation, 11, 33 vertical mounting, 10 sensor, See presence detection sensor VESA mounting plate, 10...
- Page 60 SMART TECHNOLOGIES smartkapp.com smartkapp.com/support smarttech.com/kb/170812...
Need help?
Do you have a question about the kapp iQ 55 and is the answer not in the manual?
Questions and answers