Advertisement
Quick Links
Advertisement

Subscribe to Our Youtube Channel
Related Manuals for 3D Hobby Shop YAK55


Summary of Contents for 3D Hobby Shop YAK55
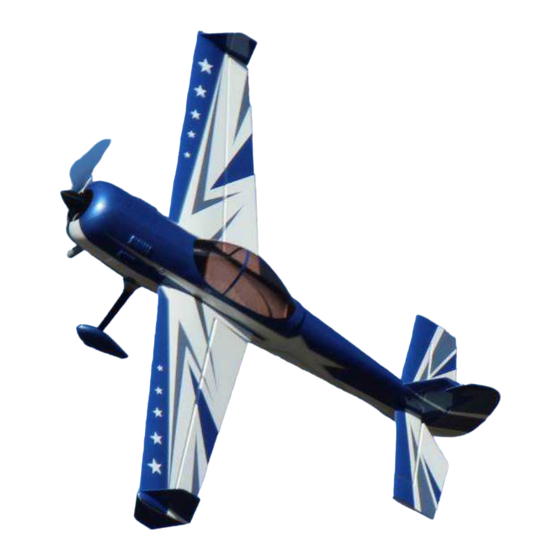
- Page 1 91” Yak55 Assembly Manual...
- Page 2 Suitable for 55/60cc gas engines or 12s Electric Power...
- Page 3 Thank you for purchasing this 3DHobbyShop ARF RC aircraft. If you have any issues, questions, concerns or problems during assembly, please contact our tech department at: Info@3DHobbyShop.com SAFETY in Assembly During assembly of this aircraft, you will be asked to use sharp knives, hot irons, and hobby adhesives. Please follow all safety procedures recommended by the manufacturers of the products you use, and always follow these important guidelines: ALWAYS protect your eyes when working with adhesives, knives, or tools, especially power tools.
-
Page 4: Required Items
SAFETY in Flying ALWAYS fly your aircraft in a safe area, away from spectators. ALWAYS fly your aircraft in a safe manner, within your control. NEVER fly too close to yourself. ALWAYS wear eye protection while operating your model aircraft. ALWAYS keep your hands and body clear of propellers. - Page 5 Wrinkles in the Covering Your Yak was packed at the factory without any wrinkles in the covering. You may notice some wrinkles now; more likely, you will notice a few in a day or two or the first time you take the plane out to the flying field.
- Page 6 Opening up holes in the covering Using a hot fine tipped soldering iron or sharp hobby knife, trim the necessary openings in the covering for installing the landing gear, servos, servo horns, wing screws, belly vents, wing locating pins, servo arms, etc.
- Page 7 Hinging the control surfaces The aileron and elevator hinging is done for you already. The rudder is a removable type, retained with a steel-wire hinge axle, inserted from the top of the rudder. This wire is taped inside your kit box. To attach the rudder, slide the wire down through the hinges as shown.
- Page 8 Control Horn Installation Cut the covering for control horns as shown and install with 30 minute epoxy. Do NOT use CA for gluing control horns on this airframe! Take your time and clean up any extra epoxy with alcohol as needed. Once you open the slots up, use the square plates and a sharpie marker or pencil to trace the area where you need to cut the square.
- Page 9 Repeat the procedure for the rudder, trimming the covering from both sides for the fiberglass plates. Dry fit the control horns through the rudder before mixing epoxy. While glue is curing put the 4/40 ball link and screw in its place to align the control horns properly. NOTE: The rudder in these photos has a different type of hinge than your Yak.
- Page 10 Elevator Servo Installation Elevator servos on your Yak mount inside the horizontal stabilizers. The openings are sized for 'standard' servo cases such as used on the Hitec HS-7955TG servo. If it is necessary to slightly enlarge the opening for your larger servos, we find that the best technique is to use a coarse file. Only remove a small amount of wood as required to fit servos of your choice while keeping the “filing”...
- Page 11 Assemble control linkages using the 4/40 screws, ball links, and locking nuts as shown. Linkages should be adjusted to suit your servo installation. For this aircraft, we recommend 1.5" arms for the ailerons, 1.75-2.0" for the elevators. For the rudder installation, a 3"...
- Page 12 Stabilizer Installation After installing the servos and setting up the elevator linkages, install the carbon stabilizer spar tube and both stabilizers with elevators using the screws and washers provided. It is helpful to use one of the common techniques to prevent these screws from loosening during flight. We prefer a slice of glow fuel tubing behind the washer to prevent these screws from backing out during flight.
- Page 13 Landing gear Attach the tail wheel to the bottom of the fuse as shown with wood screws and washers. Install one strap just at the rear of the fuselage and the front strap just behind where the gear enters the fuselage. Take the time to install all 4 screws, then remove them one by one and apply thin CA glue to the wood at each screw.
- Page 15 The main Gear is mounted onto the fuselage with 4mm hex screws, washers, and locking nuts as shown. The gear IS DIRECTIONAL and has been designed to sweep slightly forward. Pay attention to your gear installation to make sure you have not installed it backwards. Use a wrench or locking pliers to hold the nuts inside the fuselage as you tighten the screws from outside.
- Page 16 Locate the balsa wood cover plate for the bottom of the landing gear. Adhere it over the gear mounting area with rubber cement, silicone caulk, 'welder' adhesive, or another vibration-resistant glue. Locate the landing gear-to-fuselage fairings (also called 'cuffs'). They are different, right to left. Try them on each side to determine which is which.
- Page 17 Install each main wheel onto each axle with a wheel collar as shown. It is recommended to grind or file a small flat area on each axle for the collar set screw to 'grab'. The axles are plated with a very hard, corrosion-resistant layer, and it is difficult for the set screws to clamp to this layer.
- Page 18 Install the wheel pants screws as shown. Use loctite.
- Page 19 Pull-Pull cables The pull-pull cables for the rudder are assembled as shown in the following diagram: Assemble the pull-pull cables at the rudder end first, as shown, and feed the cables through the slots in the fuselage and pull them to the front of the fuselage. Use thin CA and Kicker on your crimped connections for added security against cable slip.
- Page 21 Once all connections are crimped and CA’d, adjust the lengths of the pull-pull cable to get good tension (just snug, with no sag, and no play in the rudder – “banjo-string” tight pull-pull wires will not make your plane fly better, but they will wear out your servo). Below are some photos of Pull-Pull wire installation.
- Page 22 Exhaust tunnel area Your Yak includes a large exhaust tunnel area. It is suitable for mounting a variety of canister-style mufflers of tuned pipes. All these products are slightly different sizes, and so installing them will require some custom-fitting on your part. The tunnel has a front access cover and a rear access cover.
- Page 23 The covers attach as shown with wood screws. Thread in the wood screws, then remove the screws and covers, and use thin CA glue to harden the holes made in the mounts by the wood screws. The covers have cooling outlets cut into the wood, you can remove the covering over these cooling outlets as desired.
- Page 24 We have provided several canister/pipe mounts that fit into the exhaust tunnel as shown. Our preferred canister muffler for 50-60CC engines is the MTW TD-75K.
- Page 26 Engine Mounting NOTE: If you are using a canister or tuned-pipe mufflers, you will need to verify the fore-aft location of the muffler during your engine installation. You may need to temporarily bolt your engine onto the firewall to check muffler location during that process. For this reason, your sequence of engine/exhaust mounting may be different from the suggested one.
- Page 27 A helpful technique is to then remove the template from the firewall and attach it to your engine and mount, and make any necessary cuts and hole on the template as a test before cutting your firewall. In particular, the DA60 requires cutting a relief for the carburetor bolts and choke plate. This cut should be tested on you template and then transferred to the firewall.
- Page 28 In the above photo, a hole saw is being used to create the largest opening for the DA-60 installation.
- Page 30 Now that all mounting holes are created, you will need to make space on the rear of the firewall for fender washers to distribute the stress properly from the mounting bolts. Using your favorite rotary tool or sanding drum, remove material from the balsa tri-stock to make room for washers. Proper washers on the rear of the firewall are VERY important when mounting gasoline engines.
- Page 31 Above is a side view showing a good mounting location for the ignition box. Notice that the plug wire is secured to the bottom of the firewall with a rubber wrap and a wire tie. It is very important to secure the plug wire immediately to the rear of the cylinder to prevent it from vibrating around in flight and cutting itself by rubbing on the cowl.
- Page 32 The ignition shown in the photo is mounted on thick heavy duty stick-on Velcro for vibration isolation and security. You should not simply strap the ignition box to the wood as the engine vibration can cause failure quickly if they are not mounted “softly”. Here is a bottom view on the left and a top view on the right showing the installation of a throttle servo inside the motor box.
- Page 33 Fuel Tank We recommend a two-line system for fuel. We find that a 16 ounce tank provides adequate flight times with acceptable weight on 50-60cc 3D planes. The photos below illustrate the use of the supplied tank on a similar airframe. Assemble the fuel tank as shown, using small nylon zip-ties as hose clamps to retain the flexible fuel tubing onto the rigid metal tubing.
- Page 34 The fuel-feed line runs from the tank, to a Y-connector and fuel dot, and then to the carburetor. Run the vent line as shown to prevent fuel loss during aerobatics.
- Page 35 Cowl Installation If you are setting your Yak up for gasoline power, the cowl must be cut to allow clearance for the cylinder, spark plug, and muffler (if canister is not used) of the engine. We recommend the use of a dremel rotary tool for this step.
- Page 36 Start small and work your way up to the required opening size, adjusting your work as necessary to obtain a clean installation and the ability to easily slip the cowl onto the plane with the engine and exhaust mounted. Once you get to the point where the cowl can be slipped onto the airframe and engine you can enlarge the holes slightly to allow for vibration during flight.
- Page 37 Aileron Servos Remove the covering over the servo openings in the bottom of the wings. Attach a 12” to 18” extension to the aileron servo and secure the extension as before. A pull-string is provided to help guide the extension through the wing.
- Page 38 Wing Attachment The wing attaches to the fuselage with one nylon thumb-screw per side. Your carbon-fiber wing tube is a snug fit into the wings and fuselage. This provides additional strength and fatigue resistance. As a result, you may need to periodically lubricate your wing tube. recommend non-stick cooking spray or silicone spray-lube for this job.
- Page 39 Fiberglass wingtips and SFG’s are included. You can fly the Yak with or without SFG’s or wingtips. We encourage you to try all possible combinations of SFG’s and wingtips. Thin balsa spacers are included to space the SFG’s off of the end of the wing so the ailerons will not contact the SFG during flight. Also included are some angled SFG wingtips where the SFG is canted inward at the front and out at the rear as shown in the lower photo.
- Page 40 Canopy Attachment The canopy hatch for your Yak mounts by inserting the wood dowels into the front bulkhead and securing the rear of the canopy hatch using a pair of thumbscrews. The canopy hatch is held onto the fuselage with 3mm nylon thumbscrews. These thumbscrews require no tools to install or remove and are very convenient –...
- Page 41 Regardless of your setup, care should be taken to provide adequate power distribution to all servos. Neat wiring that is properly secured is very important to prevent failures. Make sure to properly secure all plugs to prevent them from coming unplugged during flight. Take your time when installing your components and properly secure all wiring and protect your wiring from pinch points or chafing with airframe vibration.
- Page 42 Electric Power Installation The Yak flies very well as an electric. Recommended motors include: Hacker Q80, A60-18L and A80-8 A plywood piece is supplied to block off the exhaust canister tunnel if needed for electric applications to push more airflow over the battery packs. To mount your electric motor, create a mounting template for your particular motor mount on paper.
- Page 43 Proper restraint for all high power wiring is critical. Make sure to install the ESC where airflow can easily pass through its cooling fins and exit through the rear of the plane. You will need additional cooling air over your batteries. Leave the access plate on the top of the engine- mounting box open, and we recommend making another hole the same size in the bottom of the motor box or battery tray allowing more air to enter the fuselage.
- Page 44 The photo above shows a Hacker Q80 installed in one of the prototype Yaks. You can see that the cowl opening on the Yak provides excellent access for cooling air. The spinner shown in the photo above is a 3”diameter unit. High power electric setups can benefit from forced cooling, particularly after landing from a hard flight.
- Page 45 Center of Gravity The recommended CG range for this airframe is 6.5” to 7” back from the leading edge of the wing measured at the wing root where the wings enter the fuselage. Our preferred CG location is 6 and 7/8" for 3D aerobatics, and 6.5" for precision flight. Control Setup: Take care on your initial flights with the control throws of this airframe as the extremely large surfaces can allow for very fast pitch and roll rates.
Need help?
Do you have a question about the YAK55 and is the answer not in the manual?
Questions and answers