Table of Contents
Troubleshooting

Related Manuals for Progear Fitness 1017


Summary of Contents for Progear Fitness 1017
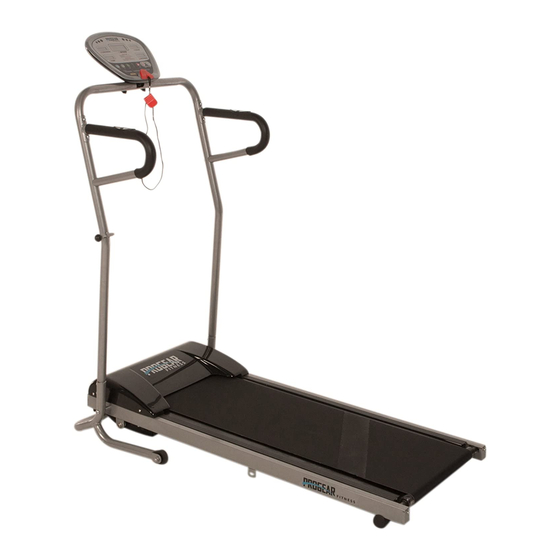
- Page 1 TREADMILL IMPORTANT: Read all instructions carefully before using this product. Retain this owner’s manual for future reference. The specifications of this product may vary from this photo, subject to change without notice. OWNER’S MANUAL Item #1017...
-
Page 2: Table Of Contents
TABLE OF CONTENTS SERVICE ------------------------------------------------------------------------ 2 LABEL PLACEMENT --------------------------------------------------------- 3 PRODUCT SAFETY ---------------------------------------------------------- 4 OVERVIEW DRAWING ------------------------------------------------------ 8 HARDWARE LIST & TOOL ------------------------------------------------- 9 PARTS LIST --------------------------------------------------------------------- 10 ASSEMBLY --------------------------------------------------------------------- 12 COMPUTER -------------------------------------------------------------------- 16 STORAGE ----------------------------------------------------------------------- 19 MAINTENANCE & TROUBLESHOOTING ----------------------------- 20 BELT ADJUSTMENT &... -
Page 3: Service
SERVICE IMPORTANT: FOR NORTH AMERICA ONLY To request product service and order replacement parts, please call our customer service department at: 1-866-924-1688 Monday through Friday, 8:00 AM-5:00 PM Pacific Standard Time, service@paradigmhw.com or email us at: Please visit our website at www.paradigmhw.com. Please have the following information ready when requesting for service: Your name Phone number... -
Page 4: Label Placement
LABEL PLACEMENT... -
Page 5: Product Safety
PRODUCT SAFETY Basic precautions should always be followed, including the following safety instructions when using this treadmill. Read all instructions before using this treadmill. DANGER: To reduce the risk of electric shock, please read the following: Always unplug the treadmill from the electrical outlet immediately after using and before cleaning, assembling, or servicing. - Page 6 PRODUCT SAFETY Keep the treadmill on a solid, level surface with the minimum safety area clearance of 6ft x 3ft around the treadmill. Be sure the area around the treadmill remains clear during use and has adequate clearance. This treadmill is for household use only.
-
Page 7: Grounding Instructions
PRODUCT SAFETY GROUNDING INSTRUCTIONS This product must be grounded. If it should malfunction or break down, grounding provides a path of least resistance for electric current, reducing the risk of electric shock. * This treadmill is equipped with a grounded cord and a grounded plug. - Page 8 PRODUCT SAFETY WARNING: Before beginning any exercise program consult your physician. This is especially important for the people who are over 35 years old or who have pre-existing health problems. Read all instructions before using any fitness equipment. We assume no responsibility for personal injury or property damage sustained by or through the use of this product.
-
Page 9: Overview Drawing
OVERVIEW DRAWING... -
Page 10: Hardware List & Tool
HARDWARE LIST & TOOLS (#43) Bolt (#19) Curve Washer (#40) Spring Washer 8 PCS 6 PCS 4 PCS (#59) Bolt Allen Wrench with Phillips (#55) Bolt 2 PCS Screwdriver 2 PCS 1 PC COMPUTER KNOBS INCLUDED (#34) Computer Knob 2 PCS SILICONE OIL INCLUDED Silicone Oil 1 PC... -
Page 11: Parts List
PARTS LIST Description Qty No. Description 001 Main Frame 1 027 Washer M10 002 Upper Motor Cover 1 028 Transport Wheel Ø50xØ8 003 Lower Motor Cover 1 029 Handlebar Support Tube 004 Main Frame Rear End Cap 2 030 Spacer Ø16xØ10.5x19 005L Left Side Rail 955xW27 1 031 Bolt M10x105 005R Right Side Rail 955xW27... - Page 12 PARTS LIST Description Qty No. Description 054 Bolt M8x40 2 060 Nylon Nut M6 055 Bolt M8x45 2 061 Handlebar Handlebar Foam Grip Extension Hand Pulse Sensor Wire 2 062 T4xØ26x550 L=22.4 inches 057 Cable Tie Holder 3 063 Hand Pulse Sensor with Wire 058 Cup Holder 1 064 Rubber Pad 059 Bolt M6x12...
-
Page 13: Assembly
ASSEMBLY Tool: Allen Wrench with Phillips Screwdriver Step 1 Connect the Sensor Wire I (#51) from the Base Frame (#26) to the Sensor Wire II (#52) from the Handlebar Support Tube (#29). Then install the Handlebar Support Tube (#29) to the Base Frame (#26) by inserting the Handlebar Support Tube (#29) into the Base Frame (#26), using four Spring Washers (#40) and four Bolts (#43). - Page 14 ASSEMBLY Tool: Allen Wrench with Phillips Screwdriver Step 2 Connect the Hand Pulse Sensor Wire (#63) from the Handlebar (#61) to the Extension Hand Pulse Sensor Wire (#62) from the Handlebar Support Tube (#29). Then attach the Handlebar (#61) onto the right side of the Handlebar Support Tube (#29) with one Bolt (#55), two Bolts (#43), and three Curve Washers (#19).
- Page 15 ASSEMBLY (#34) Computer Knob 2 PCS Step 3 Connect the Sensor Wire II (#52) and Extension Hand Pulse Sensor Wires (#62) from the Handlebar Support Tube (#29) to the wires that come from the Computer (#33). Tuck wires into the Handlebar Support Tube (#29). Attach the Computer (#33) onto the Handlebar Support Tube (#29) with two Computer Knobs (#34).
- Page 16 ASSEMBLY Tool: Allen Wrench with Phillips Screwdriver Step 4 Attach the Cup Holder (#58) onto the Handlebar Support Tube (#29) with two Bolts (#59). Tighten bolts with the Allen Wrench with Phillips Screwdriver provided. Hardware: (#59) Bolt 2 PCS...
-
Page 17: Computer
COMPUTER Quick Start: Flip the Master Power Switch that is located at the front of the treadmill to the ON position. The treadmill will self-test for a 2 second long beep. Before beginning a workout session ensure that the Safety Tether Key is properly placed onto the Computer Console and the Safety Clip is securely attached to your clothing. - Page 18 COMPUTER MODE: To select each time, distance, or calories for target pre-setting. To select hours and minutes time setting mode. SET: To confirm the CLOCK setting. FAST: To make upward adjustments of hours and minutes for setting the clock in time mode.
- Page 19 COMPUTER exercising. TIME window will countdown 3 seconds with the LCD showing "3-2-1" before the running belt starts moving. The running belt will start moving with an initial speed of 0.5 MPH. Distance starts counting down from the pre-set target distance to 0.00. When the pre-set target distance counts down to 0.00, the computer will beep to remind you.
-
Page 20: Storage
STORAGE LIFTING UP THE TREADMILL Lift the rear end of the main frame up and align Lock Knob hole. Tighten the Lock Knob by turning it in a clockwise direction into a hole of the main frame. (See diagrams A and B.) The unit can be carefully tilted onto its transport wheels for easy moving and storage. -
Page 21: Maintenance & Troubleshooting
MAINTENANCE & TROUBLESHOOTING WARNING: To prevent electrical shock, please turn off and unplug the TROUBLESHOOTING treadmill before cleaning or performing routine maintenance. CLEANING The treadmill can be cleaned with a soft cloth and mild detergent. Do not use abrasives or solvents. Be careful not get excessive moisture on the display panel as this might cause an electrical hazard or electronics to fail. -
Page 22: Troubleshooting
TROUBLESHOOTING Problem Potential Causes Corrections Er 1 (Computer did Bad communication for Check the cables are in good not receive any upper and lower connection. signal for 30 controller. seconds.) The communicate signal Turn off the Master Power from upper or lower Switch to the OFF position, controller is bad by wait 30 seconds, then turn on... - Page 23 TROUBLESHOOTING Problem Potential Causes Corrections Check your machine to make Er 5 (Excessive Turn off the Master Power Switch sure the running belt is drive motor to the OFF position, wait 30 without any abnormal current.) seconds, then turn on the Master interference.
-
Page 24: Belt Adjustment & Lubrication
BELT ADJUSTMENT & LUBRICATION Belt Adjustment: The belt is adjusted at the factory; it may come loose during transportation LUBRICATION and/or from use. After prolong use of the treadmill, the belt will stretch out. If the belt begins shifting to the left, turn on the main power switch of treadmill and let the belt run at a speed of 1-1.5 MPH. -
Page 25: Warm Up
WARM UP Quadriceps Stretch With one hand against a wall for balance, reach behind you and pull your right foot up. Bring your heel as close to your buttocks as possible. Hold for 15 counts and repeat with left foot up. Inner Thigh Stretch Sit with the soles of your feet together with your knees pointing outward. -
Page 26: Warranty
WARRANTY Paradigm Health & Wellness, Inc. warrants to the original purchaser that this product is free from defects in material and workmanship when used for the purpose intended, under the conditions that it has been installed and operated in according to Paradigm Health & Wellness, Inc.’s Owner’s Manual. Paradigm Health &... -
Page 27: Fax Form
FAX FORM Paradigm Health & Wellness, Inc. PARTS REQUEST FAX FORM Please fax this form to (1-626-810-2166) OR YOU CAN EMAIL CUSTOMER SERVICE REQUESTS TO service@paradigmhw.com NAME: _______________________________________________________ ADDRESS: ____________________________________________________ CITY ______________ STATE ______________ ZIP ___________________ TELEPHONE: (Day) _____________________________________________ (Night) ____________________________________________ (Email Address) ____________________________________ SERIAL#: __________________________________________ MODEL#: __________________________________________...
Need help?
Do you have a question about the 1017 and is the answer not in the manual?
Questions and answers