Advertisement
Quick Links
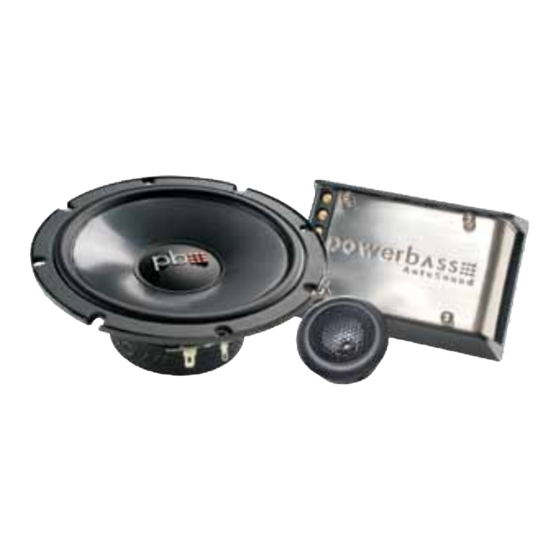
L-60Cx
L-50Cx
AUTOSOUND L SERIES COMPONENT
Application Guide
Please read through this manual to familiarize yourself with your new speakers. Should your PowerBass
Autosound speaker components ever require service, you will need to have the original dated receipt.
Advertisement

Subscribe to Our Youtube Channel
Related Manuals for PowerBass L-60Cx


Summary of Contents for PowerBass L-60Cx
- Page 1 L-60Cx L-50Cx AUTOSOUND L SERIES COMPONENT Application Guide Please read through this manual to familiarize yourself with your new speakers. Should your PowerBass Autosound speaker components ever require service, you will need to have the original dated receipt.
- Page 2 170 dB. Please observe all local sound ordinances while listening to your PowerBass Autosound system. PowerBass USA, Inc. accepts no liability for hearing loss, bodily injury, or property damage due to the...
- Page 3 POWERBASS AUTOSOUND L COMPONENT FEATURES Stamped Basket (Black Powder Finish): These rigid baskets are designed to give a precise motor alignment and the corrosion free platform that they need to perform for even the most discriminating listener. Advanced Injection Zirconium Polypropylene Z2 Cone: The high-grade cones on these speakers are injec- tion molded Zirconium coated polypropylene for additional damping.
- Page 4 Installation of PowerBass Autosound Speakers requires experience with a variety of mechanical and elec- trical procedures. This manual only provides general installation and operation instructions. If you have any reservations about your installation skills or lack of the proper tools, please contact your local PowerBass Autosound dealer for assistance.
-
Page 5: Preparing For Installation
TIPS TO GET THE MOST OUT OF YOUR POWERBASS SYSTEM Your PowerBass Autosound speakers have been meticulous engineered and designed to handle high power musical reproduction. Despite their rugged construction, it is possible to damage your speaker if they are improperly used. In general, you will hear distortion as a so-called warning before any damage occurs. -
Page 6: Installation Precautions
• These PowerBass Autosound speakers can be used above or below the mounting hole. Typically, your vehicle factory’s speaker cutouts will accommodate these new speakers without any modifications. When the speaker has been correctly installed, there should be no air leaks between the front and back of the speaker. - Page 7 COMPONENT SYSTEM INSTALLATION Component Midrange The proper installation procedure for mounting these high performance mid-range speakers is to secure the speaker to the vehicle’s speaker mounting hole. Once the speaker is in place, determine if the sup- plied grill needs to be installed. If so, place the grill in place over the speaker and screw the speaker into the mounting hole.
- Page 8 INSTALLATION PROCEDURES By mounting the tweeter separately from the woofer (or mid-range driver) the installer can choose the best location for sound quality and imaging. Three mounting types are possible allowing more versatility for the tweeter location. These are flush mount, surface mount, and angle mount. Flush Mounting (Type A) The best location for the tweeter is usually high up on the door and as far forward as possible without interference from the dashboard.
- Page 9 AUTOSOUND COMPONENT TWEETERS These high quality tweeters come complete with several mounting housings for installation versatility. Typically tweeters should be mounted on axis and as close to ear level as possible. After you have chosen the housing to be used, gently press the tweeter in the proper mounting base. Once the tweeter base is mounted, push and “twist”...
- Page 10 CROSSOVER NETWORK TERMINALS. This manual is the exclusive property of PowerBass USA, Inc. Any reproduction of this manual, or use other than its intentions is strictly prohibited without the express consent of PowerBass USA, Inc. Copyright 2009 PowerBass USA, Inc.
- Page 11 Some states do not allow limitations on the length of an implied warranty, so this limitation may not apply. No person is authorized to assume for PowerBass any other liability in connection with the sale of this product.
- Page 12 PowerBass Autosound – A division of PowerBass USA, Inc. 13936 Mountain Avenue – Chino, CA 91710 Tel. (909) 993-5399 – Fax (909) 993-5393 www.powerbassusa.com...
Need help?
Do you have a question about the L-60Cx and is the answer not in the manual?
Questions and answers