Sony HXCU-100 Operating Instructions Manual
Hd camera control unit
Hide thumbs
Also See for HXCU-100:
- Operating instructions manual (149 pages) ,
- Service manual (297 pages)
Table of Contents
Advertisement
HD Camera Control Unit
The supplied CD-ROM includes operating instructions for the HXCU-100 HD
Camera Control Unit professional disc recorder (English, French, German, Italian
and Spanish versions) in PDF format.
For more details, see "Using the CD-ROM Manual" on page 7.
Operating Instructions
Before operating the unit, please read this manual thoroughly
and retain it for future reference.
HXCU-100
© 2009 Sony Corporation
4-140-418-13 (1)
Advertisement
Table of Contents

Related Manuals for Sony HXCU-100


Summary of Contents for Sony HXCU-100
- Page 1 4-140-418-13 (1) HD Camera Control Unit The supplied CD-ROM includes operating instructions for the HXCU-100 HD Camera Control Unit professional disc recorder (English, French, German, Italian and Spanish versions) in PDF format. For more details, see “Using the CD-ROM Manual” on page 7.
- Page 2 For the HXCU-100 WARNING: THIS WARNING IS APPLICABLE FOR USA ONLY. If used in USA, use the UL LISTED power cord specified WARNING below. DO NOT USE ANY OTHER POWER CORD. To reduce the risk of fire or electric shock, do Plug Cap Parallel blade with ground pin (NEMA 5-15P not expose this apparatus to rain or moisture.
- Page 3 For the customers in Europe This product is intended for use in the following Electromagnetic Environment: E4 (controlled EMC This product has been manufactured by or on behalf of Sony environment, ex. TV studio). Corporation, 1-7-1 Konan Minato-ku Tokyo, 108-0075 Japan.
- Page 4 Pour les clients en Europe For the HKCU-FP1 Ce produit a été fabriqué par ou pour le compte de Sony Corporation, 1-7-1 Konan Minato-ku Tokyo, 108-0075 Japon. For the customers in Europe Toutes les questions relatives à la conformité des produits basées sur la législation européenne doivent être adressées à...
- Page 5 Hedelfinger Strasse 61, 70327 Stuttgart, Germany This apparatus shall not be used in a residential area. Pour les clients en Europe Fabricant : Sony Corporation, 1-7-1 Konan Minato-ku Tokyo, 108-0075 Japon Pour toute question relative à la conformité des produits dans l’UE : Sony Deutschland GmbH, Hedelfinger Strasse 61,...
-
Page 6: Table Of Contents
Table of Contents Using the CD-ROM Manual........7 Overview ..............7 Features ................7 System Configuration Example ........9 Locations and Functions of Parts ......10 Front Panel ..............10 Rear Panel ..............11 HKCU-FP1 CCU Control Panel (Optional) ....13 Status Display ............ -
Page 7: Using The Cd-Rom Manual
Operation Manuals contained on the CD-ROM. 1) An HSC-300 and HXCU-100 can be connected if both units are of version 1.10 or later. • Adobe Reader Version 6.0 or higher... - Page 8 RTS/Clear-Com intercom systems. For information on support for RTS/Clear-Com systems, contact a Sony service or sales representative. Microphone volume control The camera’s microphone volume can be controlled via the MIC REMOTE connector.
-
Page 9: System Configuration Example
Remote Control Panel a) Supplied with the HDVF-550/C550W/C730W, Part No.: A-7612-405-E An HSC-300 and HXCU-100 can be connected if both units are of version 1.10 or later. c) 600 m maximum and 50 m minimum when using Fujikura 8.5-mm dia. -
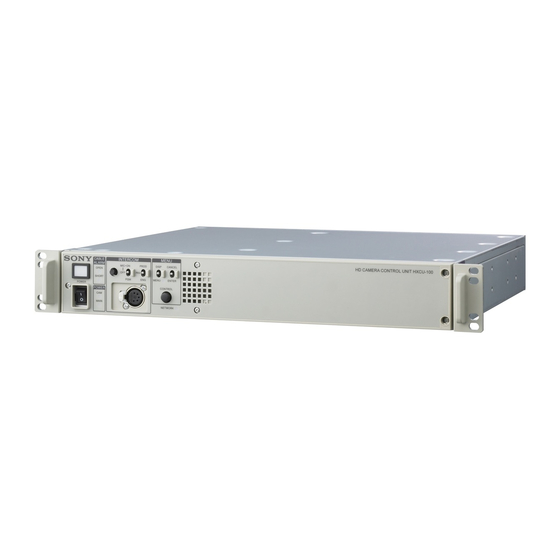
Page 10: Locations And Functions Of Parts
Locations and Functions of Parts Front Panel a Tally light c INTERCOM audio input/output and control block Turns on red to indicate a red tally signal is being received (such as when the picture from the camera connected to the INTERCOM (intercom adjustment) knob CCU is being used). -
Page 11: Rear Panel
d MENU control block e POWER switch Switches the power for the entire system on and off, including the CCU, camera, and the RCP-1000-series Remote Control DISP/MENU (display/menu) lever and indicator Panel connected to the REMOTE connector on the rear panel. CANCEL/ENTER lever Pressing the “?”... - Page 12 g SYNC (sync signal output) connector q Pr/R/R-Y, Y/G/Y, Pb/B/B-Y (component signals) Outputs a sync signal for connection to the sync signal input connectors (BNC type) connector of a waveform monitor or picture monitor. Outputs the HD component signals, SD component signals, HD RGB signals, or SD RGB signals from the corresponding h REMOTE connector (8-pin) connectors.
-
Page 13: Hkcu-Fp1 Ccu Control Panel (Optional)
HKCU-FP1 CCU Control Panel (Optional) The switches and knobs not described below are identical to those on the front panel. See “Front Panel” on page 10. a b c d Optional panel controls a PANEL ACTIVE button • UP/DOWN lever Activates the optional HKCU-FP1 CCU Control Panel to When the ECS button is lit: Adjusts the clear scan frequency. - Page 14 j White balance adjustment controls m IRIS/MASTER BLACK adjustment controls ATW (auto tracing white balance) button MASTER BLACK (master black adjustment) knob WHITE (white balance manual adjustment) knobs EXT (lens extender) indicator AUTO (auto iris) button IRIS/MB ACTIVE (iris/master black active) indicator •...
-
Page 15: Status Display
Camera settings Status Display Page 1 The CCU system status can be monitored using a picture 1/2 000 O FF monitor connected to the PIX output. For information on monitoring and changing settings, see “Setup Menu” on page 18. Displaying the Status Screen The status screen is controlled using the knob and levers in ND :1 F: 4.7 E X the MENU control block on the front panel. - Page 16 System status TRIAX Step: Triax cable compensation step (internal circuit step display) * S y s t e m S t a t u s * 1 / 12 Fan Power: CCU power supply fan status Timer: Elapsed time since power-on H X C - 1 0 0 1 0 8 0/ 5 9 .
- Page 17 CCU DPR board diagnostics Connection Speed: Connection speed setting Duplex Mode: Communication method setting *DP R Dia g* 10 /12 MDI/MDIX: Communications port wiring configuration selection HD CB :B AR 16 :9( 100 %) Link Status: Network connection status SD CB :S MPT E SEQ O N:N PN PLD S tat us: OK Page 2...
-
Page 18: Setup Menu
ROM Version Information Setup Menu * R O M V e r s i o n * 1 2 / 12 C A M E R A H X C - 1 0 0 1 . 0 0 0 9 . 0 1 . 01 C C U H X C U - 1 0 0 The CCU system and peripheral settings can be modified... - Page 19 To change the displayed page To enter a character string Some menu items require a character string input. Turn the CONTROL knob to move the , arrow to the Moving the , arrow to an item with a character string input page number, then press the CONTROL knob.
-
Page 20: Menu List
Page name Item Settings Menu List Page No. <MULTI FREQUENCY Note FORMAT> Operating frequency selection The following conventions are used in the menu list table. 1.001, 1.000 Settings column values (e.g. ON, OFF, 0): Default settings Note ENTER to execute: Press the CONTROL knob or move the Note CANCEL/ENTER lever to the ENTER position to execute. - Page 21 Page name Item Settings Page name Item Settings Page No. Page No. <OUTPUT SLOT NO <SD ASPECT> SD ASPECT SQUEEZE, EDGE CROP, FORMAT> LETTER BOX SD output aspect 1-1&2 When CAMERA FORMAT selection is 1080/59.94i: SDI OUTPUT 1080/59.94i, 525/59.94i 1/2 connector SD LB SEL 16:9, 15:9, 14:9, 13:9 output format...
- Page 22 Page name Item Settings Page name Item Settings Page No. Page No. <RETURN RET1 When CAMERA FORMAT <RETURN RET4 When CAMERA FORMAT FORMAT> is 1080/59.94i: FORMAT> is 1080/59.94i: Return 1 signal Return 4 signal 1080/59.94i, 525/59.94i, 1080/59.94i, 525/59.94i, format, aspect, format, aspect, NTSC NTSC...
- Page 23 CCU CONFIGURATION menu Page name Item Settings Page No. Page name Item Settings <MONITOR 2> LEVEL GATE ---, 1&2, 1, 2, OFF Page No. ---: Displayed when <COLOR BAR> HD BAR camera not connected, HD output color bar settings video output not set to CAMERA, or video BAR 16:9 (100%), BAR output is set to CAMERA...
- Page 24 Page name Item Settings Page name Item Settings Page No. Page No. <MIC/AUDIO> CAM MIC GAIN (REMOTE), (LOCAL) <FRONT CCU front panel (MIC ON), (OFF), (PGM INCOM> MIC/PGM switch (REMOTE): MIC position (read only) REMOTE source CCU front panel (PRIVATE), (PROD), (LOCAL): Not MIC INTERCOM switch (ENG)
- Page 25 Page name Item Settings Page name Item Settings Page No. Page No. <VIDEO SETUP ON, OFF, -- <MENU RESUME ON, OFF SETUP> SETTINGS> --: Displayed when In menu mode, format is PAL (read only) resume display of previously Q FILTER NARROW, WIDE, -- displayed page Q FILTER...
- Page 26 Page name Item Settings Page name Item Settings Page No. Page No. <DISPLAY> MESSAGE ALL, WARNING, OFF <FRONT PANEL ASSIGNABLE/CUSTOM 1> ALL: Displays all SWITCH1 NOT ASSIGN, GAMMA messages OFF, HD DTL OFF, SD Camera HKCU-FP1 DTL OFF, BLK GAMMA, messages and WARNING: Displays Displayed only...
- Page 27 Page name Item Settings Page name Item Settings Page No. Page No. <FRONT PANEL VOLUME NOT ASSIGN, HD <FRONT PANEL VOLUME REL COEFF 1> GAMMA, SD GAMMA, HD 2> HKCU-FP1 IRIS 1/1, 1/2, 1/4 DTL LEVEL, SD DTL CCU Control Relative 1/1: Variable range LEVEL, BLK GAMMA...
- Page 28 NETWORK SETTINGS menu Page name Item Settings Page No. <TCP/IP IP ADDRESS 0.0.0.0 to 255.255.255.255 SETTING> SUBNET MASK 0.0.0.0 to 255.255.255.255 DEFAULT 0.0.0.0 to 255.255.255.255 GATEWAY ENTER to execute A “SET OK?” message is displayed. Press ENTER again to confirm the change.
-
Page 29: Appendix
• A certain time is required for the video signal transmitted Appendix between the camera and the CCU to stabilize after power is applied. This is not a malfunction. Triax transmission distances The maximum and minimum transmission distances allowed Notes on Use for triax cable connections are shown in the table below. -
Page 30: License Declarations
HD SDI: SMTPE 292M, 0.8 Vp-p, 75 Ω, 1.485/1.4835 Gbps bit rate Specifications SD SDI: SMPTE 259M, 0.8 Vp-p, 75 Ω, 270 Mbps bit rate HD SDI/SD SDI selectable HXCU-100 Pr/R/R-Y, Y/G/Y, BNC type (3) General Pb/B/B-Y • HD component video... - Page 31 XLR 3-pin, male (2), 0/–20 dBu Always verify that the unit is operating properly before use. WF REMOTE D-sub 15-pin, female (1) SONY WILL NOT BE LIABLE FOR DAMAGES OF ANY (JAE DA-C1-J10 series recommended) KIND INCLUDING, BUT NOT LIMITED TO, WF MODE...
- Page 32 Sony Corporation Printed in Japan...
Need help?
Do you have a question about the HXCU-100 and is the answer not in the manual?
Questions and answers