Table of Contents
Advertisement
Quick Links
NOVEMBER 2000
SW625A-R2
SW626A-R2
Doc. No. 590-033 Rev. B
Customer Support Information:
FREE tech support 24 hours a day, 7 days a week: Call 724-746-5500 or fax 724-746-0746.
Mailing address: Black Box Corporation, 1000 Park Dr., Lawrence, PA 15055-1018
World-Wide Web: www.blackbox.com • E-mail: info@blackbox.com
© Copyright 2000. Black Box Corporation. All rights reserved.
Advertisement
Table of Contents

Related Manuals for Blackbox ServSwitch SW625A-R2


Summary of Contents for Blackbox ServSwitch SW625A-R2
- Page 1 FREE tech support 24 hours a day, 7 days a week: Call 724-746-5500 or fax 724-746-0746. Mailing address: Black Box Corporation, 1000 Park Dr., Lawrence, PA 15055-1018 World-Wide Web: www.blackbox.com • E-mail: info@blackbox.com © Copyright 2000. Black Box Corporation. All rights reserved.
- Page 2 Order toll-free in the U.S.: Call 877-877-BBOX (outside U.S. call 724-746-5500) SUPPORT FREE technical support 24 hours a day, 7 days a week: Call 724-746-5500 or fax 724-746-0746 INFORMATION Mailing address: Black Box Corporation, 1000 Park Drive, Lawrence, PA 15055-1018 Web site: www.blackbox.com • E-mail: info@blackbox.com...
- Page 3 THE SERVSWITCH™ FAMILY Welcome to the ServSwitch Family! Thank you for purchasing a BLACK BOX ® ServSwitch ™ Brand KVM switch! We appreciate your business, and we think you’ll appreciate the many ways that your new ServSwitch keyboard/video/mouse switch will save you money, time, and effort.
- Page 4 PERSONAL SERVSWITCH™ TRADEMARKS USED IN THIS MANUAL BLACK BOX and the logo are registered trademarks, and ServSwitch and Personal ServSwitch are trademarks, of Black Box Corporation. Apple and Macintosh are registered trademarks of Apple Computer, Inc. IBM, PC/AT, PS/2, and RS/6000 are registered trademarks of International Business Machines Corporation.
- Page 5 FCC/IC STATEMENTS FEDERAL COMMUNICATIONS COMMISSION AND INDUSTRY CANADA RADIO-FREQUENCY INTERFERENCE STATEMENTS Class B Digital Device. This equipment has been tested and found to comply with the limits for a Class B computing device pursuant to Part 15 of the FCC Rules. These limits are designed to provide reasonable protection against harmful interference in a residential installation.
- Page 6 PERSONAL SERVSWITCH™ NORMAS OFICIALES MEXICANAS (NOM) ELECTRICAL SAFETY STATEMENT INSTRUCCIONES DE SEGURIDAD 1. Todas las instrucciones de seguridad y operación deberán ser leídas antes de que el aparato eléctrico sea operado. 2. Las instrucciones de seguridad y operación deberán ser guardadas para referencia futura.
- Page 7 NOM STATEMENT 12. Precaución debe ser tomada de tal manera que la tierra fisica y la polarización del equipo no sea eliminada. 13. Los cables de la fuente de poder deben ser guiados de tal manera que no sean pisados ni pellizcados por objetos colocados sobre o contra ellos, poniendo particular atención a los contactos y receptáculos donde salen del aparato.
-
Page 8: Table Of Contents
PERSONAL SERVSWITCH™ Contents Chapter Page 1. Specifications ..................... 7 2. Introduction ....................9 3. Installation ....................10 3.1 Basic Installation ................10 3.1.1 Before You Install ..............10 3.1.2 Connecting Your Peripherals ..........10 3.1.3 Connecting Your Computers ..........11 3.2 Cascading .................. -
Page 9: Specifications
CHAPTER 1: Specifications 1. Specifications Compliance — FCC Class B, IC Class/classe B Hardware Required — VGA/SVGA monitor that supports your computers’ highest video standard Compliance — Safety: UL 1950, CSA 22.2 No. 950, EN60950; EMI/RFI: FCC Class B, IC Class/classe B, EN55022, EN50082 Standards —... - Page 10 PERSONAL SERVSWITCH™ Connectors (continued) — For each computer port (SW625A-R2 has 2, SW626A-R2 has 4): (2) 6-pin mini-DIN female: (1) To keyboard ports, (1) To PS/2 mouse ports; (1) HD15 female: To video cards; (1) DB9 female: To RS-232 serial mouse ports Temperature Tolerance —...
-
Page 11: Introduction
CHAPTER 2: Introduction 2. Introduction The Personal ServSwitch allows you to control multiple PCs, easily and affordably, with just one keyboard, monitor and mouse. There is no software to install and no boards to configure, so installation is simple. The Switch works with IBM ®... -
Page 12: Installation
PERSONAL SERVSWITCH™ 3. Installation 3.1 Basic Installation 3.1.1 B EFORE NSTALL You will need the appropriate kits of straight-through-pinned cables in order to connect your PCs to the Personal ServSwitch, one kit for each PC. These kits consist of 6-pin mini-DIN male-to-male cables for keyboard connections, HD15 male-to-male for video connections, and either a second 6-pin mini-DIN male-to- male for PS/2 type mouse connections (our product code EHN405-PS2) or a DB9 male-to-female for serial mouse connections (our product code EHN405-AT). -
Page 13: Connecting Your Computers
CHAPTER 3: Installation 3.1.3 C ONNECTING OMPUTERS Take these steps to attach the computers to your Personal ServSwitch, referring to Figure 3-2: PS/2 Keyboard Cable Mouse Cable VGA Video Cable . 7 A Figure 3-2. Attaching the computers. 1. Power down all computers that will be part of your Personal ServSwitch system. 2. -
Page 14: Cascading
PERSONAL SERVSWITCH™ Lastly, plug the free end of each cable into the matching port on your computer. (You’ll need the FA212 keyboard adapter from the EHN405-AT cable kit for any computer that has a 5-pin DIN keyboard port.) Tighten all thumbscrews. - Page 15 CHAPTER 3: Installation At this point, you can either connect PCs to the ports on the expansion units, or expand your system further by adding a second tier of expansion units, as shown in Figure 3-4. (The maximum size of a cascaded system is one SW626A-R2 base unit, four first-tier SW626A-R2 expansion units, sixteen second-tier SW626A-R2 expansion units, and 64 PCs.) Expansion unit...
- Page 16 PERSONAL SERVSWITCH™ 0 . 7 Figure 3-5. Cascade: Cable interconnection. 3. For cascaded operation, you should use the optional 6-VDC power supply— our product code PS626 for 110-VAC operation or PS626E for 220-VAC operation—with any Switch that does not have at least one attached PC. (You should not need this power supply with any Switch that can get power from an attached PC.) Plug the transformer into the power socket on the Switch’s rear panel, as shown in Figure 3-6.
-
Page 17: Operation
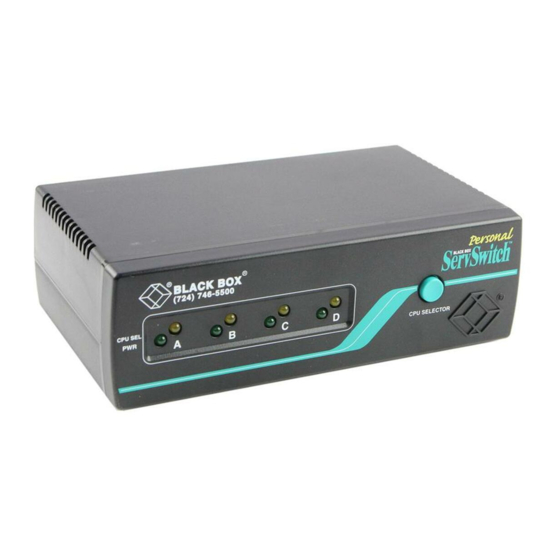
CHAPTER 4: Operation 4. Operation You can turn on your PCs one at a time or all at once. The green LEDs over each port letter on the Personal ServSwitch will light, indicating that the attached computer is powered on. After power-up, the Switch will light the amber LED of the currently selected port. -
Page 18: Scanning Pcs
PERSONAL SERVSWITCH™ 4.2 Scanning PCs The Personal ServSwitch’s scanning feature allows you to automatically monitor, or scan, each PC in your Switch system. If you use the keyboard during scanning, the scan will pause until you finish, then resume with the next PC. (You can set the Switch to pause scanning on mouse activity as well if you want.) The scan “dwell time”... -
Page 19: Troubleshooting
CHAPTER 5: Troubleshooting 5. Troubleshooting 5.1 Problems That Might Occur 5.1.1 W ITH THE TSELF Green channel LED not lit Verify that the computer is powered on. Check the cabling between your computer and the Personal ServSwitch. Verify that a keyboard works when plugged directly into your PC. -
Page 20: With The Keyboard
PERSONAL SERVSWITCH™ 5.1.4 W ITH THE EYBOARD Keyboard is inoperable on one or more channels Verify that the cables from the PC to the Personal ServSwitch are connected properly. Verify that the keyboard is plugged into the keyboard port in the User Console section on the rear panel of the single or base unit. -
Page 21: Calling Black Box
CHAPTER 5: Troubleshooting 5.2 Calling Black Box If you determine that your Personal ServSwitch is malfunctioning, do not attempt to alter or repair the unit. It contains no user-serviceable parts. Contact Black Box Technical Support at 724-746-5500. Before you do, make a record of the history of the problem. We will be able to provide more efficient and accurate assistance if you have a complete description, including: •... -
Page 22: Appendix: Keyboard Commands
PERSONAL SERVSWITCH™ Appendix: Keyboard Commands These are all of the keyboard commands that you can currently use to operate the Personal ServSwitch. Key Sequence Action Selects the PC on the single or base unit’s port X. [CTRL][CTRL] X [ENTER] Selects the expansion unit on the base unit’s [CTRL][CTRL] XY [ENTER] port X and the PC on that expansion unit’s port Y. - Page 23 NOTES...
- Page 24 NOTES...
Need help?
Do you have a question about the ServSwitch SW625A-R2 and is the answer not in the manual?
Questions and answers