Table of Contents
Advertisement
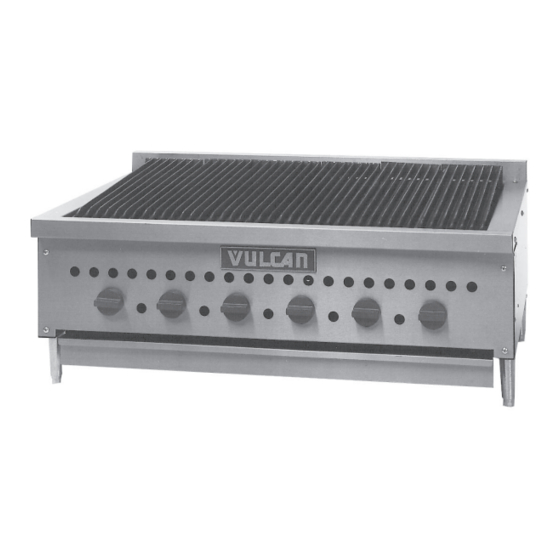
VCCB COUNTERTOP CHAR-BROILER
MODEL NO.
VCCB25
VCCB30
VCCB36
VCCB47
VCCB60
VCCB72
VCCB84
V U L C A N - H A R T C O M P A N Y , P . O . B O X 6 9 6 , L O U I S V I L L E , K Y 4 0 2 0 1 - 0 6 9 6 , TEL. (502) 7 7 8 - 2 7 9 1
FORM 30952 (1-96)
ML-114540
ML-114541
ML-114542
ML-114543
ML-114544
ML-114545
ML-114546
SERVICE MANUAL
MODEL VCCB36
Advertisement
Table of Contents

Related Manuals for Vulcan-Hart VCCB25


Summary of Contents for Vulcan-Hart VCCB25
- Page 1 SERVICE MANUAL VCCB COUNTERTOP CHAR-BROILER MODEL NO. VCCB25 ML-114540 VCCB30 ML-114541 VCCB36 ML-114542 VCCB47 ML-114543 VCCB60 ML-114544 VCCB72 ML-114545 VCCB84 ML-114546 MODEL VCCB36 V U L C A N - H A R T C O M P A N Y , P . O . B O X 6 9 6 , L O U I S V I L L E , K Y 4 0 2 0 1 - 0 6 9 6 , TEL. (502) 7 7 8 - 2 7 9 1...
-
Page 2: Important Safety Information
IMPORTANT FOR YOUR SAFETY THIS MANUAL HAS BEEN PREPARED FOR PERSONNEL QUALIFIED TO INSTALL GAS EQUIPMENT, WHO SHOULD PERFORM THE INITIAL FIELD START-UP AND ADJUSTMENTS OF THE EQUIPMENT COVERED BY THIS MANUAL. POST IN A PROMINENT LOCATION THE INSTRUCTIONS TO BE FOLLOWED IN THE EVENT THE SMELL OF GAS IS DETECTED. -
Page 3: Table Of Contents
19 CODES AND STANDARDS Vulcan-Hart Charbroilers are to be installed in accordance with state and local codes, or in the absence of local codes, with the National Fuel Gas Code, ANSI-Z223.1 (latest edition), available from the American Gas Association, Inc., 1515 Wilson Blvd., Arlington, Va. 22209 and with ANSI-NFPA Standard #96 (latest edition), Vapor Removal From Cooking Equipment, available from the National Fire Protection Association, Batterymarch Park, Quincy, MA 02269. -
Page 4: General Appliance Information
GENERAL APPLIANCE INFORMATION VCCB25 is a 25" wide Char-Broiler with 4 burners rated at 14,500 BTU's ea. VCCB30 is a 30" wide Char-Broiler with 5 burners rated at 14,500 BTU's ea. VCCE36 is a 36" wide Char-Broiler with 6 burners rated at 14,500 BTU's ea. -
Page 5: Section L Service Checks And Adjustments
SECTION I SERVICE CHECKS AND ADJUSTMENTS WARNING: SHUT OFF GAS BEFORE SERVICING VENTILATION CHECKS Insure that adequate ventilation has been provided in accordance to all codes as stated on page 3 of this manual. The vent for this appliance should be checked for restrictions every 6 months. GAS SUPPLY CHECKS If the gas supply piping is to be tested at a test pressure in excess of 1/2 psig(3.45Kpa), the appliance and its individual shut-off valve must be disconnected from the supply line. - Page 6 BURNER NOZZLE ORIFICE CHECK Perform this procedure only after the pilot has been checked and the pilot valve has been adjusted. 1. Follow steps 1-2 under Removal of Front Cover. 2. Follow steps 1-2 under Removal of Top Grates. 3. Follow steps 1-5 under Removal of Radiants. 4.
- Page 7 4. With a flat blade screwdriver, turn the pilot adjustment screw counterclockwise to increase gas flow and clockwise to decrease gas flow. (Figs. 2) NOTE: Steps 2 and 3 may be optional as adjustment can be made using the access holes provided in the front control panel cover.
- Page 8 BURNER VENTURI AIR SHUTTER ADJUSTMENT: 1. Follow steps 1-2 under Removal of Front Cover. 2. Using an offset flat blade screwdriver loosen the air shutter adjustment screw. (Fig. 3) 3. Turn the burner ON valve on. 4. With a pair of pliers rotate the air shutter so that a blue flame without any yellow tipping is seen across the burner.
-
Page 9: Section Ll Removal Of Service Parts
SECTION II REMOVAL OF SERVICE PARTS WARNING: SHUT OFF GAS BEFORE SERVICING. REMOVAL OF FRONT COVER 1. With a small blade screwdriver, loosen the mounting screw in each top burner knob. (Fig. 4) Fig. 4 2. Pull the knobs from the appliance. 3. - Page 10 4. Remove the cover. 5. Reinstall the covering by reversing steps 1-4. REMOVAL OF TOP GRATES: 1. Allow grates to cool. 2. Lift the front of the grate up then remove the back end of the grate from the burner box ledge. (Fig.
- Page 11 REMOVAL OF RADIANTS: 1. Allow top sections to cool. 2. Follow steps 1-2 under Removal of Top Grates. 3. Slide the radiant towards the rear of the broiler to clear the gutter insert channel. 4. Lift the front end of the radiant up. (Fig. 7) Fig.
- Page 12 REMOVAL OF THE DEFLECTOR FROM THE BURNER DEFLECTOR ASSEMBLY: 1. Follow steps 1-5 under Removal of the Deflector/Burner assembly. 2. With a pair of pliers, straighten the attachment rod at the end towards the burner venturi, until the rod will slip freely from the assembly. (Fig. 8) Fig.
- Page 13 REMOVAL OF RADIANT BURNER SUPPORTS: 1. Follow steps 1-5 under Removal of Burner/Deflector Assembly. 2. With a large flat blade screwdriver, remove (2) 1/4-20x1/2"L screws (per burner sections) securing the support to the back wall of the burner compartment. (Fig. 9) Fig.
- Page 14 REMOVAL OF BURNER VALVE 1. Follow steps 1-5 under Removal of Burner/Deflector Assembly. 2. With a 6" adjustable wrench follow steps for the Removal of Double Pilot Adapter. 3. With a pipe wrench, disconnect the burner valve from the manifold pipe. (Fig. 11) HOOD VALVE Fig.
- Page 15 REMOVAL OF DOUBLE PILOT ADAPTER 1. Follow steps 1-3 under Removal of Pilot Adjustment Valve. 2. With a 6" adjustable wrench remove the adapter valve. (Fig. 12) 3. To reinstall adapter reverse steps 1-2. PILOT TUBE COMPRESSION NUT PILOT ADJUSTMENT VALVE ADAPTER VALVE Fig.
- Page 16 REMOVAL OF BURNER/DEFLECTOR ASSEMBLY 1. Follow steps 1-2 under Removal of Top Grates. 2. Follow steps 2-5 under Removal of Radiant. 3. Lift the back end of the burner assembly up off of the radiant/burner support. 4. Twist the burner/deflector assembly to the right and lower the back down to clear the burner/radiant support foot.
- Page 17 REMOVAL OF BURNER VALVE ORIFICE HOOD: 1. Shut off main gas valve. 2. Follow steps 1-5 under Removal of Burner/Deflector Assembly. 3. With a 1/2" deep throat socket remove the hood. (Fig. 15) HOOD Fig. 15 4. Install new hood by reversing steps 1-3. Be sure to use pipe dope on threaded parts and retest using a soap and water solution for gas leaks.
- Page 18 REMOVAL OF GAS REGULATOR: 1. Shut off main gas supply valve. 2. With a pipe wrench disconnect the main gas line. 3. With a pipe wrench disconnect the regulator from the appliance inlet pipe. 4. Install the new regulator by reversing steps 1-3. NOTE: The regulator must be installed in the upper right position with the arrow pointing towards the appliance.
-
Page 19: Section Lll Troubleshooting
SECTION lll TROUBLESHOOTING Uneven heating, sides burning A) Temperature too low. B) Improper operation of broiler. C) Fluctuating gas pressure. Too much top heat A) Temperature too high. B) Faulty ventilation. C) Excessive heat input. D) Overrated (pressure too high or orifice too large. Uneven heat side to side A) Appliance not level side to side.
Need help?
Do you have a question about the VCCB25 and is the answer not in the manual?
Questions and answers