
Related Manuals for Spirit CT850


Summary of Contents for Spirit CT850
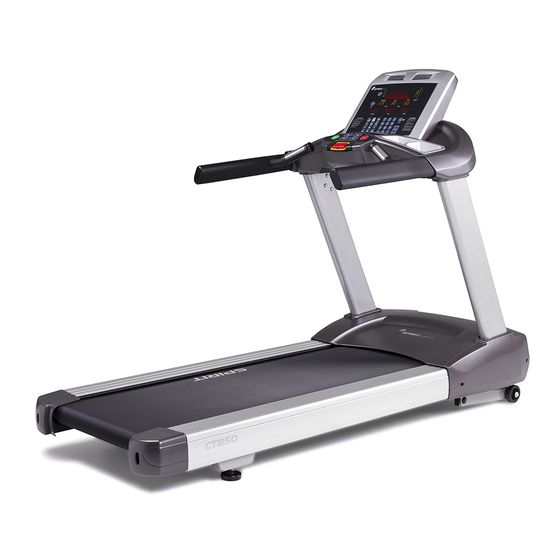
- Page 1 Owner’s Manual Model No. 1614850 CT850 - Assembly - Operation - Adjustments - Parts - Warranty CAUTION: Read and Understand this Manual before Operating unit Retain For Future Reference...
-
Page 2: Table Of Contents
Table of Contents Product Registration……………………………………………………….. 2 Important Safety Instructions……………………………………………… 4 Important Electrical Information……………………………….……………5 Hardware list …………………….……………………………………….…..7 Assembly instructions………………………………………….…………….8 Operation of Your New Treadmill……………………………………..…. 11 Programmable Features………………………………………………..….14 Fitness Test ……………………………………………………………..….17 Target Heart Rate……………………………………………………….… 20 Using a Heart Rate Transmitter…………………………………….……. 21 Heart Rate Control Operation…………………………………..……...… 22 Parts list and diagram 1614850 ..……………………………………..…... -
Page 3: Product Registration
CONGRATULATIONS ON YOUR NEW TREADMILL Thank you for your purchase of this quality treadmill from Dyaco Canada Inc. Your new treadmill was manufactured by one of the leading fitness manufacturers in the world and is backed by one of the most comprehensive warranties available. Through your dealer, Dyaco Canada Inc. -
Page 4: Important Safety Information
IMPORTANT SAFETY INFORMATION THIS UNIT IS INTENDED FOR HOUSEHOLD USE ONLY READ ALL INSTRUCTIONS BEFORE USING THIS TREADMILL CAUTION: Before starting any exercise program, it is recommended that you consult your physician. WARNING: Connect this unit to a properly grounded outlet only. DANGER: To reduce the risk of electric shock, always unplug the treadmill from the electrical outlet immediately after using and before cleaning. -
Page 5: Important Safety Instructions
Important Safety Instructions WARNING - Read all instructions before using this appliance. DANGER - To reduce the risk of electric shock disconnect your SPIRIT treadmill from the electrical outlet prior to cleaning and/or service work. WARNING - To reduce the risk of burns, fire, electric shock, or injury to persons, install the treadmill on a flat level surface with access to a 120-volt AC, 15-amp grounded outlet. -
Page 6: Important Electrical Information
Important Electrical Information WARNING! NEVER use a RCD - Residual Current Device (U.S. ver.= GFCI) - wall outlet with this treadmill. As with any appliance with a large motor, the RCD/GFCI will trip often. Route the power mains cord away from any moving part of the treadmill including the elevation mechanism and transport wheels. - Page 7 NEVER mount or dismount the treadmill while the belt is moving. SPIRIT treadmills start with at a very low speed and it is unnecessary to straddle the belt during start up. Simply standing on the belt during slow acceleration is proper after you have learned to operate the unit.
-
Page 8: Hardware List
Assembly Pack Check List Step1 #117 - 3/8" x16.5 x2.0T x4H #116 - 3 /8" x 35 x 2T ψ Split Washer (6 pcs) Flat Washer (6 pcs) #144 - 3/8”-16 x 3” #134 - M5 x 12mm Button Head Socket Bolt (6 pcs) Phillips Head Screw (4 pcs) Step2 #134 - M5 x 12mm... -
Page 9: Assembly Instructions
Assembly Instructions Step 1: Uprights 1. The right upright (34) is preinstalled with the lower computer cable A (42). To install uprights on the frame base, special care must be taken not to pinch the computer cable between the upright and frame base. Use first 3/8"-16 × 3"_Button Head Socket Bolt (144) together with 3/8'' ×... - Page 10 Step 2: Installing the console Connect upper computer cable B (41), hand pulse assembly C (37), D (38), touch • pad/backlit cable E (43) and ground wire F (35) all connect to the board on back of the console (28). Use four M5 ×...
- Page 11 Step 3: Installing console onto uprights 1. Use six M8 × 1.25 × 12L_Socket Head Cap Bolts (146) to secure the console on interface mounting bracket on uprights (3, 4). 2. Connect upper computer cable F (41) and lower computer cable A (42). 3.
-
Page 12: Operation Of Your New Treadmill
Operation of Your Treadmill Getting familiar with the control panel Console ■ Getting Started: Power the treadmill on by plugging it into an appropriate wall outlet, then turn on the power switch located at the front of the treadmill below the motor hood. Ensure that the safety key is installed, as the treadmill will not power on without it. -
Page 13: Treadmill Features
Quick-Start Operation: • Press and release the START key to begin belt movement at 0.5 mph/0.8 kph, then adjust to the desired speed using the FAST keys. Reduce the treadbelt speed using the SLOW key to the desired speed. • •... -
Page 14: Heart Rate Feature
0.4 km Track: The 0.4km track (1/4 mile) will be displayed around the dot matrix window. The flashing dot indicates your progress. In the center of the track there is a lap counter for reference. Heart Rate Feature: The Pulse (Heart Rate) window will display your current heart rate in beats per minute during the workout. -
Page 15: Programmable Features
Programmable Features The New TREADMILL offers twelve preset programs, HILL, FAT BURN, CARDIO, CALORIE, INTERVAL, STRENGTH, 5K RUN, 10K RUN, HR 1, HR 2, CUSTOM, a Gerkin protocol based Fitness Test and one Manual program. Preset Features: To choose and start preset program: •... - Page 16 Preset programs speed and incline settings The preset program speed and incline levels are shown in the chart below. The Speed numbers shown in the chart indicate a percentage of the top speed of the program. For instance, the first Speed setting for P1 (Program 1, HILL) shows the number 20.
-
Page 17: Custom Program
Custom Program: • Selecting the Custom program button, the message window shows ”PRESS ENTER TO MODIFY OR START TO BEGIN WORKOUT”. You can either press “ENTER” button or press “START” button to begin the workout. When you press “ENTER” button, dot matrix window will show U1 and flashing. -
Page 18: Fitness Test
5 Km and 10Km Run: This program automatically sets a 5K or 10K (5 or 10 kilometer) distance as your goal. The track display will show one loop that is the equivalent of 5 or 10 kilometers and the Distance window will also show 5K or 10K to start. - Page 19 Before the test: • Make sure you are in good health; check with your physician before performing any exercise if you are over the age of 35 or persons with pre-existing health conditions. • Make sure you have warmed up and stretched before taking the test. •...
- Page 20 What your score means: VO2max for male and fitted female 18-25 26-35 36-45 46-55 56-65 years years years years years years excellent >60 >56 >51 >45 >41 >37 good 52-60 49-56 43-51 39-45 36-41 33-37 above average 47-51 43-48 39-42 35-38 32-35 29-32...
-
Page 21: Target Heart Rate
Rate on a schedule approved by your physician. Consult your physician before participating in any exercise program. With all SPIRIT Heart Rate Control treadmills, you may use the heart rate monitor feature without using the Heart Rate Control program. This function can be used during any of the different programs. -
Page 22: Using A Heart Rate Transmitter
Using a Heart Rate Transmitter (Optional) How to wear your wireless chest strap transmitter: 1. Attach the transmitter to the elastic strap using the locking parts. 2. Adjust the strap as tightly as possible as long as the strap is not too tight to remain comfortable. 3. -
Page 23: Heart Rate Control Operation
Heart Rate Control How the Heart Rate Control Program Works: Heart Rate Control (HRC) uses your treadmill's incline system to adjust your heart rate. Increases and decreases in elevation affect heart rate much more efficiently than changes in speed alone. The HRC program automatically changes elevation gradually to achieve the programmed target heart rate. -
Page 24: Parts List And Diagram 1614850
EXPLODED VIEW DIAGRAM CUSTOMER SERVICE 1-888-707-1880 EMAIL: customerservice@dyaco.ca Dyaco Canada Inc. 2014... - Page 25 PARTS LIST Part Description 485001 Main Frame 485002 Incline Bracket 485003 Interface Mounting Bracket, Left 485004 Interface Mounting Bracket, Right 485005 Console Support 485006 Deck Cross Brace A 485007 Deck Cross Brace B 485008 Belt Guide Right 485009 Belt Guide Left 485010 Front Roller Assembly W/Pulley 485011 Rear Roller Assembly...
- Page 26 Part Description 485044 Toggle switch Key Board 485045 AC Motor 485046 Inverter 485048 Filter 485050 Motor Compartment Fan 485051 O ring for eliminate magnet 485052 A.C. Input Module 485053 200m/m_Computer Cable 485054 450m/m_Connecting Wire, Black 485055 450m/m_Motor Compartment Fan Wire, Black 485056 450m/m_Motor Compartment Fan wire, White 485057 150m/m_Connecing Wire, Inverter Power Cord (White) 485058 150m/m_Connecing Wire, Inverter Power Cord (Black)
- Page 27 Part Description 4850118 3/8" × 7T_Nyloc Nut 4850119 M8 × 1.25 × 40L_Socket Head Cap Bolt 4850120 Ø8 × 1.5T_Split Washer 4850121 Ø8 × 16 × 1T_Flat Washer 4850122 M8 × 1.25 × 90LSocket Head Cap Bolt 4850123 M8 × 1.25 × 55L_Hex Head Bolt 4850124 M8 ×...
-
Page 28: General Maintenance
General Maintenance Belt and Bed - Your treadmill uses a very high-efficient low-friction bed. Performance is maximized when the bed is kept as clean as possible. Use a soft, damp cloth or paper towel to wipe the edge of the belt and the area between the belt edge and frame. Also reach as far as practical directly under the belt edge. -
Page 29: Treadbelt Tracking Adjustment
Adjustments will become less of a maintenance concern as the belt is used. Proper belt tracking is an owner responsibility common with all treadmills. ATTENTION: DAMAGE TO THE RUNNING BELT RESULTING FROM IMPROPER TRACKING / TENSION ADJUSTMENTS IS NOT COVERED UNDER THE SPIRIT WARRANTY. CUSTOMER SERVICE 1-888-707-1880 EMAIL: customerservice@dyaco.ca... -
Page 30: Service Checklist - Diagnosis Guide
If an extension cord is required it should be as short as possible and heavy duty 16 gauge minimum. Low household voltage. Contact an electrician or your SPIRIT dealer. A minimum of 220 volt AC current, 50 hz is required. - Page 31 Calibration procedure: 1) Remove the safety key 2) Press and hold down the INCLINE and SPEED buttons with one hand and replace the safety key with the other. Continue to hold both keys until the window displays “FACTORY SETTING”, then press the ENTER key. 3) You will now be able to set the display to show Metric or English settings.
- Page 32 Maintenance menu: 1) Remove the safety key and press SPEED and ENTER keys at the same time then return the safety key until “ENGINEERING MODE” is displayed, press ENTER again. 2) You can now scroll through the menu using the UP /DOWN or FAST/SLOW keys. Use the ENTER key to run.
-
Page 33: Manufacturer's Limited Warranty
Manufacturer’s Limited Warranty Dyaco Canada Inc. warrants all its Spirit treadmill for a period of time listed below, from the date of retail sale, as determined by a sales receipt. Dyaco Canada Inc.’s responsibilities include providing new or remanufactured parts, at Dyaco Canada Inc.’s option, and technical support to our independent dealers and servicing organizations.
Need help?
Do you have a question about the CT850 and is the answer not in the manual?
Questions and answers