
Subscribe to Our Youtube Channel
Related Manuals for Spirit CT850+


Summary of Contents for Spirit CT850+
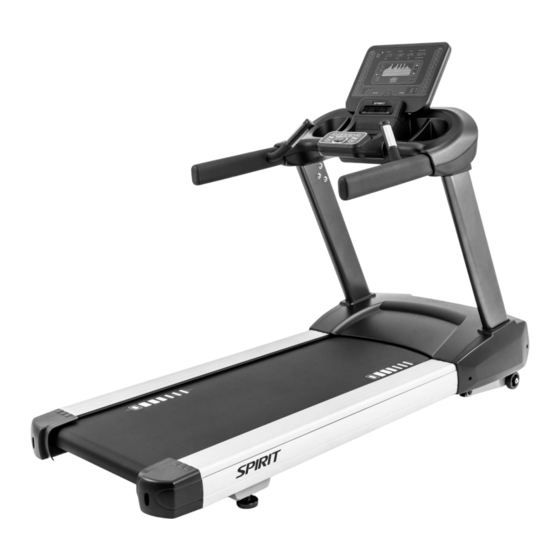
- Page 1 CT850+ T readmill OWNER’S MANUAL Please carefully read this entire manual before operating your new treadmill.
-
Page 2: Table Of Contents
TABLE OF CONTENTS Important Safety Instructions……………………………………………………………………… 2 Important Electrical Instructions…………………………………………………………………… 4 Important Operation Instructions………………………………………………………………….. 5 Getting on / off Your Treadmill…………………………………………………………………….. 6 Assembly Instructions………………………………………………………………………………. 7 Console Operation…………………………………………………………………......14 Using a Heart Rate Transmitter…………………………………………………………………… 29 General Maintenance……………………………………………………………………………..30 Troubleshooting..……………………………………………………………………………..33 Exploded View Diagram and Parts List………………………………………………..………….. 34 ST8600-YT058(AC3)_2204(SP)D... -
Page 3: Important Safety Instructions
IMPORTANT SAFETY INSTRUCTIONS WARNING – Read all instructions before using this exercise equipment. DANGER – To reduce the risk of electric shock disconnect your treadmill from the electrical outlet prior to cleaning and/or service work. WARNING – To reduce the risk of burns, fire, electric shock, or injury to persons, install the treadmill on a flat level surface with access to a 230 Vac, 9 amp grounded outlet. - Page 4 “WARNING! Heart rate monitoring systems may be inaccurate. Over exercising may result in serious injury or death. If you feel faint stop exercising immediately”. Suitable information about replacement parts that could affect the safe use of the treadmill The following statement: “Noise emission under load is higher than without load.“...
-
Page 5: Important Electrical Instructions
IMPORTANT ELECTRICAL INSTRUCTIONS WARNING! Route the power cord away from any moving part of the treadmill including the elevation mechanism and transport wheels. NEVER remove any cover without first disconnecting AC power. If voltage varies by ten percent (10%) or more, the performance of your treadmill may be affected. -
Page 6: Important Operation Instructions
IMPORTANT OPERATION INSTRUCTIONS NEVER operate this treadmill without reading and completely understanding the results of any ● operational change you request from the computer. Understand that changes in speed and incline do not occur immediately. Set your desired speed ● on the computer console and release the adjustment key. -
Page 7: Getting On / Off Your Treadmill
GETTING ON / OFF YOUR TREADMILL IMPORTANT The treadmill comes with Handles. Always hold the Handlebar when getting on and off the treadmill. First time users should familiarize themselves with using the treadmill by using the Handlebar first and then progressing to the Dual Action Handles. Once you have familiarized yourself with using the treadmill, you can progress to running without using the handles to provide a total body workout. -
Page 8: Assembly Pack Checklist
ASSEMBLY PACK CHECKLIST UNPACKING Cut the straps, then along the dotted line on the bottom of the box; lift the box over the unit and unpack. Locate the hardware package. The hardware is separated into four steps. Remove the tools first. Remove the hardware for each step as needed to avoid confusion. - Page 9 STEP 1 #150 - 3/8" × 3" Button Head Socket Bolt (10pcs) #115 - Ø 3/8" × 35 × 2.0T Flat Washer (10pcs) #133 - Ø 10 × 2T #144 - M5 × 12m/m Split Washer (10pcs) Phillips Head Screw (4pcs) STEP 2 #151 - 3/8"...
- Page 10 STEP 3 #154 - 3/8" ×1-1/4" #133 - Ø 10 × 2T Button Head Socket Bolt Split Washer (2pcs) (2pcs) #155 - Ø 10 × Ø 23 × 1.5T Curved Washer (2pcs) STEP 4 #156 - M8 × 20L #120 - Ø 8 × 1.5T Socket Head Cap Bolt Split Washer (4pcs) (4pcs)
- Page 11 STEP 1 Gather Hardware for Step 1. Thread the Computer Cable (No.53) up through the center of the Right Upright Column (No.9). Use four sets of Button Head Socket Bolt (No.150), Split Washer (No.133) against a Flat Washer (No.115) to secure the Upright Fixing Plate (No.10) to the Right Uprights (No.9) to the Main Frame (No.1) using the Allen Wrench (No.160).
- Page 12 STEP 2 Gather Hardware for Step 2. On the underside of the Console Support (No.5) is where the Locking Plate Assembly (No. 3 & 4) can be attached. Use 3 Socket Head Cap Bolts (No.152) and 3 Flat Washers (No.153) on each side to secure. Connect the Computer Cable (No.
- Page 13 STEP 3 Gather Hardware For Step 3. Further secure the uprights by inserting a Button Head Socket Bolt (No.154) through a Split Washer (No.133), and a Curved Washer (No.155) onto the backside of both Left/Right Uprights (No. 8 & 9) using the Allen Wrench (No.160). Plug the Round Cap (No.29) into the Right Upright (No.9).
- Page 14 STEP 4 Gather Hardware for Step 4. Place the Console Assembly (No.38) onto the Console Support (No.5). Secure with 4 Socket Head Cap Bolts (No.156), 4 Split Washer (No.120), and 4 Flat Washers (No.153) using the Allen Wrench (No.159). Connect the Upper Handpulse Wires (No.50 & 51) and Upper Computer Cable (No.52) to Console Assembly (No.38).
-
Page 15: Console Operation
CONSOLE OPERATION Dot Matrix Message Center Scan Button for LED Windows Direct Access LED Data Display Speed Buttons Windows Scan Button for Up, Down, Dot Matrix Program Controls Direct Access Incline Buttons Charger Water bottle holder and cargo compartment for buttons, phone, or MP3 player Start, Stop, Speed, and... - Page 16 SAFETY TETHER CORD A safety tether cord is provided with this unit. It is a simple magnetic design that should be used at all times. It is for your safety should you fall or move too far back on the tread-belt. Pulling this safety tether cord will stop tread-belt movement.
- Page 17 CONSOLE OPERATION QUICK START • Press and release any button to wake display up if not already on. • Press and release the Start button to begin belt movement at 0.3mph/ 0.5 kph, then adjust to the desired speed using the Up/Down Speed buttons. You may also use the Direct Access Speed Buttons 1 through 15 to set to a specific speed directly.
-
Page 18: Programmable Features
0.4 KM (1/4 MILE) TRACK The 1/4-mile track (0.4 km) and lap counter are located to the left of the dot matrix window. The flashing dot indicates your progress. In the center of the track there is a lap counter for reference. HEART RATE FEATURE The Pulse (Heart Rate) window will display your current heart rate in beats per minute during the workout. - Page 19 PRESET PROGRAMS SPEED/INCLINE SETTINGS The preset program Speed and Incline levels are shown in the chart below. The Speed numbers shown in the chart indicate a percentage of the top speed of the program. For instance, the first Speed setting for P1 (Program 1, HILL) shows the number 20. This means that this segment of the program will have a speed that is 20% of the top speed for the program (The user sets the top speed in the procedure above).
- Page 20 Interval This program takes you through high levels of intensity followed by recovery periods of low intensity. This program utilizes and develops your “Fast Twitch” muscle fibers which are used when performing tasks that are intense and short in duration. These deplete your oxygen level and spike your heart rate, followed by periods of recovery and heart rate drop to replenish oxygen.
-
Page 21: Custom Program
CUSTOM PROGRAM Select the Custom program using the Program button then press Enter. Note that the Dot Matrix Message Center will light a single row of dots at the bottom (Unless there is a previously saved program). The clock (Time) window will be flashing. Use the Up/Down buttons to set the program for the desired time. - Page 22 GERKIN TEST The Gerkin protocol, also known as the fireman’s protocol, is a sub-max Vo2 (volume of oxygen) test. The test will increase speed and elevation alternately until you reach 85% of your Max heart rate. The time it takes for you to reach 85% determines the test score (VO2max) as shown in the chart below. Stage Time Speed...
- Page 23 ARMY A timed 2 mile / 3.2 kph run. You control the speed manually. Maximum time allowed to pass the test. Male Female 17-21 16:36 19:42 22-26 17:30 20:36 27-31 17:54 21:42 32-36 18:48 23:06 37-41 19:30 24:06 For more detailed information, visit: http://bit.ly/SF-Army AIR FORCE A timed 1.5 mile / 2.4kph run.
- Page 24 MARINES A timed 3 mile/ 4.8 kph run. You control the speed manually. Maximum time allowed to pass the test: Male Female 17-26 28:00 31:00 27-39 29:00 32:00 40-45 30:00 33:00 33:00 36:00 For more detailed information, visit: http://bit.ly/SF-Marines A timed 1.5 mile/ 2.4kph run. You control the speed manually. Maximum time allowed to pass the test: Male Female...
- Page 25 Before The Test: • Make sure you are in good health; check with your physician before performing any exercise if you are over the age of 35 or persons with pre-existing health conditions. • Make sure you have warmed up and stretched before taking the test. •...
- Page 26 WHAT YOUR SCORE MEANS VO2max Chart for males and very fit females 18-25 26-35 36-45 46-55 56-65 years years years years years years excellent >60 >56 >51 >45 >41 >37 good 52-60 49-56 43-51 39-45 36-41 33-37 above average 47-51 43-48 39-42 35-38...
-
Page 27: Heart Rate Programs
HEART RATE PROGRAMS The old motto, “no pain, no gain”, is a myth that has been overpowered by the benefits of exercising comfortably. A great deal of this success has been promoted by the use of heart rate monitors. With the proper use of a heart rate monitor, many people find that their choice of exercise intensity is either too high or too low and exercise is much more enjoyable by maintaining their heart rate in the desired benefit range. -
Page 28: Heart Rate Control
HEART RATE CONTROL Heart Rate Control (HRC) uses your treadmill’s incline system to control your heart rate. Increases and decreases in elevation affect heart rate much more efficiently than changes in speed alone. The HRC program automatically changes elevation gradually to achieve the programmed target heart rate. Selecting a Heart Rate Control Program: You have the option, during the setup mode, to choose either the Weight Control (HR-1) program or the Cardiovascular (HR-2) program. -
Page 29: Rate Of Perceived Exertion
RATE OF PERCEIVED EXERTION Heart rate is important but listening to your body also has a lot of advantages. There are more variables involved in how hard you should workout than just heart rate. Your stress level, physical health, emotional health, temperature, humidity, the time of day, the last time you ate and what you ate, all contribute to the intensity at which you should workout. -
Page 30: Using A Heart Rate Transmitter
USING A HEART RATE TRANSMITTER (OPTIONAL) How to wear your wireless chest strap transmitter: Attach the transmitter to the elastic strap using the locking parts. Adjust the strap as tightly as possible as long as the strap is not too tight to remain comfortable. -
Page 31: General Maintenance
GENERAL MAINTENANCE MAINTENANCE OF RUNNING BELT/DECK: Your treadmill uses a very high-efficient and proprietary belt/deck combination. Performance is maximized when the deck is kept as clean as possible. Use a soft, damp cloth, or paper towel, wipe the edge of the belt and the area between the belt edge and the frame. Also reach as far as practical directly under the belt edge. -
Page 32: Calibration Procedure
TREADBELT TRACKING ADJUSTMENT: The performance of your treadmill is dependent on the frame running on a reasonably level surface. If the frame is not level, the front and back roller cannot run parallel, and constant belt adjustment may be necessary. The treadmill is designed to keep the tread-belt reasonably centered while in use. - Page 33 GENERAL MAINTENANCE 1. After each workout, wipe down all areas exposed to sweat with a damp cloth. 2. Ensure all bolts are properly tightened after assembly and before each use. 3. Ensure that the unit is properly leveled after assembly and before each use. Use leveling pads on the bottom of the feet to adjust height.
-
Page 34: Troubleshooting
TROUBLESHOOTING Before contacting your dealer for aid, please review the following information. It may save you both time and expense. This list includes common problems that may not be covered under the treadmill’s warranty. PROBLEM SOLUTION/CAUSE Display does not light 1) Tether cord not in position. -
Page 35: Exploded View Diagram And Parts List
EXPLODED VIEW DIAGRAM -34-... - Page 36 PARTS LIST Description Q’ty Main Frame Incline Bracket Locking Plate Assembly ( L ) Locking Plate Assembly ( R ) Console Support Handle Bar (R) Handle Bar (L) Left Upright Right Upright Upright Fixing Plate Running Deck Stabilizer Assembly(A) Running Deck Stabilizer Assembly(B) Belt Guide(R) Belt Guide(L) Front Roller W/Pulley...
- Page 37 Q’ty Description 900m/m_Handpulse W/Cable Assembly(SMP-03) 900m/m_Handpulse W/Cable Assembly(SMR-03) 400m/m_Handpulse Wire (Upper) 400m/m_Handpulse Wire (Upper) 1100m/m_Computer Cable(Upper) 2000m/m_Computer Cable Drive Motor Filter Filter Plate AC Electronic Module 450m/m_Connecting Wire (White) 450m/m_Connecting Wire (Black) 350m/m_Connecting Wire(White) 350m/m_Connecting Wire (Black) 400m/m_Motor Fan Connecting Cable(Black) 400m/m_Motor Fan Connecting Cable(White) Incline Motor Ø...
- Page 38 Q’ty Description Ø 8 × 1.5T_Split Washer Ø 5/16" × 16 × 1.0T_Flat Washer M8 × 1.25 × 95m/m_Button Head Socket Bolt M8 × 55m/m_Hex Head Bolt M8 × 1.25 × 6.5T_Square Nut Ø 3/8" × Ø 25 × 2.0T_Flat Washer M10 ×...
Need help?
Do you have a question about the CT850+ and is the answer not in the manual?
Questions and answers