Advertisement
Table of Contents
Advertisement
Table of Contents

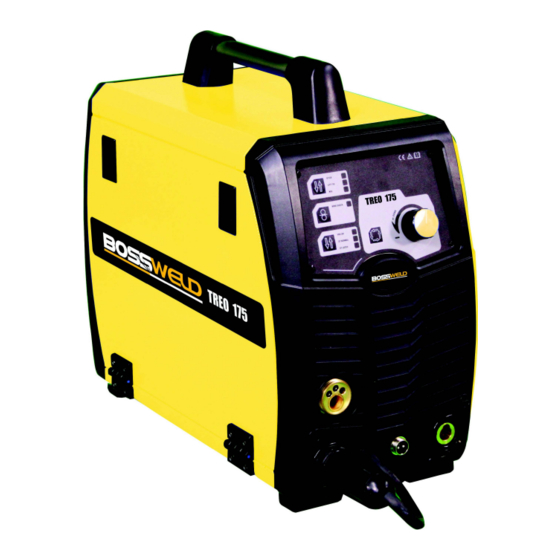
Related Manuals for BossWeld TREO 175


Summary of Contents for BossWeld TREO 175
- Page 1 TREO 175 User Manual...
-
Page 2: Table Of Contents
Contents SYMBOL TABLE ................................ 3 STATEMENT OF WARRANTY ..........................4 IMPORTANT SAFETY PRECAUTIONS ........................ 5 TECHNICAL PARAMETERS ........................... 8 INSTALLATION INSTRUCTIONS ........................... 9 PANEL FUNCTION ILLUSTRATION ........................12 OPERATION INSTRUCTIONS ..........................13 MALFUNCTION DISPLAY ............................. 17 OPERATION PARAMETER RECOMMENDATION ................... 18... -
Page 3: Symbol Table
SYMBOL TABLE Amperage Stick (SMAW) Voltage Pulse Current Function (GTAW) Hertz Spot Time (frequency) (GTAW) Seconds Remote outputs control (Panel/Remote) Percent Remote Function DC (Direct Arc Control Current) (SMAW) AC (Alternating Gas Post-Flow Current) Time 2T (GTAW) Gas Pre-Flow Time 4T (GTAW) Voltage Reduction... -
Page 4: Statement Of Warranty
STATEMENT OF WARRANTY LIMITED WARRANTY: “Dynaweld” warrants to customers of its authorised distributors hereafter “Dynaweld” that its products will be free of defects in workmanship or material. Should any failure to conform to this warranty appear within the time period applicable to the Dynaweld products as stated below, Dynaweld shall, upon notification thereof and substantiation that the product has been stored, installed, operated, and maintained in accordance with Dynaweld’s specifications, instructions, recommendations and recognized standard industry practice, and not subject to misuse, repair, neglect, alteration, or accident, correct such defects by suitable repair or... -
Page 5: Important Safety Precautions
IMPORTANT SAFETY PRECAUTIONS WARNING OPERATION AND MAINTENANCE OF ARC WELDING EQUIPMENT CAN BE DANGEROUS AND HAZARDOUS TO YOUR HEALTH. To prevent possible injury, read, understand and follow all warnings, safety precautions and instructions before using the equipment. GASES AND FUMES GASES AND FUMES PRODUCED DURING THE ARC WELDING OR CUTTING PROCESS CAN BE DANGEROUS AND HAZARDOUS TO YOUR HEALTH. -
Page 6: Electric Shock
ELECTRIC SHOCK ELECTRIC SHOCK CAN INJURE OR KILL. THE ARC WELDING PROCESS USES AND PRODUCES HIGH VOLTAGE ELECTRICAL ENERGY. THIS ELECTRIC ENERGY CAN CAUSE SEVERE OR FATAL SHOCK TO THE OPERATOR OR OTHERS IN THE WORKPLACE. Generally speaking, Arc welding is safe to perform, provided that adequate precautions are taken to protect the welding operator and bystanders within the vicinity of the welding operation and the environment. - Page 7 NOISE NOISE CAN CAUSE PERMANENT HEARING LOSS. ARC WELDING/CUTTING PROCESSES CAN CAUSE NOISE LEVELS TO EXCEED SAFE LIMITS. YOU MUST PROTECT YOUR EARS FROM LOUD NOISE TO PREVENT PERMANENT LOSS OF HEARING. • To protect your hearing from loud noise, wear protective ear plugs and/or ear muffs. •...
-
Page 8: Technical Parameters
TECHNICAL PARAMETERS Item Type Treo 175 Power voltage (V) 1 phase 240V ± 15% Frequency (Hz) 50/60 Rated input current (A) No-load voltage (V) 20-175 (MMA) Output current adjustment (A) 10-175 (TIG) 50-175 (MIG) Output voltage (V) 16.5-22.8 Duty cycle (%) Power factor 0.73... -
Page 9: Installation Instructions
±15% of rated voltage. When using long cable, in order to reduce voltage drop, a large diameter extension cable is suggested. If the cable is too long, it will affect the performance of arcing and other system function. TREO 175 Installation Procedures 1. - Page 10 Explanatory drawing for Installation of TREO 175 Explanatory drawing for Installation of TREO 175 (LIFT TIG)
- Page 11 Explanatory drawing for installation of TREO 175 (STICK):...
-
Page 12: Panel Function Illustration
PANEL FUNCTION ILLUSTRATION Front panel instruction STICK/LIFT TIG/MIG switch key WIRE Check/Inch VRD/2T/4Tswitch key Data selection key (effective under MIG mode) Multifunctional data adjusting knob (coarse adjustment by pressing the knob and turning it: big regulation rate and high speed; fine adjustment only by turning the knob: small regulation rate and low speed) Multifunctional data display Polarity conversion joint... -
Page 13: Operation Instructions
• OPERATION INSTRUCTIONS The starting up display Switch on the welding power source, the front panel displays as Chart 1. After the (Multifunctional data display) (or any key or knob on front panel) flashes for 5 seconds, the machine enters into the welding mode that saved in the last shutdown. - Page 14 Operation instruction under LIFT TIG mode a. When welding stops, press the (STICK/LIFT TIG/MIG switch key) the LIFT TIG indicator lights up, and it turns into LIFT TIG mode. LIFT TIG means the tungsten contacts the work piece first, then press the torch switch, the arc is ignited by lifting the torch. b.
- Page 15 Chart 6: Display status when perform Chart 7: Display status after stop welding under welding under LIFT TIG mode TIG mode Operation Instruction Under MIG Mode a. When welding stops, press (STICK/LIFT TIG/MIG switch key) MIG indicator lights up, and the machine enters into MIG mode.
- Page 16 g. Three seconds later after setting the welding parameters, the (multifunctional data display) would flash for one time, which means the data has been saved. The panel will display this data when you restart the machine. h. Releasing the torch switch and stopping welding, the panel displays “HOLD” flashes for 3 seconds, this means the welding stops.
-
Page 17: Malfunction Display
MALFUNCTION DISPLAY Malfunction Display of Wire Feeder When the wire feeder is malfunctioning and the (multifunctional data display) flashes continuously, the machine cannot work normally. Please restart the machine, the panel would display the parameters that were set before malfunction occurrence. Malfunction Display of Over-Current When over-current, and the (multifunctional data display) flashes continuously, the machine cannot work normally. -
Page 18: Operation Parameter Recommendation
OPERATION PARAMETER RECOMMENDATION Generally, welding current is adequate to welding electrode according with as following: Electrode Specification φ φ φ φ Welding Current 70-100A 110-140A 170-220A 230-280A Welding variables when use TIG: TIG welding specifications of stainless steel as follows: Tungsten Wire Diameter Type of Butt... - Page 19 WELDING WIRE DIAMETER SELECTION CHART CARBON STEEL Note: 1. The above amperage range is to be used as a guide only 2. Welding travel speed will affect the end weld result 3. For additional information on gas selection, consult your distributor...
- Page 20 TREO 175 EMC insulating board left movable cover of TREO 175 joint right cover of TREO 175 crossover coupling separator output board of TREO 175 magnetic valve support...
- Page 21 BOSSWELD TREO 175 COMMON PARTS LIST 600555 Drive Roller Treo 0.6/0.8mm V Groove (Solid wire) 600556 Drive Roller Treo 0.8/1.0mm V Groove (Solid wire) 600557 Drive Roller Treo 0.9/1.2mm V Groove (Solid wire) 600558 Drive Roller Treo 0.8/1.0mm U Groove (Aluminium) 600559 Drive Roller Treo 0.9/1.2mm U Groove (Aluminium)
- Page 22 CIRCUIT DIAGRAM...
- Page 23 ATTENTIONS & PREVENTATIVE MEASURES 1. Environment a. The machine works in environment where air conditions are dry with a dampness level of max 90%. b. Ambient temperature should be between -10 to 40 degrees centigrade. c. Avoid welding in the rain, to avoid water entering the machine. d.
- Page 24 POTENTIAL OPERATING PROBLEMS Arc starting difficulty. Arc interruption happens easily: Ensure the earth clamp is secured to the work piece. Check all electrical connections and ensure they are firm. The output current fails to reach rated value: The supply voltage to the machine may be lower than the stated supply. When the power voltage is lower than rated value, the maximum output current will be lower than rated value.
-
Page 25: Troubleshooting And Fault Finding
TROUBLESHOOTING AND FAULT FINDING Note: The following operations must be performed by qualified electricians with valid certifications. Before maintenance, you are suggested to contact local distributor to verify qualification. MALFUNCTIONS AND SOLUTIONS OF TREO 175 Malfunctions Solution • The meter shows 1. - Page 26 Abnormal Items Area and Item to be Inspected & Maintained 1. Turn on power supply Distribution Boxes (Input Protection 2. Fuse burnt out Devices) 3. Connection joint loose 1. Examine whether the cable is cut off. 2. Connection joint loose Input Cable 3.
- Page 27 INITIAL PROBLEMS DIAGNOSE Abnormal Items Area and Item to be Inspected & Maintained 1. Weld gun cable rolled up or over curved 2. Adaptability of contact tip, wire feeding Weld Gun and Cable pipe and cable diameter Worn, blocked up or deformation, etc. 1.
-
Page 28: Welding Torch
DAILY CHECKING WELDING POWER SUPPLY Position Check Points Remarks 1. Switch condition of operation, transfer and installation Control Panel 2. Test the power indicator Cooling Fan Check to ensure the fan is working when switched on 1. When powered, check for abnormal smells Power Source 2. - Page 29 WIRE FEED ASSEMBLY Position Checking Keys Remarks Pressure Pressure on the wire is required to push the wire on the Ensure there is adequate pressure on the through the Mig gun. If there is not enough pressure, Drive wire to push the wire through the Mig Gun this will cause the wire to slip in the drive roller.
- Page 30 Notes...
- Page 31 Notes...
- Page 32 CONTACT DETAILS Dynaweld Industrial Supplies Pty. Ltd. PO Box 470 123 Fairford Road PADSTOW NSW 2211 Phone: (02) 9772 1144 Fax: (02) 9774 1685...
Need help?
Do you have a question about the TREO 175 and is the answer not in the manual?
Questions and answers