
Related Manuals for Axiohm TELESTO


Summary of Contents for Axiohm TELESTO
- Page 1 THERMAL PRINTING SOLUTIONS SET-UP GUIDE TELESTO Printer Reference: FDE - 3108164 - Issue A AXIOHM, 1, Rue d’Arcueil BP 820, 92542 Montrouge Cedex, France Tel: (33) (0) 1 58 07 17 17 Fax: (33) (0) 1 58 07 17 18 www.axiohm.com...
-
Page 2: Table Of Contents
..............................3 ENERAL DESCRIPTION ............................. 4 ECHNICAL SPECIFICATIONS DELIVERY &INSTALLATION ............................ 5 ................................5 RINTER LOCATION TELESTO ..................5 ONNECTING THE POWER SUPPLY AND INTERFACE ON ................................ 6 APER FEED BUTTON ................................6 APER OADING SELF TEST TICKET DESCRIPTION .......................... 7 TROUBLESHOOTING .............................. -
Page 3: Your Printer
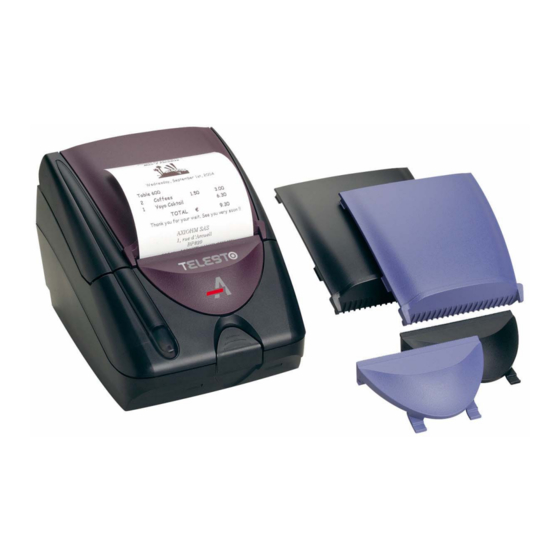
The packing box contains: Printer Power supply & power card (depending on versions) Paper roll Set Up Guide Screw driver General description Tear bar Cover open Paper feed button button + LED indicator TELESTO Set-Up Guide page 3 / 9 Reference : FDE-3108164-A... -
Page 4: Technical Specifications
Cutter life time 500 000 Cuts Power supply - INPUT 100 - 240 V DC 50 – 60 Hertz - OUTPUT V DC Watt Safety standard UL, cUL, FCC, CE Class B TELESTO Set-Up Guide page 4 / 9 Reference : FDE-3108164-A... -
Page 5: Delivery &Installation
5 to 45°C for operating (- 20 to 60 for storage) no risk of water exposure no mechanical stress it is recommended to avoid the mechanical vibrations Connecting the power supply and interface on TELESTO Approximate Approximate length length : 1.8m : 1.8m... -
Page 6: Paper Feed Button
Step n°1: Push button to open lid Step n°2 (See indications for correct setting of the roll) Step n°3: Place roll inside the bucket, keeping the end out Step n°4: Close the lid TELESTO Set-Up Guide page 6 / 9 Reference : FDE-3108164-A... -
Page 7: Self Test Ticket Description
(approx 10s) when the light is off, immediately close the lid keeping the feed button pressed RS232 If you want more information about the configuration, see the Axiohm manual (3108271) TELESTO Set-Up Guide page 7 / 9... -
Page 8: Troubleshooting
“on” the printer to recover the stand by position automatically. If it doesn’t work properly, switched “off” the printer and manually adjust this position by using the Axiohm screw driver (through the hole on the right side of the printer – see picture). This mini screw driver delivered with the printer must be used for this operation. -
Page 9: Cleaning Your Printer
EACH end of the cable. Use of a cable other than described here will require that you test the cable with the Axiohm printer and your system for FFC and CE mark certification.
Need help?
Do you have a question about the TELESTO and is the answer not in the manual?
Questions and answers