Advertisement
Quick Links
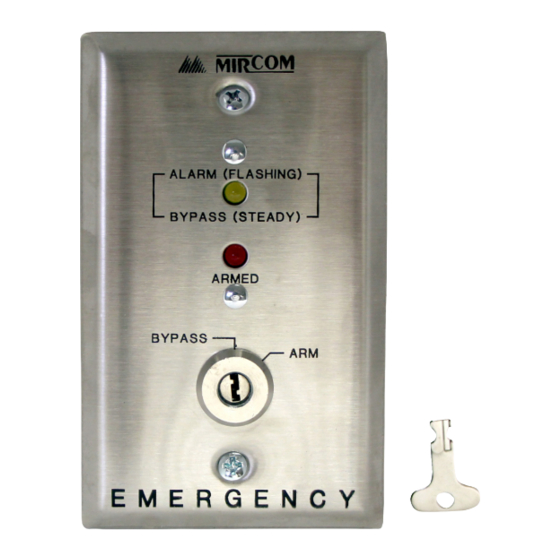
DA-100 Door Alarm Station Installation Instructions
MIRCOM's model DA-100 is a solid-state key operated Door Alarm Station designed to work with Call Receiver Panel (EC-300). The DA-
100 consists of a rugged key lock switch and an electronic module assembly mounted behind a standard single gang stainless steel plate
for years of reliable service. The unit mounts onto a standard single gang electrical box for easy and quick installation. The DA-100 has a
yellow LED for ALARM/BYPASS and red LED for ARMED status indicators. The DA-100 can use either N.O. or N.C. contacts
for door monitoring.
Installation
1. Locate the location for door contact(s).
2. Read the notes and wire the unit using the appropriate connection diagram for the desired type of door contact, normally open (N.O.)
or normally closed (N.C.).
3. Mount the unit into a standard single gang electrical box using the two screws supplied.
4. Set the key lock switch to either the "BYPASS" or "ARMED" position as desired.
5. Keep the keys in a safe place for future use.
Operation
BYPASS: By placing the key in the "BYPASS" position, the door(s) being monitored will NOT cause an alarm when opened. The yellow
LED will illuminate (steady) to acknowledge that the station is in "BYPASS" mode.
ARMED: By placing the key in the "ARMED" position, the door(s) being monitored WILL cause an alarm when opened. The red LED
will illuminate (steady) to acknowledge that the station is in the "ARMED" position.
ALARM: A flashing yellow LED on the DA-100 informs the user that the door being monitored has been opened. To reset the station,
the key must be inserted and the switch must be placed into the "BYPASS" then back to the "ARMED" position. Before
resetting the station, ensure that the door(s) being monitored are securely closed.
Notes:
Connect line 1 to the desired flash rate (slow or fast).
Use 22AWG. wire except where noted.
Only normally closed (N.C.) contacts will be supervised.
See EC-300 owners manual for more information.
LT-439 Rev.2 April 2012
DA-100 Door Alarm Station Installation Instructions
DA-100 Door Alarm Station Installation Instructions
LT-439 Rev.2 April 2012
LT-439 Rev.2 April 2012
Advertisement

Related Manuals for Mircom DA-100


Summary of Contents for Mircom DA-100
- Page 1 100 consists of a rugged key lock switch and an electronic module assembly mounted behind a standard single gang stainless steel plate for years of reliable service. The unit mounts onto a standard single gang electrical box for easy and quick installation. The DA-100 has a for years of reliable service.
- Page 2 DA-100 Door Alarm Station DA-100 Door Alarm Station Wiring Wiring LT-439 Rev.2 April 2012 LT-439 Rev.2 April 2012 DA-100 Door Alarm Station DA-100 Door Alarm Station Wiring Wiring LT-439 Rev.2 April 2012 LT-439 Rev.2 April 2012...
Need help?
Do you have a question about the DA-100 and is the answer not in the manual?
Questions and answers