Table of Contents
Advertisement
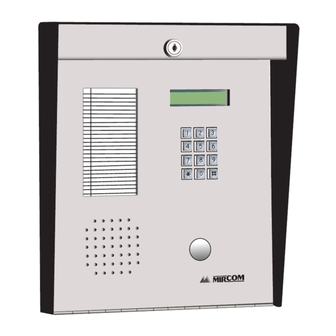
9500 Series
NSL No Subscriber Line Access Systems
Scrolling & Non-Scrolling Directory
INSTALLATION, PROGRAMMING,
and TROUBLESHOOTING MANUAL
NOTICE
All inform ation, docum entation, and specifications contained in this m anual are subject to change
without prior notice by the m anufacturer.
©1998 by Mircom Technologies Lim ited
Printed in CANADA, June 30, 1998
LT-462 rev.6
®
Advertisement
Table of Contents

Subscribe to Our Youtube Channel
Related Manuals for Mircom 9500 Series


Summary of Contents for Mircom 9500 Series
- Page 1 TROUBLESHOOTING MANUAL NOTICE All inform ation, docum entation, and specifications contained in this m anual are subject to change without prior notice by the m anufacturer. ©1998 by Mircom Technologies Lim ited Printed in CANADA, June 30, 1998 LT-462 rev.6...
-
Page 2: Table Of Contents
TABLE of CONTENTS IMPORTANT NOTICE SYSTEM FEATURES INTRODUCTION SPECIFICATIONS OPERATION SYSTEM BLOCK DIAGRAM: Single Entrance Application Multiple Entrances Application Multiple Building Application PRE-INSTALLATION PLANNING: Entry or Lobby Panel Types Controllers ® Optional Program m ing Software Kit (using IBM PC), Model RS-485IM Decoder/Relay Cabinets Site Selection Power Supply Requirem ents... - Page 3 ELEVATOR RECALL (RESTRICTION) FEATURE PROGRAMMING INSTRUCTIONS: Scrolling Dir. Non-Scrolling Entering Program m ing Mode Direct Access Program m ing Codes Table "No Manual" Menu Driven Program m ing Using *888 . Manual Entry of Residents’/Tenants’ Dial Codes and Relay # . Entry, Review, Edit or Delete Dial Codes or Residents’/Tenants’...
-
Page 4: Important Notice
F.C.C. Registration Number: 1M 8CAN-21269-DT-E Notice for all 9500 series Telephone Entry System Sold Internationally: Conform ity to the local Tel. Co. standards m ust be reviewed before installation of 9500 Series Telephone Access System s. MIRCOM TECHNOLOGIES LIMITED, 9500 Series: No Subscriber Line... -
Page 5: System Features
Watch Dog Timer circuit to automatically reset the unit to eliminate system latch-up. Compact, small, and easy to install Decoder/Relay Cabinets with LED indicator for each phone line. Ideal for installers and troubleshooting. MIRCOM TECHNOLOGIES LIMITED, 9500 Series: No Subscriber Line Page 2... -
Page 6: Introduction
INTRODUCTION MIRCOM'S 9500 Series Entry System s provides a high quality two way com m unication between the residents and their visitors in a m ulti-unit dwelling establishm ent. The system uses the existing phone lines for com m unication and access control. The system does not require a subscriber phone line since it uses the existing phone line wiring. - Page 7 Call W aiting Feature: All 9500 Series system s has a built-in two-way call waiting feature that notifies the resident (using the phone) with a distinct tone that an incom ing caller is waiting. The resident m ay answer the call by flashing the hook switch.
-
Page 8: System Block Diagram
SYSTEM BLOCK DIAGRAMS SINGLE ENTRANCE APPLICATION: MIRCOM TECHNOLOGIES LIMITED, 9500 Series: No Subscriber Line Page 5... -
Page 9: Multiple Entrances Application
M ULTIPLE ENTRANCES APPLICATION: MIRCOM TECHNOLOGIES LIMITED, 9500 Series: No Subscriber Line Page 6... -
Page 10: Multiple Building Application
M ULTIPLE BUILDING APPLICATION: MIRCOM TECHNOLOGIES LIMITED, 9500 Series: No Subscriber Line Page 7... -
Page 11: Pre-Installation Planning
Magnetic strips directory kit, 40 nam es capacity. It com es with plastic letters, m agnetic strips, brackets, and hexnuts. M odel TH-101 Therm ostat heater. Note: Painted Silver, Gold & Copper Vein lobby panels are available by custom order. MIRCOM TECHNOLOGIES LIMITED, 9500 Series: No Subscriber Line Page 8... -
Page 12: Controllers
PC/XT/286/386/486/Pentium Com patible PC under MS-DOS version 5 or higher, W indows 95 or higher, OS/2 with Colour or Monochrom e Text Screen (MDA, CGA, EGA, VGA, SVGA) capability and one serial port. To order this kit, please consult our factory for further inform ation. MIRCOM TECHNOLOGIES LIMITED, 9500 Series: No Subscriber Line Page 9... -
Page 13: Decoder/Relay Cabinets
CA-71A or RJ-71C configured BIX Block. M odel 9106E 6 Ft. Am phenol Cable. Use this cable for interfacing the 9500 series system s to existing RJ-71A configured BIX Block. M odel 9406 6 Ft. Octopus Relay Cable. Use this cable for custom wiring the telephone's Tip and Ring by using the standard CA-38A (RJ-38A) m odular jacks. -
Page 14: Ca-71A Bix Block Or Rj-71C Punch Down Block Wiring Configuration
CA-71A or RJ-71C configured blocks since they are straight forward and easy to use. 8. DOOR STRIKES Select the appropriate door strike as required by your system applications. W e recom m end using Mircom 's door strikes below and its com patible power transform er. See appendix "C" for door strikes' specifications. -
Page 15: Enclosures And Accessories Installation Instructions
ENCLOSURES AND ACCESSORIES INSTALLATION INSTRUCTIONS M OUNTING THE UNIVERSAL TYPE LOBBY/ENTRY PANEL Mount the panel as shown on FIG.1 and FIG.2 using the supplied screws. MIRCOM TECHNOLOGIES LIMITED, 9500 Series: No Subscriber Line Page 12... -
Page 16: Mounting The Magnetic Letter Kit (Mlk-040)
Mount the Magnetic Letter Kit according to the Installation Instruction that com es with the Kit. Extra characters and m agnetic strips can be ordered separately. Please contact the factory or our nearest dealer. MIRCOM TECHNOLOGIES LIMITED, 9500 Series: No Subscriber Line Page 13... -
Page 17: Mounting The Therm Ostat Heater Kit Model Th-101
TH-101 unit to 24VAC tap on the PS-3B transform er. The transform er m ust be installed outside the enclosure. Fig. 2A: HEATER INSTALLATION M OUNTING THE CONTINENTAL TYPE LOBBY/ENTRY PANEL MIRCOM TECHNOLOGIES LIMITED, 9500 Series: No Subscriber Line Page 14... - Page 18 Mount the panels as shown on FIG.3 (for scrolling) or FIG.3A (for non-scrolling) using the supplied screws. MIRCOM TECHNOLOGIES LIMITED, 9500 Series: No Subscriber Line Page 15...
-
Page 19: Mounting The Magnetic Letter Kit (Mlk-070)
M OUNTING THE M AGNETIC LETTER KIT M LK-070 (OPTIONAL) Mount the Magnetic Letter Kit according to the Installation Instruction that com es with the Kit. This kit is used only for Continental type lobby/entry panel. MIRCOM TECHNOLOGIES LIMITED, 9500 Series: No Subscriber Line Page 16... -
Page 20: Mounting The Decoder/Relay Cabinet
M OUNTING THE DECODER/RELAY CABINET Mount the Decoder/Relay Cabinet as shown on FIG. 4 using the supplied screws. MIRCOM TECHNOLOGIES LIMITED, 9500 Series: No Subscriber Line Page 17... -
Page 21: Electronic Modules Installation Instructions
Earth Ground at each terminating point. Also note that the Relay Control line “COM(-)” (marked “GND” on some older boards) is a system “Common” and MUST NOT be connected to Earth Ground ! FIG.5 COMMUNICATION LINK WIRING MIRCOM TECHNOLOGIES LIMITED, 9500 Series: No Subscriber Line Page 18... -
Page 22: Relay Cabinet's Decoder/Mother Board Jumper Configuration
RELAY CABINET'S DECODER/MOTHER BOARD JUMPER CONFIGURATION Install jumpers as shown in FIG. 6. WIRING THE DOOR STRIKE TO 9501A, 9502A, or 9503 (Controllers) Wire the Door Strike as shown in FIG. 7. MIRCOM TECHNOLOGIES LIMITED, 9500 Series: No Subscriber Line Page 19... -
Page 23: W Iring The Electrom Agnetic Door Lock
Wire as shown in FIG. 8. WIRING THE LOCK-BACK SWITCH TO 9501A, 9502A, or 9503 (Controllers) Wire the Lock-Back Switch as shown in FIG. 9 to enable automatic door-open timer cut-off. MIRCOM TECHNOLOGIES LIMITED, 9500 Series: No Subscriber Line Page 20... -
Page 24: W Iring The Door Override (Postal Lock & Fire Alarm )
WIRING THE DOOR OVERRIDE (Postal Lock & Fire Alarm) to 9501A, 9502A, or 9503 (Controllers) Wire as shown in FIG.10. WIRING THE MUSIC SOURCE TO THE 9501A CONTROLLER Wire the Radio or Tape Deck's audio output as shown in FIG. 11. MIRCOM TECHNOLOGIES LIMITED, 9500 Series: No Subscriber Line Page 21... -
Page 25: Wiring The Auxiliary Relay And Main Entrance Active Relay Contacts
WIRING THE AUXILIARY RELAY and MAIN ENTRANCE ACTIVE RELAY CONTACTS Wire as shown in FIG.12. WIRING THE SYSTEM and LAMP SUPPLIES Wire as shown in FIG. 13. MIRCOM TECHNOLOGIES LIMITED, 9500 Series: No Subscriber Line Page 22... -
Page 26: Wiring Instruction For Multiple Entrances Application
WIRING INSTRUCTION FOR MULTIPLE ENTRANCES APPLICATION Wire as shown in FIG. 14. WIRING THE GUARD TELEPHONE TO 9501A CONTROLLER Wire as shown in FIG. 15. MIRCOM TECHNOLOGIES LIMITED, 9500 Series: No Subscriber Line Page 23... -
Page 27: W Iring The Speaker, Mic., And Keypad/Display Assem Bly
WIRING TO EARTH GROUND Although the electronics of the 9500 Series System are not Earth Grounded, it is absolutely vital to have good solid Earth Grounding connections to each enclosure; that is, a separate (do not rely on the Relay Control Wire shields to provide this Earth Ground) ground bonding wire (preferably at least 14 AWG) that is run to the NEAREST confirmed building electrical system ground, or cold water pipe. -
Page 28: Elevator Recall (Restriction) Feature
Therefore all residents on the twelfth floor activate the sam e Elevator-Recall (Restriction) relay num ber 12 on the first relay Model 9512E Elevator-Recall Relay Card in the last relay cabinet. 2. M ULTIPLE ENTRANCES - ELEVATOR-RECALL (RESTRICTION) MIRCOM TECHNOLOGIES LIMITED, 9500 Series: No Subscriber Line Page 25... - Page 29 At the end of this call, the specific Elevator-Recall (Restriction) relay will then be activated. EXAM PLES: If a 9502A is program m ed with a UNIT- ID = 1 and a Resident/Tenant Code of “1215" is entered on the MIRCOM TECHNOLOGIES LIMITED, 9500 Series: No Subscriber Line Page 26...
- Page 30 The relays available for Elevator-Recall (Restriction) are labelled Relay 1 to Relay 12. W iring is achieved at the term inal block which is rem ovable for easy installation. MIRCOM TECHNOLOGIES LIMITED, 9500 Series: No Subscriber Line Page 27...
-
Page 31: Programming Instructions
There are two ways to program the system . MIRCOM TECHNOLOGIES LIMITED, 9500 Series: No Subscriber Line Page 28... -
Page 32: No Manual" Menu Driven Programming Using *888
3-digit m axim um Residents’/Tenants’ Dial Codes resident capacity 4-digit starting point for resident codes *777 Select Digit for Hold 1, 2 or 3 "NO MANUAL" MENU DRIVEN PROGRAMMING USING *888 MIRCOM TECHNOLOGIES LIMITED, 9500 Series: No Subscriber Line Page 29... -
Page 33: Manual Entry Of Residents'/Tenants' Dial Codes And Relay
* to enter code again. After entering the Code and Relay num ber, the next screen should display... -Program Options- * = Abort, # = Store xxxx xxxx MIRCOM TECHNOLOGIES LIMITED, 9500 Series: No Subscriber Line Page 30... -
Page 34: Residents'/Tenants' Nam Es
Press * to abort or # to store entry. Repeat the above process until all residents' nam es are entered. W hen finished, press * to return to PROGRAM MODE m enu. To quit, enter *000 while at PROGRAM MODE m enu to return to NORMAL MODE. MIRCOM TECHNOLOGIES LIMITED, 9500 Series: No Subscriber Line Page 31... -
Page 35: Program M Ing The Keyless Entry Codes
To enter Keyless Entry Codes, scroll through until you reach the feature as shown below. [1=Bck] [3=Fwd] Do you want to enter KEYLESS Codes ? [*=Abort] [#=Yes] Press # to access the feature. The display should appear... MIRCOM TECHNOLOGIES LIMITED, 9500 Series: No Subscriber Line Page 32... -
Page 36: Review And Delete Keyless Entry Codes
Please enter the new Master Code in the space provided below for future reference. New Master Code: ___________________ Date: ______________________ MIRCOM TECHNOLOGIES LIMITED, 9500 Series: No Subscriber Line Page 33... -
Page 37: Set Door Tim
<----99 seconds max. Please enter choice: Enter the desired door-open period. The next display should appear... -Program Options- * = Abort, # = Store 00 to 99 Sec. Please enter choice: MIRCOM TECHNOLOGIES LIMITED, 9500 Series: No Subscriber Line Page 34... -
Page 38: Elevator Recall
To select Multiple or Single entrance (factory default is single entrance), scroll through until you reach the feature as shown below. [1=Bck] [3=Fwd] Do you want to edit Single/Multi option? [*=Abort] [#=Yes] MIRCOM TECHNOLOGIES LIMITED, 9500 Series: No Subscriber Line Page 35... -
Page 39: Ring Cycle Select
Press * to abort or # store entry. To quit, enter *000 while at PROGRAM MODE m enu to return to NORMAL MODE. SET CLOCK (NOT AVAILABLE - DO NOT USE) To set the clock, scroll through until you reach the feature as shown below. MIRCOM TECHNOLOGIES LIMITED, 9500 Series: No Subscriber Line Page 36... -
Page 40: Two 11-Digit Telephone Num Ber Entry
To enter the SECOND 11-digit telephone num ber, scroll through until you reach the feature as shown below. [1=Bck] [3=Fwd] Do you want to set the 2nd 11-digit # ? [*=Abort] [#=Yes] MIRCOM TECHNOLOGIES LIMITED, 9500 Series: No Subscriber Line Page 37... -
Page 41: Ring Pattern Select
Please enter choice: Enter 15 for Mircom 's distinct ringing pattern or 38 for Norm al or Standard North Am erican ringing pattern. Enter any num ber for other desired ringing pattern. After entering the selection, the display should appear... -
Page 42: Select Digit For Hold
MODE m enu to return to NORMAL MODE. * * * * End of Programming * * * * FIG. 18: 9501A, 9502A, and 9503 CONTROLLER’S RESET PINS & FUSES MIRCOM TECHNOLOGIES LIMITED, 9500 Series: No Subscriber Line Page 39... - Page 43 2. By using the Direct Access Program m ing Codes for m anual program m ing. Entering these codes will lead the user directly to the desired function. The Direct Access Program m ing Codes are listed on the following table. MIRCOM TECHNOLOGIES LIMITED, 9500 Series: No Subscriber Line Page 40...
- Page 44 1 and 3 keys are for scrolling up or down the feature m enus. # key is used to access the displayed feature. * key is used for quit, exit, cancel, or abort. Press 3 for next m enu. The screen should appear... MIRCOM TECHNOLOGIES LIMITED, 9500 Series: No Subscriber Line Page 41...
- Page 45 W hen finished, press * to exit to PROGRAM MODE m enu to select other features. To quit, press *000 while at PROGRAM MODE m enu to return to NORMAL MODE. MIRCOM TECHNOLOGIES LIMITED, 9500 Series: No Subscriber Line Page 42...
- Page 46 Press # to store or * to abort entry. Repeat this process until all codes are entered. Press * to exit to PROGRAM MODE m enu when finished. To quit, enter *000 while at PROGRAM MODE m enu to return to NORMAL MODE. MIRCOM TECHNOLOGIES LIMITED, 9500 Series: No Subscriber Line Page 43...
-
Page 47: Master Code Reset
Press * to exit to PROGRAM MODE m enu. To quit, enter *000 while at PROGRAM MODE m enu to return to NORMAL MODE. NOTE: To restore Master Code, please see FIG. 18 for location of reset pins. MIRCOM TECHNOLOGIES LIMITED, 9500 Series: No Subscriber Line Page 44... - Page 48 Adjust On-Line Timer - Press # Press # to access the feature. The display should appear... On-LINE Timer 00 To 99 Sec. Enter the On-Line period. The next display should appear... MIRCOM TECHNOLOGIES LIMITED, 9500 Series: No Subscriber Line Page 45...
- Page 49 Press # to store or * exit entry. The next display should appear... Press * To Exit Press * to exit to PROGRAM MODE m enu. To quit, enter *000 while at PROGRAM MODE m enu to return to NORMAL MODE. MIRCOM TECHNOLOGIES LIMITED, 9500 Series: No Subscriber Line Page 46...
- Page 50 <---- 38 for North American ringing pattern Enter 15 for Mircom 's distinct ringing pattern or 38 for Norm al or Standard North Am erican ringing pattern. Enter any num ber for other desired ringing pattern. After entering the selection, the display should appear...
- Page 51 Type in the digit you require and then press #. W hen finished, the system should exit to PROGRAM MODE m enu. To quit, enter *000 while at PROGRAM MODE m enu to return to NORMAL MODE. * * * * End of Program m ing * * * * MIRCOM TECHNOLOGIES LIMITED, 9500 Series: No Subscriber Line Page 48...
-
Page 52: Music Level Adjust
Touch Tone type phones. Therefore, no adjustm ents are required for tone type detection as long as the resident telephone can generate a "Touch-Tone" signal when on-line. FIG. 19: CONTROL LOCATIONS MIRCOM TECHNOLOGIES LIMITED, 9500 Series: No Subscriber Line Page 49... -
Page 53: Display Contrast Adjustment
DISPLAY CONTRAST ADJUSTMENT Open the door and adjust the contrast control as shown on FIG. 20, turn clockwise to increase contrast. FIG. 20: DISPLAY CONTRAST ADJUSTM ENT MIRCOM TECHNOLOGIES LIMITED, 9500 Series: No Subscriber Line Page 50... -
Page 54: Troubleshooting
CAUTION! Do not unplug or install any cards while the power is “on”. Note: For further help, please call or fax: Application Engineering Department Tel.: (888) 660-4655 Fax: (888) 660-4113 MIRCOM TECHNOLOGIES LIMITED, 9500 Series: No Subscriber Line Page 51... -
Page 55: A-1: Ca-71A Bix Block W Iring Configuration
APPENDIX A-1: CA-71A BIX Block Wiring Configuration MIRCOM TECHNOLOGIES LIMITED, 9500 Series: No Subscriber Line Page 52... -
Page 56: A-2: Rj-71C Punch Down Block W Iring Configuration
APPENDIX A-2: RJ-71C Punch Down Block Wiring Configuration MIRCOM TECHNOLOGIES LIMITED, 9500 Series: No Subscriber Line Page 53... -
Page 57: B-1: Ca-71A Bix Block Identification Form
APPENDIX B-1: CA-71A BIX Block Identification Form MIRCOM TECHNOLOGIES LIMITED, 9500 Series: No Subscriber Line Page 54... -
Page 58: B-2: Rj-71C Punch Down Block Identification Form
APPENDIX B-2: RJ-71C Punch Down Block Identification Form MIRCOM TECHNOLOGIES LIMITED, 9500 Series: No Subscriber Line Page 55... -
Page 59: C: Accessory Specifications
0.706 lb M odel: M -20 VOLTAGE: 4-6V DC (silent), 8-16V AC (buzzing) DIMENSION: 1 3/4" W ide by 5 7/8" High by 1 1/2" Deep W EIGHT: 0.986 lb MIRCOM TECHNOLOGIES LIMITED, 9500 Series: No Subscriber Line Page 56... - Page 60 AM PHENOL CODE NUM BER JACK # 0000 0001 0002 0003 0004 0005 0006 0007 0008 0009 0010 0011 0012 0013 0014 0015 0016 0017 0018 0019 0020 0021 0022 0023 MIRCOM TECHNOLOGIES LIMITED, 9500 Series: No Subscriber Line Page 57...
- Page 61 APPENDIX D-2: DIRECTORY WORKSHEET KEYLESS DIAL RELAY / TEL. CO. APT. # RESIDENT NAM E ENTRY CODE LINE AM PHENOL CODE NUM BER JACK # MIRCOM TECHNOLOGIES LIMITED, 9500 Series: No Subscriber Line Page 58...
-
Page 62: E: Character Set Table
W hile at Resident Nam e Entry m ode, scroll through the character set by pressing "1" to m ove backward or "3" to m ove forward. ex. while at 7, press "1" to go backward to 6. ex. while at c, press "3" to go forward to d. Space MIRCOM TECHNOLOGIES LIMITED, 9500 Series: No Subscriber Line Page 59... -
Page 63: Resident Operating Instructions
MIRCOM TELEPHONE ENTRY SYSTEM RESIDENT OPERATING INSTRUCTIONS Mircom's state-of-the-art door entry system has been installed in this building to provide you and your guest with an increased level of confidence and security. The system operates with your existing telephone. Your guest simply dials your code number or selects your name by scrolling through the electronic directory on the lobby panel and your telephone will ring. - Page 64 It is im portant that all system users be trained in the correct operation of the alarm system and that they know how to respond when the system indicates an alarm . MIRCOM TECHNOLOGIES LIMITED, 9500 Series: No Subscriber Line Page 61...
- Page 65 • Software Most Mircom products contain software. W ith respect to those products, Mircom does not warranty that the operation of the software will be uninterrupted or error-free or that the software will meet any other standard of performance, or that the functions or performance of the software will meet the user’s requirements. Mircom shall not be liable for any delays, breakdowns, interruptions, loss, destruction, alteration or other problems in the use of a product arising our of, or caused by, the software.
-
Page 66: Warranty
(90) days, whichever is longer. The original owner m ust prom ptly notify Mircom Technologies Ltd. in writing that there is defect in m aterial or workm anship, such written notice to be received in all events prior to expiration of the warranty period. - Page 67 Products which Mircom Technologies Ltd. determ ines to be repairable will be repaired and returned. A set fee which Mircom Technologies Ltd. has predeterm ined and which m ay be revised from tim e to tim e, will be charged for each unit repaired.
- Page 68 Advanced Life Safety Solutions Canada U.S.A. © Mircom 2006 Printed in Canada 25 Interchange Way 60 Industrial Parkway PMB 278 Subject to change without prior notice Vaughan, ON L4K 5W3 Cheektowaga, NY 14227 Tel: 1-888-660-4655 Fax: 1-888-660-4113 www.mircom.com Tel: 905-660-4655 Fax: 905-660-4113...
Need help?
Do you have a question about the 9500 Series and is the answer not in the manual?
Questions and answers