
Summary of Contents for Rectifier RT9- 24V
- Page 1 Installation, Operation and Technical Manual RT9- 24V and MCSU-4 Rack Power System Document: 158-1872-01 Date: 19 February 2014 © Rectifier Technologies Pacific Pty Ltd ACN 058 107 707...
-
Page 2: Table Of Contents
Lightning and Transient Suppression ............. 8 4.1.4 Cabling, Auxiliary Equipment and Circuit Breakers ........9 Rectifier Installation and Removal ...............11 4.2.1 To Remove a Rectifier from the Magazine ........... 11 4.2.2 Inserting a Rectifier into the Magazine ............11 MUIB - Mini User Interface Board................12 4.3.1 MUIB Connections .................. - Page 3 Installation, Operation and Technical Manual Rectifier Technologies Battery Cell Monitor (BCM).................. 32 4.9.1 Main Features of the BCM................32 4.9.2 BCM Specifications ..................33 4.9.3 Preparing the battery for connection to the BCM.......... 33 4.9.4 Installing the board ..................34 4.9.5...
- Page 4 Battery Cell Measurements ................72 6.12 Earth Leakage Detector - MUIB3 and MUIB5 only........... 73 Commissioning ......................74 Indicators on the Rectifier Front Panel ..............74 System Parameter Ranges ................. 74 7.2.1 RT9 SMR Parameters .................. 74 System Commissioning ..................74 7.3.1...
-
Page 5: General Warnings
8. Take care when removing the rectifier as it may be too hot to touch the metal casing, especially if the ambient temperature is high and the unit has been operating at maximum load. -
Page 6: Summary Of Programmed System Parameters
Installation, Operation and Technical Manual Rectifier Technologies 2. Summary of Programmed System Parameters Parameter Description Range Default Actual Value Value Base (System) Menu Amb Tmp Alm Ambient temperature alarm level 30-99°C 55°C Volts Hi System output volts high threshold 26-33V 28.7V... - Page 7 SMR Sleep Mode Minimum rectifiers that must 0 to Number be online. SMR defined in the system Sleep Rotation SMR Sleep Mode rectifier rotation value (in 1 to 365, 0 = 7 days Days). Off – no rotation Battery Menu...
- Page 8 Installation, Operation and Technical Manual Rectifier Technologies Parameter Description Range Default Actual Value Value BDT End Q Battery capacity limit to terminate BDT 25-9995AH 300AH Temp Sen Alm Enable/Disable Temp. Sensor failure alarm On/Off Maximum of 4 batteries with MUIB2, maximum of 2 batteries with other interfaces.
-
Page 9: Configuration
Installation, Operation and Technical Manual Rectifier Technologies 3. Configuration 3.1 System Description This Manual has been written with the objective of giving the reader a sufficient understanding of the system and its constituent parts in order to be able to install, commission and operate the system. - Page 10 Alternatively, a remote communication port can be used to display all the system and rectifier information on a remote PC. With this facility, it is possible to not only monitor but also control all the rectifier and system parameters. In addition, the system has the capability to dial up to three telephone numbers to connect to the remote PC in the event of a system fault having developed, and will continue dialling until the fault is reported.
-
Page 11: Rectifier Specific Configurations
Figure 3.4. It consists of 4 rectifiers (2U total), and a MCSU-4 shelf, for a total of The arrangement shown is designed to fit into a standard 19” rack. Other configurations are equally possible. Figure 3.4 Typical 4 rectifier modular power supply with MCSU-4 158-1872-01 19-Feb-14... -
Page 12: Installation
Openings in the top and sides of the enclosure must comply with the following: ... -
Page 13: Cabling, Auxiliary Equipment And Circuit Breakers
Distribution Module, Battery Circuit Breakers, DC Cabling, Battery Current Transducers, Temperature Sensors and AC Monitoring Module (optional). These modules are required inside the rectifier rack for normal system operation. A brief description of the modules and what they connect to is given below, along with a detailed rack wiring diagram in Figure 4.1 that shows a system using a MUIB interface. - Page 14 Installation, Operation and Technical Manual Rectifier Technologies Figure 4.1 Typical System Wiring Battery Current Transducers: A Hall effect current measuring unit that is installed over the cable connecting the battery string to its circuit breaker. The signal lines are connected to terminal on the MUIB.
-
Page 15: Rectifier Installation And Removal
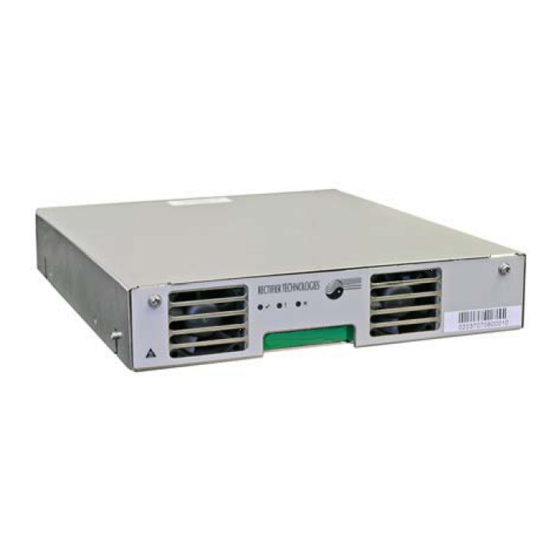
The rectifiers are designed to be “hot pluggable” in that they can be plugged into and out of a “live” magazine. Due to the small size of energy storage elements in the rectifier output, there is no significant disturbance to the DC bus when a rectifier is plugged into the magazine. -
Page 16: Muib - Mini User Interface Board
Installation, Operation and Technical Manual Rectifier Technologies 4.3 MUIB - Mini User Interface Board Connections between the MCSU-4, the external transducers and other inputs are made using the connectors provided on the MUIB. Terminals are provided for alarm relay contacts, battery and ambient temperature sensors, two battery current transducers, LVDS control and circuit breaker operation detection using the breaker auxiliary contacts for both the battery and load circuit breakers. - Page 17 Installation, Operation and Technical Manual Rectifier Technologies Figure 4.2 Battery transducers connection to MUIB Figure 4.3 MUIB Connection Diagram 34-way ribbon cable to MiniCSU Conn # Conn Label Class Used for: MiniCSU Anal/Dig 34-way ribbon cable to MiniCSU RELAY 1...
- Page 18 Installation, Operation and Technical Manual Rectifier Technologies Figure 4.4. MUIB Connectors wiring information Connector Signal Name Connector Signal Name X1 MCSU-4 1-34 34 way ribbon X32 1 PHASE AC 1-10 Not used with MCSU-4 X2 RELAY 1 N/O relay contact...
- Page 19 Installation, Operation and Technical Manual Rectifier Technologies Figure 4.5. MUIB Fuse Function and Specification Fuse Function Specification +15VDC F500mA, Glass, M20x5 -15VDC F500mA, Glass, M20x5 Ground T2A, HRC, M20x5 -V System T2A, HRC, M20x5 -V Battery T2A, HRC, M20x5 +V System...
-
Page 20: Muib2 - Mcsu-4 User Interface Board (Type2)
This provides better resolution of the load current than the calculated current determined from the reported individual rectifier output currents. This is because there is an inherent resolution limit for each rectifier current measurement that can significantly degrade the load current resolution when a system contains a large number of rectifiers. - Page 21 Installation, Operation and Technical Manual Rectifier Technologies annunciation of alarms: Relay 3 - HVSD, Relay 4 – any system alarm, Relay 5 - SMR shut down. Other two relays are used for control of optional external equipment. Relay 2 is programmed for FAN CONTROL. If any one of the SMR heat-sink temperatures exceeds a pre-set (non-programmable) value, the relay closes.
-
Page 22: Fuses
Installation, Operation and Technical Manual Rectifier Technologies 4.4.3.4 Load Current Transducer Input A load current transducer is connected to X76 of the MUIB2 via a connector using the pin connections shown below. Figure 4.11 Load transducer pin connection for MUIB2 4.4.3.5 Power Input... - Page 23 Installation, Operation and Technical Manual Rectifier Technologies Figure 4.12 MUIB2 Connection Diagram and Connector Legend 34 way ribbon cable to MCSU-2 16 way ribbon cable to MCSU-2 Conn # Conn Label Class Comments MCSU-4 Anal/Dig 34-way ribbon cable to MCSU-4...
- Page 24 Installation, Operation and Technical Manual Rectifier Technologies Figure 4.9 MUIB2 Connector Wiring Information Connector Signal Name Connector Signal Name X1 MCSU-4 1-34 34 way ribbon X18 AMB. TEMP No connection X180 MCSU-4 1-16 Aux Port Sensor -ve X179 Next Unit...
-
Page 25: Muib3 - Systems With Earth Leakage Detection
Installation, Operation and Technical Manual Rectifier Technologies 4.5 MUIB3 – Systems with Earth Leakage Detection The MUIB3 has been designed to operate in conjunction with 24V, 48V and 110V rectifiers and MCSU-4 to control and monitor these systems, while providing earth leakage current detection. - Page 26 Installation, Operation and Technical Manual Rectifier Technologies 4.5.3.2 Relay Contact outputs There are 5 relays with normally open (N/O) and normally closed (N/C) contacts available on the MUIB3, connector X2. In standard RTP system three of the relays are for remote annunciation of alarms: Relay 3 - HVSD, Relay 4 - any system alarm, Relay 5 - SMR shut down.
- Page 27 Installation, Operation and Technical Manual Rectifier Technologies MCSU-4. Therefore, when any one of these 2 inputs are not used, a shorting plug should be installed on the input not being used. 4.5.3.7 Earth Leakage Detector The block diagram in Figure 4.5-2 shows the principle on which the earth leakage detector works.
- Page 28 Installation, Operation and Technical Manual Rectifier Technologies Figure 4.5-3 MUIB3 Connection Diagram 34-way ribbon cable to MiniCSU-2 Conn # Conn Label Class Comments MCSU-4 34-way ribbon cable to MCSU-4 RELAY 1 Digital Dummy load on 110V systems, not used on other systems RELAY 2 “...
- Page 29 Installation, Operation and Technical Manual Rectifier Technologies Figure 4.5-4 MUIB3 Connector wiring information Connector Signal Name Connector Signal Name X1 MCSU-4 1-34 34 way ribbon X39 BATTERY 1 -15V X2 RELAY 1 N/O relay contact +15V (USER) N/C relay contact...
-
Page 30: Single Phase Ac Monitoring Module - Mmib4
Installation, Operation and Technical Manual Rectifier Technologies 4.6 Single Phase AC Monitoring Module – MMIB4 In low power systems where single phase power only is supplied, an optional single phase monitoring module can be used to monitor the incoming AC voltage, current and frequency. - Page 31 Installation, Operation and Technical Manual Rectifier Technologies AC1, AC2, AC3 from MMIB2 AC Dist. Module 16-way X185 ribbon X120 cable to MiniCSU Note: In 220V ph-ph systems if Neutral not supplied, connect AC1- X217 AC2 to X2 input; AC2- AC3 to X120 input and...
-
Page 32: Smm - Site Monitor Module
Installation, Operation and Technical Manual Rectifier Technologies 4.8 SMM - Site Monitor Module Site Monitor Module is an expansion of the RT MCSU-4. It allows the user to monitor status of equipment that is not a part of an RT power system. It may also be used to monitor other (third party) DC power systems. -
Page 33: Installation
Installation, Operation and Technical Manual Rectifier Technologies 4.8.3 Installation Wiring of the site monitor is entirely dependent on the signals to be monitored. shows the basic wiring diagram of a system using a site monitor and a Battery Cell Monitor. Signals... - Page 34 Installation, Operation and Technical Manual Rectifier Technologies Figure 4.8 Example Site Monitor Wiring Diagram 158-1872-01 19-Feb-14...
-
Page 35: Site Monitor Settings
Installation, Operation and Technical Manual Rectifier Technologies 4.8.5 Site Monitor Settings Please observe following guidelines: 1. Label – name of monitored input, up to 8 characters. Leave blank for not used channels. 2. Hi T-hold – thresholds of analog channels to generate warning/alarm/output control. When set to zero the threshold is disabled, adjustable up to 999.9... -
Page 36: Battery Cell Monitor (Bcm)
Installation, Operation and Technical Manual Rectifier Technologies 4.9 Battery Cell Monitor (BCM) The Battery Cell Monitor (BCM) is an add-on module for the MCSU-4. It is used to monitor individual cells of a battery during float or equalisation operation, or during a discharge. -
Page 37: Bcm Specifications
Installation, Operation and Technical Manual Rectifier Technologies 4.9.2 BCM Specifications Battery configuration options: (48V systems): (24V systems): 24Cell x 2V, 12Cell x 4V, 12Cell x 2V, 6Cell x 4V, 8Cell x 6V, 4Cell x 12V 4Cell x 6V, 2Cells x 12V... -
Page 38: Installing The Board
Installation, Operation and Technical Manual Rectifier Technologies 4.9.4 Installing the board Generally, the BCM board is located close to the batteries so that it is not necessary to run large number of wires for long distances. The 16 way ribbon cable connecting to the MCSU-4 can be up to 10m long, but should be connected directly to the MCSU-4, instead of connected at the end of another chain of peripherals. -
Page 39: Battery Cell Lead Connection To The Bcm Board
Installation, Operation and Technical Manual Rectifier Technologies 4.9.6 Battery Cell Lead Connection to the BCM board The battery cell voltage sensing leads are terminated with 13 way female (Weco 5.0mm pitch) screw terminals. This plugs onto the connectors on the BCM board. How the cell voltage sense leads connect to the BCM board depends on the battery configuration. - Page 40 Installation, Operation and Technical Manual Rectifier Technologies Figure 4.12 BCM connections to two 48V (12 cell) battery banks. 158-1872-01 19-Feb-14...
- Page 41 Installation, Operation and Technical Manual Rectifier Technologies Figure 4.13 BCM connections to two 48V (8 monoblock) battery banks. 158-1872-01 19-Feb-14...
- Page 42 Installation, Operation and Technical Manual Rectifier Technologies Figure 4.14 BCM connections to up to four 48V (4 x 12V monoblock) battery banks. 158-1872-01 19-Feb-14...
- Page 43 Installation, Operation and Technical Manual Rectifier Technologies Figure 4.15 BCM connections to two 24V (12 cell) battery banks. 158-1872-01 19-Feb-14...
- Page 44 Installation, Operation and Technical Manual Rectifier Technologies Figure 4.16 BCM connections to two 24V (6 monoblock) battery banks. 158-1872-01 19-Feb-14...
- Page 45 Installation, Operation and Technical Manual Rectifier Technologies Figure 4.17 BCM connections to four 24V (4 monoblock) battery banks. 158-1872-01 19-Feb-14...
- Page 46 Installation, Operation and Technical Manual Rectifier Technologies Figure 4.18 BCM connections to four 24V (2 monoblock) battery banks. 158-1872-01 19-Feb-14...
-
Page 47: Remote Communication Interfaces
Installation, Operation and Technical Manual Rectifier Technologies 5. Remote Communication Interfaces Remote Communications Port is located at the back of MCSU-4. The module is a part of the controllers’ magazine. If a replacement of MCSU-4 is required, there is no need for disconnection of the communication link. - Page 48 Installation, Operation and Technical Manual Rectifier Technologies The main part of Smart Modem is a Socket Modem MT5600SMI-34 manufactured by MultiTech Systems (USA). Please check with your local Telecom authorities if it has necessary approval (it is approved in Australia). If an approval has not been issued yet, an alternative, approved brand can be used.
-
Page 49: Operation
Installation, Operation and Technical Manual Rectifier Technologies 6. Operation System operation is generally controlled by the MCSU-4 system controller. As a result, operation information for the system is directly related to the operation of the MCSU-4 as described in this section. -
Page 50: Mcsu-4 Components
SMR menu, which includes the rectifier related programmed parameters as well as the output current and heat-sink temperature for each rectifier; b) Battery menu in which all the parameters appertaining to the batteries are found;... -
Page 51: Status Indicating Leds (Mcsu-4)
DC is not present Internal failure of MCSU-4 The amber LED indicates any alarm condition, either system or rectifier related. The red LED indicates that one or more of the rectifiers in the system is shut down. 6.2 Operating the MCSU-4 6.2.1 Password security... -
Page 52: Test Mode
Installation, Operation and Technical Manual Rectifier Technologies 6.2.2 Test Mode This is a special mode of system operation allowing service personnel to perform system tests without permanent parameters change and altering system operating history (Alarm Log). To activate Test Mode move to Password Setup sub-menu and enter “TESTMODE” as the password. -
Page 53: Mcsu-4 Alarms
Installation, Operation and Technical Manual Rectifier Technologies In this case, the message indicates that there are three alarms present and they can be observed by pressing the ENTER button. When the ENTER button is pressed the most recent alarm name, such as the one shown below will appear on the display. -
Page 54: User Programmable Relay Functions
Installation, Operation and Technical Manual Rectifier Technologies Alarm Name Comments AC Freq Fault AC frequency lower or higher than preset value Battery Switch One or more battery switches open Cct Breaker Fuse or CB in load distribution open LVDS Open... -
Page 55: Mapping Of Loaded Smrs
Installation, Operation and Technical Manual Rectifier Technologies 6.5 Mapping of loaded SMRs This function is available only on selected models of MCSU-4. In some system configurations it may be necessary to leave empty magazines between groups of rectifiers. In such a case a controller without mapping function would continuously alarm SMR communication fault for magazines with no SMRs. -
Page 56: Three Phase Ac Monitoring Screens
Installation, Operation and Technical Manual Rectifier Technologies Single phase AC voltage. 1ph AC Volts 245V Single phase AC current 1ph AC Current Single phase AC frequency 1ph AC Frequency 50.0Hz 6.6.2 Three Phase AC Monitoring Screens In a system wired for 3 phase input with an AC monitor module, it will be necessary to activate the 3 phase AC monitoring selection screen via the “Auxiliary Units”... -
Page 57: Base Menu Programmable Parameters
Installation, Operation and Technical Manual Rectifier Technologies 6.6.3 Base Menu Programmable Parameters The screens below display programmable parameters within the MCSU-4 Base Menu. To change a parameter, press INC button until the desired parameter is found, then press ENTER. The parameter value will flash on and off. Press INC to increase the value or DEC to decrease the value until the desired value is on the screen. - Page 58 Installation, Operation and Technical Manual Rectifier Technologies Enter the new password again. Confirmation This screen will be displayed for 2 seconds if new password Confirmation and confirmation matched. The screen will be returned to password sub-menu entry point. Password Changed...
- Page 59 Installation, Operation and Technical Manual Rectifier Technologies Number of SMRs in the system. This number must be Number of SMRs entered correctly. Otherwise the display will show that some SMRs are not responding (number too big) or will not be monitored (number too small).
-
Page 60: Audio Alarm
Installation, Operation and Technical Manual Rectifier Technologies Modem enable; this can be toggled between ON and OFF. Modem When a change is made, the front panel is disabled while the modem is activated/deactivated. The screens below (up to Note) will only be displayed if the... -
Page 61: Auxiliary Function Selection & Parameters
Installation, Operation and Technical Manual Rectifier Technologies Audio Alarm is disabled. Audio Alarm Circuit breaker auxiliary contact circuit input. This input can Cct Input be configured to be normally closed, normally open or disabled (Not Used). Used - N/C Battery circuit breaker auxiliary contact circuit input. This... - Page 62 Installation, Operation and Technical Manual Rectifier Technologies AC Frequency high level; if the AC source frequency is 1ph AC fhi Alarm higher than this value, the MCSU-4 will report an AC Freq Fail alarm 55.0Hz AC frequency low level; if the AC source frequency is lower...
- Page 63 Installation, Operation and Technical Manual Rectifier Technologies 6.6.4.3 Battery Cell Voltage Monitoring This function is available only on units fitted with software supporting it. The system must be fitted with Battery Cell Monitor modules. Entry point to Battery Cell Monitor sub-menu when this Battery Monitor auxiliary is switched On.
- Page 64 Installation, Operation and Technical Manual Rectifier Technologies Entry point to Site Monitor sub-menu when this auxiliary is Site Monitor switched On. If it is switched Off the next screen will be shown and the rest of the menu items will be hidden.
-
Page 65: Smr Menu Screens
MCSU-4 (home) menu. NOTE: Output current and limit values shown below are typical for a 25A unit. When a rectifier is on line and operating normally, its output SMR1 current and heatsink temperature are displayed. Pressing ENTER once allows to view additional information. -
Page 66: Smr Menu Programmable Parameters
Installation, Operation and Technical Manual Rectifier Technologies If SMR was shut down on “primary not OK” this screen is SMR3 not displayed. HV Shut Down Read SMR version and heatsink temperature after pressing SMR3 INC or DEC at previous screen. -
Page 67: Smr Menu Sleep Mode
The RSM allows for sufficient time after placing a Rectifier On-Line or into Sleep mode in order for the output of all Rectifiers to settle and the average Rectifier output power to be valid again. The RSM always ensure that the minimum number of Rectifier to keep On- Line is maintained. -
Page 68: Battery Parameter Menu Screens
SMR Sleep Mode report number of rectifiers sleeping Sleeping SMRs SMR Sleep Mode report number of rectifiers online Sleep SMR Online SMR Sleep Mode report Average Rectifier % Output Power Sleep Av Power 80 % 6.8 Battery Parameter Menu Screens All information pertaining to the batteries is accessed by momentarily pressing the Batt button on the front panel. - Page 69 Installation, Operation and Technical Manual Rectifier Technologies Battery 2 Current; (if present) Battery 2 Battery Temperature; If a sensor is fitted, the battery Battery Temp temperature is shown in degrees Celsius. (Since there is provision for only one sensor, the sensor should be located 31C...
- Page 70 System Float voltage. 0.6V The System Voltage Drop parameter is calculated by summing the resistive voltage drop in each rectifier due to output connector, output relay and passive current sharing output “slope” and the expected drop of the busbars of the system.
- Page 71 Installation, Operation and Technical Manual Rectifier Technologies Equalisation Voltage. This sets the maximum voltage System Equalise reached during equalisation of the batteries. 59.5V Equalisation not initialised by voltage level. Volts Start Eq Equalisation initialised by voltage level V reached during Volts Start Eq battery discharge.
-
Page 72: Battery Discharge Test
Installation, Operation and Technical Manual Rectifier Technologies A Low Voltage Disconnect Switch (LVDS) is often LVDS Trip integrated into the system to disconnect the batteries from 44.0V the load in the event that the AC power outage is too long causing the batteries to discharge beyond a safe level. - Page 73 Installation, Operation and Technical Manual Rectifier Technologies The Battery Discharge Test is a software function in the MCSU-4, which performs a periodic, controlled battery discharge using the load to discharge the battery. The test can be used to confirm capacity of the battery in the same way as a manual discharge using an external load would, except the normal system load is used without disconnection.
-
Page 74: Results Of Last Battery Discharge Test - (Last Bdt)
Installation, Operation and Technical Manual Rectifier Technologies Reset of failed test alarm. This message will be seen only if BDT Alarm Reset last test failed and has not been reset. Pressing ‘ENT’ while Press ENTER viewing this display will reset the alarm and hide the message. -
Page 75: Alarms Log Screens
Installation, Operation and Technical Manual Rectifier Technologies Duration of the test Last BDT Dur 1h18min Voltage of the battery at the time of termination of the test. Last BDT EndV 49.2V Remaining estimated capacity of a battery string at the time Last BDT of termination of the test, where n is a number of the string. -
Page 76: Relationship Between "Bcm Batteries" And "Num Batteries
Installation, Operation and Technical Manual Rectifier Technologies 6.11.1 Relationship between “BCM Batteries” and “Num Batteries” With the BCM option enabled, the BCM parameters must be setup before monitoring can be performed. Following through the screens of section 6.6.4.3, the screen indicating “BCM Batteries”... -
Page 77: Earth Leakage Detector - Muib3 And Muib5 Only
Installation, Operation and Technical Manual Rectifier Technologies Battery 1 Current screen appears after pressing BATT. Battery 1 Pressing ENTER brings up the next screen. Battery cell status: Battery 1, Cell 01, cell voltage 2.225V Battery1 Cell01 which is deviating +12% from the average cell voltage of the battery string. -
Page 78: Commissioning
7.1 Indicators on the Rectifier Front Panel There are three LEDs on the front panel to indicate the operating status of the rectifier modules. They are as follows: LED Name... -
Page 79: Commissioning Procedure
15. #16 corresponds to 0001 0000, #17 to 0001 0001 and so on. Insert a rectifier into the #1 position in the system and turn the AC power on. The rectifier should power up and start the MCSU-4. -
Page 80: Maintenance
Under normal conditions, the output current variation from the average rectifier current by every rectifier should be within ±2A or ±3%, whichever is less. It is possible however, for internal loop parameters to change to such an extent that a unit does not share to the extent that it should. - Page 81 The purpose of a filter is to remove dust from the air but as they become dustier less air flows into the rectifier and eventually overheating of the rectifier can occur. The rectifiers will protect themselves in the event of overheating, and an alarm will be generated accordingly.
-
Page 82: Fault Finding And Replacement Procedures
Installation, Operation and Technical Manual Rectifier Technologies 9. Fault Finding and Replacement Procedures This section describes in some detail the possible causes for alarms that may occur from time to time and the procedures that should be followed to clear the alarms and more importantly, address the problem or cause of the alarm. - Page 83 SMRs sharing Communications link malfunctioning or Replace Comms cable and/or SMR load current faulty rectifier (digital current control) Faulty MCSU-4 voltage and current Replace MCSU-4 control loop IODEM signal (analog active current control) Float or Equalise level on MCSU-4 set Check and re-adjust Float or Equalise too high/too low.
- Page 84 Installation, Operation and Technical Manual Rectifier Technologies Alarm Condition Possible Cause Action Suggested No Load Load circuit breakers have tripped and Reset circuit breakers there is no load If only one unit showing alarm, comms In SMR menu check status of this SMR.
-
Page 85: Mcsu-4 Fault Finding And Repair Procedures
Installation, Operation and Technical Manual Rectifier Technologies Alarm Condition Possible Cause Action Suggested Battery Disch Output voltage low due to SMRs off Check AC voltage & restore if possible; Float level set too low Set float level to correct value... -
Page 86: Replacing Mcsu-4
Installation, Operation and Technical Manual Rectifier Technologies It therefore follows that it is possible for a MCSU-4 fault to occur which can suppress the SMR voltage to that low level and thus cause a battery discharge despite the precautions that have been taken to ensure that this does not happen.
Need help?
Do you have a question about the RT9- 24V and is the answer not in the manual?
Questions and answers