Table of Contents
Advertisement
Quick Links
Advertisement
Table of Contents

Related Manuals for Russell Hobbs 18941 Series


Summary of Contents for Russell Hobbs 18941 Series
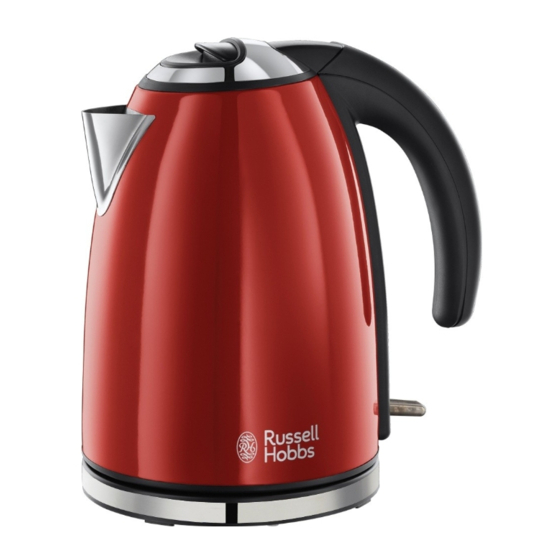
- Page 1 PADDINGTON KETTLE 2 YEAR WARRANTY 18941 Series INSTRUCTIONS & WARRANTY...
- Page 2 (Warranty Period), for the period of:- (a) Two (2) years for Russell Hobbs products (see product packaging for details) (b) Two (2) years with ve (5) year motor warranty for Russell Hobbs products (see product packaging for details) (c) Limited Lifetime, Ten (10) years for Russell Hobbs cookware.
- Page 3 Warranty Conditions 4. The Goods must be used in accordance with the manufacturer’s instructions. This Warranty does not apply should the defect in or failure of the Goods be attributable to misuse, abuse, accident or non-observance of manufacturer’s instructions on the part of the user.
-
Page 4: Before Using For The First Time
Congratulations on the purchase of your Russell Hobbs appliance. Each unit is manufactured to ensure safety and reliability. Before using the appliance for the first time, please read the instruction booklet carefully and keep it for future reference. Pass it on if you pass on the appliance. -
Page 5: Switching Off
SWITCHING ON Caution: Keep clear, as steam will escape from the spout when boiling. • Plug the power cord into the wall power outlet and switch it on. • Place the kettle on the base – take care not to spill any water. •... -
Page 6: Water Filter
DE-SCALE REGULARLY – EVEN IN SOFT WATER AREAS Water contains minerals that will form deposits on the inside of your kettle, commonly referred to as scaling. Scaling discolours the internal surfaces and can affect the performance. To maintain the performance of your kettle, it should be de-scaled every three months or so. De-scale more frequently if you live in a hard water area. -
Page 7: Important Safeguards
IMPORTANT SAFEGUARDS When using electrical appliances, basic safety precautions should always be followed, including: 1. To protect against electrical hazards do not immerse the power cord, plug, base, or kettle in water or any other liquid. 2. Do not use in the bathroom or near any source of water. Do not use outdoors. 3. - Page 8 RUSSELL HOBBS and logo are Trade Marks of Spectrum Brands, Inc., or one of its subsidiaries. ©2013 Spectrum Brands, Inc.
-
Page 9: Year Warranty
PADDINGTON 2 SLICE TOASTER 2 YEAR WARRANTY RHG501 series INSTRuCTIONS & WARRANTy... - Page 10 (Warranty Period), for the period of:- (a) Two (2) years for Russell Hobbs products (see product packaging for details) (b) Two (2) years with ve (5) year motor warranty for Russell Hobbs products (see product packaging for details) (c) Limited Lifetime, Ten (10) years for Russell Hobbs cookware.
- Page 11 Warranty Conditions 4. The Goods must be used in accordance with the manufacturer’s instructions. This Warranty does not apply should the defect in or failure of the Goods be attributable to misuse, abuse, accident or non-observance of manufacturer’s instructions on the part of the user.
- Page 12 Congratulations on the purchase of your Russell Hobbs appliance. Each unit is manufactured to ensure safety and reliability. Before using the appliance for the first time, please read the instruction booklet carefully and keep it for future reference. Pass it on if you pass on the appliance.
- Page 13 BEFORE FIRST TIME USE • Ensure all packaging, swing tags and promotional labelling has been removed from the toaster, and check that the toasting slots are empty before connecting to the wall power outlet. • Position your toaster in a well ventilated area, on a firm, level, heat-resistant surface, clear of curtains, drapes and other combustible materials. • Plug the power cord into the wall power outlet and switch on. • Set the browning control to the highest setting (6). • Now operate the toaster by pressing down the bread carriage lever until it locks into place. This process will cure the new elements and burn off any dust, residues, etc., which may have accumulated on the elements. The new elements may give off an odour and a small amount of vapour whilst burning in; this is normal. The toaster will shut itself off after a few minutes. It is now ready for toasting.
-
Page 14: Hints And Tips
REHEATING TOAST Note: You must only reheat plain, unbuttered toast. • Set the browning control to the lowest setting. HINTS AND TIPS • When toasting more than one slice of bread, use slices of similar size, thickness and freshness. • Old or thin bread will cook faster than fresh or thick bread, so use a lower setting. •... - Page 15 2. Do not insert anything, other than food to be toasted, into the toasting slots. Doing so may result in personal injury from electric shock and/or damage to the appliance. 3. Do not use in the bathroom or near any source of water. 4.
- Page 16 RUSSELL HOBBS and logo are Trade Marks of Spectrum Brands, Inc., or one of its subsidiaries. ©2013 Spectrum Brands, Inc.
Need help?
Do you have a question about the 18941 Series and is the answer not in the manual?
Questions and answers