Table of Contents
Advertisement
All rights reserved. No part of this publication may be reproduced or transmitted
in any form or by any means, electronic, mechanical, photocopying, recording,
or otherwise, without the prior written permission of TVS Electronics. The
information contained here is designed only for use with this TVS printer. TVS
Electronics is not responsible for any use of this information as applied to
other printers.
Neither TVS Electronics nor its affiliates shall be liable to the purchaser of this
product or third parties for damages, losses, costs or expenses incurred by
the purchaser or third parties as a result of accident, misuse or abuse of this
product or unauthorized modifications, repairs or alterations to this product
or other than designed as a original TVS Electronics products.
Every effort has been made to ensure that the information in this document is
complete, accurate and up-to-date. TVS-E assumes no responsibility for the
results of errors beyond its control.
©
Copyright
2004 by TVS Electronics, Chennai, India.
TVS Electronics Limited, 34, Developed Plots, South Phase,
Industrial Estate, Guindy, Chennai - 600 032. INDIA.
Tel: (+91) 44 - 2232 5506/09/5200 5200
Fax:(+91) 44 - 2232 7577
www.tvs-e.com
th
REL - 2004, 20
September.
Advertisement
Table of Contents

Related Manuals for TVS electronics MSP 450 Champion


Summary of Contents for TVS electronics MSP 450 Champion
- Page 1 Electronics is not responsible for any use of this information as applied to other printers. Neither TVS Electronics nor its affiliates shall be liable to the purchaser of this product or third parties for damages, losses, costs or expenses incurred by...
- Page 2 FCC Compliance This equipment has been tested and found to comply with the limits for a Class B Digital device, pursuant to part 15 of the FCC Rules. These limits are designed to provide reasonable protection against harmful interference in a residential installation.
- Page 3 Energy Star Compliance As an Energy Star Partner, TVS Electronics has determined that this product meets the Energy Star guidelines for Energy efficiency. The International Energy Star Office Equipment program is a voluntary partnership with the computer and office equipment industry to promote the...
-
Page 4: Table Of Contents
CONTENTS 1. Introduction 2. Know your MSP 450 Champion The MSP 450 Champion Advantage Important Safety Instructions 3. Installation Unpacking the printer Identifying Printer Components Choosing a place for the printer Installing the ribbon cassette Installing the Inkbank Connecting the printer to power... - Page 5 Paper Tear-Off Paper Park Printing on Multi-part forms Copy Mode Adjust the top-of-form position 6. Maintenance Cleaning your MSP 450 Champion Preserving the Ribbon Cassette Shifting the printer DOs and DON’Ts 7. Troubleshooting Power Paper feeding Printing 8. Specifications Printer Specifications Paper Specifications 9.
-
Page 6: Introduction
1. TVS ELECTRONICS - AN INTRODUCTION TVS Electronics, founded in 1986, started as an IT peripherals manufacturer in India and has today transformed itself into an IT Transaction Solution provider and Business Process Outsourcing partner. True to its Credo “Productivity through Intelligence”, the organization has... -
Page 7: Know Your Msp 450 Champion
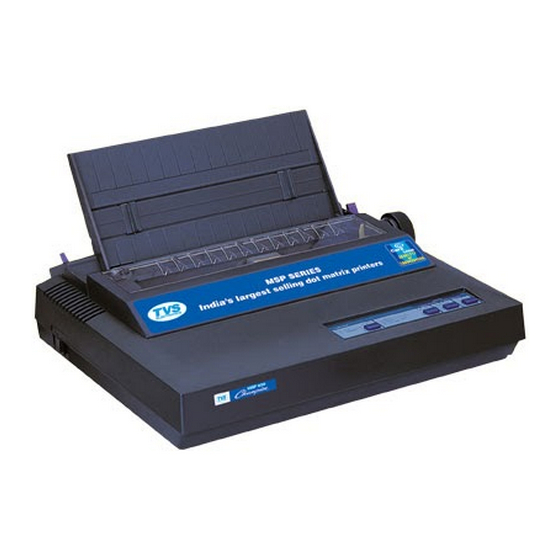
It is the best-in class office printer offering true language printing - for printing letters, documents, proposals and invoices. Your MSP 450 CHAMPION is equipped with the new generation 9 pin printhead from TVS Electronics. This printer is capable of printing both text and graphics in bi-directional mode. -
Page 8: Important Safety Instructions
Important Safety Instructions Your MSP 450 Champion has been carefully designed to give you years of safe, reliable performance. However, there are a few basic precautions you should take to avoid hurting yourself or damaging the unit: Read all of these instructions and save them for later reference. - Page 9 10. If an extension cord is used with this product, make sure that the total of the ampere ratings on the product plugged into the wall outlet does not exceed 15 amperes. 11. Never push objects of any kind into this product through cabinet slots as they may touch dangerous voltage points or short out parts that could result in a risk of fire or an electric shock.
-
Page 13: Installation
3. INSTALLATION Unpacking the printer In addition to this guide, your printer box should include a MSP 450 Champion printer software CD-ROM, and the following items: Ribbon Cassette & Inkbank MSP 450 Champion Powercord Cable Parallel Interface Cable User Guide Remove all the protective materials packed around and inside your printer first, then place the printer on the table. -
Page 14: Identifying Printer Components
Identifying Printer Components The main components of your MSP Series printer are: ON/OFF switch Top Cover Paper Insertion Guide Tractor Unit Paper Select lever Platen Knob Control Panel Parallel Interface Connector Print head and Ribbon Cassette and InkBank... -
Page 15: Choosing A Place For The Printer
Choosing a right place for the printer MSP 450 Champion has been designed to withstand rugged environmental conditions. But to get the best performance from your printer kindly take care of the following points: Follow the guidelines given below carefully when selecting a location for your printer. -
Page 16: Installing The Ribbon Cassette
Installing the ribbon cassette To install the ribbon, follow these steps: Turn OFF the printer power switch Open the top cover, and slide the printhead to the center of the platen. - Page 17 Remove the new cassette from its packaging and position it with the ribbon knob which should be aligned over the post protruding from the left end of the floor of the printer opening. Lower the ribbon cassette into place and snap it down. Ribbon groove Ribbon gear...
- Page 18 Slide the ribbon down into position between the printhead and the metal ribbon mask. Do not force the ribbon between the ribbon mask and the ribbon guide (the black plate close to the platen). Turn the ribbon knob anti-clockwise for advancing the ribbon until there is no slack.
-
Page 19: Installing The Inkbank
Installing the Inkbank Your MSP 450 Champion comes with a patented Inkbank, it is the refilling mechanism with a life of 10 Million Characters. To insert the Inkbank in the cassette follow the illustration given below: In order to replace the Inkbank, pull the Inkbank and insert the new one as shown above. -
Page 20: Connecting The Printer To Power
Connecting the Printer to Power Power supply unit of MSP 450 Champion is housed externally as a separate unit. It has to be connected to the main Printer unit, through the power supply socket positioned at the back of the printer. -
Page 21: Connecting The Printer To Your Computer
Connecting the printer to your computer Your MSP 450 champion communicates with the computer through Centronics Parallel Printer cable, which comes along with your printer. Before making any connections, turn off both your printer and your computer. To connect the parallel cable to your printer, follow these steps: Switch off the printer. -
Page 22: Installing The Driver
Installing the Driver Insert CD Click Settings - Printer Select Add Printer... - Page 23 Choose Local Printer and Click Next Click Have Disk Click Browse Choose from CD-Driver- for TVS-E MSP (Select Driver files from the Cd path):tvse\drivers\MSP Series\ (Operating System) After Selecting Click OK...
- Page 24 Select your Printer Model and Click OK Finish Installation...
-
Page 25: Control Panel
4. CONTROL PANEL Control panel usage Your MSP 450 Champion has a user friendly and easy to use Control Panel. Control Panel has tactile switches, which produces click sound, and ensures you that the switch is operated. Control Panel is as shown below:... - Page 26 Modes ONLINE Mode You can print either text or graphics, only in ONLINE Mode. The printer will receive data from printer only in ONLINE Mode. The ONLINE Indicator LED glows green when the printer is in this mode. ON LINE Copy Mode 10 CPI...
-
Page 27: Online Mode
Paper Out Mode When there is no paper for the printer to print, the printer automatically enters Paper Out Mode. The ONLINE Indicator LED blinks in this mode. ON LINE Copy Mode 10 CPI PITCH PROPORTIONAL 12 CPI CONDENSED This indicates you to feed paper for further printing. Once the paper is fed, the printer goes to OFFLINE Mode. - Page 28 SWITCHES ONLINE Switch You can press this switch to toggle the printer between ONLINE Mode and OFFLINE mode. However, you can’t enter into ONLINE Mode, when the printer senses paper out. If you wish to stop the printer while printing, you can just go to OFFLINE Mode by pressing ONLINE Switch.
- Page 29 FONT Switch This switch is used to select the built-in fonts of your choice. Your MSP 450 Champion supports Draft High Speed Draft Roman Sans Serif Courier Prestige Orator Script OCR-B (selectable through software or Menu mode) 10. Orator-S (selectable through software or Menu mode) 11.
- Page 30 PITCH Switch This switch is used to select the built-in fonts of your choice. Your MSP 450 Champion supports 10 cpi 12 cpi Condensed (17 cpi) Proportional The following diagram shows PITCH Indicator LED status and the corresponding Pitch size selected.
-
Page 31: Entering Menu Settings
Entering Menu mode Settings First remove the printer’s Top Cover, so you can see the printed Menus and Options. Just press the FONT Switch for about 5 seconds in OFFLINE, you will enter into Menu Mode. Now your Control Panel switches gets a new name and meaning attached to it. -
Page 32: Changing The Settings
Changing the settings To change the current setting, press the SELECT key until the printhead is beneath the option you want. Then press the SAVE key. The printer fills in the new setting and advances to the next menu item. PAPER PARK ON LINE COPY MODE... - Page 33 The printer automatically exits the Menu Programming when you press MENU or SAVE at the last menu item. PAPER PARK ON LINE COPY MODE FORWARD MICROFEED REVERSE MICROFEED Copy MENU DRAFT PAPER TEAR Mode Mode PRESTIGE 10 CPI LF/FF ONLINE PITCH FONT PROPORTIONAL...
-
Page 34: Menu Mode Settings
Menu mode settings The following is a list of setting available. You can set the printer to any of the settings. MSP 450 CHAMPION DEFAULT PRINT SETTINGS ARE UNDERLINED INSTALL 1 LANGUAGE ENGLISH DEVAN TAMIL PRINT STYLE LANG-STD PCISCII 1SCII91... - Page 35 FORM LENGTH: 3.67 INCHES 4.00 INCHES 6.00 INCHES 7.00 INCHES 8.00 INCHES 11.00 INCHES 12.00 INCHES 14.00 INCHES PAGE SKIP PRINT MODE TEXT DIR BI-DIRECTION UNI-DIRECTION GRAPHIC DIR BI-DIRECTION UNI-DIRECTION PROP-ALIGN CHARACTER SLASH ZERO CHARACTER SET: ITALICS GRAPHICS INT. CHAR. SET.: USA, FRANCE, GERMANY, UK, DENMARK 1, SWEDEN, ITALY, SPAIN 1, JAPAN, NORWAY, DENMARK 2, SPAIN 2,...
- Page 36 CHARACTER SET SET1 SET 2 PITCH: 10 CPI 12 CPI 15 CPI PROPORTIONAL INSTALL 2 OPTION RAM BUFFER DOWNLOAD TEAR OFF MOT_COM AUTO CR AUTO LF COPY MODE LANGUAGE ENGLISH, FRACAIS, DEUTSCH, ITALINO, ESPANOL, PORTUG & NEDERL ENABLE DISABLE FONT LOCK...
-
Page 37: Loading The Paper
Setting the Paper Select Lever and the Tractor Select Lever You can either use single sheet stationery or continuous stationery with your MSP 450 Champion. You can select the type of stationery you use, by setting the Paper Select Lever and the Tractor Select Lever. -
Page 38: Setting The Paper Thickness Lever
Setting the Paper Thickness Lever Your MSP 450 Champion is capable of printing multi-part stationery, up to four copies (including original). You can set the paper thickness lever accordingly and take multicopies. To print in multi-part stationery, the printhead must be adjusted to allow for the extra thickness of the paper. -
Page 39: Installing The Tractor Unit
Installing the Tractor Unit Your MSP 450 Champion comes with a convertible Push and Pull Tractor Unit. The Tractor Unit is a paper feed mechanism used for printing on continuous stationery. The tractor has sprockets (or tractors) on either end, that can slide left or right to adjust to the paper width. - Page 40 The sprocket pins on the tractors fit into the holes along the edge of the paper. The flip-up covers on the tractor, clamps the paper in place over the pins. With each new line, the tractor wheel rotates, making the paper move through the printer.
-
Page 41: Installing The Tractor In The Push Position
Installing the Tractor in the Push Position Your printer comes from the factory with the push position as the default position for Tractor Mechanism. When the tractor is in the push position, paper first passes through the tractor that “pushes” the paper around the platen and through the printer. To install the tractor feed mechanism in Push Position Switch the printer power OFF. -
Page 42: Installing The Tractor In The Pull Position
Installing the Tractor in the Pull position When the tractor feed mechanism is in the Pull Position, the paper first passes around the platen and then the tractor “pulls” the paper through the printer. Here’s how to install the tractor-feed mechanism in the Pull Position Switch the printer power OFF. -
Page 43: Installing Paper Insertion Guide
Installing Paper Insertion Guide Before you try to install the paper insertion guide, ensure the Tractor Unit is in Push Position. First, fit the guide slots on each end of the paper insertion guide on the guide pins provided in both side of the Tractor Unit. Slide the sheet guide down until the ends rest on the guide pins. -
Page 44: Loading Single Sheet
Loading single sheet (A4) Using MSP 450 Champion you can print on Letter Heads and other types of stationeries that are not available in continuous format. Your printer has the automatic paper loading feature to load single sheets. Ensure Paper Insertion Guide is installed properly. - Page 45 Move the left paper guide on the Paper Insertion Guide to the initial printing position. Insert the single sheet and adjust the right paper guide to the paper width. A4 Cut Sheet Slide the cut sheet behind the platen through the paper guides. The paper should be inserted about 1 inch.
-
Page 46: Loading Continuous Stationery
Loading continuous stationery Your printer can print from 3.5 to 10 inches form lengths of continuous paper. You can feed standard continuous paper through the provision provided in Rear or Bottom of the printer. Rear feed continuous Paper To load continuous paper for rear feeding, follow these steps: Move the Paper Select Lever to the PIN position Move the Tractor Select Lever to the Paper Stack position. - Page 47 Flip the locking levers forward and adjust the tractors to the approximate paper width. You can use the small arrow on the edge of the top cover as a guide for the left edge of the paper. Adjust the paper supports so that they are evenly spaced.
- Page 48 Press LF/FF Switch to advance the paper step by step. When the paper is sensed by the sensor at the rear end, the paper advances automatically to the Top-of-Form position. Adjust the paper left or right as needed by sliding the tractors. When the paper is positioned, lock the tractors in place by flipping the locking levers towards the back.
-
Page 49: Bottom Paper Feeding
Bottom Paper Feeding Bottom paper feeding with the Tractor Unit in the Pull Position is idle for printing multi-part forms. The features like Paper Tear Off, Top-of-Form adjustment and Paper Parking are not available with Bottom Paper Feeding. To load continuous forms for bottom feeding follow these steps : Be sure the tractor is in the pull position. - Page 50 Position the forms in the printer as far left as possible in order to activate the printer’s paper sensor. You can tell that the paper sensor is activated when the control panel’s Online Indicator LED stops flashing. Set the printer right-side up. Open the tractor covers, position the forms on the sprockets and close the covers.
-
Page 51: Paper Tear-Off
Paper Tear-Off This is a very useful feature if you use your printer for invoicing, ticketing or documents that are printed and issued immediately. Paper Tear-Off feature is selected by enabling “Tear Off” in the MENU Programming. The top cover of your printer has a tear bar at the rear edge so you can easily tear off perforated sheets with ease. - Page 52 When the next set of data is sent to the printer (say the data for next ticket), the paper is automatically retracted to the appropriate printing position. Then the printing starts. When a print job ends in the middle of a page, press the ONLINE key to take the printer OFFLINE, and then hold the LF/FF key for 2 to 3 seconds to advance the paper to tear-off position.
-
Page 53: Paper Park
Paper Park Your printer is equipped with a feature called Paper Park. If you have applications to print both with cut sheets and continuous stationery you need not unload your continuous stationery and load cut sheets. This is done with a Paper Park command through control panel. - Page 54 The continuous paper goes back out of the Paper End Sensor, no longer touching the platen and rests on the tractor. However, it is ready to feed into the printer. Repeat the above step if the stationery is not fully parked. The printer reverses the paper a maximum of 15 inches each time you give a Paper Park command.
- Page 55 The paper gets automatically fed and stops in the Top-of-Form position. If necessary, make any adjustments for paper alignment with the Paper Select Lever in the PIN Position; then return it to the FRIC position. Press the Online Switch to set the printer to ONLINE Mode. Note: Paper Park feature is available only with the Tractor in the Push Position.
-
Page 56: Printing On Multi-Part Forms
Printing on Multi-part forms Your printer is capable of printing multi-part stationery, up to four copies (including original). Set the paper thickness lever according to the number of copies you take. Enable COPY Mode only when you are printing 1+3 copies. Caution: If COPY Mode is enabled while printing in single sheet or other than 1+3 copies then the print head might be damaged. -
Page 57: Copy Mode
COPY Mode Only when you are printing a multi-part stationery (1+3 copies), enable COPY Mode to get clear impression even in the last copy. Ensure the printer is in ONLINE Mode and there is no print job in process. COPY Mode is enabled by holding the PITCH Switch for 5 seconds in ONLINE Mode. -
Page 58: Adjust The Top-Of-Form Position
Adjusting the top-of-form position The “Top-of-Form” is the distance from the top edge of the paper to the top of the first line of print. The default Top-of-Form setting is 1 inch. This feature is useful when you need to print in preprinted stationery like letterheads, invoice, etc. - Page 59 PAPER PARK ON LINE COPY MODE FORWARD MICROFEED REVERSE MICROFEED Copy MENU DRAFT PAPER TEAR Mode Mode PRESTIGE 10 CPI LF/FF ONLINE PITCH FONT PROPORTIONAL ROMAN 12 CPI ORATOR SANS SERIF SCRIPT CONDENSED COURIER Use Micro line feeds (forward and reverse) to adjust the TOF and set to your requirement.
-
Page 60: Cleaning Your Msp 450 Champion
6. MAINTANENCE Cleaning your MSP 450 Champion To keep your MSP 450 Champion operating at its best, you need to clean it periodically. Before cleaning: Make sure the printer is switched off. Switch off the mains power supply Unplug the power cord from the electrical outlet. -
Page 61: Preserving The Ribbon Cassette
Preserving the Ribbon Cassette To ensure a long life for your cassette and optimum performance from your MSP 450 Champion: Keep the new ribbon cassette in its packaging untill you are ready to install it. Remove the ribbon and TVS Inkbank only if necessary. -
Page 62: Shifting The Printer
Shifting the Printer The following steps should be followed for shifting / transporting the printer from one location to another location: Unplug the power supply. Detach the external power adaptor. Detach interface cable from the printer. Remove any paper loaded in the printer. Make sure the Printhead is not HOT. -
Page 63: Dos And Don'ts
DOs and DON’Ts Do place the printer on uniform surface. Do use TVS-E Genuine Ribbons and Inkbanks, for better print quality and long Printhead life. Rotate the ribbon in the direction shown on the ribbon cassette. Do adjust head gap while using multi-part stationery. Always stack the continuous sheet below the printer stand to avoid paper jam. -
Page 64: Troubleshooting
7. TROUBLESHOOTING POWER PROBLEM: Printer is turned ON but the POWER light on the control panel does not glow. CHECKS: Check the power cord. Is it firmly connected to the wall outlet? Plug a lamp or other device into the wall outlet to be sure it is working. PROBLEM: The control panel lights come on briefly and go off CHECKS:... -
Page 65: Paper Feeding
PAPER FEEDING PROBLEM: Continuous stationary does not feed properly. CHECKS: Make sure the continuous paper is set in the tractors correctly Be sure the paper select lever is in the correct position. Make sure the paper is stacked properly Make sure the paper is loaded properly as per the instructions given in the manual. - Page 66 Check the tractor. It must be in the Push position. Be sure the printer is in OFFLINE Mode. PROBLEM: Continuous-feed paper jams. CHECKS: Make sure the tractors are locked. Make sure the paper select lever is set in PIN position. Make sure the paper thickness lever is correctly set for the type of paper you are using.
-
Page 67: Printing
PRINTING PROBLEM: Printhead does not move. CHECKS: Open the top cover and try turning the ribbon knob. If it is jammed, replace the ribbon cassette with a new one. Check inside the printer for excessive dust or dirt that may be restricting the printhead’s movement. - Page 68 CHECKS: Four-part forms should always be bottom-fed through the printer. Old carbonless forms don’t create as dark an image as fresh forms. We recommend using the Sans Serif font because it is the most readable font. Adjust the paper thickness lever to the correct position. Set EMPHASIZED print ON for better results.
- Page 69 CHECKS: Your word processing software may be sending a reset command that cancels this control panel setting. Set FONT LOCK to ON using the control panel to protect font settings from software override. To avail Online Support visit us at: www.tvs-e.com or careline@tvs-e.com DO NOT TRY TO REPAIR THE PRINTER YOURSELF...
-
Page 70: Specifications
8. SPECIFICATIONS Printer Specification Model Name MSP 450 Champion Print Head Type 24 Pin Print Direction Bi-directional logic seeking Print Width 80 column Print Head Life 200 Million Characters Print Speed Character Pitch (cpi) High Speed Draft (cps) Draft (cps) - Page 71 Paper Handling Paper Path Standard Top, Rear, Bottom Continuous-Tractor Feed Standard Convertible Push & Pull Paper Size Cut Sheets Width 3.5-10" Continuous Form Width 3.5-10" Paper Thickness Tractor feed - 0.3mm(max) Friction feed - 0.3mm(max) Copy Capability 1+3* Consumables - Ribbon Type Unique TVS Ribbon Cassette with Replaceable Inkbank...
- Page 72 Software Specifications Drivers Windows 95, 98, NT 4.0, 2000, Me, XP, Linux Redhat Electronic Guide HTML Based Electrical Specifications Operating Voltage 150 VAC-270 VAC Mains Frequency 47-63 Hz Power (Standby) Environmental Operating Conditions Temperature +5 to +45 deg C Relative Humidity 10% to 80% Physical Dimensions Width x Depth x Height (mm)
-
Page 73: Paper Specifications
Paper Specification Note: Use recycled paper and envelopes only under normal temperature and humidity conditions, as follows: Temperature 15 to 25 ºC (59 to 77 ºF) Humidity 30 to 60% RH Do not load paper that has been folded or is damaged, wrinkled, or curled. - Page 74 No. 10:241 x 105 mm (9.5 x 4.1”) Thickness 0.16 to 0.35 mm (0.0063 to 0.01378”) Weight 45 to 90 g/m2 (12 to 24 lb) Continuous paper (standard and multipart): Front entry only Width 101.6 to 254 mm (4.0 to 10.0”) Length 101.6 to 558.8 mm (4.0 to 22.0”) (one page)
- Page 75 The thickness of the perforation part when extended should be 1 mm or less. Continuous paper with labels: Front and Bottom entry Label size 23.8 x 63.5 mm (15/16 x 2.5”) Minimum 2.5 mm (0.1) cornerradius, minimum Backing sheet width 101.6 to 254 mm (4.0 to 10.0) Backing sheet length 101.6 to 558.8 mm (4.0 to 22.0)
-
Page 76: Ascii Table
9. ASCII TABLE This table lists the ASCII characters and their decimal, octal and hexadecimal numbers. Characters which appear as names in parentheses (e.g., (nl)) are non-printing characters. - Page 77 ASCII Name Description C Escape Sequence null byte bell character backspace horizontal tab formfeed newline carriage return vertical tab escape space...
- Page 78 ESC SEQUENCES FOR MSP 450 CHAMPION The following section lists ESC sequences used in MSP 450 Champion COMMAND COMMAND DESCRIPTION Character Sets ESC 7 Select IBM character set 1 ESC 6 Select IBM character set 2 ESC ( T Select Code Page...
- Page 79 COMMAND COMMAND DESCRIPTION ESC _ Overscore ON ESC_ Overscore OFF Vertical control ESC C 0 Page length, set in n inches ESC C n Page length set in lines ESC N Skip over perforation ON ESC O Skip over perforation OFF Form Feed Line Feed ESC 1...
- Page 80 COMMAND COMMAND DESCRIPTION Character size/spacing ESC g Select 15 cpi pitch* ESC SI Select 20 cpi pitch* ESC S Superscript printing ON ESC V Set Intercharacter spacing* Character style ESC # HSD print mode ON ESC % G Italics ON ESC % H Italics OFF ESC DEL F...
- Page 81 COMMAND COMMAND DESCRIPTION ESC U Uni-directional print ON ESC U Uni-directional print OFF Vertical control ESC J Perform n/216th line feed ESC % 5 Perform n/144th line feed ESC 5 Auto Line Feed ON ESC 5 Auto Line Feed OFF ESC % 9 Set line spacing to 7/144 inch* ESC DLE H...
-
Page 82: Customer Support
10. CUSTOMER SUPPORT If your printer is not operating properly and you cannot solve the problem using the Troubleshooting information, contact customer support services for assistance. We will be able to help you much more quickly if you give us the following information: Printer model Serial number of your printer (the serial number is on the back of the... -
Page 83: Website Details
11. WEBSITE DETAILS For further information and product details visit us at www.tvs-e.com If you cannot solve the problem using the troubleshooting information you can contact us at careline@tvs-e.com You can register your call with the following details: Name Printer model Serial number Country Problem faced... -
Page 84: Glossary
12. GLOSSARY GLOSSARY - A ,B APPLICATION PROGRAM Software purchased or written for performing specific tasks. It makes a person’s job easier and more efficient. Some of the popular programs are WordStar, dBASE, WordPerfect, Lotus 1-2-3 and PageMaker. ASCII (AMERICAN STANDARD CODE FOR INFORMATION INTERCHANGE) A standardised coding system for letters and symbols.It contains characters found on a keyboard and a few control commands. - Page 85 BYTE A group of 8 bit that a computer stores in one location. Each letter pressed on the keyboard generates a byte. GLOSSARY - C CHARACTER GRAPHICS The characters sent to the printer that represent symbols not found on a typewriter keyboard.
- Page 86 COPY MODE Increases multi-copy capability by increasing the pin (in the print head) intensity and correspondingly reduces the speed. CPI (CHARACTERS PER INCH) A measure of character spacing in printing. CPS (CHARACTERS PER SECOND) A measure of the speed at which characters are printed. GLOSSARY - D DEFAULT Printer settings which are used by the printer when it is turned on, reset or...
- Page 87 GLOSSARY - E, F, G ELITE A Pitch where characters are printed 12 characters per inch. EMPHASIZED (ENHANCED) A printing mode in which each dot is printed twice, with the second slightly to the right of the first. This makes the printed text bold. ESCAPE (ESC) A special control code used to begin most printer commands.
- Page 88 GLOSSARY - H, I HEX DUMP A trouble-shooting feature: In this mode each code that is received by the printer is printed in hexadecimal notation.The control codes are also printed as hex codes rather than being executed. It helps to diagnose any malfunctioning in data transfer between the computer and printer.
- Page 89 GLOSSARY - L, M, O Letter Quality A superior method of printing in a 24 wire Dot matrix printers. LQ reduces the print speed and increases the number of dots per character to increase the print quality. LINE FEED (LF) A feature in the printer that enables the paper to advance one line.
- Page 90 GLOSSARY - P PAPER PARK A feature that permits you to switch from continuous stationery to single sheets without completely retracting the former. Thus the stationery not in active use is “parked” till such time it is required again for printing. This feature is possible only with the tractor in the push mode.
- Page 91 PORT The connector that a cable plugs into. Hence terms such as parallel port; communication port are commonly used. PRINTER DRIVER A software program that translates features of application software to commands that the specific printer can interpret. PROPORTIONAL SPACING A printing mode in which the space given to each character is proportional to its width.
- Page 92 SELF TEST A diagnostic feature in the printer. Without being connected to a computer, under this mode the printer would print characters stored in the ROM. SERIAL INTERFACE Serial interface is also called as the communication port or the COM port. Normally this interface is used for connecting a modem or a mouse.
Need help?
Do you have a question about the MSP 450 Champion and is the answer not in the manual?
Questions and answers