Advertisement
60cm Double Oven
Installation and User manual
Content
Important Safety instructions-------------------- 2
Product description--------------------------------- 4
Installation-------------------------------------------- 6
Start using your oven------------------------------- 8
Maintenance and cleaning------------------------ 13
Warranty----------------------------------------------- 15
For warranty service call 1300 373 199 (Australia)
or 0508 123108 (New Zealand) to connect you to
the nearest authorised service centre
20131205 issue0
BDO614DX
BDO614DX-F
1
Advertisement

Subscribe to Our Youtube Channel
Related Manuals for Bellini BDO614DX


Summary of Contents for Bellini BDO614DX
-
Page 1: Table Of Contents
Product description--------------------------------- 4 Installation-------------------------------------------- 6 Start using your oven------------------------------- 8 Maintenance and cleaning------------------------ 13 Warranty----------------------------------------------- 15 For warranty service call 1300 373 199 (Australia) BDO614DX or 0508 123108 (New Zealand) to connect you to BDO614DX-F the nearest authorised service centre... -
Page 2: Important Safety Instructions
Important Safety Instructions This manual explains the proper installation and use of your oven, please read it carefully before using even if you are familiar with the product. The manual should be kept in a safe place for future reference. General Warnings Child Safety If the supply cord is damaged, the cord must be... - Page 3 To reduce the risk of fire, do not place or install Do not use the door as a shelf. this unit in areas where the ventilation or Do not push down when the oven door is open. circulation ducts may become blocked. Make sure there are at least 70mm of space between the Grill back of your oven and the wall.
-
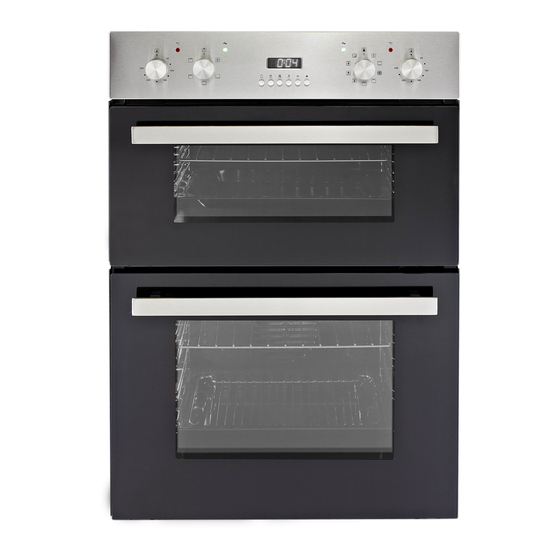
Page 4: Product Description
Product Description Control panel Oven lift handle Upper oven Oven door handle Lower oven Accessory Picture Quantity Name Baking tray Grill rack Screws(ST4x35) Technical Specifications product usable electrical max. power dimensions (h x w x d) mm net weight capacity connection rating 36L(Upper) -
Page 5: Control Panel
Control panel Item Description Explanation Upper oven heating element indicator It turns on when upper oven heating element is on. Upper oven power indicator It turns on when upper oven has power in. Display Auto function indicator light Cooking indicator light Minute minder indicator light Lower oven power indicator It turns on when lower oven has power in. -
Page 6: Installation
Installation WARNING! Please follow the points below when installing the appliance available from the vinyl-wrap supplier. Use An Authorized Person As stated in the local municipal building codes GSM cannot accept responsibility for damage and other relevant statutory regulations: caused by installation into low temperature Wiring connections must be in accordance with tolerant cabinets. - Page 7 Cut-out dimensions Mounting Screw CAUTION! Your appliance must be mounted on a flat surface for the full width and depth of the product. Connect power supply WARNING: THIS APPLIANCE MUST BE EARTHED. This appliance should be wired into a 30A double pole switched fused spur outlet, having 3 mm contact separation and placed in an easily accessible position adjacent to the appliance.
-
Page 8: Start Using Your Oven
Start Using Your Oven Preparing Your Oven Remove any packing material before start. First time your oven connected with power supply, display will flash, press , display stop flashing and show 0.00, turn temperature and function selector to choose conventional oven function and temperature to 250 degrees , oven start working, keep running about 30 –... - Page 9 Function Description Oven light By setting the button to this position the lighting inside the oven is switched on, e.g. use when washing the oven chamber. When this function is set, the oven is heated using only the bottom element Use for, Bottom heating element e.g.
- Page 10 Select Temperature And Start Cooking The oven thermostat control knob sets the required temperature of the oven. It is possible to regulate the temperature within a range of 50 - 250°C. Work with Timer Your oven is equipped with timer that has the following features: O’clock time –...
- Page 11 Cooking Duration Setting Choose desired function and temperature by turning corresponding knobs. Press the button, display will show 00:00 and AUTO flash. e + and – to set the cooking duration you need. Wait for 5 seconds to confirm setting. Once setting is confirmed, the AUTO symbol stay as ON and system start countdown, display goes back to O’clock time during the program running.
- Page 12 Delay start cooking You need to set desired function and temperature before using this feature. Choose desired function and temperature by turning corresponding knobs. Press the button, display will show 00:00 and AUTO flash. e + and – to set the cooking duration you need.
-
Page 13: Maintenance And Cleaning
Maintenance and Cleaning WARNING! Before cleaning your oven, or performing maintenance, disconnect it from the power supply. Do not use steam cleaners. Do not line the oven bottom with aluminium foil, as the consequent accumulation of heat could compromise the cooking and even damage the enamel. To protect against the risk of electrical shock, do not immerse the unit, cord or plug in water or other liquid or sprinkle water to clean the appliance! Do not clean the appliance when it is still hot! The inside and external surface of... - Page 14 Replacement Of The Oven Light Bulb WARNING! In order to avoid the possibility of an electric shock ensure that the appliance is disconnected from the power supply before replacing the bulb. Set all control knobs to the “OFF” position (● / 0) and disconnect the mains plug.
-
Page 15: Warranty
Consumer until the expiry of two (2) years (Warranty Period). If within the Warranty Period a manufacturing defect is discovered in the Bellini product or it fails to perform to the Company’s specifications as a result of some defect in materials, components or workmanship (Defect) then the Company will, at its option, repair the Bellini product or supply a replacement Bellini product free of charge. - Page 16 1.10 If you are required to transport the Bellini product to the Company or its service agent, you must ensure it is safely disconnected by a qualified tradesman and securely packed and insured. The Company does not accept any responsibility for loss or damage of the Bellini product prior to it being received by the Company or its service agent.
Need help?
Do you have a question about the BDO614DX and is the answer not in the manual?
Questions and answers