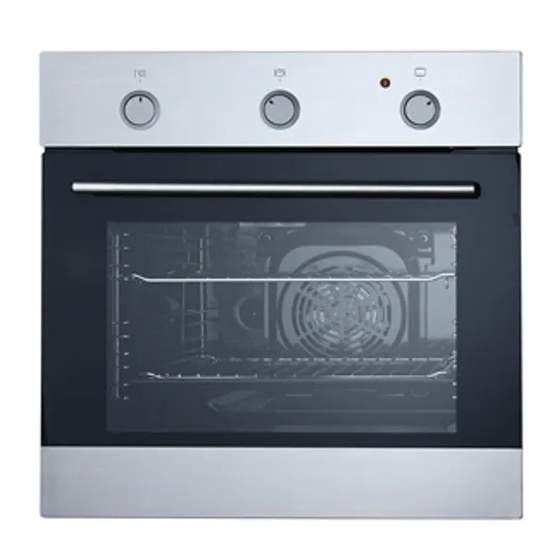
Bellini BO6602X Installation And User Manual

Bellini BO6602X Installation And User Manual

60cm

Advertisement

60cm Built In Oven
Installation and User manual
Content
Important Safety instructions-------------------- 1
Product description--------------------------------- 3
Installation-------------------------------------------- 6
Start using your oven------------------------------- 8
Maintenance and cleaning------------------------ 16
Warranty----------------------------------------------- 18
20101101 issue4
BO6602X
BO610CX
BO610TCX

Advertisement

Table of Contents
loading
Need help?

Need help?

Do you have a question about the BO6602X and is the answer not in the manual?

Questions and answers

Subscribe to Our Youtube Channel

Summary of Contents for Bellini BO6602X

  • Page 1: Table Of Contents

    20101101 issue4 60cm Built In Oven Installation and User manual Content Important Safety instructions-------------------- 1 Product description--------------------------------- 3 Installation-------------------------------------------- 6 Start using your oven------------------------------- 8 Maintenance and cleaning------------------------ 16 Warranty----------------------------------------------- 18 BO6602X BO610CX BO610TCX...
  • Page 2: Important Safety Instructions

    Important Safety instructions This manual explains the proper installation and use of your oven, please read it carefully before using even if you are familiar with the product. The manual should be kept in a safe place for future reference. General warnings Child safety If the supply cord is damaged, the cord must be...
  • Page 3 liquids or their associated vapors may be present. To avoid an accident, ensure that oven shelves To reduce the risk of fire, do not place or install and fittings are always inserted into the appliance this unit in areas where the ventilation or in accordance with the instructions.
  • Page 4: Product Description

    Product Description Model BO6602X A. Temperature Control Knob D. Function Selection Knob B. Time Control Knob E. Power Indicator Light C. Oven Door Handle F. Door Glass Model BO610CX & BO610TCX A. Temperature Control Knob D. Function Selection Knob B. Timer Operation Indicator Light E.
  • Page 5 BO610CX Control Panel G. Time Controller Indicator H. Press buttons I. Timer decreasing L. Timer increasing J. O’clock M. Timer Over Ride K. Programming Cooking Time N. Programming Delay Cooking Time BO610TCX Control Panel G. Time Controller Indicator H. Touch Control Keys I.
  • Page 6: Technical Specifications

    Accessory Name Picture Quantity Baking tray For BO6602X, QTY=1; Grill rack For BO610CX/TCX QTY=2 Grill insert Screws(ST4x35) Technical Specifications product dimensions usable electrical max. power max. current model (h x w x d) mm net weight capacity connection rating rating...
  • Page 7: Installation

    Installation WARNING! Please follow the points below when installing the appliance If the appliance is to be installed adjacent to vinyl Use an authorized person As stated in the local municipal building codes wrapped surfaces, use an installation kit and other relevant statutory regulations: available from the vinyl-wrap supplier.
  • Page 8 Cut-out dimensions Mounting Screw CAUTION! Your appliance must be mounted on a flat surface for the full width and depth of the product Connect power supply cord Open terminal board cover at rear panel of appliance. Connect wires as below: Close the terminal board cover.
  • Page 9: Start Using Your Oven

    Select the functions ( All Models ) To select the desired function, push the “Function Selection Knob” (D) and the knob will pop up. Turn the knob in any direction to select the desired function. Model BO6602X (6 functions) Model BO610CX & BO610TCX (10 functions)
  • Page 10 function description Switch off function Separate Oven light By setting the knob to this position the lighting inside the oven is switched on, e.g. use when washing the oven chamber. When the knob is turned to this position, the oven activates the combined grill and fan Fan and combined function.
  • Page 11 To select the desired temperature, push the “Temperature Selection Knob” (A) and the knob will pop up. Turn the knob in a clockwise direction to the desired temperature (50 ℃ ~ 250 ℃ ) BO6602X A thermostat controls the temperature in your appliance, but Power Indicator light remains ON when oven reaches temperature , Power Indicator light will turn OFF only when below a or b happen a.
  • Page 12 Select the timer Model BO6602X To select this function, push the “Time Control Knob” (B) and the knob will pop up. To set the timer, turn the knob clockwise , away from the Timer Over Ride position until it stops and then turn it back anticlockwise to the required time.
  • Page 13 Baking Recommend to use the baking trays which were provided with your oven; It is also possible to bake in cake tins and trays bought elsewhere which should be put on the drying rack; for baking it is better to use black trays which conduct heat better and shorten the baking time; Shapes and trays with bright or shiny surfaces are not recommended when using the conventional heating method( top and bottom elements) , use of such tins can result in undercooking the base cakes;...
  • Page 14: Roasting Meat

    Baking in cake tins BOTTOM+TOP ELEMENTS CAKE TYPE TEMPERATURE [℃] BAKING TIME [min] Meringues Victoria sponge Teacake Layer cake Baking on the trays provided with the cooker BOTTOM+TOP ELEMENTS CAKE TYPE TEMPERATURE [℃] BAKING TIME [min] Yeast Crumble Fruit Sponge CAUTION! When using the cake function of the oven it is necessary to initially heat up the oven chamber, using the third level from the bottom is recommended for baking.
  • Page 15 Others BOTTOM+TOP ELEMENTS ULTRA-FAN TIME TYPE OF MEAT [min] LEVEL TEMPERATURE [℃] LEVEL TEMPERATURE [℃] Veal 200-210 160-170 90-120 Lamb 200-220 160-180 100-120 Venison 200-220 175-180 100-120 Fish 210-220 175-180 40-55 Grill +rotisseries* Oven functions: grill element + top element (Combined grill) TYPE OF MEAT TEMPERATURE [℃] TIME [min]...
  • Page 16: Troubleshooting

    CAUTION! The figures given it tables are approximate and can be adapted based on your own experience and cooking preferences. During grilling you should turn the meat over periodically as well as basting it with its juices or with hot salty water.
  • Page 17: Maintenance And Cleaning

    Maintenance and Cleaning WARNING! Before cleaning your oven, or performing maintenance, disconnect it from the power supply. Do not use steam cleaners. Do not line the oven bottom with aluminium foil, as the consequent accumulation of heat could compromise the cooking and even damage the enamel. To protect against the risk of electrical shock, do not immerse the unit, cord or plug in water or other liquid or sprinkle water to clean the appliance! Do not clean the appliance when it still hot! The inside and external surface of the...
  • Page 18 Replacement of the oven light bulb WARNING! In order to avoid the possibility of an electric shock ensure that the appliance is disconnected from the power supply before replacing the bulb. Set all control knobs to the position”●”/”0” and disconnect the mains plug , Unscrew and wash the lamp cover and then wipe it dry.
  • Page 19: Warranty

    State and Territory Laws. damage or connected to incorrect power supply. The original purchaser of this Bellini product is 6. The Company (and any company related to the provided with the following warranty, subject to the Company) will not be liable for any special, following warranty conditions.
  • Page 20 NOTES:...

This manual is also suitable for:

Bo610tcxBo610cx

Table of Contents

Save PDF