Table of Contents
Advertisement
Model :
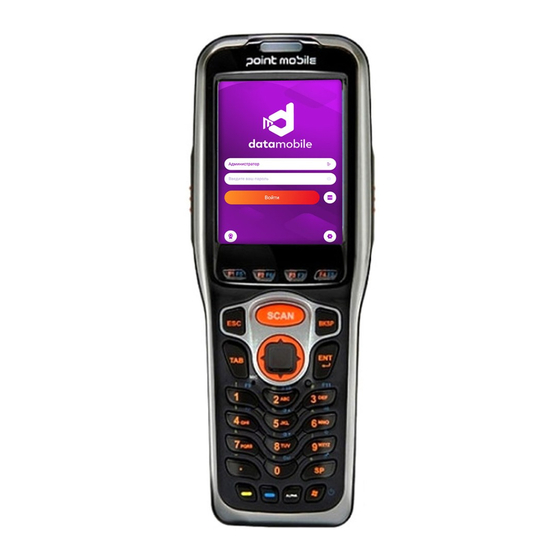
PM260
The Point Mobile name and logo are trademarks of Point Mobile Co., Ltd. in Korea and many other countries.
All rights reserved. This document and any enclosed documents contain confidential or privileged information
belonging to Point Mobile and/or its affiliates. You are hereby notified that any disclosure, copying, distribution
or the taking of any action based on the contents of this information is strictly prohibited.
Originator :
Version :
Chloe Kim
1.0
PM260
User Manual
POINT MOBILE CO., LTD.
B-9F, Kabul Great Valley, 32, Digital-Ro 9Gil
Geumcheon-gu, Seoul, Korea 153-709
www.pointmobile.co.kr
Dept.
PC/PE/ID/PM/QA
Date :
th
May. 15
, 2013
Advertisement
Table of Contents

Related Manuals for Point Mobile PM260


Summary of Contents for Point Mobile PM260
- Page 1 PM260 User Manual The Point Mobile name and logo are trademarks of Point Mobile Co., Ltd. in Korea and many other countries. All rights reserved. This document and any enclosed documents contain confidential or privileged information belonging to Point Mobile and/or its affiliates. You are hereby notified that any disclosure, copying, distribution...
-
Page 2: Table Of Contents
3.11. Using Windows Explorer ···································································· 17 4. GET TO KNOW YOUR DEVICE ······························································· 17 4.1. Feature of Your Device ······································································ 17 4.2. PM260 Handy Terminal ····································································· 17 4.3. Front Panel Layout ··········································································· 18 4.4. Display Backlight ·············································································· 19 4.5. Keypad Backlight ·············································································· 19 4.6. - Page 3 Suspend Mode ················································································· 30 4.24. Memory Allocation ············································································ 31 4.25. Care and Cleaning of the Products······················································· 31 4.26. PM260 Technical Specifications ·························································· 31 5. USING THE KEYPAD ··········································································· 33 5.1. Numeric Keypad Layout ····································································· 33 5.2. Navigation Keys ··············································································· 33 5.3.
- Page 4 9. USING CONTROL PANEL ····································································· 43 9.1. System Properties ············································································ 43 9.2. General ·························································································· 43 9.3. Memory ·························································································· 44 9.4. Device name ··················································································· 44 9.5. Copyrights ······················································································· 44 9.6. Power properties ·············································································· 45 9.7. Battery tab ······················································································ 45 9.8. Power off tab ··················································································· 45 9.9.
- Page 5 12.3. Power Supply ·················································································· 59 12.4. Front Panel ····················································································· 60 12.5. Back Panel ······················································································ 60 12.6. Powering the Single Slot Docking Cradle or Single Slot Ethernet Cradle Device ····· 61 12.7. Charging the Main Battery ·································································· 62 12.8. Inserting a Terminal ·········································································· 62 12.9.
-
Page 6: Introduction
This manual generally provides you with the safety information and basic features and operations of the PM260 device. Please read all safety precautions and this manual carefully before using your handy terminals and peripherals to ensure safe and proper use. -
Page 7: Safety Regulations
☞ NOTE: PM260 handy terminals meet or exceed the requirements of all applicable standards organizations for safe operation. However, as with any electrical equipment, the best way to ensure safe operation is to read this manual carefully before performing any type of connection to the handy terminal and operate them according to the agency... -
Page 8: General Safety Rules
Any tampering will invalidate the warranty. • When replacing the battery pack or at the end of the operative life of the PM260 handy terminal, disposal must be performed in compliance with the laws in force in your country. - Page 9 The following information is provided to comply with the rules imposed by international authorities and refers to the correct use of PM260 handy terminal. Laser Safety Statement This product has been tested in accordance with and complies with CDRH 21 CFR 1040.10 and 1040.11 and IEC 60825-1 Ed 2 (2007) except for deviations pursuant to Laser Notice No 50, dated...
-
Page 10: Led Safety
Pursuant to part 15 of the FCC Rules, you are cautioned that changes or modifications not expressly approved by Pointmobile could void your authority to operate the PM260 handy terminal. This device complies with part 15 of the FCC Rules. Operation is subject to the following two conditions: (1) This device may not cause harmful interference, and (2) this device must accept any interference received, including interference that may cause undesired operation. -
Page 11: Radio Compliance
(2) l'utilisateur de l'appareil doit accepter tout brouillage radioélectrique subi, même si le brouillage est susceptible d'en compromettre le fonctionnement. 2.9. Radio Compliance PM260 RF terminals are in conformity with all essential requirements of the R&TTE Directive (1999/5/EC). 0984... -
Page 12: China Compliance
This product has required the extraction and use of natural resources for its production. It may contain hazardous substances that could impact health and the environment, if not properly disposed. In order to avoid the dissemination of those substances in our environment and diminish the pressure on the natural resources, we encourage you to reuse, recycle and recover the product. -
Page 13: Charge The Batteries
4. Replace the battery door with a hinging motion and move the door’s lock downwards. ☞ NOTE: The battery door must be installed prior to booting the unit. 5. Tighten the hand strap. W ARN I NG: Use only Pointmobile-approved Li-Ion battery packs. Unauthorized battery may result in damage not covered by the warranty. -
Page 14: Led Indicators
W ARN I NG: Use only Pointmobile-approved peripherals, power cables, and power adapters. Unauthorized peripherals, cables, or power adapters may cause batteries to explode or damage your device. DO NOT attempt to charge damp/wet handy terminals or batteries. All components must be dry before connecting to an external power source. -
Page 15: Turn Your Device On
to local guidelines. W ARN I NG: Storage of batteries for long time at fully charged status or at fully discharged status should be avoided. Only in case of long storage, in order to avoid deep discharge of the battery, it's recommended to partially recharge the battery every two-three months to keep the charge status at a medium level. -
Page 16: Desktop
turning on process. When the process is complete, the Desktop appears, and the terminal is ready for use. 3.6. Desktop ☞ NOTE: You can access the Desktop any time by tapping the Change Views icon in the command bar and selecting Desktop on the popup menu Tab to change views 3.7. -
Page 17: Using The Stylus
Indicates the status of battery power. Double tap to open the Power control panel setting. When this icon shows a red power plug, it indicates the device is using external power. Displays the current time. Double tap to change the time and date. Indicates whether the keypad is standard alpha (upper and lower case), all caps alpha, or in numeric mode. -
Page 18: Using Windows Explorer
4. Get to Know Your Device 4.1. Feature of Your Device The following list outlines a few of the feature included in your device. 4.2. PM260 Handy Terminal Operating Systems: Microsoft Windows Embedded CE 6.0 Pro Micro Processor: Marvell® PXA300 624MHz ... -
Page 19: Front Panel Layout
BT: Bluetooth Radio with Internal Antenna WLAN: 802.11 b/g/n Radio with Internal Antenna (5GHz bands are not supported.) Notification LEDs 1) Power indications, 2) Warning indications, 3) Scan reading indications Notification Vibration Motor 4.3. Front Panel Layout LED Indicator Shows the information needed to operate your device as follows: Note: The LED is user-programmable. -
Page 20: Display Backlight
Touch Screen Display The display is a LCD (Liquid Crystal Display) with a 4-wire analog resistive touch screen. The 2.8” (1/4) VGA (Video Graphic Array) is transmissive active matrix color and backlit. The resolution is 240 x 320; see Display Backlight on paragraph 4.4. For touch screen input, use the stylus included with the terminal or your finger. -
Page 21: Using Screen Protectors
The duration of backlight of keypad synchronizes with LCD backlight’s. 4.6. Using Screen Protectors Pointmobile defines proper use of the terminal touch panel display as using a screen protector and proper stylus. Screen protectors maintain the ongoing integrity (i.e., prevent scratching) of the touch panel, which is why their use is recommended for applications that require a high to medium level of interface with the touch panel. - Page 22 Make sure that it lies flush with edges of the touch panel. ☞ NOTE: To reposition the screen protector, lift up gently and reapply. Yellow tag with cover film: “Please peel off this mask after application completed. 6. Press gently but firmly. Use the card a necessary to smooth out any air pockets or bumps after allocation...
-
Page 23: Back Panel Layout
Press the Power key to weak the terminal and check the touch panel with the stylus. Verify that the screen accepts input from the stylus as usual. If not, re-apply the screen protector. Press the Power key to put the terminal back in suspend mode. 10. - Page 24 Hand Strap The HANDY TERMINAL comes with an adjustable, elastic hand strap. You can attach it to the device. Keep in mind that the hand strap covers the battery. When you want to replace the battery, you will need to adjust the hand strap accordingly. Finger Saddle This is a slightly depressed and angled area of the back housing that is designed to cradle or “saddle”...
-
Page 25: Left Side Panel Layout
4.9. Left Side Panel Layout Side Button There is a button like this on both side panels. You can use the Programs Buttons option in the Control Panel to change the functionality of the side buttons. Scan function is assigned by default. -
Page 26: Right Side Panel Layout
not limited to, working on an ESD mat and ensuring that the operator is properly grounded. Do not force the card. If you feel resistance, remove the card, check the orientation, and reinsert it. Do not use the Micro SD card slot for any other accessories. It is highly recommended to lock the card holder even if the card is not present. -
Page 27: Bottom Panel Layout
4.13. Bottom Panel Layout DC Power Jack The DC power jack receives external power from the Handy Terminal power cable that is included with the terminal. When connected to the Handy Terminal power cable, the terminal is powered and the main battery pack is charging. I/O Connector The I/O mechanical connector is designed to work exclusively with HANDY TERMINAL peripherals and cables. -
Page 28: Peripherals And Accessories
☞ NOTE: Signals referenced are for a DTE device. 4.14. Peripherals and Accessories The following items are sold separately and enhance your HANDY TERMINAL’s capabilities. Single Slot Docking Cradle This charging and communication cradle supports USB and RS-232 communication, enabling your terminal to interface with the majority of enterprise systems. -
Page 29: Main Battery Pack
4.18. Main Battery Pack There are two Li-ion battery packs available for the HANDY TERMINAL: Standard Capacity: Li-ion 3.7V/2200mAh/8.1Wh High Capacity: Li-ion 3.7V/3300mAh/12.2Wh The Li-ion battery pack is the primary power source for the Handy Terminal as well as for the internal backup battery. -
Page 30: Storage Guidelines
Data and files saved on the Handy Terminal may be stored in RAM memory; therefore, maintain a continuous power supply to the terminal to help prevent data loss. When you remove a battery pack, insert another charged battery pack in the Handy Terminal. If the main battery pack is low, insert the terminal into a charging peripheral to power the terminal and begin recharging the battery. -
Page 31: Resetting The Terminal
☞ NOTE: Even if the internal backup battery fails, data and programs stored in Flash memory(mounted as root directory) or on an optional SD card are not lost. However, the terminal automatically cold boots when you install a fully charged battery pack, and you need will to reset the Real-Time Clock. Charging The internal backup battery charges off the main battery pack and requires 2 hours charge time to backup RAM data for 24 hours. -
Page 32: Memory Allocation
4.25. Care and Cleaning of the Products When needed, clean the image engine window and the LCD display with a clean, non-abrasive, lint- free cloth. The terminal can be cleaned with a damp cloth. 4.26. PM260 Technical Specifications Model PM260 Operating System Microsoft Windows Embedded CE 6.0 Pro... - Page 33 Memory 128MB RAM X 128MB Flash User accessible Micro SD memory card slot. Please contact your Toshiba sales Storage Expansion representative for available qualified card options. Display 2.8 in. transmissive active matrix 65K color LCD with backlight, QVGA (240 x 320) 1D Laser : N4313 Scan Engine 2D Imager : IT5300SR...
-
Page 34: Using The Keypad
1) 1D ; 293g (318g with High capacity battery) Weight 2) 2D ; 288g (313g with High capacity battery) 2D Imager model: IT5300SR 2D Imager. Decodes all standard 1D, 2D, Postal, and OCR Scanner / Decode codes. Capabilities 1D Laser model: N4313 laser engine. Decodes all standard 1D codes. 5. -
Page 35: Alpha/Numeric Modes
Scan Activates the image engine to scan a bar code or take an image. Moves the cursor one space forward. Space If you are typing text, it moves the text one space forward as well. 5.4. Alpha/Numeric Modes The keypad defaults to numeric mode. Use the ALPHA key to toggle between numeric and alpha modes. -
Page 36: Red Key Combinations
BLUE + 1 BLUE + 2 BLUE + 3 BLUE + 4 Toggle the wireless radio on and off BLUE + 5 Increase screen brightness BLUE + 6 Increase volume BLUE + 8 Decrease screen brightness BLUE + 9 Decrease volume BLUE + 0 Delete Align the screen... -
Page 37: Program Buttons
5.8. Program Buttons Buttons can be programmed to execute different functions using the Program Button program in the Control Panel. The following buttons on the HANDY TERMINAL are programmed for the listed function. Press and hold BLUE key and press the appropriate function key to execute the indicated function. -
Page 38: Available Image Engines
☞ NOTE: Misreading may occur, if the bar code isn’t positioned correctly. Recommended scanner beam positions are as follows 6.2. Available Image Engines The HANDY TERMINAL is equipped with an IT5300SR 6.3. Depth of Field Depth of Field for IT5300SR Reference Range Near Code Size... -
Page 39: Supported Bar Code Symbologies
OCR A, 12 pt 2.4in / 6.1cm 8.9in / 22.7cm OCR B, 12 Pt 2.6in / 6.7cm 9.5in / 24.1cm ☞ NOTE: Test Condition: Room Temperature(Approx. 20°C), 450 ~ 500 Lux. 6.4. Supported Bar Code Symbologies Symbology Type Symbology Name Codabar 1D Symbologies Code 11... -
Page 40: Using Demos
6.6. Using Demos Handy Terminal Demos are software utilities loaded on all Handy Terminal terminals that demonstrate the advanced features of the terminal. There are two Demos that feature the image engine: Image Demo and Scan Demo. To access these demos, tap Start -> Programs -> Demos. •... -
Page 41: Capturing Images (It5300Sr Engine Only)
The aiming pattern is smaller when the terminal is held closer to the code and larger when the terminal is held farther from the code. Symbologies with smaller bars or elements (mil size) should be read closer to the unit whereas larger bars or elements (mil size) should be read farther from the unit. -
Page 42: Supported Bar Code Symbologies
Code 39 7.5 mil 4.1in / 10.4cm 10.7in / 27.4cm Cede 39 10 mil 3.4in / 8.7cm 14.5in / 36.9cm UPC 13 mil, 100% 1.9in / 4.7cm 16.8in / 42.8cm Code 39 15 mil 1.9in / 4.7cm 19.9in / 50.4cm Code 39 20 mil 25.5in / 64.6cm Code 39 40 mil... -
Page 43: Sample Bar Code
2. Position the Handy Terminal over one of the Sample Bar Codes on paragraph 7.8. A range of 4-10 inches (10-25 cm) from the bar code is recommended. 3. Project the aiming beam by pressing and holding the Scan key. The Scan LED lights red 4. -
Page 44: Using Control Panel
icon in taskbar to open the command bar menu. Menu Item Sub Item This item … Enables and disables the audio notification for decode/data Beep reception. There is one sound for success and another sound for an error. Notification Enables and disables LED notification for decode/data reception. Enables disables Vibrator... -
Page 45: Memory
1. Select 2. Start > Settings > Control Panel > System Properties > General tab to determine the following information about your PDA: Operating system • Processor • • Memory • Expansion cards 9.3. Memory Specifies available ROM and RAM capacity 9.4. -
Page 46: Power Properties
9.6. Power properties 9.7. Battery tab To see main and backup battery level indicators open Start > Settings > Control panel > Battery or double tap on Battery icon in taskbar. The option to enable/disable the backup battery charging from the main battery 9.8. -
Page 47: Cpu Power Setting Tab
☞ To save battery life it is recommended to set idle time as short as possible. NOTE: 9.9. CPU Power Setting Tab Handy Terminal has DFM(Dynamic Frequency Management) and DVM(Dynamic Voltage Management) to extend battery life time. It has Auto, 104MHz, 416MHz and 624MHz mode. According to CPU time needed by application, Handy Terminal raises the power mode from 104MHz to 624MHz and steps down from 624MHz to 104MHz operating point. -
Page 48: Program Button Properties
9.12. Program Button properties 9.13. Program Buttons Tab Select Start > Settings > Control Panel > Program buttons Chose its type: • Default – button will be assigned default function. • No function – button does not have any functions. •... -
Page 49: Backlight Properties
9.15. Backlight Properties Modify display and keyboard backlight brightness. Also set backlight options (i.e. turn off time). To modify backlight settings open: Start > Settings > Control Panel > Backlight Battery power Tab 9.16. Modify display backlight settings when device runs on batteries. -
Page 50: Keyboard Backlight Tab
9.18. Keyboard backlight Tab Enable Keyboard backlight when button is pressed By default this is turned off. 9.19. Scanner Settings To change the Scanner configuration parameter as follows: Tap the Scanwedge icon in the System Tray to open the menu shown in image on the right and select Settings to open the Scanner Settings applet or Start >... - Page 51 Specifies the trigger time out in seconds. If a barcode is not Trigger timeout (sec) decoded within the specified timeout, the default Notifier indicates that decoding is failed Enable Auto Scan with specified Enable Auto Scan interval. Auto Scan interval (sec) Set Auto Scan interval time.
-
Page 52: Communication
Enter Suffix to be sent after the Suffix decoded/received data Select barcode types you want to read Symbologies There is “Enable All” and “Disable All” to enable/disable all symbologies Section Option Description Tap/enable this checkbox to Enable this code enable the selected bar code type. -
Page 53: Installing Additional Software
Wireless Radios (Wireless Communication) HANDY TERMINALs can be equipped with an 802.11b/g/n and Bluetooth radio. For more information, see Wireless Radios on paragraph 10.14. I nstalling Additional Softw are 10.2. Handy Terminal is shipped with the operating system, radio drivers, and custom software (CICO) already installed. -
Page 54: Activesync Communication
ActiveSync Com m unication 10.4. To synchronize, ActiveSync 4.1 or higher must be installed and configured for the appropriate communication type on the host workstation and the Handy Terminal. Handy Terminals ship with ActiveSync already installed. Therefore, if ActiveSync is already installed on the host workstation, you just need to connect the Handy Terminal to the host workstation (via Handy Terminal peripheral) to initiate communication. -
Page 55: Setting Up The Handy Terminal
Setting Up the Handy Term inal 10.9. The Handy Terminal defaults to USB communication out of the box. To verify and/or change the default setting, tap Start -> Settings -> Control Panel -> PC Connection. Must be checked to connect to a workstation Displays the current connection setting Com m unicating w ith the Handy Term inal 10.10. -
Page 56: Adding Programs Via Activesync
The Mobile Device folder opens in Windows Explorer. The Handy Terminal is now treated as a mass storage device, and transferring files is as simple as dragging and dropping or copying and pasting as you would for moving files between folders on your hard drive. -
Page 57: Wireless Radios
2. Bluetooth (WPAN configuration): see Bluetooth Handler on paragraph 11. ☞ NOTE: PM260 does not provide all Bluetooth profiles. Connecting the Term inal to a W ireless Netw ork 10.15. You connect the terminal to a wireless network through the on-board radio (802.11b/g/n and/or Bluetooth). -
Page 58: Wlan (802.11B/G/N Radio)
terminal resumes, depending on the radio power mode and security protocol selected, it may take up to 30 seconds for the 802.11 b/g/n radio driver to re-associate the radio to the network. ☞ NOTE: Area coverage and radio performance may vary, due to environmental conditions, access points types or interference caused by other devices (microwave ovens, radio transmitters, etc.). -
Page 59: Bluetooth Handler
7. Follow the directions on the screen to complete installation. 11. Bluetooth Handler Bluetooth wireless technology is a short-range communications technology to connect portable and/or fixed devices while maintaining high levels of security. Enabling the Bluetooth Radio 11.1. 1. Select the device panel indicated by the UP arrow in the lower, right portion of the display. 2. -
Page 60: Setting Up A Bluetooth Printer
Setting Up a Bluetooth Printer 11.4. 1. Make sure that the Bluetooth printer is on and activated. 2. If not done so already, turn Bluetooth On (by selecting the vertical arrow on the Command Bar). 3. Tap Serial tab. 4. Tap Scan Device, which runs a Bluetooth Inquiry, then SDP Query. 5. -
Page 61: Front Panel
by warranty. W ARN I NG: DO NOT attempt to charge damp/wet handy terminals or batteries. All components must be dry before connecting to an external power source. Front P anel 12.4. Terminal Well Place the Handy Terminal in the terminal well to communicate with a host device, power the terminal, and charge the terminal’s battery. -
Page 62: Powering The Single Slot Docking Cradle Or Single Slot Ethernet Cradle Device
compliant device to facilitate USB communication to and from the terminal. USB communication occurs through Microsoft ActiveSync (v.4.1 or higher). For more information about ActiveSync setup, see ActiveSync Communication on paragraph 10.4. Serial Port The serial port supports serial communication between the terminal and another device. Note that the connector is a DB9 Male connector, requiring a female connector on the serial cable. -
Page 63: Charging The Main Battery
When a terminal is properly seated, the base powers the terminal, charges the terminal’s main battery pack, and lasunches ActiveSync (see ActiveSync Communication on paragraph 10.4). Pointmobile recommends that you leave the base connected to its power source at all times, so that it is always ready to use. -
Page 64: Charging Backup Battery
Charging Backup Battery 12.10. To check battery power while the terminal is operating, tap Start -> Settings -> Control Panel - > double tap Power. Technical Specifications 12.11. 260-HB (Single Slot Docking Cradle) Model 260-EHB (Single Slot Ethernet Cradle) Structural Dimensions 135.7mm(D) x 116.4mm(W) x 81mm(H) Single Slot Docking cradle -... - Page 65 Red: charging Communication USB Mini-B Male connector supports data transmission of up to 12 Mbps Interface Standard DB9 serial connector supports data transmission up to 115 Kbps Ethernet 10/100BASE-T(support only PM260-SE) Agency Approvals UL listed Power Supply TUV licensed Power Supply compliant to FCC part 15, Class B...
Need help?
Do you have a question about the PM260 and is the answer not in the manual?
Questions and answers