Table of Contents
Advertisement
Quick Links
Advertisement
Table of Contents

Subscribe to Our Youtube Channel
Related Manuals for StarDot Technologies NetCam SC

Summary of Contents for StarDot Technologies NetCam SC
- Page 1 NetCam SC User’s Manual w w w.stardot .com...
-
Page 3: Table Of Contents
1.3 Parts of NetCam SC ..............6 1.4 Connecting NetCam SC to a Network ........6 1.5 An Overview of Network Connectivity ........7 Chapter 2 Installation ................9 2.1 Installing NetCam SC ...............9 2.2 Outdoor Environment ...............9 Chapter 3 Accessing NetCam SC ............10 3.1 Viewing NetCam SC’s Images ..........10 3.2 NetCam SC’s Configuration Menus ........11 3.3 Image Properties ..............11 3.4 Overlay Properties ..............17 3.5 FTP Properties ...............20 3.7 Date/Time Properties .............24... - Page 4 Page 4 NetCam SC...
-
Page 5: Chapter 1 Configuration
Configuration Congratulations on your purchase of a StarDot NetCam SC network camera with integrated web server. The NetCam SC combines the best of the analog CCTV world (auto iris, day/night IR filter*, video out, 24VAC/12VC power inputs, I/O) with the best of the digital IP camera world (up to 5 megapixel, Power over Ethernet, integrated video motion detection). -
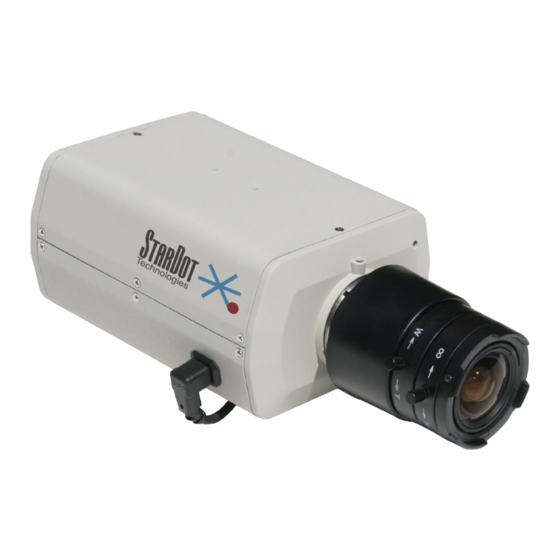
Page 6: Parts Of Netcam Sc
If your network does not auto-assign IP addresses, you can assign a manual IP using a null serial cable. Connect one end of a null model serial cable to the S1 port of NetCam SC and the other end into an available serial port on your PC. -
Page 7: An Overview Of Network Connectivity
Plug one end of a null modem serial cable into the S1 port on the back of NetCam SC and the other end into an available 9-pin serial port on the back of your computer. Use the included StarDot Tools software to configure the camera using the Setup Wizard. - Page 8 IP address. Once the IP has been assigned, browse to the camera with a web browser and configure NetCam SC so it has a permanent static IP address (see Chapter 3.8).
-
Page 9: Chapter 2 Installation
Run standard CAT 5 or better Ethernet cable from a PoE hub/switch (or PoE power injector) into the NET jack on the back of NetCam SC. NetCam SC will run off the PoE power running in the CAT 5 cable. No other power source is required. -
Page 10: Chapter 3 Accessing Netcam Sc
Accessing NetCam SC Viewing NetCam SC’s Images Any Java-enabled browser can be used to view the live images. Type NetCam SC’s IP address in your browser’s address bar (example: http://192.168.1.5). Or use StarDot Tools to Find the camera’s IP address. -
Page 11: Netcam Sc's Configuration Menus
NetCam SC’s Configuration Menus Virtually any web browser can be used to access NetCam SC’s configuration menus. To access these menus, type NetCam SC’s IP address in your browser’s address bar (example: http://192.168.1.5). This will bring up the live image page. Click on the Configuration link. You will be prompted for a User Name and Password. -
Page 12: Auto Exposure
As with most digital cameras, NetCam SC achieves the highest quality and clearest images at quarter resolution. This is due to the way color is calculated with digital image sensors. The largest “high quality” image on the NetCam SC 5MP is 1296x960. - Page 13 * may introduce pixel noise EXPOSURE GRID When Auto Exposure is enabled, NetCam SC adjusts the exposure of the image based on the average brightness of the pixels located in the selected regions in the Exposure Grid. If you want the camera to...
- Page 14 camera is pointing outdoors. • Back Light - Backlight compensation (BLC) adjusts the picture in situations where a bright light source, such as window, is causing the image to be improperly exposed. • Low Light Presets - There are a lot of controls in determining how the camera behaves in low light conditions.
-
Page 15: Video Out
COLOR BALANCE Auto Color Balance Enabling Auto Color Balance causes NetCam SC to automatically adjust the color balance of the image based on the content of the image. In most situations, you will want Auto Color Balance enabled. - Page 16 Auto Color Balance Type • Average - An average of the entire image is used to determine color balance. • Bright - Only bright areas are used to determine color balance. • Spot - Only spot areas are used to determine color balance. •...
-
Page 17: Overlay Properties
For instance, %d inserts the current day of the month on the live image. There is a complete list of markup characters below and a mini reference on the Overlay page itself. Default: NetCam SC %a %b %d %H:%M:%S %Y Exposure: $e Scale The size of the font can be scaled from 1x (smallest size) to 4x (largest size). - Page 18 Additionally, any date/time markups (preceded by the % character) can be used to compose the filenames in the FTP Properties Page, which is very useful for archiving images with unique filenames (based on the current date and time, for instance). Date Markups Year, Four-Digit [2000-2199] Year, Two-Digit [00-99]...
- Page 19 Camera Uptime NetCam SC supports much of the ISO 8859-1 character set, which is very useful for adding foreign language text to NetCam SC’s overlay. For a list of characters, visit http://www.stardot.com/netcam/netcam-overlay.txt In most cases, you can also copy and paste characters from other applications.
-
Page 20: Ftp Properties
FTP Properties The FTP Properties instruct NetCam SC to upload images to a remote server. After making changes, click the Apply button to save the settings in the camera. FTP Upload FTP stands for File Transfer Protocol, one of the most popular methods for transferring files over the Internet. - Page 21 (0-9) is automatically appended to the end of the filenames. Default: Off Passive Mode If NetCam SC is behind a proxy server, enable passive mode. If you are unsure if you need passive mode, it is usually safe to enable it anyway. Default: On...
- Page 22 FTP/Web server. Current IP Link Path/File If NetCam SC is using an external modem to dial out to an ISP, it will most likely be assigned a different IP address every time it connects. This makes it next to impossible to access the camera directly from a browser since its IP address is not known.
- Page 23 Default: 30 Upload Window NetCam SC can upload images 24 hours a day, seven days a week, or you can set whatever time window and days of the week you like. Use military time for the beginning and ending window times.
-
Page 24: Date/Time Properties
Date/Time Properties The Date/Time Properties allow you to set the camera’s date and time. After making changes, click the Apply button to save the settings. Setting the Date and Time Automatic vs. Manual - For the most accurate date & time, having the camera automatically synchronize with a network time server is recommended. - Page 25 Apply button after you’ve set the time. TIME ZONE NetCam SC integrates your current time zone into the time/date string and can even automatically adjust for daylight savings time. Type in the time zone code from the list on this page. If your time zone is not listed, enter your abbreviated time zone followed by the number of hours you are behind GMT (if you’re ahead of GMT, add the “-”...
-
Page 26: Network Properties
If your network is Ethernet-based (LAN, cable modem, DSL), use the NET port on the back of NetCam SC to access the camera. The first step to network access is assigning NetCam SC an IP address. There are two ways in which this can be done: automatically (DHCP) or manually. - Page 27 Consult your network administrator to determine which IP address to use. If you are setting up the camera behind a residential gateway or cable/DSL router, your IP address will probably be something similar to 192.168.1.5. • Subnet Mask - Find out your netmask from your network administrator.
-
Page 28: Dial-Out Properties
Dial-Out Properties The Dial-Out Properties page contains all the ISP dial-up configuration information for setting up NetCam SC on a dial-up modem. After making changes, click the Apply button to save the settings in the camera. Internet Dial-Out Connection (PPP) If NetCam SC’s primary connection to the Internet will be a dial-up... - Page 29 If enabled, NetCam SC will attempt to stay continuously connected to the Internet. If disconnected, it will automatically attempt to reconnect. If NetCam SC is configured to upload images to a server via FTP, it is not necessary to enable this option; NetCam SC will automatically attempt to dial into the Internet when an image is scheduled to upload if dial-out is enabled.
-
Page 30: Security Properties
NetCam SC from unwanted visitors. NetCam SC Users NetCam SC has its own multi-user capable, password protected operating system. By default, the live images can be viewed by anyone and only the configuration pages are password protected. However, these options can be changed. -
Page 31: Advanced Menus
Configuration Files This advanced menu provides access to all of the configuration files in NetCam SC. We recommend that you do not edit these files unless you are well versed in Linux and the NetCam SC camera settings. 3.14 PTZ For future use. -
Page 32: Trigger Properties
“Default guide”. To set up a TZO account, visit http://stardot.tzo.com. After you’ve signed up, enter the appropriate information in either NetCam SC or your router (if it supports DDNS). 3.16 Trigger Properties... - Page 33 Trigger Overview By connecting an alarm system, motion detector or other type of sensor to the back of NetCam SC, it is possible to gather a series of images when the sensor “triggers” the camera. TRIGGER I/O Port Select with I/O port your trigger source is connected to. NetCam SC only has I/O port 1.
- Page 34 Password This is the password assigned to you by your hosting provider Path Specify the path on your FTP server where you’d like the images stored. There is no need to specify a filename. NetCam SC automatically Page 34 NetCam SC...
- Page 35 (image0-000.jpg, image0-001.jpg, image0- 002.jpg, etc.). Passive Mode If NetCam SC is behind a proxy server, enable passive mode. If you are unsure if you need passive mode, it is usually safe to enable it anyway. Timeout If the FTP process hasn’t completed within the time specified here, the Express 1 will attempt to restart the process.
-
Page 36: Weather Station
3.17 Weather Station StarDot offers an optional mini weather station (AUX-WX2) that plugs into the back of NetCam SC. It’s a great way to capture and display the current temperature, humidity and barometric pressure. To view the weather data, add one or more of the markup tags in your overlay text:... -
Page 37: Chapter 4 Imaging Tips
However, you do have control over the lens settings and the positioning of NetCam SC. If you have an auto iris lens, you can ignore the iris section, since the iris is controlled automatically by NetCam SC. -
Page 38: Image Processing Options
Dynamic range is the term used to describe the amount of detail a camera is able to capture in both dark and light areas at the same time. NetCam SC has great dynamic range, but as is the case with most cameras, it has its limits. - Page 39 Brightness - This controls how the bright the auto exposure will adjust the image. When auto exposure is enabled (which it should be, especially when doing outdoor imaging), this is the main control you will need to adjust to increase or decrease the overall brightness of the live images.
-
Page 40: Chapter 5 Lenses
Some lenses do not contain numerical iris markings, but will be marked with “open” and “close”. You will need to look in the lens to see the size of the iris when placing NetCam SC outdoors, or you can evaluate the live video when adjusting the iris. - Page 41 the chrome back-focus ring. Screw the new lens (with attached spacer if the lens is C-Mount) into the chrome back focus ring on the camera. Continue turning until the lens is a securely attached. Monitor the live video either via the analog BNC video output or with a web browser.
-
Page 42: Troubleshooting Guide
Troubleshooting Guide The StarDot Tools software does not list NetCam SC on my local network and/or is not accessible via its IP address. Double-check all cable connections and make sure NetCam SC’s network cable is plugged into an active Ethernet hub, switch or router. Make sure NetCam SC’s power LED is on (amber on boot-up, then green). -
Page 43: Specifications
Specifications TECHNICAL SPECIFICATIONS Image Sensor 2592x1944 (5MP) Micron 1/2.5” RGB Frame Transfer CMOS Sensitivity 0.3 LUX Color (with f1.2 iris), 0 LUX in IR mode (w/ IR illuminator) Exposure Auto exposure with brightness adjustment and grid exposure selection or manual exposure (1/48,000 second ~ 1.3 seconds) Imaging Features Auto/manual color balance (including skew override), contrast enhancement (haze subtraction, gamma correction) and sharpening Image Compression Industry Standard JPEG and Motion-JPEG (adjustable quality/compression) Frame Rate 12 FPS ~ 30+ FPS, depending on resolution Typical File Sizes 320x240 (8~20KB) 640x480 (25~70KB) 1296x960 (50~200KB) 2592x1944 (150-300KB) Network Connection 1 x 10/100-baseT Ethernet, PoE (802.3af) Network Protocols Supported TCP/IP, HTTP, FTP, DHCP, PING, TELNET, DAYTIME, NTP, SMB, NFS Serial Connection 1 x RS-232 Ports, DB9, up to 115.2Kb/sec I/O Connectors 1 x Fully Isolated Digital Alarm Input 1 x Fully Isolated Relay, 28VDC 2A or 125VDC 0.5A Internal Operating System... - Page 44 6820-H Orangethorpe Ave Buena Park, CA 90620 U.S.A. 714-228-9282 • Fax: 714-228-9283 E-mail: info@stardot.com http://www.stardot.com © Copyright StarDot Technologies [netcam sc manual 4-1.indd]...
Need help?
Do you have a question about the NetCam SC and is the answer not in the manual?
Questions and answers