Table of Contents
Advertisement
Quick Links
Download this manual
See also:
User Manual
Advertisement
Table of Contents

Related Manuals for Interlogix TruVision NVR 50


Summary of Contents for Interlogix TruVision NVR 50
- Page 1 TruVision NVR 50 Quick Start Guide P/N 1072605A-EN • REV 1.0 • ISS 13MAR13...
- Page 2 Copyright © 2013 UTC Fire & Security Americas Corporation, Inc. Interlogix is part of UTC Climate Controls & Security, a unit of United Technologies Corporation. All rights reserved. Trademarks and The TruVision and Interlogix names and logos are trademarks of United patents Technologies.
- Page 3 Figure 1: Back panel connections Connect to one CCTV monitors (BNC-type Connect to a HDTV. The HDMI connection connectors): Main monitor supports both digital audio and video. Connect one audio input to RCA connectors. 10. Connect to an optional USB device such as a mouse, CD/DVD burner or HDD.
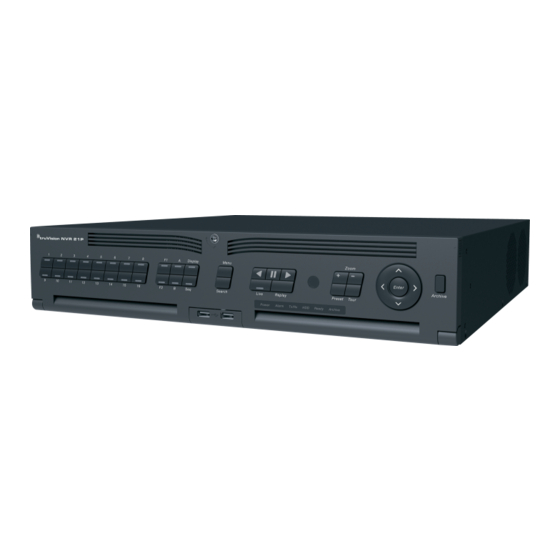
- Page 4 Figure 2: Front panel controls Item Name Description Status LEDs Power: Green indicates the NVR is working correctly. Red indicates a fault. Alarm: Lit indicates an external alarm status or motion. Tx/Rx: Tx/Rx indicator blinks green when network connection is functioning properly.
-
Page 5: Package Contents
Press once to enter quick archive mode. Press twice to start archiving. Indicator blinks green when data is being written to backup device. Package contents Quick install The TruVision NVR 50 (model TVN 50) is Recommended steps for setting up the shipped with the following items: NVR: •... - Page 6 By default, the setup wizard will start once 3. Check and remember NVR device the NVR has loaded. The wizard walks you address value. The default value is 255. through some of the more important The device address is valid for all IR settings of your NVR.
- Page 7 • Gateway address - 192.168.1.1 The list of commands available depends on which monitor is active; main or spot • Ports: (monitor B). See Table 1 below. When using the browser: RTSP port: 554 Table 1: Mouse menu for monitor A (main monitor) HTTP port: 80 When using TruNav:...
-
Page 8: Specifications
≤ 8 kg (≤ 17.6 lb.) (without HDD or DVD-R/W) Contact information Description of the command icons in the menu toolbar: For contact information, see www.interlogix.com, or Configures camera settings. www.utcfssecurityproducts.eu Configures display settings. Configures recording settings. Configures standard network settings.
Need help?
Do you have a question about the TruVision NVR 50 and is the answer not in the manual?
Questions and answers