
Related Manuals for Sam4s ELLIX 20


Summary of Contents for Sam4s ELLIX 20
-
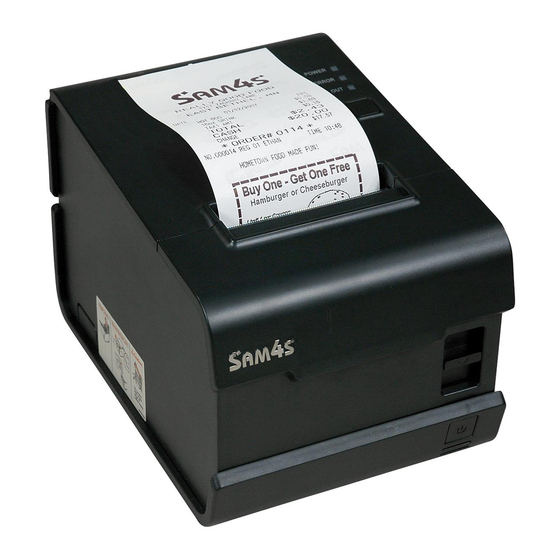
Page 1: Receipt Printer
ELLIX 20 RECEIPT PRINTER OPERATOR’S Manual All specifications are subject to change without notice... - Page 2 If the printer is damaged by the static electricity, you should turn the printer “OFF”. INTRODUCTION The ELLIX 20 Roll Printer is designed for use with electronic instruments such as system ECR, POS, banking equipment, computer peripheral equipment, etc. The main features of the printer are as follows: High speed printing : 52 lines per second.
- Page 3 LEGISLATION AND WEEE SYMBOL 2002/96/CE Waste Electrical and Electronic Equipment Directive on the treatment, collection, recycling and disposal of electric and electronic devices and their components. The crossed dustbin symbol on the device means that it should not be disposed of with other household wastes at the end of its working life.
-
Page 4: Table Of Contents
Table of Contents CHAPTER 1. SETTING UP THE PRINTER ........2 1-1. U ................2 NPACKING 1-2. C ...............3 ONNECTING THE ABLES 1-3. C ............4 ONNECTING THE COMPUTER 1-4. C .............5 ONNECTING THE RAWER 1-5. C .............6 ONNECTING THE OWER UPPLY 1-6. -
Page 5: Chapter 1. Setting Up The Printer
Chapter 1. Setting Up the Printer 1-1. Unpacking Your printer box should include these items. If any items are damaged or missing, please contact your dealer for assistance. - 2 -... -
Page 6: Connecting The Cables
1-2. Connecting the Cables You can connect up to three cables to the printer. They are all connected to the connector panel on the back of the printer, which is shown as below: NOTES : Before connecting any of the cables, make sure that both the printer and the computer should be turned off. -
Page 7: Connecting The Computer
1-3. Connecting the computer You need an appropriate interface cable. 1. Plug the cable connector securely into the printer’s interface connector. 2. Tighten the screws on both sides of the cable connector. 3. Attach the other end of the cable to the computer. - 4 -... -
Page 8: Connecting The Drawer
1-4. Connecting the Drawer WARNING: Use a drawer that matches the printer specification. Using an improper drawer may damage the drawer as well as the printer. CAUTION: Do not connect a telephone line to the drawer kick-out connector; otherwise the printer and the telephone line may be damaged. -
Page 9: Connecting The Power Supply
1-5. Connecting the Power Supply Use the optional Power supply for your printer. WARNING: Make sure that you use the attached Power supply or equivalent. Using an incorrect power supply may cause fire or electrical shock. CAUTIONS: When connecting or disconnecting the power supply from the printer, make sure that the power supply is not plugged into an electrical outlet. - Page 10 - 7 -...
-
Page 11: Installing Or Replacing The Paper Roll
1-6. Installing or Replacing the Paper Roll CAUTION : When the printer lid is raised the serrated edge of the paper tear bar is also accessible, Care should be taken with the serrated edge. - 8 -... -
Page 12: Partition Installation
1-6-1. Partition Installation NOTES : The Paper partition is dealer option item. You can install the partition for 58mm paper printing on ELLIX20. Push the Open-Button and open the Cover-Open. Insert the Partition into the Paper-Supply as shown. Push the Partition until the two hook locks firmly. - 9 -... -
Page 13: Wall Mount Installation
1-6-2. Wall Mount Installation NOTES : Wall mount bracket is dealer option item. Drill the wall to make the three holes ø6.5mm, depth over 35mm and put the three anchors ⓐ into the each hole. (Notice the position of the holes.) Tighten the three screws ⓑ... -
Page 14: Paper Roll Installation
1-6-3. Paper Roll Installation NOTES : Be sure to use paper rolls that meet the specifications. Do not use paper rolls that have the paper glued to the core because the printer cannot detect the paper end correctly. 1. Open the paper roll cover by pressing the cover-open button. 2. -
Page 15: Adjustments And Settings
1-7. Adjustments and Settings The ELLIX 20 is set up at the factory to be appropriate for almost all users. It does, however, offer some settings for users with special requirements. It has DIP switches that allow you to change communication settings, such as handshaking and parity check, as well as printing density. -
Page 16: Serial Interface Specification
1-7-1. Serial Interface Specification DIP Switch Set 1 Functions FUNCTION DEFAULT Handshaking XON/XOFF DSR/DTR Word Length 7Bit 8Bit Parity Check Parity Selection EVEN Baud rate selection Refer to the Following Table Dip Switch Select Dip Switch 2 Dip Switch 1 Baud rate selection Transmission speed SW –... -
Page 17: Parallel Interface Specification
1-7-2. Parallel Interface Specification Dip Switch Set 1 Functions FUNCTION DEFAULT Reserved Reserved Reserved Reserved Reserved Reserved Reserved Dip Switch Select Dip Switch 2 Dip Switch 1 Dip Switch Set 2 Functions FUNCTION DEFAULT Mode Selection STAR EPSON *Kitchen Bell Enable Disable Auto Cutter... -
Page 18: Using The Printer
1-8. Using the Printer You can control the basic paper feeding operations of the printer with the button on the control panel. The indicator lights help you monitor the printer’s status. 1-8-1. Control Panel Feed Button The button can be disabled by the ESC c 5 command. Press the FEED button once to advance paper one line. -
Page 19: Chapter 2. Hexadecimal Dumping
Chapter 2. Hexadecimal Dumping This feature allows the experienced users to see exactly what data is coming to the printer. This can be useful in finding software problems. When you turn on the hexadecimal dump function, the printer prints all commands and data in hexadecimal format along with a guide section to help you find specific commands. -
Page 20: Chapter 3. The Self Test
Chapter 3. The self test The self-test checks whether the printer has any problems. If the printer does not function properly, contact your dealer. The self-test checks are as follows; Make sure paper roll has been installed properly. Turn on the power while holding down the FEED button. The self-test begins. The self-test prints the current printer status, which provides the control ROM version and the DIP switch setting. -
Page 21: Chapter 4. Code Table
Chapter 4. Code Table The following pages show the character code tables. To find the character corresponding to a hexadecimal number, count across the top of the table for the left digit and count down the left column of the table for the right digit. For example, 4A = J. Page 0 ( PC437 : USA, Standard Europe) ( International Character Set : USA ) - Page 22 1000 1001 1010 1011 1100 1101 1110 1111 ▁ ┴ ー タ ミ 0000 ═ ╳ ▂ ┬ 。 ア チ ム ╞ 円 0001 ┤ 「 イ ツ メ 0010 ▃ ╪ 年 ├ 」 ウ テ モ 0011 ▄...
- Page 23 1000 1001 1010 1011 1100 1101 1110 1111 Ç É á ░ └ ð Ó 0000 ü æ í ▒ ┴ Ð ß ± 0001 é Æ ó ▓ ┬ Ê Ô ‗ 0010 â ô ú │ ├ Ë Ò...
- Page 24 1000 1001 1010 1011 1100 1101 1110 1111 Ç É á ░ └ ╨ α ≡ 0000 ü À í ▒ ┴ ╤ ß ± 0001 é È ó ▓ ┬ ╥ Γ ≥ 0010 â ô ú │ ├ ╙...
- Page 25 1000 1001 1010 1011 1100 1101 1110 1111 Ç É ¦ ░ └ ╨ α ≡ 0000 ü È ´ ▒ ┴ ╤ ß ± 0001 é Ê ó ▓ ┬ ╥ Γ ≥ 0010 â ô ú │ ├ ╙...
- Page 26 1000 1001 1010 1011 1100 1101 1110 1111 Ç É á ░ └ ╨ α ≡ 0000 ü æ í ▒ ┴ ╤ ß ± 0001 é Æ ó ▓ ┬ ╥ Γ ≥ 0010 â ô ú │ ├ ╙...
- Page 27 1000 1001 1010 1011 1100 1101 1110 1111 € À Ð à ð 0000 ˚ ‘ ¡ ± Á Ñ á ñ 0001 ‚ ’ ¢ ² Â Ò â ò 0010 Ó ó 0011 ƒ “ £ ³ Ã ã...
- Page 28 1000 1001 1010 1011 1100 1101 1110 1111 А Р а ░ └ ╨ р Ё 0000 Б С б ▒ ┴ ╤ с ё 0001 В Т в ▓ ┬ ╥ т Є 0010 Г У г │ ├ ╙...
- Page 29 1000 1001 1010 1011 1100 1101 1110 1111 Ç É á ░ └ đ Ó 0000 ü Ĺ í ▒ ┴ Đ ß ˝ 0001 é ĺ ó ▓ ┬ Ď Ô ˛ 0010 â ô ú │ ├ Ë Ń...
- Page 30 1000 1001 1010 1011 1100 1101 1110 1111 Ç É á ░ └ ð Ó 0000 ü æ í ▒ ┴ Ð ß ± 0001 é Æ ó ▓ ┬ Ê Ô ‗ 0010 â ô ú │ ├ Ë Ò...
- Page 31 1000 1001 1010 1011 1100 1101 1110 1111 0000 0001 0010 0011 0100 0101 0110 0111 1000 1001 1010 1011 1100 1101 1110 1111 Page 255 ( Space Page ) - 28 -...
- Page 32 ASCII code (Hex) Country 23 24 40 5B 5C 5D 5E 60 7B 7C 7D 7E \ France à ° ç § é ù è ¨ Germany § Ä Ö Ü ä ö ü ß U.K. £ \ Denmark I Æ...
-
Page 33: Chapter 5. Control Commands
Chapter 5. Control Commands 5-1. EPSON mode commands Command Hexadecimal Function <HT> Horizontal tab <LF> Print and line feed Print and return to standard <FF> mode (In page mode) <CR> Print and carriage return <CAN> Cancel print data in page mode <DLE>... - Page 34 Command Hexadecimal Function Select paper sensor(s) to output <ESC> c 3 n 1B 63 33 n paper-end signals Select paper sensor(s) to stop <ESC> c 4 n 1B 63 34 n printing <ESC> c 5 n 1B 63 35 n Enable/disable panel buttons <ESC>...
- Page 35 Command Hexadecimal Function Enable/disable Automatic Status <GS> a n 1D 61 n Back (ASB) <GS> f n 1D 62 n Select font for HRI characters <GS> g 0… 1D 67 30… Initialize maintenance counter <GS> g 2… 1D 67 32… Transmit maintenance counter <GS>...
-
Page 36: Star Mode Commands
5-2. STAR mode commands Command Hexadecimal Function <ESC> R n 1B 52 n Select international character set <ESC> <GS> t n 1B 1D 74n Select character table <ESC> / 1 1B 2F 31 Select slash zero <ESC> / <1> 1B 2F 01 <ESC>... - Page 37 Command Hexadecimal Function <ESC> O 1B 4F Cancel bottom margin <ESC> I n 1B 6C n Set left margin <ESC> Q n 1B 51 n Set right margin <LF> Line feed <ESC> a n 1B 61 n Feed paper n lines <FF>...
- Page 38 Command Hexadecimal Function <ESC> <GS> / m 1B 1D 2F m Printing of download bit image Define drive pulse width for <ESC> <BEL> n1 n2 1B 07 n1 n2 peripheral device #1 <BEL> Control peripheral device #1 Control peripheral device #1 <FS>...
-
Page 39: Appendix
APPENDIX A. Miscellaneous Notes A.1 Notes on Printing and Paper Feeding 1) Because the ELLIX series printer is a line printer, it automatically feeds paper after printing the data. Therefore, when the line spacing for one line is set to a smaller value than the print data, paper may be fed more than the set amount just to print the data. - Page 40 A.3 Other notes 1) Printer mechanism handling ① Do not pull the paper out when the cover is closed. ② Because the thermal elements of the printer head and driver IC are easy to break, do not touch them with any metal objects. ③...
-
Page 41: Two-Color Printing
B. Two-color printing Two-color printing is performed using two-color thermal paper if the two-color print command is executed and if two-color paper is selected by the customized value setting with Function 5 of the GS ( E command. Format Function Changes into the user setting mode GS ( E pL pH fn d1 d2 Ends the user setting mode... -
Page 42: Recovery From The Auto Cutter Error
C. Recovery from the Auto Cutter Error If a foreign object, for example a paper clip drops in the auto cutter and causes the auto cutter to lock up, the printer will error. The main Error LED will blink and the buzzer will beep regularly indicating there is a problem. -
Page 43: Printer Head Cleaning
D. Printer Head Cleaning Paper dust on the heating elements may lower the printing quality. In this case, clean the printer head as follows: 1) Open the printer cover. 2) Clean the thermal elements of the printer head using a cotton swab moistened with alcohol solvent (ethanol, methanol, IPA). -
Page 44: Connectors
E. Connectors ELLIX 20S Connector ELLIX 20P Connector ELI - USB Connector ELI - ETHER Connector - 41 -... -
Page 45: Interface Connector
E.1 Interface Connector Serial Interface (RS-232) Pin No. Signal name Direction Function Frame Ground Output Transmit Data Input Receive Data Output Request To Send Input Data Set Ready Signal Ground Output Data Terminal Ready Printer Host side side (DSUB9 (DSUB25 2(RXD) 2(TXD) FEMALE) - Page 46 Serial Interface (RS-485) PinNo. Signal name Direction Function FGND Frame Ground Output Transmit Data Output Input Receive Data Input SGND Signal Ground Output DSR(RS-232) Input DTR(RS-232) 1.2km 1,7(S.GND) 1,7(S.GND) Host side Printer side 2(TXD-) 2(TXD-) (DSUB25 (DSUB25 3(TXD+) 3(TXD+) FEMALE) MALE) 4(RXD-) 4(RXD-)
- Page 47 Parallel Interface (IEEE 1284) Source Compatibility Mode Nibble Mode Byte Mode Host nStrobe HostClk HostClk Host / Printer Data 0 (LSB) Data 0(LSB) Host / Printer Data 1 Data 1 Host / Printer Data 2 Data 2 Host / Printer Data 3 Data 3 Host / Printer...
-
Page 48: Usb Interface
Host side Printer (DSUB25 side MALE) DSUB 25P MALE CENTRONICS 36P ( INTERFACE CABLE PIN CONNECTION ) USB Interface Signal name Line Color Function Shell Shield Drain Wire Frame Ground VBUS Host Power White Data Line(D-) Green Data Line(D+) Black Signal Ground Printer Host side... -
Page 49: Ethernet Interface
Ethernet Interface Signal Signal Function Name Direction ENET TX+ Ethernet Transmit Data Line(+) ENET TX- Ethernet Transmit Data Line(-) ENET RX+ Ethernet Receive Data Line(+) ENET RX- Ethernet Receive Data Line(+) MAX 100M 1(ENET TX+) 6(ENET RX-) 2(ENET TX-) 3(ENET RX+) 3(ENET RX+) 2(ENET TX-) 6(ENET RX-) -
Page 50: Drawer Connector
E.2 Drawer Connector Pin No. Signal name Direction Frame Ground Drawer kick- out drive signal 1 Output Drawer open/close signal Input +24V Drawer kick- out drive signal 2 Output Signal Ground - 47 -... -
Page 51: Error Status
F. Error Status The printer beeps the buzzer or continuously the ERROR LED blinks when it enters the Error status. There are four kinds if error status in ELLIX20 as below: Paper Out Error ( Buzzer status ) ELLIX20 beeps the buzzer as like “ Beep---,Beep---,…” and turns on the NO PAPER LED when detecting the paper out. - Page 52 Cutter Not Home ( Buzzer and ERROR LED status ) If the cutter blade is not in home position when the normal waiting time, the printer enters Cutter Not Home error status. The buzzer and ERROR LED beeps and blinks as like: (Beep beep beep----, Beep beep beep----, Beep beep beep…) Approximately 250 ms 250 ms...
-
Page 53: Adjusting The Roll Paper Near-End Sensor Location
G. Adjusting the roll paper Near-End sensor location This sensor has five settings, which are scale #1,2,3,4 and 5. The Near-End sensor is set to #3 positions at the factory. You can change the setting to adjustment scale #1,2,3,4 and 5 as described below. -
Page 54: Specification
H. Specification H.1 General Printer specification Printing method Thermal line printing Dot density 180 dpi Printing width 72 mm Paper width 80 mm 42 (Font A) Characters per line (default) 56 (Font B) 52 lines/sec Printing speed 220 mm/sec Receive Buffer Size 4 Kbytes NOTE : Printing speed may be slower, depending on the data transmission speed and the combination of control commands. -
Page 55: Paper Specification
H.2 Paper specification Item Description Remark Mitsubishi F5841 Black color Paper Type Mitsubishi PB670* Red/Black color Mitsubishi PB770* Blue/Black color Paper Form Paper Roll Paper Width 80 (+0,-1) , 3.14”(+0,-0.039”) Paper Roll Size Max 83mm Spool Inside Dia. 12mm (0.47”) Spool Outside Dia. - Page 56 JK68-60972A (Rev.03)
Need help?
Do you have a question about the ELLIX 20 and is the answer not in the manual?
Questions and answers