
Related Manuals for Sam4s ELLIX50


Summary of Contents for Sam4s ELLIX50
- Page 1 ELLIX50 Receipt Printer User Guide All specifications are subject to change without notice.
- Page 3 Warning - U.S. This equipment has been tested and founded to comply with the limits for a Class A digital device pursuant to Part 15 of the FCC Rules. These limits are designed to provide reasonable protection against harmful interference when the equipment is operated in a commercial environment.
- Page 4 “OFF” and contact your dealer for assistance. INTRODUCTION The ELLIX50 Roll Printer is designed for use with electronic instruments such as system ECR, POS, banking equipment, computer peripheral equipment, etc. The main features of the printer are as follows: 1.
- Page 5 9. Peripheral units drive circuit enables control of external devices such as cash drawer. 10. 2-dimensional bar code(PDF-417) and Two color printing. Please be sure to read the instruction in this manual carefully before using ELLIX50. NOTES : The Power outlet shall be near the equipment and it should be easily accessible.
-
Page 6: Table Of Contents
Contents Chapter 1. Setting Up the Printer ·························· 1.1. Unpacking ·····································································7 1.2. Connecting the Cables ················································7 1.3. Connecting the host device ········································8 1.4. Connecting the Drawer ···············································8 1.5. Connecting the Power Supply ···································9 1.6. Installing options & Replacing the Paper Roll ·······10 1.6.1. -
Page 7: Chapter 1. Setting Up The Printer
Your printer box should include these items. If any items are damaged or missing, please contact your dealer for assistance. Interface cable(option) Power-cord Roll paper ELLIX50 Receipt Printer User Guide All specifications are subject to change without notice. ELLIX50 Wall Mount(option) AC Adapter Operator’s... -
Page 8: Connecting The Host Device
Plug the drawer cable into the drawer kick out connector on the back of the printer next to the power supply connector. To use the drawer, you can connect the cable to the connector. ELLIX50 Receipt Printer... -
Page 9: Connecting The Power Supply
1.5. Connecting the Power Supply WARNING : Make sure that you use the power supply provided with the printer or equivalent. CAUTION : When connecting or disconnecting the power supply from the printer, make sure that the power supply is not plugged into an electrical outlet. Otherwise you may damage the power supply or the printer. -
Page 10: Installing Options & Replacing The Paper Roll
1. Push the Open-Button and open the Cover-Open. 2. Remove the partition as indicated in picture 4 below. 3. Insert the partition into the slot for 58mm wide roll as indicated in 5 & 6 below. ➊ ➋ open ➌ ➍ ➎ ➏ ELLIX50 Receipt Printer... -
Page 11: Wall Mount Installation
1.6.2. Wall Mount Installation 1. Use the template for Wall Mounting and mark the wall where you want to install the printer. 2. Drill 3 holes in the marked places (diameter 6.5mm depth 35mm). Insert the wall plug (A) into the hole. 3. -
Page 12: Splash Cover Installation
2. Remove the used paper roll core if there is one. 3. Insert the paper roll as shown. 4. Pull out a small amount of paper, as shown. Then close the cover. Tear off the paper as shown. ELLIX50 Receipt Printer... -
Page 13: Adjustments And Settings
: When closing the printer cover press firmly in the centre of the printer cover. 1.7. Adjustments and Settings ELLIX50 is set up at the factory to be appropriate for most users. It does, however, offer some settings for users with special requirements. -
Page 14: Serial Interface(Rs-232C) Dip Switch Set
Hex Dump Self-Test Mode Select Print * Refer to the Following Table Density Download Mode Memory Stick Interface Auto Cutter Tuning ※ Kitchen Bell is option. » Print Density Print Density SW-5 SW-6 Remark 1(Light) Default 4(Dark) ELLIX50 Receipt Printer... -
Page 15: Wlan Interface Dip Switch Set
1.7.2. WLAN lnterface DIP Switch Set DIP Switch Set 1 Functions • FUNCTION DEFAULT WLAN Disable Enable USB Mode VCOM DIP Switch Set 2 Functions • ※ Dip Switch 2 Functions are the same as the series interface. 1.7.3. Serial+Ethernet Interface DIP Switch Set DIP Switch Set 1 Functions •... -
Page 16: Using The Printer
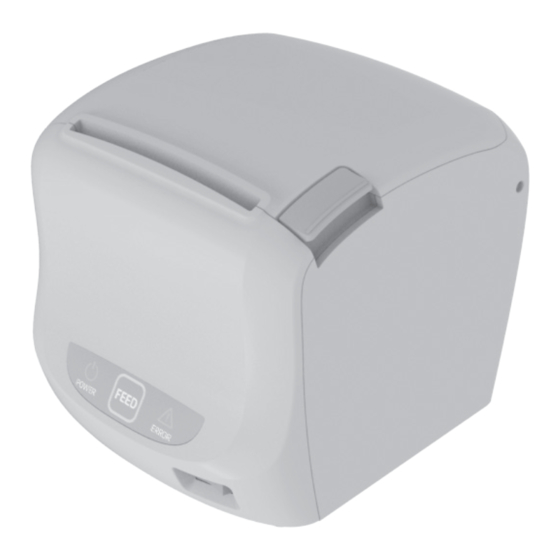
The POWER light is "ON" whenever the printer is "ON". ERROR LED • This indicates an error. See 2-3 Error Status and Error Resolution <Page 17> for information of what to do when this light comes on. ELLIX50 Receipt Printer... -
Page 17: Chapter 2. Appendix
CHAPTER APPENDIX 2.1. Adjusting the Paper Near-End Sensor Location The sensor has five sensitivity settings. 1. Push the open button and open the printer cover. 2. If you find there is too much paper remaining when the sensor is triggered, set the near end sensor to position #4 or #5. -
Page 18: Printer Head Cleaning
1. Power off the printer. 2. Open the printer cover. 3. Clean the thermal elements of the printer head using a cotton swab moistened with alcohol solvent (ethanol, methanol, IPA) 4. Insert a paper roll and close the printer cover. ELLIX50 Receipt Printer... -
Page 19: Error Status And Error Resolution
2.3. Error Status and Error Resolution The printer buzzer sounds momentarily or continuously and the ERROR LED blinks when the printer indicates an Error status. Error Status Indicators include: Cutter Jam • If buzzer and ERROR LED beeps or blinks as like: “Beep Beep---, Beep Beep---"... -
Page 20: Specification
The Following paper can be used instead of the specified paper above. • TF50KS-E : Nippon Paper industries Co., Ltd. • PD 160R : New Oji Paper Mfg, Co.,Ltd. • F380 : Kansaki Specialty Papers,Inc.(USA) ※ Mitsubishi PB670 / PB770 are two color mode papers. ELLIX50 Receipt Printer... - Page 21 MEMO OPERATOR’S Manual...
- Page 22 MEMO ELLIX50 Receipt Printer...
- Page 24 ELLIX50 Receipt Printer OPERATOR’S Manual JK68-60036E...
Need help?
Do you have a question about the ELLIX50 and is the answer not in the manual?
Questions and answers