Avid Technology Mbox User Manual
Avid technology mbox usb audio and midi interface
Hide thumbs
Also See for Mbox:
- User manual (48 pages) ,
- Quick start manual (7 pages) ,
- Manual (80 pages)
Table of Contents
Advertisement
Quick Links
Advertisement
Table of Contents

Related Manuals for Avid Technology Mbox


Summary of Contents for Avid Technology Mbox
- Page 1 ® Mbox User Guide Version 9.0...
- Page 2 Legal Notices This guide is copyrighted ©2010 by Avid Technology, Inc., (hereafter “Avid”), with all rights reserved. Under copyright laws, this guide may not be duplicated in whole or in part without the written consent of Avid. 003, 96 I/O, 96i I/O, 192 Digital I/O, 192 I/O, 888|24 I/O,...
-
Page 3: Table Of Contents
Connecting Instruments to the Mbox ........ - Page 4 Configuring Mbox for Third-Party Applications ........
-
Page 5: Chapter 1. Welcome To Mbox
1/4 TS jacks, with Mbox may not function properly if connected switchable Mic, Line, and DI levels to a USB hub. Connect Mbox Mini to a sepa- • Soft-limit feature on each input rate, dedicated USB port. -
Page 6: System Requirements And Compatibility
File > Save Choose Save from the the Pro Tools Installation Guide. File menu Mbox can be also be used with a qualified Mac Control+N Hold down the Control key or Windows computer running other Core Au- and press the N key dio- or ASIO-compliant applications. -
Page 7: About Www.avid.com
Products and Developers Learn about Avid products; download demo software or learn about our Development Partners and their plug-ins, applications, and hardware. News and Events Get the latest news from Avid or sign up for a Pro Tools demo. Chapter 1: Welcome to Mbox... - Page 8 Mbox User Guide...
-
Page 9: Chapter 2. Mbox Hardware Overview
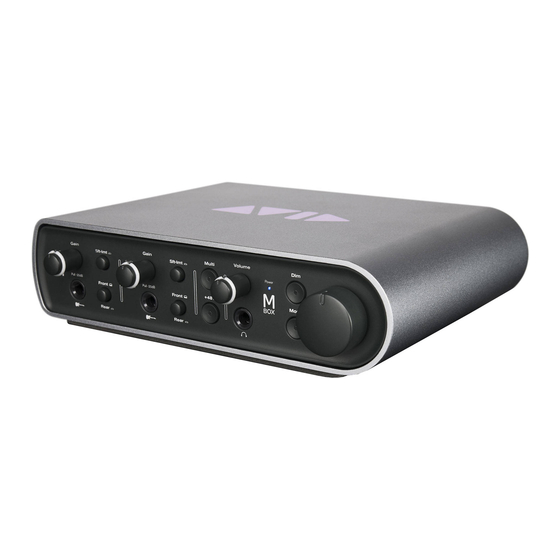
2 Mbox Hardware Overview Mbox Front Panel Features Figure 1 identifies controls, indicators, and input and output ports on the front panel on the Mbox. Input 1 Input 2 Sig/Clip Sig/Clip Headphone Volume Soft Limit Soft Limit Gain/ Gain/... - Page 10 When using phantom power, the Mbox nal has “clipped” (overloaded) the input of the maximum current per microphone is 4 mA. Mbox. Clipping the input can result in audible distortion. If you are not sure about the phantom power re-...
- Page 11 The Dim and Mono LEDs flash USB LED between off and on to indicate tuner mode is ac- The USB LED indicates that the Mbox is receiv- tive. When a string is played on a guitar plugged ing power from its USB connection. Once the...
-
Page 12: Mbox Back Panel Features
Mbox Back Panel Features Figure 2 identifies each port on the back panel of the Mbox. S/PDIF Monitor Mic/Line MIDI I/O digital I/O outputs inputs USB port Figure 2. Mbox back panel Mic/Line Input 2 is at the far left (when looking... - Page 13 S/PDIF transfers and keep the cable length to a maximum of 10 meters. MIDI I/O The MIDI In and MIDI Out ports are standard 5-pin MIDI ports, each providing 16 channels of MIDI input and output. Chapter 2: Mbox Hardware Overview...
- Page 14 Mbox User Guide...
-
Page 15: Chapter 3. Installing And Connecting Mbox
3 Installing and Connecting Mbox To use Mbox with Pro Tools or any other Core- To install the drivers and connect the Mbox: Audio- or ASIO-compatible applications, you Make sure you are logged in as an Administra- must install the Mbox hardware drivers on your tor for the account where you want to install the computer. - Page 16 After the computer has restarted, connect the small end of the included USB cable to the USB port on Mbox and connect the other end to any available USB port on your computer. If the USB LED on the front panel of the...
-
Page 17: Chapter 4. Making Studio Connections
The Headphone Output mirrors Monitor Out- put channels 1–2. Connecting Outputs To connect headphones: To hear audio from Mbox, you need to connect Connect headphones with a 1/4-inch stereo headphones or an external sound system (such connector (or adapter) to the Headphone jack. -
Page 18: Audio Inputs
Connecting a Sound System Audio Inputs The Monitor Outputs on the back of the Mbox Mbox provides two channels of analog inputs, support 1/4-inch plugs. These connections can and supports microphones, guitars, keyboards, be balanced TRS (Tip-Ring-Sleeve) connectors, and other types of instruments and devices. -
Page 19: Connecting A Microphone
Tip-Sleeve cables from keyboards, mixers, and connect the microphone to the Mbox. other line-level sources. The Mbox can only supply power through a mi- DI For 1/4-inch Tip-Sleeve cables from guitar, crophone cable with an XLR connector. If you bass, or similar sources. -
Page 20: Connecting Instruments To The Mbox
Phantom Power switch (labeled 48V) on the front of the Mbox. This switch sends 48V to both mic inputs. The 48V LED on the front of the Mbox lights when phantom power is being supplied. - Page 21 Connecting Keyboards and Mixers To use a guitar with Mbox: To use a keyboard or mixer with Mbox: On the front of the Mbox, plug your guitar ca- Plug your keyboard, mixer, or other audio ble into one of the Instrument inputs.
- Page 22 S/PDIF input port, and the device’s S/PDIF input to Mbox’s S/PDIF output port. Using S/PDIF Input If you are using the S/PDIF input on Mbox with a third-party CoreAudio-or ASIO-compliant ap- plication, use the Mbox Control Panel to config- ure the input. If you are using Pro Tools, use the Hardware Setup dialog in Pro Tools.
-
Page 23: Midi Connections
Monitoring MIDI Instruments with MIDI Connections Mbox The two MIDI ports on Mbox are available to If you have a MIDI instrument that has analog any MIDI application on your computer, as long outputs, you can connect it to Mbox to monitor as the Mbox hardware drivers are installed. - Page 24 Mbox User Guide...
-
Page 25: Chapter 5. Using The Driver Control Panel
Pro Tools or other audio applications that sup- menu > System Preferences), then double-click port the CoreAudio (Mac) or ASIO (Windows) Avid Mbox. (You can also open the Driver Con- standard. trol Panel from the Applications menu.) – or –... -
Page 26: Presets
Presets The Preset view lets you load and save Mbox Set- tings files, which contain all settings of the Mbox Driver Control Panel. This is useful if you'd like to save various configurations so that... - Page 27 Vertical Vertical (Meters Only) Mbox Driver Control Panel Mbox Driver Control Panel (Vertical shown) (Vertical (Meters only) shown) The Vertical layout provides access to all con- The Meters Only layout emphasizes pre-fader trols and meters in a vertical window. The Verti-...
-
Page 28: Additional Functions
Setup is where you define the hardware settings Mbox also features a variety of functions acces- of the Mbox. For example, you can set buffer sible through pop-up menus located at the up- size, sample rate, and clock source. Think of... - Page 29 Internal If you are using Mbox by itself (i.e., with- tems. It may be necessary to experiment with out other digital devices or an external clock),...
- Page 30 Soft Button Settings the level of a signal before it passes the fader. This allows signal levels to be displayed regard- The Mbox has four “Soft” buttons: Multi, +48v, less of the fader positions within the stereo mix Mono, and Dim.
- Page 31 Clicking the Flow pop-up menu opens a display showing the signal flow from the inputs to the Web links Firmware and driver information outputs of Mbox. This is a useful reference for understanding the path of an audio signal flow- Viewing Firmware and Installer ing through Mbox.
-
Page 32: Stereo Mixes
However, linking two channels does not have any effect on their Pan controls, which are always made on a per-channel basis. Mbox User Guide... -
Page 33: Using The Stereo Mix Section
The Software Returns section is where the audio Mic/Line and Instrument inputs are monitored, coming back from Pro Tools (or other audio ap- as well as the S/PDIF input of Mbox. Hardware plication) is monitored. Software Returns 1 and Inputs 1–2 are the analog inputs, and Hardware 2 is the default stereo output from Pro Tools. - Page 34 “Post-Fader Stereo Mix 1” is chosen in the Setup allowing you to type in your own custom chan- pop-up menu. nel name (such as “guitar,” “vocals,” etc.). The Channel Labels also display the signal level (in dB) while a fader is being adjusted. Mbox User Guide...
- Page 35 FX Returns Master These knobs control how much of the Effect au- The Master section is for monitoring the main dio output is mixed in with the monitor signal mixer output. This output can be routed to any Master L/R outputs. Unlike sends, FX Returns hardware output.
- Page 36 Along the bottom-left of the Driver Control Panel are the following status indicators: Hardware Connected This tells you the status of the hardware; if a properly installed, powered-on Mbox is con- nected to the computer. Status indicators Streaming This indicates if audio from an audio applica-...
-
Page 37: Chapter 6. Using The Multi Button (Pro Tools Only)
Using the Multi Button (Pro Tools Only) The Multi button on the front panel of the Using the Multi Button Mbox can be assigned to easily execute several functions in Pro Tools including (but not lim- In the Hardware Setup dialog, Pro Tools lets you... -
Page 38: Press And Release Options
Pro Tools is already in Manual Tempo mode, the options: session automatically adjusts its tempo to match the value created by the Tap Tempo function. None No function is selected in this mode. Mbox User Guide... -
Page 39: Press And Hold Options
Press and Hold Options Hold Duration Options When you click on the Press and Hold list, a When you click on the Hold Duration list, a pop-up menu provides access to the following drop-down menu provides access to the follow- options: ing options: None No function is selected in this mode. - Page 40 Mbox User Guide...
-
Page 41: Appendix A. Using Third-Party Applications
Using Third-Party Applications The Mbox hardware drivers allow you to use Configuring the Apple Sound third-party CoreAudio-(Mac) or ASIO-(Win- Preferences dows) compliant audio and MIDI applications with your Mbox. (Mac Only–Required for Using Qualified Pro Tools Interface with Apple iTunes or QuickTime... - Page 42 Mbox User Guide...
-
Page 43: Appendix B. Compliance Information
appendix b Compliance Information Proposition 65 Warning Environmental Compliance This product contains chemicals, including Disposal of Waste Equipment by Users lead, known to the State of California to in the European Union cause cancer and birth defects or other re- productive harm. -
Page 44: Emc (Electromagnetic Compliance)
Any modifications to the unit, unless expressly approved by mark on this compliant equipment thereby declaring conformity Avid, could void the user's authority to operate the to EMC Directive 2004/108/EC and Low Voltage Directive equipment. 2006/95/EC. Korean EMC Regulations Japan VCCI Compliance Mbox User Guide... -
Page 45: Safety Compliance
Edition/IEC60950-1, 2nd Edition and Canadian CAN/CSA is required when the equipment has been damaged in any way, C22.2 No. 60950-1-07; 2007 2nd Ed. Avid Technology, Inc. such as power-supply cord or plug is damaged, liquid has been has been authorized to apply the appropriate TUV & cTUV spilled or objects have fallen into the equipment, the marks on its compliant equipment. - Page 46 :71( כאשר המוצר מצויד במתג הפעלה . יש להקפיד -מתג ההפעלה הראשי נמצא על הלוח הקדמי של ה HD MADI . שהגישה אליו חופשית גם לאחר התקנת המכשי ר . 40° C 81( אין להשתמש במכשיר כאשר טמפרטורת הסביבה עולה על Mbox User Guide...
-
Page 47: Index
Stereo Width control 17, 19 analog 8 digital 8 gain 6 monitoring 6 TRS 15 installing Pro Tools LE Mac 11 USB connection indicator 7 Mbox features 1 MIDI connections 19 mono switch 6 outputs Monitor outputs 8 Index... - Page 48 Mbox 3 User Guide...
- Page 50 Avid Technical Support (USA) Product Information 2001 Junipero Serra Boulevard Visit the Online Support Center at For company and product information, Daly City, CA 94014-3886 USA www.avid.com/support visit us on the web at www.avid.com...
Need help?
Do you have a question about the Mbox and is the answer not in the manual?
Questions and answers