SCHOLTES BC 99DT P XA Operating Instructions Manual
Scholtes bc 99dt p xa; bc 99d p xa; bcg 99d p ovens
Hide thumbs
Also See for BC 99DT P XA:
- Operating instructions manual (64 pages) ,
- Operation instruction manual (17 pages) ,
- Operating instructions manual (76 pages)
Table of Contents
Advertisement
Operating Instructions
IT
GB
Italiano, 1
English,17
ES
Espanol, 47
BC 99DT P XA
BC 99D P XA
BCG 99D P
Contents
Installation, 18-19
FR
Français, 32
Technical data
Oven structure, 21
Start-up and use, 22-28
time
Cooking advice table for the ExtraLarge Space
feature
Cooking advice table for using the Small Space and
Main Space at the same time
Care and maintenance, 30-31
OVEN
GB
Advertisement
Table of Contents

Related Manuals for SCHOLTES BC 99DT P XA


Summary of Contents for SCHOLTES BC 99DT P XA
-
Page 1: Table Of Contents
Start-up and use, 22-28 Setting the clock Setting the minute minder ExtraLarge Space Small Space Main Space BC 99DT P XA Using the Small Space and Main Space at the same BC 99D P XA time Programming cooking BCG 99D P... -
Page 2: Installation
Installation ! ! ! ! ! Please keep this instruction booklet in a safe place Ventilation for future reference. If the appliance is sold, given away or moved, please make sure the booklet is To ensure adequate ventilation is provided, the back also passed on to the new owners so that they may panel of the cabinet must be benefit from the advice contained within it. -
Page 3: Electrical Connection
Electrical connection Before connecting the appliance to the power supply, make sure that: ! ! ! ! ! Ovens equipped with a three-pole power supply • the appliance is earthed and the plug is compliant cable are designed to operate with alternating with the law;... -
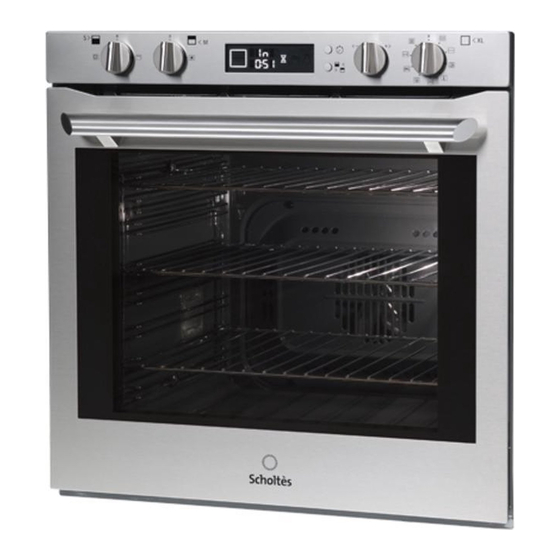
Page 4: Description Of The Appliance
Description of the appliance Overall view GUIDE RAILS Control panel for the sliding racks position 7 position 6 DIVIDER shelf Divider "D" position RACK shelf position 5 position 4 position 3 DRIPPING PAN shelf position 2 position 1 Control panel SMALL SPACE SET TIMER EXTRALARGE... -
Page 5: Oven Structure
Oven structure The oven has a capacity of 70 litres and offers users This is made possible thanks to the heat-insulating the option of cooking on 4 shelves at the same time or DIVIDER, which divides the whole ExtraLarge Space cooking large quantities, which would not necessarily into two different-sized spaces: the Main Space and be possible in a traditional oven. -
Page 6: Start-Up And Use
Start-up and use ! The first time you use your appliance, heat the empty 1. Press the button until the icon and the three oven with its door closed at its maximum temperature digits on the DISPLAY begin to flash. for at least half an hour. - Page 7 For the ROTISSERIE function, the default power level 3. Start the rotisserie function by selecting the value is indicated as a percentage (%) and may also functions. be adjusted manually. Automatic (Success) cooking functions MULTILEVEL function ! The temperature temperature and cooking duration are pre-set temperature temperature pre-set...
-
Page 8: Small Space
• Place the food inside the oven while it is still cold. approximately 30–45 minutes. Alternatively, leave at room temperature for approximately 1 hour (until the • Start the PIZZA cooking mode. dough has doubled in volume). • Break up the dough, kneading gently, and divide it to create several loaves. -
Page 9: Main Space
restored and must be reprogrammed. Cooking functions Cooking functions GRILL function The top heating element comes on. By turning the CREATION function TEMPERATURE knob, the different power levels which All heating elements and the fan are activated. Since may be set will appear on the display; these range between 5% and 100%. -
Page 10: Programming Cooking
1. Follow steps 1 to 3 to set the duration as detailed 4. Once the preheating stage is completed, the above. icon stops flashing (becomes fixed) and a buzzer 2. Next, press the button until the icon and the sounds. Food may now be placed inside the oven. two digits on the DISPLAY begin to flash. - Page 11 GRILL • We recommend that the power level is set to • Preheat the oven for 5 minutes. maximum. The top heating element is regulated by • Fit the DIVIDER to the DIVIDER rack “D”. a thermostat and may not always operate •...
-
Page 12: Cooking Advice Table For The Small Space Feature
Cooking advice table for the Small Space feature Function Foods Weight Cook on Rack position Preheating Recommended Cooking (in kg) no. of temperature duration shelves (°C) (minutes) Dri pping Rack 1 Divider Fast Fish fillets 180-200 20-30 cooking* Meat fillets 180-200 30-40 Frozen pizza... -
Page 13: Precautions And Tips
Precautions and tips ! This appliance has been designed and manufactured in • Do not rest heavy objects on the open oven door. compliance with international safety standards. The • The appliance should not be operated by people following warnings are provided for safety reasons and (including children) with reduced physical, sensory or must be read carefully. -
Page 14: Care And Maintenance
Care and maintenance Switching the appliance off Inspecting the seals Disconnect your appliance from the electricity Check the door seals around the oven at regular supply before carrying out any work on it. intervals. If the seals are damaged, please contact your nearest Service Centre ( see Assistance ). -
Page 15: Automatic Cleaning Using The Pyrolytic Function
Automatic cleaning using the Safety devices PYROLYTIC function • The icon on the display, when lit, indicates During the PYROLYTIC cycle, the internal that the oven door was automatically locked as soon temperature of the oven reaches 500°C. The as the temperature reached a high value. pyrolytic cycle is activated, burning away food and grime residues.
Need help?
Do you have a question about the BC 99DT P XA and is the answer not in the manual?
Questions and answers