SCHOLTES BC 199DT P XA S Operating Instructions Manual
Hide thumbs
Also See for BC 199DT P XA S:
- Operating instructions manual (68 pages) ,
- Operating instructions manual (23 pages) ,
- Operating instructions manual (69 pages)
Table of Contents
Advertisement
Advertisement
Table of Contents

Related Manuals for SCHOLTES BC 199DT P XA S


Summary of Contents for SCHOLTES BC 199DT P XA S
-
Page 2: Table Of Contents
BC 199DT P XA S BC 199D P XA S BCG 199D P S Français Mode d’emploi FOUR Sommaire Mode d’emploi,1 Avertissements,3 Assistance,5 Description de l’appareil,7 Description de l’appareil,9 Installation,44 Structure du four,46 Mise en marche et utilisation,47 Précautions et conseils,59... -
Page 3: Avvertenze
AT T E N Z I O N E : A s s i c u r a r s i c h e l’apparecchio sia spento prima di sostituire la lampada per evitare la possibilità di Avvertenze scosse elettriche. ATTENZIONE: Questo apparecchio e le sue parti accessibili diventano molto caldi durante l’uso. -
Page 4: Avertissements
Never use steam cleaners or pressure • sortir tous les accessoires ainsi que le cleaners on the appliance. kit éventuel de glissières coulissantes ; • ne pas placer de torchons ou de WARNING: Ensure that the appliance is maniques sur la poignée du four. switched off before replacing the lamp to avoid the possibility of electric shock. - Page 5 Antes de activar la función de limpieza automática: • limpie la puerta del horno • con una esponja húmeda quite los residuos más consistentes del interior del horno. No utilice detergentes; • quite todos los accesorios y el kit guías deslizables (si existe);...
-
Page 6: Assistenza
• il trasporto dell’elettrodomestico non riparabile in loco. Inoltre, qualora l’elettrodomestico non sia riparabile la garanzia prevede la sostituzione a prezzo agevolato in funzione dell’anzianità del prodotto. Assistenza * Al costo di 14,25 centesimi di Euro al minuto (iva inclusa) Attenzione: dal Lun. -
Page 7: Asistencia
• Si ce n’est pas le cas, contacter le service d’Assistance Servicio de asistencia técnica (SAT) technique agréé. Llame al 902.133.133 y nuestros técnicos intervendrán con rapidez y eficacia, devolviendo el electrodoméstico a sus ! Ne jamais faire appel à des techniciens non agréés. condiciones óptimas de funcionamiento. -
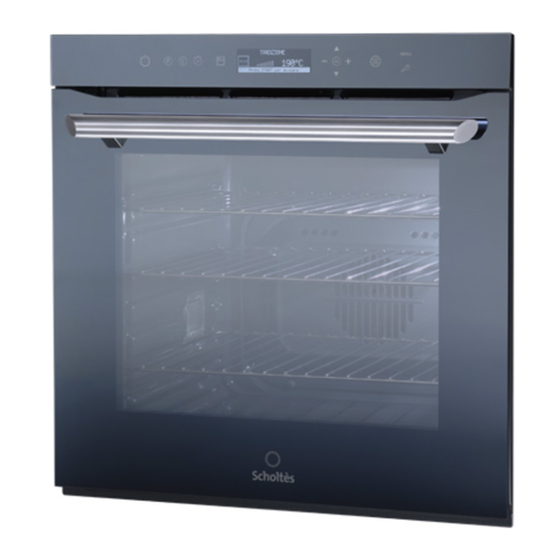
Page 8: Descrizione Dell'apparecchio
Descrizione dell’apparecchio Description de l’appareil Vista d’insieme Vue d’ensemble 1 POSIZIONE 1 1 NIVEAU 1 2 POSIZIONE 2 2 NIVEAU 2 3 POSIZIONE 3 3 NIVEAU 3 4 POSIZIONE 4 4 NIVEAU 4 5 POSIZIONE 5 5 NIVEAU 5 6 POSIZIONE DIVIDER “D” 6 POSIZIONE SÉPARATEUR “D”... -
Page 9: Descrizione Dell'apparecchio
Descrizione dell’apparecchio Description of the appliance Pannello di controllo Control panel 1 Selezione Programmi 1 Cooking mode selection 2 Regolazione Tempi 2 Time adjustment 3 Tasto SELEZIONE CAVITA’ 3 SELECT RECESS button 4 Tasto OK 4 OK button 5 Freccia Su 5 Up arrow 6 START/STOP 6 START/STOP... -
Page 10: Description De L'appareil
Description de l’appareil Descripción del aparato Tableau de bord Panel de control 1 Sélection Programmes 1 Selección de Programas 2 Réglage Temps 2 Programación de Tiempos 3 Touche SÉLECTION ENCEINTE 3 Botón SELECCIÓN CAVIDAD 4 Touche OK 4 Botón OK 5 Flèche vers le Haut 5 Flecha hacia Arriba 6 START/STOP... -
Page 11: Installation
Installation Ventilation To ensure adequate ventilation, the back panel of the cabinet must be ! Please keep this instruction booklet in a safe place for removed. It is advisable to install future reference. If the appliance is sold, given away or the oven so that it rests on two moved, please make sure the booklet is also passed on to strips of wood, or on a completely... - Page 12 ! Once the appliance has been installed, the power supply Fitting the power supply cable cable and the electrical socket must be easily accessible. 1. Open the terminal board ! The cable must not be bent or compressed. by inserting a screwdriver into the side tabs of the ! The cable must be checked regularly and replaced by cover.
-
Page 13: Oven Structure
Oven structure This is made possible thanks to the heat-insulating DIVIDER, which divides the whole ExtraLarge Space into two different-sized spaces: the Main Space and the Small The oven has a capacity of 70 litres and offers users the Space. option of cooking on 4 shelves at the same time or cooking The Main and Small Space compartments may be used at large quantities, which would not necessarily be possible... -
Page 14: Start-Up And Use
Start-up and use ! After choosing the language in the menu, if the display is not used for another 60 seconds it will automatically revert to the UNIVERSAL menu. ! When inserting the shelf Setting the clock make sure the backstop is To set the clock, switch on the oven by pressing the button, at the rear of the cavity (see... - Page 15 AUTOMATIC You can also set a cooking duration with an immediate or UNIVERSAL delayed start. MY RECIPES with the first option selected (black text on a white MULTILEVEL mode background). All heating elements and the fan are activated. Since the 3.
- Page 16 DESSERTS mode PASTEURISATION mode This cooking mode is suitable for all baked desserts which This cooking mode is suitable for fruit, vegetables, etc... do not fall into the PASTRIES or TARTS category (for Small containers may be placed on 3 shelf levels. Let the example, small choux pastries, sponge cake, etc...).
-
Page 17: Small Space
• Place the food inside the oven while it is still cold. CAKE mode (PLUM-CAKE) • Start the automatic function BREAD. This function is ideal for all recipes made using baking • When the cooking process has finished, leave the loaves powder. -
Page 18: Main Space
9. During cooking it is always possible to: Main Space - modify the temperature by pressing the “°C” button, adjust the figure using the buttons and confirm by pressing Starting the oven “OK” (for UNIVERSAL cooking modes only); 1. Fit the DIVIDER to the DIVIDER shelf “D” using the pin, - set the cooking duration (for UNIVERSAL cooking modes with the arrows turned towards the rear part of the oven. - Page 19 recommended cooking modes, temperatures and oven shelf LOW TEMPERATURE mode heights reflect our expert’s own experience in the kitchen and This type of cooking mode, used for years by industry will help you achieve the very best results. professionals, enables food (meat, fish, fruit and vegetables) The table below specifies whether it is best to pre-heatyour to be cooked at very low temperatures (85, 95 and 120°C), oven or not for each UNIVERSAL, cooking mode.
-
Page 20: Using The Small Space And Main Space At The Same Time
heights reflect our expert’s own experience in the kitchen and • Place the food inside the oven while it is still cold. will help you achieve the very best results. • Start the PIZZA cooking mode. Using the Small Space and Main Space at ROAST... -
Page 21: Practical Cooking Advice
- stop cooking by pressing the “START/STOP” button; 5. When the cooking time has elapsed, a buzzer sounds - Set the timer by pressing the “MENU” button; and the oven switches off. • For example: it is 9:00 a.m. and a time of 1 hour and - switch off the oven by pressing the button. - Page 22 GRILL FAST COOKING • Preheat the oven for 5 minutes. • Preheat the oven, making sure the dripping pan is on • Fit the DIVIDER to the DIVIDER rack “D”. shelf level 6. • Keep the oven door closed when cooking in this mode. •...
-
Page 23: Cooking Advice Table For The Main Space Feature
Cooking advice table for the Main Space feature Function Foods Weight Cook on Rack position Preheating Recommended Cooking (in kg) no. of temperature duration shelves (°C) (minutes) Universal Dripping Rack 1 Divider Tarts* Tarts 30-40 35-45 Pizza 15-25 20-30 Desserts* Cream puffs 25-35 25-35... -
Page 24: Cooking Advice Table For The Small Space Feature
Cooking advice table for the Small Space feature Function Foods Weight Cook on Rack position Preheating Recommended Cooking (in kg) no. of temperature duration shelves (°C) (minutes) Universal Dripping Rack 1 Divider Fast cooking* Fish fillets 160-180 20-30 Meat fillets 180-200 30-40 Frozen pizza... -
Page 25: Precautions And Tips
Precautions and tips • The appliance is not intended to be operated by means of an external timer or separate remote- control system. ! This appliance has been designed and manufactured in compliance with international safety standards. The Disposal following warnings are provided for safety reasons and •... -
Page 26: Sliding Rack Kit Assembly
Sliding rack kit assembly • The inside of the oven should ideally be cleaned after each use, while it is still lukewarm. Use hot water and detergent, then rinse well and dry with a soft cloth. Do To assemble the sliding not use abrasive products. - Page 27 • remove large or coarse food residues from the inside of Once the automatic cleaning cycle is over the oven using a damp sponge. Do not use detergents; You will have to wait until the temperature inside the oven has cooled down sufficiently before you can open the oven •...
Need help?
Do you have a question about the BC 199DT P XA S and is the answer not in the manual?
Questions and answers
What does F03 means. How shall we handle this fail code?
The F03 error code on the SCHOLTES BC 199DT P XA S indicates a malfunction detected by the appliance’s diagnostic system. When this error appears, it is necessary to contact an authorized technical assistance service. Before calling, make sure the issue cannot be resolved by basic checks. When contacting support, provide the type of anomaly, the error code (F03), the model number, and the serial number from the appliance’s rating plate. Do not use unauthorized technicians.
This answer is automatically generated