
Related Manuals for Digital Projection M-Vision Cine LED


Summary of Contents for Digital Projection M-Vision Cine LED
- Page 1 M-Vision Cine LED Digital Video Projector 16:9 widescreen display User Manual Rev E October 2014 111-184E...
- Page 2 Digital Projection User Manual M-Vision Cine LED...
-
Page 3: Declaration Of Conformity
Digital Projection User Manual M-Vision Cine LED Declaration of Conformity Directives covered by this Declaration 2004/108/EC Electromagnetic Compatibility Directive. 2006/95/EC Low Voltage Equipment Directive. Products covered by this Declaration Large screen video projector type The CE mark was first applied in:... - Page 4 Digital Projection User Manual M-Vision Cine LED...
-
Page 5: Symbols Used In This Guide
Product revision • Because we at Digital Projection continually strive to improve our products, we may change specifications and designs, and add new features without prior notice. Projectors built prior to this revision of the User Manual may therefore not include all the features described. - Page 6 Important Information Digital Projection User Manual M-Vision Cine LED General precautions Notes Do not open the cabinet. There are no user serviceable parts inside. Use only the power cable provided. Ensure that the power outlet includes a Ground connection, as this equipment MUST be earthed.
- Page 7 Place the projector in a dry area away from sources of dust, moisture, steam, smoke, sunlight or heat. Operation and configuration precautions Software update should NOT be carried out except by, or with the supervision of, Digital Projection Service personnel. Rev E October 2014 Page vii...
- Page 8 Electronic Equipment. Our products are designed with reuse, recycling and recovery of all components in mind. To this end, at end of life, your projector may be returned to Digital Projection Ltd or its agent so that the environmental impact can be minimised.
- Page 9 Digital Projection User Manual Important Information M-Vision Cine LED Digital Projection Contact details Notes Digital Projection Limited, Greenside Way, Middleton, Manchester M24 1XX, UK. Registered in England No. 2207264, Registered Office: as above +44 (0) 161 947 3300 +44 (0) 161 684 7674 Email enquiries@digitalprojection.co.uk, service@digitalprojection.co.uk...
- Page 10 Important Information Digital Projection User Manual M-Vision Cine LED Page x Rev E October 2014...
-
Page 11: Important Information
M-Vision Cine LED User Manual Contents Declaration of Conformity ........................iii Important Information Symbols used in this guide ........................v ..............................v Warnings ............................v Trademarks Product revision ............................v Manual revision ............................v General precautions ..........................vi Installation precautions ........................vii Operation and configuration precautions .................. -
Page 12: Table Of Contents
Table of Contents Digital Projection User Manual M-Vision Cine LED Connecting the projector ........................ 2.13 ..........................2.13 Signal Inputs ........................2.15 Control connections ........................... 2.16 Power connection 3. Getting Started Positioning the screen and projector .................... 3.2 Switching the projector on ....................... -
Page 13: Main Menu
Digital Projection User Manual Table of Contents M-Vision Cine LED Main menu ............................4.9 ............................. 4.9 Aspect Ratio ............................4.10 Presets ............................4.11 Brightness ............................4.11 Contrast ............................4.11 Saturation ..............................4.11 ............................4.12 Sharpness ..........................4.12 Noise Reduction ............................4.12 Overscan ............................ 4.13 Input Select ............................ - Page 14 Table of Contents Digital Projection User Manual M-Vision Cine LED 5. Maintenance Changing the LED module ....................... 5.2 Cleaning the fans ..........................5.2 6. Appendix Troubleshooting ..........................6.2 ............................6.4 Error codes Specifications ............................6.5 ............................ 6.5 Part numbers ............................. 6.5 Optical ............................
- Page 15 1. Introduction Contents What’s in the box? ..........................1.2 Key features of the projector ......................1.3 Getting to know the projector ......................1.4 ............................1.4 Front view ............................1.4 Rear view Rev E October 2014 Page 1.1...
-
Page 16: Digital Projection
1. Introduction Digital Projection User Manual M-Vision Cine LED What’s in the box? Notes • Make sure your box contains everything listed. If any pieces are missing, contact your dealer. • You should save the original box and packing materials, in case you ever need For more detailed information to ship your Projector. -
Page 17: Key Features Of The Projector
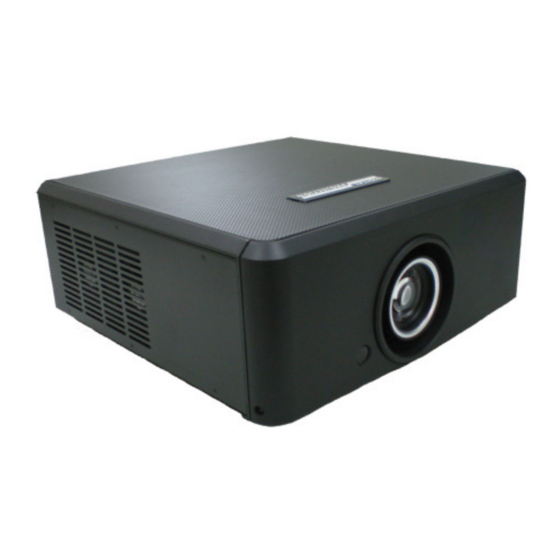
In any environment where ambient light can be controlled, the M-Vision Cine LED represents the perfect low maintenance home theater projector in limited ambient light. -
Page 18: Power Connection
1. Introduction Digital Projection User Manual M-Vision Cine LED Getting to know the projector Notes Horizontal shift Front view (adjustments adjustment under badge) Zoom Vertical shift ring adjustment Focus For more detailed information ring about lenses or lens shift, see section 2. - Page 19 2. Installation Contents Screen requirements ......................... 2.2 ............................2.2 Aspect ratio ......................2.2 Fitting the image to the DMD ............2.2 Examples of 16:9 images displayed with different aspect ratio settings ............2.3 Examples of 4:3 images displayed with different aspect ratio settings .............
-
Page 20: Installation
2. Installation Digital Projection User Manual M-Vision Cine LED Screen requirements Notes Aspect ratio Fitting the image to the DMD The projector uses a DMD (Digital Mirror Device) to create the image that is projected onto the screen. The resolution of the DMD in this projector is 1920 x 1080 pixels, or to put it another way, its aspect ratio is 16:9. -
Page 21: Examples Of 4:3 Images Displayed With Different Aspect Ratio Settings
Digital Projection User Manual 2. Installation M-Vision Cine LED Examples of 4:3 images displayed with different aspect ratio settings Notes The 4:3 image shown here has far fewer pixels than the 1920 x 1080 of the DMD. Your image Native may be different. -
Page 22: Diagonal Screen Sizes
2. Installation Digital Projection User Manual M-Vision Cine LED Diagonal screen sizes Notes Screen sizes are sometimes specified by their diagonal size (D) in inches. When dealing with large screens and projection distances at different aspect ratios, it is more convenient to measure screen width (W) and height (H). -
Page 23: Fitting The Image To The Screen
Digital Projection User Manual 2. Installation M-Vision Cine LED Fitting the image to the screen Notes It is important that your screen is of sufficient height and width to display images at all the aspect ratios you are planning to use. -
Page 24: Positioning The Screen And Projector
2. Installation Digital Projection User Manual M-Vision Cine LED Positioning the screen and projector Notes Optimum viewing position The projector should be For optimum viewing, the screen should be a flat surface perpendicular to the floor. installed as close to the The bottom of the screen should be 1.2m (4 feet) above the floor and the front row... -
Page 25: Screen Size Vs Throw Distance
Digital Projection User Manual 2. Installation M-Vision Cine LED Screen size vs throw distance Notes Throw distance is the distance measured from the front of the projector to the screen. This is an important calculation in any projector installation as it determines whether or not you have enough room to install your projector with the desired screen size, and if your image will be the right size for your screen. -
Page 26: Lens Charts For The Short Throw Zoom Lens
2. Installation Digital Projection User Manual M-Vision Cine LED Lens charts for the short throw zoom lens Notes example • You can display a 16:9 image with a screen width of 3m at a distance of 5m, but for a screen width of 3.5m, you will need to use the 0.8x converter lens. -
Page 27: Lens Charts For The Long Throw Zoom Lens
Digital Projection User Manual 2. Installation M-Vision Cine LED Lens charts for the long throw zoom lens Notes example • You can display a 4:3 image with a screen width of 3m at a distance of 6m, but Note that for the long throw for a screen width of 2m, you will need to use the 1.25x converter lens. -
Page 28: Shifting The Image
2. Installation Digital Projection User Manual M-Vision Cine LED Shifting the image Notes Ideally, the projector should be positioned perpendicular to the screen. The normal position for the projector is at the centre of the screen. However, you can set the projector above or below the centre, or to one side, and adjust the image... -
Page 29: Mounting The Projector
Digital Projection User Manual 2. Installation M-Vision Cine LED Mounting the projector Notes The four adjustable feet under the chassis allow the projector to be lowered onto a BEFORE INSTALLING THE flat surface without any danger of hands being trapped between the bottom frame PROJECTOR, READ ALL THE and the surface. -
Page 30: Rear Projection
2. Installation Digital Projection User Manual M-Vision Cine LED Rear projection Notes To use rear projection, set Rear Projection to On, in the System menu, to reverse the image. For more detailed information In rear-screen applications where space behind the projector is limited, a mirror may about using the menus, see be used to fold the optical path. -
Page 31: Connecting The Projector
Digital Projection User Manual 2. Installation M-Vision Cine LED Connecting the projector Notes Signal Inputs The following inputs are available: Component 1 S-Video Video HDMI 1 HDMI 2 Component 2 For more information on HDMI 1 & 2 HDCP-compliant digital video inputs from HDMI or DVI sources. - Page 32 2. Installation Digital Projection User Manual M-Vision Cine LED Input connection examples, continued Page 2.14 Rev E October 2014...
-
Page 33: Control Connections
All of the projector’s features can be controlled via a serial connection, using the text strings described in Remote communications protocol, in section 6. Appendix. The RS232 connection can also be used to download the firmware updates, issued from time to time by Digital Projection. Projector Computer Trigger 1 &... -
Page 34: Power Connection
2. Installation Digital Projection User Manual M-Vision Cine LED Power connection Notes Use only the power cable provided. Ensure that the power outlet includes a Ground connection, as this equipment MUST be earthed. Power connection Handle the power cable carefully and avoid sharp bends. - Page 35 3. Getting Started Contents Positioning the screen and projector .................... 3.2 Switching the projector on ....................... 3.2 Inserting batteries into the remote control ................... 3.2 Selecting an input signal or test pattern ..................3.3 ..............................3.3 Input ............................3.3 Test pattern Adjusting the lens ..........................
-
Page 36: Switching The Projector On
3. Getting Started Digital Projection User Manual M-Vision Cine LED Positioning the screen and projector Notes • Install the screen, ensuring that it is in the best position for viewing by your audience. For more information about positioning the screen and • Mount the projector, ensuring that it is at a suitable distance from the screen for... -
Page 37: Selecting An Input Signal Or Test Pattern
• Turn the knurled ring at the outer end of the lens, to adjust the focus until the image is sharp. Shift • Rotate the Digital Projection badge on top of the projector to reveal the shift If the projector is fitted with the adjustment access holes. Use the 5mm allen wrench to adjust the horizontal and fixed 0.73:1 lens then there are... -
Page 38: Adjusting The Projected Image
3. Getting Started Digital Projection User Manual M-Vision Cine LED Adjusting the projected image Notes Aspect ratio For more detailed information • Press on the remote control until the image is displayed in the corect aspect about: ratio. - using all the control keys... -
Page 39: Controlling The Projector
4. Controlling the projector Contents Overview ............................... 4.3 ........................4.3 Controlling the projector The control panel ..........................4.4 ........................4.4 LED status indicators The remote control ..........................4.5 ............................. 4.5 Layout ............................4.5 Timeout Using the control keys ........................4.6 .............................. - Page 40 4. Controlling the projector Digital Projection User Manual M-Vision Cine LED ..........................4.16 Dynamic Black ........................... 4.16 Adaptive Contrast ............................ 4.17 RGB Adjust ............................4.17 Offsets ............................4.17 Gains ............................4.18 Fine Sync .............................. 4.19 System menu ............................. 4.20 ..........................4.21 Source Enable ..........................
-
Page 41: Overview
Digital Projection User Manual 4. Controlling the projector M-Vision Cine LED Overview Notes Controlling the projector The projector can be controlled from: • the remote control • the projector control panel • the RS232 input For more information about controlling the projector using the RS232 input, see Remote communications protocol in section 6. -
Page 42: The Control Panel
4. Controlling the projector Digital Projection User Manual M-Vision Cine LED The control panel Notes The projector control panel is designed to be read in both table top or ceiling orientation, for ease of use. Menu navigation keys Many features are controlled... -
Page 43: The Remote Control
Digital Projection User Manual 4. Controlling the projector M-Vision Cine LED The remote control Notes Many features are controlled Layout from the menus using the menu navigation keys on the remote control or the projector control panel. For more information about using the menus, see later in this section, Using the menus. -
Page 44: Using The Control Keys
4. Controlling the projector Digital Projection User Manual M-Vision Cine LED Using the control keys Notes Power • Press POWER ON on the remote control to switch the projector ON. Note that the blue POWER The power indicator on the control panel will flash blue for approximately 30 indicator light will be OFF seconds, whilst the projector initialises. -
Page 45: Image Quality Settings
Digital Projection User Manual 4. Controlling the projector M-Vision Cine LED Image quality settings Notes • Press any of the following keys on the remote control, followed by , to adjust these image quality settings: For more information about all... -
Page 46: Using The Menus
4. Controlling the projector Digital Projection User Manual M-Vision Cine LED Using the menus Notes Navigating menus and submenus Some menu controls can be The menus are organised into five pages. When the menus are in use, the menu accessed directly using the page headings are always visible at the top of the menu panel. -
Page 47: Main Menu
Digital Projection User Manual 4. Controlling the projector M-Vision Cine LED Main menu Notes • To display the menus, press MENU on the remote control or the projector control panel. • Use the keys to select the Main menu page,... -
Page 48: Presets
4. Controlling the projector Digital Projection User Manual M-Vision Cine LED Main menu continued Notes Presets • Press ENTER or SELECT. The Presets submenu will appear: To select a different menu, press MENU once or twice, so that no items are... -
Page 49: Brightness
Digital Projection User Manual 4. Controlling the projector M-Vision Cine LED Main menu continued Notes Brightness • Press once. To exit from the menus completely, you may need to press up to three times. After the first press, the Brightness adjustment bar will appear:... -
Page 50: Sharpness
4. Controlling the projector Digital Projection User Manual M-Vision Cine LED Main menu continued Notes Sharpness • Press once. To exit from the menus completely, you may need to After the first press, the Sharpness adjustment bar will appear. press up to three times. -
Page 51: Input Select
Digital Projection User Manual 4. Controlling the projector M-Vision Cine LED Main menu continued Notes Input Select • Press ENTER or SELECT. The Input select submenu will appear: To select a different menu, press MENU once or twice, so that no items are... -
Page 52: Advanced Menu
4. Controlling the projector Digital Projection User Manual M-Vision Cine LED Advanced menu Notes • To display the menus, press MENU on the remote control or the projector control panel. • Use the keys to select the Advanced menu page,... -
Page 53: Video Standard
Digital Projection User Manual 4. Controlling the projector M-Vision Cine LED Advanced menu continued Notes Video Standard In most cases, the Auto setting will determine the correct video standard to use. If it To exit from the menus does not, you can select the appropriate setting manually. -
Page 54: Colour Gamut
4. Controlling the projector Digital Projection User Manual M-Vision Cine LED Advanced menu continued Notes Colour Gamut In most cases, the Auto setting will determine the correct colour gamut to use. If it To exit from the menus does not, you can select the appropriate setting manually. -
Page 55: Rgb Adjust
Digital Projection User Manual 4. Controlling the projector M-Vision Cine LED Advanced menu continued Notes RGB Adjust • Press ENTER or SELECT. The RGB Adjust submenu will appear: To select a different menu, press MENU once or twice, so that no items are... -
Page 56: Fine Sync
4. Controlling the projector Digital Projection User Manual M-Vision Cine LED Advanced menu continued Notes Fine Sync • Press ENTER or SELECT. The Fine Sync submenu will appear: To select a different menu, press MENU once or twice, so that no items are... -
Page 57: Hsg
Digital Projection User Manual 4. Controlling the projector M-Vision Cine LED Advanced menu continued Notes • Press ENTER or SELECT. The HSG submenu will appear: To select a different menu, press MENU once or twice, so that no items are... -
Page 58: System Menu
4. Controlling the projector Digital Projection User Manual M-Vision Cine LED System menu Notes • To display the menus, press MENU on the remote control or the projector control panel. • Use the keys to select the System menu page,... -
Page 59: Source Enable
Digital Projection User Manual 4. Controlling the projector M-Vision Cine LED System menu continued Notes Source Enable • Press ENTER or SELECT. The Source Enable submenu will appear: To select a different menu, press MENU once or twice, so that no items are... -
Page 60: Menu Position
4. Controlling the projector Digital Projection User Manual M-Vision Cine LED System menu continued Notes Menu Position • Use the keys to select from: To exit from the menus completely, you may need to Top left press up to three times. -
Page 61: Rear Projection
Ceiling Mode • Use the keys to select from: Projected image is reversed, top to bottom Logo Display • Use the keys to select from: The Digital Projection logo is displayed during power up Rev E October 2014 Page 4.23... -
Page 62: Control Menu
4. Controlling the projector Digital Projection User Manual M-Vision Cine LED Control menu Notes • To display the menus, press MENU on the remote control or the projector control panel. • Use the keys to select the Control menu page,... -
Page 63: Auto Source
Digital Projection User Manual 4. Controlling the projector M-Vision Cine LED Control menu continued Notes Auto Source • Use the keys to select from: To set what a ‘blank’ screen looks like, use the Blank projector searches for an alternative input source when the current... -
Page 64: Service Menu
4. Controlling the projector Digital Projection User Manual M-Vision Cine LED Service menu Notes • To display the menus, press MENU on the remote control or the projector control panel. • Use the keys to select the Service menu page,... -
Page 65: Blue Only
Digital Projection User Manual 4. Controlling the projector M-Vision Cine LED Service menu continued Notes Blue Only This is useful for color-calibrating the projector or other video components. To exit from the menus completely, you may need to • Use the... - Page 66 4. Controlling the projector Digital Projection User Manual M-Vision Cine LED Page 4.28 Rev E October 2014...
-
Page 67: Maintenance
5. Maintenance Contents Changing the LED module ....................... 5.2 Cleaning the fans ..........................5.2 Rev E October 2014 Page 5.1... -
Page 68: Changing The Led Module
The LED module in this personnel. projector should be changed ONLY by authorised and • Contact your Digital Projection Dealer. qualified service personnel. Cleaning the fans • Turn the power OFF and wait until the fans stop. • Use a vacuum cleaner to clean the inlet and outlet fans, as shown below. -
Page 69: Appendix
6. Appendix Contents Troubleshooting ..........................6.2 ............................6.4 Error codes Specifications ............................6.5 ............................ 6.5 Part numbers ............................. 6.5 Optical ............................6.6 Electrical ............................6.6 Physical Dimensions ............................6.7 Video formats supported ........................6.8 Input connections ..........................6.10 ........................... 6.10 HDMI 1 &... -
Page 70: Troubleshooting
6. Appendix Digital Projection User Manual M-Vision Cine LED Troubleshooting Problem Possible solutions The red ISSUE indicator is illuminated Check the Error codes detailed on the next page. continuously or flashing. The projector will not power up. Note that the blue POWER indicator light will be OFF when the projector is in normal RUNNING MODE. - Page 71 See section 4. Controlling the projector, The remote control In the event that this troubleshooting guide has not solved the problem, then contact your Digital Projection dealer or service centre. Rev E October 2014 Page 6.3...
-
Page 72: Error Codes
6. Appendix Digital Projection User Manual M-Vision Cine LED Error codes Notes If the projector detects an error, the red Issue indicator will flash, as shown in the chart below. For example, if the fan fails, the red indicator will flash twice followed by a pause, then the sequence will repeat until the error condition is corrected. -
Page 73: Specifications
Digital Projection User Manual 6. Appendix M-Vision Cine LED Specifications Part numbers Projector 0.73:1 fixed lens 110-001 1.56–1.86:1 zoom lens 110-002 1.85–2.40:1 zoom lens 110-003 Power cable 10A, Europe 102-163 Power cable 13A, North America 102-165 Power cable 10A, United Kingdom... -
Page 74: Electrical
6. Appendix Digital Projection User Manual M-Vision Cine LED Lens aperture 0.73:1 fixed lens F/2.5 1.56–1.86:1 zoom lens F/2.5–2.76 1.85–2.40:1 zoom lens F/2.17–2.46 Lens shift (zoom lenses only) Vertical ± 0.6 H (120%) Horizontal ± 0.15 W (30%) Electrical Inputs... -
Page 75: Dimensions
Digital Projection User Manual 6. Appendix M-Vision Cine LED Dimensions All dimensions in mm unless otherwise stated Rev E October 2014 Page 6.7... -
Page 76: Video Formats Supported
6. Appendix Digital Projection User Manual M-Vision Cine LED Video formats supported Frame Signal Type Resolution Reference Rate 640x480 59.94 VESA DMT 640x480 74.99 VESA DMT 640x480 VESA DMT 800x600 60.32 VESA DMT 800x600 VESA DMT 800x600 85.06 VESA DMT 848x480 47.95... - Page 77 Digital Projection User Manual 6. Appendix M-Vision Cine LED Frame Signal Type Resolution Reference Rate NTSC NTSC (M, 4.43) 59.94 ITU-R BT.1700, SMPTE 170M PAL (B,G,H,I) ITU-R BT.1700 PAL (N) ITU-R BT.1700 PAL (M) 59.94 ITU-R BT.1700 SECAM SECAM (M) ITU-R BT.1700...
-
Page 78: Input Connections
6. Appendix Digital Projection User Manual M-Vision Cine LED Input connections Notes HDMI 1 & 2 inputs 19 way type A connector pin view of panel connector TMDS Data 2+ TMDS Data 2 Shield TMDS Data 2- TMDS Data 1+... -
Page 79: Rgb Input
Digital Projection User Manual 6. Appendix M-Vision Cine LED RGB input Notes 15 way D-type connector pin view of female connector unused Digital Ground (H Sync) R Ground B Ground G Ground Digital Ground (V Sync/DDC) unused H Sync V Sync... -
Page 80: Control Connections
6. Appendix Digital Projection User Manual M-Vision Cine LED Control connections Notes Wired Remote control connection Sleeve 3.5mm mini jack Signal Ring Not connected Sleeve Ground Ring Trigger 1 & 2 output Sleeve 3.5mm mini jack Trigger outputs are normally... -
Page 81: Remote Communications Protocol
Digital Projection User Manual 6. Appendix M-Vision Cine LED Remote communications protocol Notes Introduction Details of how to connect to The projector can be controlled by using an external control system or a PC via an the projector, using the serial RS232 serial interface, using a terminal-emulation program, such as HyperTerminal. - Page 82 6. Appendix Digital Projection User Manual M-Vision Cine LED Code transmitted <keyname> Description 0x82 sharp Bring up or cancel sharpness slide bar. 0x83 Bring up or cancel noise reduction slide bar. 0x85 gam.sw Switch to the next gamma value. 0x8B src.1...
-
Page 83: Operation Commands
Digital Projection User Manual 6. Appendix M-Vision Cine LED Operation Commands Operation commands are used to simulate menu operations and determine the settings of the projector, and use the following format: op <operation> <command> [CR] The <command> string can take one of the following formats: <command>... - Page 84 6. Appendix Digital Projection User Manual M-Vision Cine LED Operation <command> Values Notes nr.general = ? + - 0 - 200 block.reduct = ? + - 0 - 200 mosq.noise = ? + - 0 - 200 overscan 0 = Off...
- Page 85 Digital Projection User Manual 6. Appendix M-Vision Cine LED Operation <command> Values Notes phase = ? + - 0-200 tracking = ? + - 0-200 sync.level = ? + - 0-200 menu.pos 0 = Top left 1 = Top right...
- Page 86 6. Appendix Digital Projection User Manual M-Vision Cine LED Operation <command> Values Notes pixel.clock <number> signal <string> lamp.hours <number> total.hours <number> environment <string> Temperatures fact.reset (execute) blue.only 0 = Off 1 = On pattern 0 = White 1 = Black...
- Page 87 Digital Projection User Manual M-Vision Cine LED...
- Page 88 Digital Projection User Manual M-Vision Cine LED...
Need help?
Do you have a question about the M-Vision Cine LED and is the answer not in the manual?
Questions and answers