
Related Manuals for Digital Projection Mercury HD


Summary of Contents for Digital Projection Mercury HD
- Page 1 MERCURY HD Super High Brightness Digital Video Projector User’s Manual 16:9 widescreen display 103 512 A...
-
Page 3: Declaration Of Conformity
Digital Projection MERCURY HD Declaration of Conformity Directives covered by this Declaration 89/336/EEC Electromagnetic Compatibility Directive, amended by 92/31/EEC and 93/68/EEC. 73/23/EEC Low Voltage Equipment Directive, amended by 93/68/EEC. Products covered by this Directive Large Screen Projector type MERCURY HD... -
Page 4: Important Information
Your serial number is located on the side of your projector. modifications or changes to the unit EXCEPT those specified Record it here: by Digital Projection in this manual. Failure to comply with this government regulation could void your right to operate this equipment. -
Page 5: Important Information
CAUTION : Do not touch them as the pieces of glass may any local building codes. cause injury. If this happens, contact your Digital Projection d. Please consult your dealer for more information. dealer for lamp replacement. • Allow a minimum of 90 seconds to elapse after turning off the To Dealer or Installer: projector. - Page 6 Digital Projection MERCURY HD...
-
Page 7: Table Of Contents
Table of Contents Digital Projection MERCURY HD 1. Introduction 7. Double Stacking and Link Mode What's in the Box? ..............1-2 Stacking and Connecting the Projectors ....... 7-2 Introduction to the Projector ..........1-3 Adjusting and Registering Signals to Be Projected ..... 7-5 Getting to Know Your Projector .......... - Page 8 Digital Projection MERCURY HD viii...
-
Page 9: Introduction
Introduction What's in the Box? ........1-2 Introduction to the Projector ....1-3 Getting to Know Your Projector ....1-4 Control Panel Features ..................1-6 Terminal Panel Features ..................1-7 Remote Control Features ......1-9 Remote Control Precautions ................1-11 Remote Control Battery Installation ............... 1-11 Operating Range for Wireless Remote Control .......... -
Page 10: What's In The Box
Make sure your box contains everything listed. If any pieces are missing, contact your dealer. Please save the original box and packing materials if you ever need to ship your Projector. NOTE: Lenses are optional. Order lenses from your Digital Projection dealer. Remote control (102-161) and... -
Page 11: Introduction To The Projector
1 watt. corrections HDTV 1080p (1920x1080), HDTV 1080i (1920x1080), and • Digital Projection DigiView for enhanced video image 1600x1200 are displayed with DigiScale. display, more vibrant colors and blacks richer with detail • DigiScale enhanced image technology for increased... -
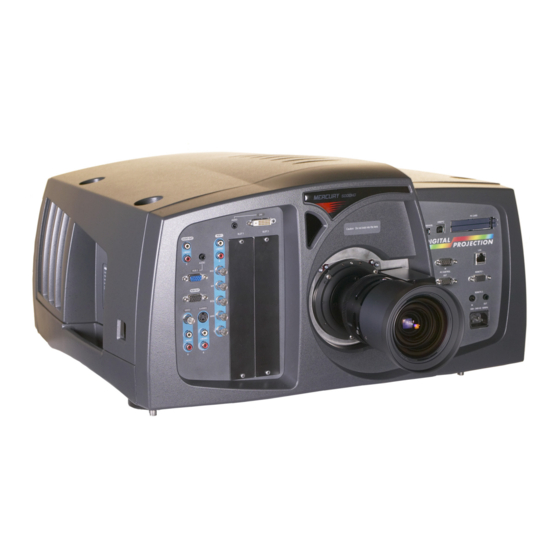
Page 12: Getting To Know Your Projector
1. Introduction Digital Projection MERCURY HD Getting to Know Your Projector Remote control sensor Ventilation outlet Terminal panel (Left) Lens (optional) Remote control sensor Terminal panel (Right) AC INPUT Connect the supplied power cable’s three-pin plug here. Mounting holes for... - Page 13 Digital Projection 1. Introduction MERCURY HD Ventilation outlet Remote control sensors 2 x 5/8 UNC mounting holes (maximum depth 1¼”) 4 x M8 mounting holes (maximum depth 16mm) Feet (rotate to fine-adjust the height and level of the projector)
-
Page 14: Control Panel Features
1. Introduction Digital Projection MERCURY HD Control Panel Features 1. POWER Button (ON / STAND BY)( 7. AUTO ADJUST Button Use this button to turn the power on and off when the main Use this button to adjust Position-H/V and Pixel Clock/Phase power is supplied and the projector is in standby mode or for an optimal picture. -
Page 15: Terminal Panel Features
Digital Projection 1. Introduction MERCURY HD Terminal Panel (left) Features DVI AUDIO Input Mini Jack (Stereo Mini) This is where you connect the audio output from your computer when connected to the DVI input. A commercially available audio cable is required. -
Page 16: Terminal Panel Features
Insert a PC card, commercially available flash memory card When you plug the supplied power cable into an active wall or Digital Projection optional wireless LAN card here. outlet and turn on the Main Power switch, the POWER There are two slots: Slot 1 and Slot 2. -
Page 17: Remote Control Features
Digital Projection 1. Introduction MERCURY HD 1. POWER ON Remote Control Features Press and hold this button for a minimum of two seconds to turn on the projector when the main power is supplied and the projector is in standby mode or idle mode. - Page 18 1. Introduction Digital Projection MERCURY HD 10. UNDO Press to return the adjustments and settings to the previous 21. KEYSTONE (R) condition. While pressing and holding CTL, pressing this Press to display the Keystone Correction (3D Reform) button clears the entire menus or adjustment/setting screen.
-
Page 19: Remote Control Precautions
Digital Projection 1. Introduction MERCURY HD Remote Control Precautions Operating Range for Wireless Remote Control The infrared signal operates by line-of-sight up to a distance of • The remote control system may not function when direct sunlight or strong illumination strikes the remote control sensor of the main unit, approximately 7m (20 feet) and a 60 degree angle of the or when there is an obstacle in the path. -
Page 20: Using The Remote Control In Wired Operation
1. Introduction Digital Projection MERCURY HD Using the Remote Control in Wired Operation Connect one end of the supplied remote cable to the REMOTE 2 IN mini jack and the other end to the remote jack on the remote control. -
Page 21: Installation
Installation Setting Up Your Projector ......2-2 Screen Size and Projection Distance ............2-2 Lens Shift Adjustable Range ....2-4 Optional Lens Installation ....... 2-5 Making Connections ........ 2-6 Connecting Your PC or Macintosh ............... 2-6 To connect Scart Output ................2-7 Connecting an External Monitor .............. -
Page 22: Setting Up Your Projector
2. Installation Digital Projection MERCURY HD This chapter describes how to set up your projector and how to connect video and audio sources. Setting Up Your Projector Your Projector is simple to set up and use. But before you get started, you must first: 1. - Page 23 Digital Projection 2. Installation MERCURY HD Table of Throw Distances and Screen Sizes for Optional Zoom Lenses NOTE: applicable to all wide-screen formats that use the full width of the DMD™. NOTE: Actual throw distances may vary from those shown in the table below by up to +/-5%.
-
Page 24: Lens Shift Adjustable Range
2. Installation Digital Projection MERCURY HD Lens Shift Adjustable Range The diagram shows the location of the image position in the lens. The lens can be shifted within the shaded area as shown using the normal projection position as a starting point. -
Page 25: Optional Lens Installation
Digital Projection 2. Installation MERCURY HD Optional Lens Installation This section describes how to install the lens. Before installation * Determine the optional lens to be used to obtain a desired projection distance. There are six optional lenses available: 0.64 : 1 fixed part no. -
Page 26: Making Connections
2. Installation Digital Projection MERCURY HD Making Connections NOTE: When using with a notebook PC, be sure to connect between the projector and the notebook PC before turning on the power to the notebook PC. In most cases signal cannot be output from RGB output unless the notebook PC is turned on after connecting with the projector. -
Page 27: To Connect Scart Output
SCART is a standard European audio-visual connector for TVs, VCRs and DVD players. It is also referred to as Euro-connector. NOTE: The ADP-SC1 SCART adapter is obtainable from your Digital To RGB 2 IN Projection dealer. Contact your Digital Projection dealer for more information. Female ADP-SC1... -
Page 28: Connecting Your Dvd Player
2. Installation Digital Projection MERCURY HD Connecting Your DVD Player Optional 15-pin-to-RCA (female) x 3 cable (ADP-CV1) RCA(female)-to-BNC(male) adapter (not supplied) Component video RCA x 3 cable (not supplied) Audio cable (not supplied) Audio Equipment DVD player Audio cable (not supplied) -
Page 29: Connecting Your Vcr Or Laser Disc Player
Digital Projection 2. Installation MERCURY HD Connecting Your VCR or Laser Disc Player Video cable (not supplied) Audio cable (not supplied) S-video cable (not supplied) Audio equipment VCR/ Laser disc player Audio cable (not supplied) Use common RCA cables (not provided) to connect your NOTE: Refer to your VCR or laser disc player owner's manual for more VCR, laser disc player or document camera to your projector. -
Page 30: Connecting To A Network
2. Installation Digital Projection MERCURY HD Connecting to a Network With the LAN connection, you can control the projector over the network using a computer to switch the unit on/off, select the input and others. * To control the projector over the network using a computer, use the Dynamic Image Utility 2.0 contained on the User Supportware CD-ROM or the HTTP Server feature. -
Page 31: Connecting The Supplied Power Cable
Digital Projection 2. Installation MERCURY HD Connecting the Supplied Power Cable Connect the supplied power cable to the projector. First connect the supplied power cable's three-pin plug to the AC IN of the projector, and then connect the other plug of the supplied power cable in the wall outlet. - Page 32 2. Installation Digital Projection MERCURY HD 2-12...
-
Page 33: Projecting An Image (Basic Operation)
Projecting an Image (Basic Operation) Turning on the Projector ......3-2 Selecting a Source ........3-3 Adjusting the Picture Size and Position .. 3-3 Correcting the Horizontal and Vertical Keystone Distortion (DigiScale - 3D Reform) ......3-4 Optimizing RGB Picture Automatically ..3-6 Turning Up or Down Volume .... -
Page 34: Turning On The Projector
3. Projecting an Image Digital Projection MERCURY HD This chapter describes how to turn on the projector and to project a picture languages for the menu. onto the screen. 2. Press the ENTER button to execute the selection. Turning on the Projector NOTE: •... -
Page 35: Selecting A Source
Digital Projection 3. Projecting an Image MERCURY HD Selecting a Source Adjusting the Picture Size and Position Selecting the computer or video source 1. Turn on the projector 2. Select your type of projector orientation. Desktop front, ceiling rear, desktop rear, and ceiling front. -
Page 36: Correcting The Horizontal And Vertical Keystone Distortion
3. Projecting an Image Digital Projection MERCURY HD Preparation (Recommended): (2) Press and hold the CTL and press the ZOOM + or - button to adjust the image size. You can also adjust the image size by Warm up the projector for about 60 minutes. - Page 37 Digital Projection 3. Projecting an Image MERCURY HD When using the remote control or cabinet 3. Press the 3D REFORM button on the projector cabinet or the buttons: KEYSTONE button on the remote control. The Cornerstone adjustment screen is displayed.
-
Page 38: Optimizing Rgb Picture Automatically
3. Projecting an Image Digital Projection MERCURY HD 8. Use the SELECT button to select another icon which Optimizing RGB Picture Automatically points in the direction. Adjusting the Image Using Auto Adjust Optimizing RGB image automatically Press the Auto Adjust button to optimize an RGB image automatically. -
Page 39: Turning Off The Projector
Digital Projection 3. Projecting an Image MERCURY HD Turning off the Projector To turn off the projector: First press the POWER (ON/STAND BY) button on the projector cabinet or the POWER OFF button on the remote control for a minimum of two seconds. - Page 40 3. Projecting an Image Digital Projection MERCURY HD...
-
Page 41: Convenient Features
Convenient Features Turning Off the Image and Sound ... 4-2 Enlarging and Moving a Picture ....4-2 Getting the On-line Help and Information 4-2 Using a USB Mouse ........4-3 Using a USB HUB Function ...... 4-3 Changing Background Logo ....4-4 Making Freehand Drawings on a Projected Image (ChalkBoard) ..... -
Page 42: Turning Off The Image And Sound
4. Convenient Features Digital Projection MERCURY HD Turning Off the Image and Sound Enlarging and Moving a Picture Press the MUTE PICTURE button to turn off the image and sound for a You can enlarge the area you want up to 400 percent. -
Page 43: Using The Usb Mouse
Digital Projection 4. Convenient Features MERCURY HD Operate the PC mouse using the USB mouse Using the USB Mouse Using a commercially available USB mouse gives you smooth operation. NOTE: You can select the operation mode of the USB mouse connected to the USB port of the projector. -
Page 44: Changing Background Logo
Projection logo to another, you cannot return the logo to background even by using Factory Default. To do so, repeat the above steps. The Digital Projection logo file is included on the supplied CD-ROM Projector User Supportware in folder (“/Logo/” ). -
Page 45: Using The Viewer
Using the Viewer Making the Most out of the Viewer Function ........5-2 Operating the Viewer Function from the Projector (playback) ........ 5-3... -
Page 46: Making The Most Out Of The Viewer Function
5. Using the Viewer Digital Projection MERCURY HD Inserting and Removing a PC Card NOTE: • To use the Viewer, first you need to create presentation materials on NOTE: your PC using the Dynamic Image Utility 2.0 contained on the •... -
Page 47: Operating The Viewer Function From The Projector (Playback)
Digital Projection 5. Using the Viewer MERCURY HD When the tool bar is not displayed: Operating the Viewer Function from the You can use the button on the cabinet to select folders Projector (playback) or slides. This section describes the operation for showing slides of pre- sentation documents created using the Viewer function with the projector. -
Page 48: Auto Play Mode
5. Using the Viewer Digital Projection MERCURY HD Auto Play Mode Preparations: If the "Auto Play" option is selected in "Viewer Options" of the Insert the PC card into the card slot. menu, any given slide will start to play automatically. -
Page 49: Deleting Captured Images
Digital Projection 5. Using the Viewer MERCURY HD Deleting Captured Images Using the Delete button on the tool bar for Viewer can delete captured images. Delete Prev Play Jump Drive View Setup Next Stop Select To delete captured images: 1. Select Viewer and display a folder list of captured images. - Page 50 5. Using the Viewer Digital Projection MERCURY HD...
-
Page 51: Using The Projector In A Network
Using the Projector in a Network Introduction ..........6-2 Supported Equipment ......6-3 Equipment Connections and Settings ..6-4 Software Installation ....... 6-5 Starting/Exiting the Software ....6-6 Troubleshooting ........6-7... -
Page 52: Introduction
Introduction • Using a network environment (*2), this program enables the Thank you for your purchase of the Digital Projection portable screen image displayed by the personal computer to be sent to projector (hereafter referred to as "unit" or "projector"). -
Page 53: Supported Equipment
A LAN that supports TCP/IP or a wireless LAN environment is a requirement. Network Environment • For information on supported LAN cards, contact Digital Projection (when used) • For wireless LAN connection, use Digital Projection optional wireless LAN card (001-723 or 001- 762 for France). Supported OS Windows 98... -
Page 54: Equipment Connections And Settings
6. Using the Projector in a Network Digital Projection MERCURY HD Equipment to Be Prepared Equipment Connections and Settings • Projector (This unit) • Personal computer When Using a Network Environment • USB cable (included with the projector) What Can Be Accomplished Connection at the Projector Side •... -
Page 55: Software Installation
Digital Projection 6. Using the Projector in a Network MERCURY HD 7. Now, follow the operations described in the screen messages. Software Installation When the uninstall procedure is completed, there will be a return to the "Add/Remove Programs Properties" screen. -
Page 56: Starting/Exiting The Software
6. Using the Projector in a Network Digital Projection MERCURY HD Exit the Software Starting/Exiting the Software 1. Click [Exit]. Viewer PPT Converter 2.0 will close. Dynamic Image Utility 2.0 Start the Software Image Express Utility 1.0 Start the Software... -
Page 57: Troubleshooting
Digital Projection 6. Using the Projector in a Network MERCURY HD Troubleshooting In this section, the software names have been abbreviated as follows: Dynamic Image Utility 2.0 to DIU 2.0, Viewer PPT Converter 2.0 to PPTC 2.0, and Image Express Utility 1.0 to IEU 1.0. - Page 58 6. Using the Projector in a Network Digital Projection MERCURY HD <Problem> Projection to the screen is not possible when using the LAN environment. (DIU 2.0, IEU 1.0) Check Points Countermeasures Have LAN cards (i.e., adapters) been put into both the personal Put LAN cards (i.e., adapters) into both the personal computer...
- Page 59 Digital Projection 6. Using the Projector in a Network MERCURY HD <Problem> The projector cannot be found with "General search". (IEU 1.0) Check Points Countermeasures Are the wireless LAN settings appropriate? Please check the access points, the personal computer setting Are the channel numbers for the personal computer and the values and the projector [LAN Mode] setting values.
- Page 60 6. Using the Projector in a Network Digital Projection MERCURY HD 6-10...
-
Page 61: Stacking And Connecting The Projectors
Using Double Stacking and Link Mode Stacking and Connecting the Projectors 7-2 Adjusting and Registering Signals to Be Projected ..........7-5 Adjusting the Lens Shift, Zoom and Focus to Clearly Display all projected patterns ..7-5 Link Mode Setting ........7-5 List of Menu Items Available in Link Mode ............ - Page 62 7. Double Stacking and Link Mode Digital Projection MERCURY HD Stacking and Connecting the Projectors NOTE: Up to three units can be gravity stacked without external support. In some cases, however, two images will not align on the screen correctly. This will become more apparent when displaying small text and detailed graphics.
- Page 63 Digital Projection 7. Double Stacking and Link Mode MERCURY HD Throw Distances for Optional Lenses Master projector Screen center Slave projector Throw Distance Refer to the table of throw distances in chapter 2, and ensure that the distance between the projectors and the screen is in the middle part of the recommended range for both lenses.
- Page 64 7. Double Stacking and Link Mode Digital Projection MERCURY HD Hookup 1. Use commercially available RGB signal cables to connect the RGB output of the master projector to the RGB input of the slave projector until all the projectors are connected.
-
Page 65: Adjusting And Registering Signals To Be Projected
Digital Projection 7. Double Stacking and Link Mode MERCURY HD Adjusting and Registering Signals to Be Adjusting the Lens Shift, Zoom and Focus Projected to Clearly Display all projected patterns 1. Display a desired input signal on the master projector. -
Page 66: List Of Menu Items Available In Link Mode
7. Double Stacking and Link Mode Digital Projection MERCURY HD List of Menu Items Available in Link Mode Available Menu Items NOTE Source Select Sound Menu Link Mode On/Off Timer Sleep Timer Source Information Projector Information Direct Button NOTE LENS SHIFT... -
Page 67: Using The On-Screen Menus
Using the On-Screen Menus Basic Menu Operation..8-2 Projector Options ..........8-13 Menu ..............8-13 List of Direct Button Setup ..............8-15 Combinations ..... 8-3 Lamp Settings ............8-18 Link Mode .............. 8-18 Menu tree ......8-4 LAN Mode ............. 8-19 Password ............. -
Page 68: Using A Usb Mouse,
8. Using the On-Screen Menus Digital Projection MERCURY HD Customizing the Menu Basic Menu Operation The Custom menu can be customized to meet your requirements. Selecting a menu item from the "Custom Menu Edit" list, allows Using the Menus you to custom tailor the menu items to your needs. -
Page 69: List Of Direct Button Combinations
Digital Projection 8. Using the On-Screen Menus MERCURY HD List of Direct Button Combinations CTL+ Input (1-10) Switches to any selected signal found in the Entry List. To enable this combination, you must first assign specific remote buttons for direct input selection in the Entry Edit window. -
Page 70: Menu Tree
8. Using the On-Screen Menus Digital Projection MERCURY HD Menu tree NOTE: The item appears dimmed on the menu, it is unavailable. - Page 71 Digital Projection 8. Using the On-Screen Menus MERCURY HD NOTE: The shaded item indicates the default setting.
- Page 72 8. Using the On-Screen Menus Digital Projection MERCURY HD * When selecting “PC Card”, the “Network Type” and the “WEP” setting screens appear.
-
Page 73: Menu Descriptions & Functions
Digital Projection 8. Using the On-Screen Menus MERCURY HD Entering Alphanumeric Characters by Using the Menu Descriptions & Functions Menu Alphabet or numeric characters are used for your IP address Source Select or projector name. To enter IP Address or projector name, use Enables you to select a video source such as a VCR, DVD the software keyboard. -
Page 74: Adjust Source
8. Using the On-Screen Menus Digital Projection MERCURY HD Edit ....Enables you to change source names or Video Adjust (not available for RGB) assign the direct key. Noise Reduction Source Name Enter a signal name. Up to 18 alphanumeric characters can be used. -
Page 75: Picture Management
Digital Projection 8. Using the On-Screen Menus MERCURY HD DigiView - SweetVision 3D Y/C Separation This option turns on or off the 3 dimension separation feature. NOTE: This feature is available for NTSC3.58 of Video signal only. Picture Management The SweetVision feature provides improvement of contrast using a proprietary detail enhancement technology. -
Page 76: Image Options
8. Using the On-Screen Menus Digital Projection MERCURY HD Selecting Gamma Correction Mode Aspect Ratio Use the buttons to choose one mode from the seven listed: Video-Lo ..Video originated material in a Theatrical environment with low ambient light Film-Lo ..Film originated material in a Theatrical... -
Page 77: Option Adjust
Digital Projection 8. Using the On-Screen Menus MERCURY HD Option Adjust Signal Level Clamp Timing According to the signal, this function sets the detection position (i.e., clamp position) of the black level reproduction of the analog input signal. Normally this is not used. -
Page 78: Ref. Adjust
8. Using the On-Screen Menus Digital Projection MERCURY HD Ref. Adjust Position Using DigiScale - 3D Reform This feature adjusts the vertical position of the image when This feature corrects trapezoidal distortion so that the viewing video with an aspect ratio selected. -
Page 79: Factory Default
Digital Projection 8. Using the On-Screen Menus MERCURY HD Factory Default Projector Options Menu Menu Page 1 All Data /Current Signal The Factory Default feature allows you to change adjustments and setting to the factory preset for source. All Data ..Reset all the adjustments and settings for all... - Page 80 8. Using the On-Screen Menus Digital Projection MERCURY HD Selecting Menu Display Time Menu Page 2 This option allows you to select how long the projector waits after the last touch of a button to turn off the menu. The preset choices are "Manual", "Auto 5 sec", "Auto 15 sec", and "Auto 45 sec".
-
Page 81: Setup
Digital Projection 8. Using the On-Screen Menus MERCURY HD Setup Page 2 Setup Setup Page 1 Setting Viewer Options Show Folder List: If this option is checked, when the Viewer source is Selecting Projector Orientation [Orientation] selected on the projector, the folder lists will be displayed This reorients your image for your type of projection. - Page 82 8. Using the On-Screen Menus Digital Projection MERCURY HD Selecting Operation Mode Setup Page 4 Set the operation mode of the USB mouse connected to the USB port (MOUSE/HUB) on the projector Auto .... Depending on connection of the USB port...
- Page 83 Digital Projection 8. Using the On-Screen Menus MERCURY HD Enabling Last Memory [Last Memory] S-Video Mode Select: The projector stores the last signal data in memory for each This feature is used to select the S-Video signal detection input (RGB1, RGB2, DVI DIGITAL, Video, S-Video and Slot mode.
-
Page 84: Lamp Settings
Eco Mode ..Select this mode to increase the lamp life (80% Brightness). Enabling and Disabling Projector ID: NOTE: The Mercury HD projector is designed to accept only one lamp Each projector needs its own unique addresses when (Lamp 1), so the Lamp Select and Interval settings below will be used in serial communication mode. -
Page 85: Lan Mode
• Connect an Ethernet LAN cable to the LAN port (RJ-45) of the projector for network connection. • Digital Projection's optional wireless LAN card is available. For more information on inserting or ejecting a LAN card, see page 5-2. • Either PC Card Slots 1 or 2 can accept LAN card. If two LAN cards are inserted into both PC card slots, the first inserted one is effective. - Page 86 8. Using the On-Screen Menus Digital Projection MERCURY HD Advanced Network Type (required for wireless only) IP Address Mode: An IP address can be automatically assigned to this Select communication method when using wireless LAN. projector by your DHCP server. If your network does not...
- Page 87 Digital Projection 8. Using the On-Screen Menus MERCURY HD WEP (for Wireless only) DHCP Select this option whether using the WEP (Wired Equivalent Depending on your network environment, acquiring an IP ad- Privacy) key for encryption or not. To use encryption, specify dress from a DHCP server may not be possible.
- Page 88 8. Using the On-Screen Menus Digital Projection MERCURY HD LAN Mode Mail Page Test Mail: Send a test mail to check if your settings are correct. NOTE: If you entered an incorrect address in a test, you may not receive an Alert mail. Should this happen, check if the Recipient's Address is correctly set.
-
Page 89: Password
Digital Projection 8. Using the On-Screen Menus MERCURY HD Password Delete A password can be set for your projector to avoid operation by an unauthorized person. There are two password options: one for menu and the other for logo. When a password is set, doing any one of the following four op- erations will display the Password input screen. -
Page 90: Security
NOTE: Do not forget your keyword. However, if you forget your The Security function is not available keyword, Digital Projection or your dealer will provide you with your unless at least one PC card is Release Code. See more information at the end of this section. -
Page 91: Tools
NOTE: Digital Projection or your dealer will provide you with your On/Off Timer Release Code in exchange for your registered keyword and Request Code. - Page 92 8. Using the On-Screen Menus Digital Projection MERCURY HD Enabling the On or Off Timer 3. Select “Edit” and press the ENTER button to open the Edit window. 1. To execute the setting, select “Active” . 4. Set the Day, Time (24 hours format), On-Time and Off-Time using the SELECT buttons and the Software keyboard (1 thru 10).
-
Page 93: Capture
Digital Projection 8. Using the On-Screen Menus MERCURY HD Enabling Sleep Timer ChalkBoard The ChalkBoard feature allows you to write and draw messages on a projected image. See page 4-4. NOTE: This feature is available only when using with USB mouse. -
Page 94: Projector Information
8. Using the On-Screen Menus Digital Projection MERCURY HD Source Information Page 2 Projector Information Page 2 Filter Usage, Projector Usage, Projector ID Signal Type, Video Type, Sync Type, Interlace, Direct Key Projector Information Page 3 Projector Information Displays the information for your projector such as lamp usage, filter usage, version number and others. -
Page 95: Routine Maintenance
Routine Maintenance Replacing the Lamp ......... 9-2 Replacing or Cleaning the Filter ....9-3 Cleaning the Cabinet and the Lens ..9-3... -
Page 96: Replacing The Lamp
CAUTION: Do not use a lamp other than the Digital Projection replacement lamp (Standard life lamp: 102-246). 6. Secure it in place with the two screws. -
Page 97: Replacing Or Cleaning The Filter
Digital Projection 9. Routine Maintenance MERCURY HD Replacing or Cleaning the Filter Cleaning the Cabinet and the Lens The air-filter prevents dust or dirt from getting inside the 1. Turn off the projector before cleaning. projector and should be cleaned after every 100 hours of 2. - Page 98 9. Routine Maintenance Digital Projection MERCURY HD...
-
Page 99: Appendix
Appendix USB Memory Device or USB Memory Card Reader Support ......10-2 Troubleshooting ........10-3 Specifications ........10-5 Cabinet Dimensions ....... 10-7 Pin Assignments of D-Sub RGB Input Connector ..........10-7 Compatible Input Signal List ....10-8 REMOTE 1 Connector ......10-9 PC Control Codes and Cable Connection ........... -
Page 100: Usb Memory Device Or Usb Memory Card Reader Support
10. Appendix Digital Projection MERCURY HD USB Memory Device or USB Memory Card Reader Support The projector is compatible with either a USB memory device or USB memory card reader which supports the viewer and secu- rity features. • To use a USB memory device or USB memory card reader, connect the device to the USB port (type A). -
Page 101: Troubleshooting
Digital Projection 10. Appendix MERCURY HD Troubleshooting This section helps you resolve problems you may encounter while setting up or using the projector. Power Indicator Indicator Condition Projector Condition Note The main power is off – Blinking light Green blinking 0.5 sec ON,... - Page 102 10. Appendix Digital Projection MERCURY HD Common Problems & Solutions Problem Check These Items Does not turn on • Check that the power cable is plugged in. See pages 1-9 and 2-11. • Ensure that the rear cover is installed correctly. See pages 1-4 and 9-2.
-
Page 103: Specifications
Digital Projection 10. Appendix MERCURY HD Specifications Part Number 001-731 Optical Digital Light Processor Texas Instruments DMD™, native resolution 1280 x 720 Lamp Standard Lamp (Part No. 102-246) 250 W AC Lamp Life (typical) Normal mode 1500 hours Lens Options Motorized zoom and Motorized focus 0.64 : 1 fixed... - Page 104 10. Appendix Digital Projection MERCURY HD Input Compatibility NTSC / PAL / PAL60 / SECAM / NTSC4.43, YCbCr Component, HDTV-1080I, 1080p, 720p, 480p, 480I, VGA, SVGA, XGA, SXGA / UXGA (with Advanced AccuBlend) Sychronization Horizontal Frequency : 15 - 100 kHz (RGB : 24 kHz or over)
-
Page 105: Cabinet Dimensions
Digital Projection 10. Appendix MERCURY HD Cabinet Dimensions All dimensions in mm and (inches) Pin Assignments of D-Sub RGB Input Connector Mini D-Sub 15 Pin Connector Signal Level Pin No. RGB Signal (Analog) YCbCr Signal Green or Sync on Green... -
Page 106: Compatible Input Signal List
10. Appendix Digital Projection MERCURY HD Compatible Input Signal List Signal Resolution Frequency H. Refresh Rate Displayed as ( Dots ) ( kHz ) ( Hz ) NTSC – 15.734 16:9 (4:3)* – 15.625 16:9 (4:3)* SECAM – 15.625 16:9... -
Page 107: Remote 1 Connector
Digital Projection 10. Appendix MERCURY HD REMOTE 1 Connector This connector is used for a third party external control device. Pin No. SHORT/OPEN FUNCTION External control mode ON SHORT External control mode OFF OPEN POWER ON SHORT OPEN POWER OFF... -
Page 108: Pc Control Codes And Cable Connection
10. Appendix Digital Projection MERCURY HD . Using Software Keyboard PC Control Codes and Cable Connection PC Control Codes Function Code Data POWER ON 02H 00H 00H 00H 00H 02H POWER OFF 02H 01H 00H 00H 00H 03H INPUT SELECT RGB 1... -
Page 109: Operation Using An Http Browser
Digital Projection 10. Appendix MERCURY HD Structure of the HTTP Server Operation Using an HTTP Browser Overview The use of HTTP server functions will allow control of the projec- tor from a web browser without the installation of special soft- ware. - Page 110 10. Appendix Digital Projection MERCURY HD Source Select: This switches the input connector of the projector. RGB1 ......Switches to the RGB 1 connector. RGB2 ......Switches to the RGB 2 connector. DVI(DIGITAL) .... Switches to the DVI connector. Video ......Switches to the Video connector.
Need help?
Do you have a question about the Mercury HD and is the answer not in the manual?
Questions and answers