
Related Manuals for Digitus DN-70560


Summary of Contents for Digitus DN-70560
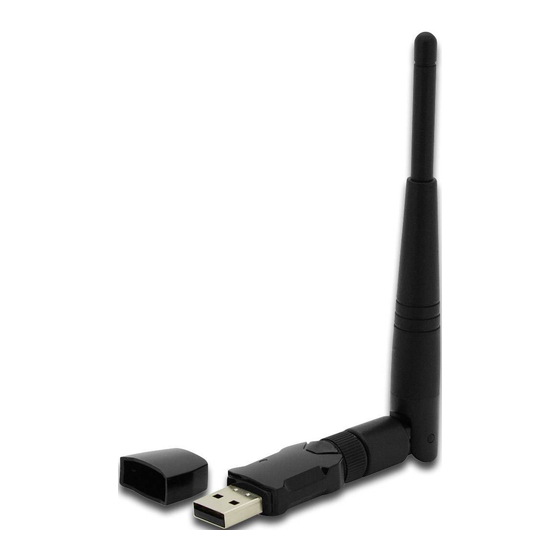
- Page 1 Wireless AC 433Mbps Dual Band USB 2.0 Adapter DN-70565 DN-70560 User Manual DN-70560 • DN-70565 1 / 36...
-
Page 2: Table Of Contents
C h a p t e r 1 : I n t r o d u c t i o n … … … … … … … … … … … … … … . … … … … . 3 1 . -
Page 3: Chapter 1. Introduction
Chapter 1. Introduction Thank you for purchasing the wireless 802.11b/g/n/a/ac USB adapter! This adapter is mini size design and you are able to plug it into the USB port. Excepting common wireless standards 802.11b/g/n, this wireless adapter is also 802.11ac compatible - data transfer rate is 150/433Mbps, and that’s three times faster than 802.11g wireless network! 1.1 Product Features ◆... -
Page 4: Chapter 2: Quick Installation Guide
CHAPTER 2: Quick Installation Guide This chapter is to assist you how to use the included CD-ROM which comprises the Driver and the Client Utility Interface. 2.1 Driver Installation Please follow the following instructions to install your new wireless USB Adapter: 2.1.1 Insert the USB wireless network card into an empty USB 2.0 port of your... - Page 5 2.1.3 Insert the driver CD into your CD-ROM. You can see autorun screen below. if not, you can double click ‘autorun.exe’ on CD. Click ‘Install Driver’ to start the installation procedure 2.1.4 Installation descriptions shown. Click ‘Next’ to continue 5 / 36...
- Page 6 2.1.5 Once the installation is finished the computer will be asked to reboot. you can click ‘Finish’ and reboot the computer to finish the installation of driver files. 2.1.6 A new icon will appear near the clock of system tray: Left-click the icon will launch wireless network configuration utility, and you can right-click the icon to show the quick menu of configuration utility.
-
Page 7: Connect To Wireless Access Point
Wireless network card is not detected. For detailed instructions of wireless network configuration utility, please see next chapter. 2.2 Connect to Wireless Access Point To use wireless network, you have to connect to a wireless access point first. You can either use Client utility (comes with network card driver), or Windows Zero Config utility (comes with Windows operating system). - Page 8 3. Please wait for a while, and all wireless access points which can be reached by this wireless network card will be displayed here. If the wireless access point you wish to connect does not appear here, you can click ‘Refresh’ button to scan for wireless access points again; if the wireless access point you’re looking for still not appear, try to move the computer closer.
- Page 9 All options in this page will be filled automatically according to the access point you wish to add to profile. However, you can still modify any of them to meet your requirement. Profile name You can give a name to this profile, so you can remember its purpose easily.
- Page 10 Data encryption Select the data encryption type from drop-down menu. This setting must be identical with the setting of wireless access point you with to connect. ASCII / PASSPHRASE When the encryption type is ‘WEP’, it’s required to input a set of ‘passphrase’ to connect to wireless access point.
-
Page 11: Using Windows Zero Configuration
NOTE: If you connected to an access point but the connection has been dropped soon, please check security settings and re-check password spelling. 2.2.2 Using Windows Zero Configuration Windows XP and Vista has a built-in wireless network configuration utility, called as ‘Windows Zero Configuration’ (WZC). You can also use WZC to configure your wireless network parameter: 1. - Page 12 3. A message indicating that you’ve been switched to Windows Zero. NOTE: To return to use Client utility, uncheck ‘Windows Zero Config’ box. 4. Click ‘Start’ button (should be located at the bottom-left corner of windows desktop), click ‘Control Panel’, then click ‘Network and Internet Connections’...
- Page 13 5. Double click ‘Network Connections’. 13 / 36...
- Page 14 6. Right-click ‘Wireless Network Connection’ (it may have a number as suffix if you have more than one wireless network card, please make sure you right-click the Wireless LAN 802.11ac USB Network Adapter), then select ‘View Available Wireless Networks’. 7. All wireless access points in proximity will be displayed here. If the access point you want to use is not displayed here, please try to move your computer closer to the access point, or you can click ‘Refresh network list’...
- Page 15 8. If the access point is protected by encryption, you have to input its security key or passphrase here. It must match the encryption setting on the access point. If the access point you selected does not use encryption, you’ll not be prompted for security key or passphrase.
-
Page 16: Chapter 3: Client Utility
CHAPTER 3: Client Utility 3.1 Connection Profile Management If you need to connect to different wireless access points at different time, like of access point of your home, office, cybercafe, or public wireless service, you can store the connection parameters (encryption, passphrase, security etc, etc.) as a profile for every access point, so you don’t have to input these parameters every time when you want to connect to a specific wireless access point. - Page 17 You’ll be prompted to input connection parameters for the wireless access point you wish to connect: 17 / 36...
- Page 18 Required parameters are: Profile name You can give a name to this profile, so you can remember its purpose easily. It can be any phrase to help you remember. Network Name (SSID) The SSID (Service Set IDentifier, i.e. access point’s name).
-
Page 19: Remove An Existing Profile
Certificate If certification is required to authenticate with 802.1x authentication server, please select a local certificate from dropdown list. Check this box and PAC (Privilege Access Certificate) will be automatically selected. When all required parameters are set, click ‘OK’ to create and save a new profile. -
Page 20: Make A Copy Of Existing Profile
3.1.4 Make a copy of existing profile If you need to make a copy of a specific profile, you can use this function. This function is very convenient when you need to build a new profile which parameters are similar to any existing profile. To do this, select an existing profile, then click ‘Duplicate’... -
Page 21: Set As Default Profile
3.1.5 Set as default profile If you wish to use a specific profile as default connection, you can select a profile in the list, and click ‘Set Default’. Selected profile will become default selection and Client configuration utility will attempt to connect to selected access point. -
Page 22: Status
All general information like signal strength and link quality will be displayed here. These information are very useful when you encounter some problem on connecting to access point. If you wish to get a new IP address from DHCP server, you can click ‘ReNew IP’... -
Page 23: View Network Statistics
3.2.3 View Network Statistics To view the statistical data of wireless network card, click ‘Statistics’ menu, and the statistics of wireless connection will be displayed: All connection-related statistics is displayed here. You can click ‘Reset’ button, to reset the statistics of all items back to 0. 3.3 Miscellaneous Settings There are few functions provided by Client configuration utility, you can access these functions from the bottom of configuration menu:... -
Page 24: Establish Secure Connection With Ap By Wps
The descriptions of these function are listed as follow: Show Tray Icon Check this box to show an icon on system tray. Uncheck this box to hide it. Radio Off Switch wireless radio off. Wireless network functionalities are disabled. Disable Adapter Disable wireless network adapter. - Page 25 Please follow the following instructions to setup WPS: Right-click Client configuration utility icon, and click ‘Open Config Utility’. 2. Click ‘Wi-Fi Protect Setup’ menu. 3. You can use PIN code or Push-Button configuration, and WPS-compatible wireless access point must use the same type of WPS. For instructions on setup each type of WPS, see next 2 chapters for detailed instructions.
-
Page 26: Pin Code
3.4.1 PIN Code To use PIN Code, please click ‘Pin Input Config (PIN)’ button: You’ll be prompted to select an access point you wish to connect. If you know its SSID, click ‘Yes’, otherwise click ‘No’. 26 / 36... - Page 27 If you select ‘Yes’, a list of all WPS-compatible AP nearby will be displayed; you can click ‘Refresh’ to rescan, then select an AP and click ‘Select’ button. If you select ‘No’, wireless network card will prompt you to enter 8-digit PIN code into your AP, without selecting an AP in advance.
-
Page 28: Push Button
3.4.2 Push Button To use Push-Button WPS configuration, please click ‘Push Button Config (PBC)’ button. This is the easiest way to establish secure connection by WPS, but if there’re more than one WPS-compatible AP using Push-Button config, please use PIN Code instead. After you click “Push Button Config(PBC)”, a message box will appear: Please activate Push-Button function on wireless access point now, and wireless network card will establish secure connection with access point... -
Page 29: Chapter 4 Soft Ap Function
CHAPTER 4 Soft-AP Function Excepting become a wireless client of other wireless access points, this wireless adapter can act as a wireless service provider also! You can switch this wireless adapter’s operating mode to ‘AP’ mode to simulate the function of a real wireless access point by software, and all other computers and wireless devices can connect to your computer wirelessly, even share the internet connection you have. - Page 30 After mode switch is complete, you’ll see general information of software AP, which shows AP’s SSID and connected wireless clients. Client mode icon : Software AP icon: 30 / 36...
-
Page 31: Configure Ssid And Channel
4.1.1 Configure SSID and Channel To configure software AP, click ‘Config’ button: The ‘Wireless Network Properties’ is displayed. Please note that Ad-Hoc mode is not available when network card is in AP mode. The description of major setup items are listed below: 31 / 36... -
Page 32: Setup Soft-Ap Security
Network Name Please input the SSID (the name used to identify this (SSID) wireless access point) here. Up to 32 numerical characters can be accepted here, excepting space. Channel Please select the wireless channel you wish to use, from 1 to 13. To save changes, click ‘OK’;... -
Page 33: Advanced Settings
The description of setup items about wireless security are listed below: Network Select network authentication mode from dropdown Authentication menu. Data Encryption Select data encryption method from dropdown menu. ASCII / If the encryption method is WEP, check either ‘ASCII’ PASSPHRASE or ‘PASSPHRASE’... -
Page 34: Wireless Statistics
The description of all setup items are listed below: Beacon Interval Please input wireless beacon time interval here. DTIM Period Please input DTIM (Delivery Traffic Indication Message) here. Preamble Mode Select wireless frame preamble mode (long or short) from dropdown menu. Set Defaults Reset all settings back to factory default value. -
Page 35: Internet Connection Sharing (Ics)
4.4 Internet Connection Sharing (ICS) In this page, you can assign a network card on your computer as the path for all wireless clients to get connected to Internet. If you have only one network card (except this software access point), you don’t have to select network card here;... - Page 36 4. Please adjust the position of network card (you may have to move your computer if you’re using a notebook computer) and click ‘Rescan’ button for few more times. If you can find the wireless access point or wireless device you want to connect by doing this, try to move closer to the place where the wireless access point or wireless device is located.
Need help?
Do you have a question about the DN-70560 and is the answer not in the manual?
Questions and answers