Table of Contents
Advertisement
Quick Links
Advertisement
Table of Contents

Related Manuals for Digitus DN-70230


Summary of Contents for Digitus DN-70230
- Page 1 GIGA LAN USB2.0 USB MEDIA ADAPTER User Manual DN-70230...
-
Page 3: Table Of Contents
Table of Contents Introduction .................. 1 Product Feature ................2 Specifications ................3 Package Content ................. 5 Installation ................7 Identifying hardware components ................7 LED indicators ......................9 Starting Up ................12 System requirement ....................12 Hardware installation ....................13 Utility Installation ..................... - Page 4 Copyright This publication, including all photographs, illustrations and software, is protected under international copyright laws, with all rights reserved. Neither this manual, nor any of the material contained herein, may be reproduced without written consent of the author. Disclaimer The information in this document is subject to change without notice. The manufacturer makes no representations or warranties with respect to the contents hereof and specifically disclaims any implied warranties of merchantability or fitness for any particular purpose.
- Page 5 About this manual This manual is intended for system administrators who are familiar with setting up a new system and installing an operating system. Safety information Before installing and using the USB Media Adapter, take note of the following precautions: Read all instructions carefully.
-
Page 7: Introduction
Introduction Thank you for purchasing the USB Media Adapter. This product is specifically designed for Small Office and Home Office needs, providing a reliable and centralized data storage solution. With it you will be able to access your shared files from any desktop or laptop within your network. -
Page 8: Product Feature
Product Feature Convert any USB 2.0 mass storage device into a Network Attached Storage device Great for creating a custom Network Attached Storage appliance. Support Gigabit Ethernet 10/100/1000Mbps. Support 2-USB 2.0 ports (capacity 4GB~2TB) (Model A) Support 1 USB 2.0 port + 1 SD card reader port (capacity 4GB~2TB) (Model B) Simple to install. -
Page 9: Specifications
Specifications Function Summary Item Descriptions Interfaces 2-USB2.0 high speed compliant port(Model A) 1-USB2.0 high speed compliant port + 1 SD card reader port (Model B) Complies with IEEE 802.3/u/ab, 10/100/1000Base-T Software Network Operating System Support Windows 2000/XP/2003/Vista/Windows 7,Mac OS X or above, Linux Network Protocol Support Samba /FTP (UTF8) / BitTorrent/UPnP AV... - Page 10 Item Descriptions USB Port 2-USB2.0 high speed compliant port(Model A) 1-USB2.0 high speed compliant port + 1 SD card reader port (Model B) Reset Button Yes (Reset / Load Factory Defaults ) Backup Button Yes(Backup/ backup disk or SD card to USB Disk) Power Adapter 5V/2A, switching Dimension...
-
Page 11: Package Content
Package Content The package should contain all the followings. If anything is missing or appears damaged, contact your dealer immediately. Also, keep the box and packaging materials in case you need to ship the unit in the future. CD-ROM with manual Power Adapter and driver USB Media Adapter... - Page 12 Chapter 1 Installation Identifying hardware components LED Indicators...
-
Page 13: Installation
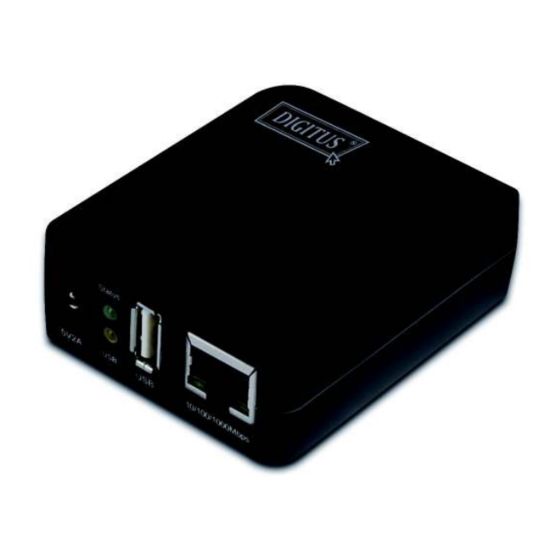
1 Installation 1.1 Identifying hardware components Front View Rear View (Model A) Description Description 10/100/1000Base-T LAN port USB-2 2.0 high-speed port of rear side USB 2.0 high-speed port of front side USB-2 LED(Rear) Power port (5V/2A) Reset Button Status LED Backup Button USB LED (Front) - Page 14 Rear View (Model B) Description Description 10/100/1000Base-T LAN port SD card reader port of rear side USB 2.0 high-speed port of front side SD card LED(Rear) Power port (5V/2A) Reset Button Status LED Backup Button USB LED (Front)
-
Page 15: Led Indicators
1.2 LED indicators Function Color Location State Status LED Green Front When system power on, the LED will blink for self-test. After booting successfully, the LED will keep light. USB LED Orange Front When plug in the USB Disk, the LED will turn on. - Page 17 Chapter 2 Starting Up System requirement Hardware installation Utility Installation...
-
Page 18: Starting Up
2 Starting Up 2.1 System requirement Operating system and software: Windows 2000, XP, 2003, Vista, Windows 7, Mac OS X or above, Linux Required hardware resources: RJ-45 cable(Cat5e) JAVA-enabled computer USB 2.0 External HDD USB cable... -
Page 19: Hardware Installation
2.2 Hardware installation 2.2.1 Connecting the USB Media Adapter 1. Turn on power of the external HDD enclosure. 2. Connect the external HDD enclosure to the USB port of the front of the USB media adapter. 3. Connect the AC power adapter cord to the power port to the front of the USB media adapter. 4. -
Page 20: Utility Installation
2.3 Utility Installation Please double click "Utility Installation" to start the installation steps as follow: 1. Preparing to install the USB Media Adapter Setup. - Page 21 2. Click the " Next" button on the Welcome window. 3. Select "Browse" to choose the destination location and click the "Next" button on the window.
- Page 22 4. Install processing. 5. Check the “Yes” selection and click the "Finish" button on the Setup Complete window.
- Page 23 Chapter 3 Managing Your Device Prepare Your Computer to Connect USB Media Adapter Status of USB Media Adapter Setup Your USB Media Adapter Setup FTP Server Setup SMB Server BitTorrent Media Server Disk Utility Misc : Factory Default and Firmware Upgrade 3.10 Restart 3.11...
-
Page 24: Managing Your Device
3 Managing Your Device 3.1 Prepare Your Computer to Connect USB Media Adapter 1. Please make sure your computer supports the JAVA environment. If not, you can go to http://java.com to download and install the JAVA software. 2. Open the Server Search Tool of utility program and click Search Next to search the USB media adapter from your network environment, and then click Connect into login screen. - Page 25 Linux and Mac System The following two procedures are for Linux and Mac, other procedures are similar as previous. 1. Please install the JAVA environment for Linux and Mac system. 2. Double click the SDisk.jar to search the USB media adapter from your network environment, and the click Connect.
-
Page 26: Status Of Usb Media Adapter
3.2 Status of USB Media Adapter After logging in, user may find the current system and TCP/IP information by clicking on “Status”. System Information: It provides system and disk information. System information includes the basic information such as Host Name, Group Name, Firmware version, MAC Address and Date/Time. Disk Information: It provides the information of attached HDD such as device name, used size, free size and capacity. -
Page 27: Setup Your Usb Media Adapter
TCP/IP Information TCP/IP provides current TCP/IP settings and information. The Status of DHCP, IP address, Subnet Mask, Gateway, Primary DNS, Secondary DNS setting will be shown here. PPPoE Information PPPoE provide setting of PPPoE IP address DDNS Information It shows the status of DDNS, Enabled or Disabled. 3.3 Setup Your USB Media Adapter Before attaching you external HDD, please check the following items: USB Media Adapter can recognize only the partition in FAT 32, maximum single file size... - Page 28 If your external HDD contains one FAT 32 partition already, formatting HDD could be unnecessary. Note: Formatting HDD will cause data lost. Format your External HDD Format your USB External HDD At first Time Setup Please plug your USB external HDD to the USB port of USB Media Adapter. Log-in USB Media Adapter utility and check the “Disk Information”...
- Page 29 Format your External HDD If the external HDD is recognized correctly, please go to Services > Disk Utility and click on Format to process. Formatting time depends on the size of the external HDD. It takes 2 to 5 minutes in general. Format Finished After finish formatting, a new webpage will be redirected and shows “Format successfully!”...
- Page 30 Setting your USB Media Adapter Before setting your USB Media Adapter, please check the following items: 1. “Group Name”, “Subnet Mask”, “Gateway” need to be set as the same as your local network. If the setting is different, your USB Media Adapter is not able to be found on local network. 2.
- Page 31 System System Settings Host Name: The name you want to be shown in local LAN. Group Name: The workgroup that you would like to join. By Windows are generally “MSHOME” or “Workgroup” Tips: You may reference the subnet Mask, Gateway, Primary DNS and secondary DNS setting in your Computer.
- Page 32 TCP/IP TCP/IP Settings 1. Obtain TCP/IP settings automatically: When this option is enabled, USB Media Adapter will use the IP assigned by router. However, this IP may changes from time to time. 2. Use the following TCP/IP settings: Enable this option will allow user to setup a fixed IP, Subnet Mask, Gateway, Primary DNS and Secondary DNS.
- Page 33 PPPoE Point-to-Point Protocol over Ethernet (PPPoE) emulates a dial-up connection. If your ISP uses a PPPoE connection. Your ISP will provide you with a username and password. This option is typically used for DSL services. PPPoE Settings It allows user to setup PPPoE service name, login user name, login password and other PPPoE settings.
- Page 34 DDNS The DDNS feature allows you to host a server (FTP, Game Server, etc…) using a domain name that you have purchased with your dynamically assigned IP address. Most broadband Internet Service Providers assign dynamic (changing) IP addresses. Using a DDNS service provider, your friends can enter in your domain name to connect to your server no matter what your IP address DDNS Settings Please setup following settings to enable DDNS service: service provider, host name, user name...
-
Page 35: Setup Ftp Server
3.4 Setup FTP Server FTP (File Transfer Protocol) Enable FTP server service let the user to upload/download files from local network or internet. FTP Settings 1. FTP Service: Click “Enable” and “Apply” will start the FTP service. To stop FTP service, click ”Disable”... - Page 36 Create, modify, enable, disable and delete a FTP account. Create a FTP account: Click on “New”, the browser will bring up a “FTP New Account” windows. Enter an account name and password. You may also choose the “Access Right” for the added account, it could be “Read only”...
-
Page 37: Setup Smb Server
3.5 Setup SMB Server SMB Server: Enable SMB service let the user to read or read/write files in local network Create, modify, enable, disable and delete a SMB account. Create a SMB account: Click on “New”, the browser will bring up a “SMB New Account” windows. - Page 38 Modify a SMB account: Click on “Modify”, the browser will bring up a “Modify SMB Account” window. Here you may change the pass word and the read/write attribute of selected account. Also, you may change the folder name by renaming it. In “Sharing List”, you may decide which folder you would allow the user to browse and write.
- Page 39 Login SMB server: After setting a SMB account, user may go to My Network Places>View Group computers to find the SMB server. The server name is the same as the “Host name” in system setup. Click on the server and the system will pop up a login window. Please enter your account name and password.
-
Page 40: Bittorrent
3.6 BitTorrent BitTorrent, or “BT download” is a Peer-to-Peer application. By using BitTorrent, nodes in Peer-to-Peer download and share file in P2P network. - Page 41 Setting BitTorrent Download Path: Setting a download path to store the completed file. Mail Notification: USB Media Adapter will send a notification to your email to inform you the download is complete. Upload a Torrent to USB Media Adapter Find and download a Torrent User may find the legal Torrent from Internet easily.
- Page 42 Click on “Browse” to select the Torrent Click on “Upload” button to upload the Torrent into USB Media Adapter.
- Page 43 Upload complete. In Download Queue will show the downloading file.
- Page 44 Now the torrent is active and communicating with other nodes. Several minutes later the download will start and show the complete level in percentage. TIP: USB Media Adapter supports maximum 4 torrents download at the same time and maximum 32Torrents queuing.
-
Page 45: Media Server
3.7 Media Server USB Media Adapter supports UPnP and allows PS3, XBOX360 and even iTunes to access the sharing folder. User may organize their file by types. USB Media Adapter provides Photo, Music and Video category. TIPS: User may use SMB service save the file to specific category and select it in Media Server to share and play back with PS3, XBOX360 and iTunes. -
Page 46: Disk Utility
3.8 Disk Utility Disk Utility contains 3 basic Disk tools: Format the Disk, Power-saving mode and Scan the Disk. Format the Disk: Format attached external HDD in the USB port (primary HDD) to FAT 32, the only supported format. Power-saving mode: If attached external HDD in the USB port (primary HDD) support power-saving, it will enter the power-saving mode automatically. -
Page 47: Misc: Factory Default And Firmware Upgrade
Misc: Factory Default and Firmware Upgrade Factory Default By pressing “OK”, the USB Media Adapter adaptor will reload the default setting and all the current setting will be erased. - Page 48 Firmware Upgrade User may enhance better performance and stability by upgrading Firmware. Simply download the firmware to computer and click on “Browse” to select it. Make sure the firmware is correct and press “Firmware Upgrade” to process it. Firmware Upgrade will spend several minutes and the current setting will also be erased.
-
Page 49: Restart
3.10 Restart This function let user to restart the USB Media Adapter without pressing the physical reset button. To restart USB Media Adapter, click on “OK”. - Page 50 Restart will complete in 60 seconds and will automatically redirected to status page if it is setting with a fixed IP.
-
Page 51: Backup Your Disk (Model A)
3.11 Backup Your Disk (Model A) USB media adapter provides disk backup function let user can backup his external disk simply from USB-2 port (Slave HDD ) to USB port (Primary HDD). User can follow procedures below to backup his external disk. 1. -
Page 52: Backup Your Sd Card (Model B)
3.11 Backup Your SD Card (Model B) USB media adapter provides disk backup function let user can backup his external disk simply from SD port (SD card) to USB port (Primary HDD). User can follow procedures below to backup his SD card. 1. - Page 53 Chapter 4 Internet Connection...
-
Page 54: Internet Connection
4 Internet Connection Connection to USB media adapter over the Internet: USB media adapter has a fixed IP: 1. Open the IE of the external network computer and input the IP of STORAGE in the address bar to access the WEB management interface. USB media adapter has no fixed IP: Method 1: DMZ connection 1. - Page 55 Chapter 5 Troubleshooting...
-
Page 56: Troubleshooting
5 Troubleshooting Often after time spent troubleshooting, the problem is traced to something as simple as a loose connection. Check the following before proceeding to the problem-specific solutions. In each problem-specific section, try the steps in the order suggested. This may help you to solve the problem more quickly.
Need help?
Do you have a question about the DN-70230 and is the answer not in the manual?
Questions and answers