Table of Contents
Advertisement
Advertisement
Table of Contents

Related Manuals for Assa Abloy KP10G77


Summary of Contents for Assa Abloy KP10G77
- Page 1 Installation Instructions For Keypad 10 Line Lock KP10G77 A7113E 8/08 Copyright © 2005, 2007,2008, SARGENT Manufacturing, an ASSA ABLOY Group company. All rights reserved. Reproduction in whole or in part without the express written permission of SARGENT Manufacturing is prohibited.
-
Page 2: Table Of Contents
Table of Contents Page General Description ................1 Specifications ..................1 Parts Breakdown................2-3 Features ....................4 Installation Instructions..............5-12 Programming Instructions English ...................12-15 Chain Programming ..............16 Transaction Log ................17 Guide De Progammation (French) ...........18 800-810-WIRE (9473) • www.sargentlock.com • A7113E... -
Page 3: General Description
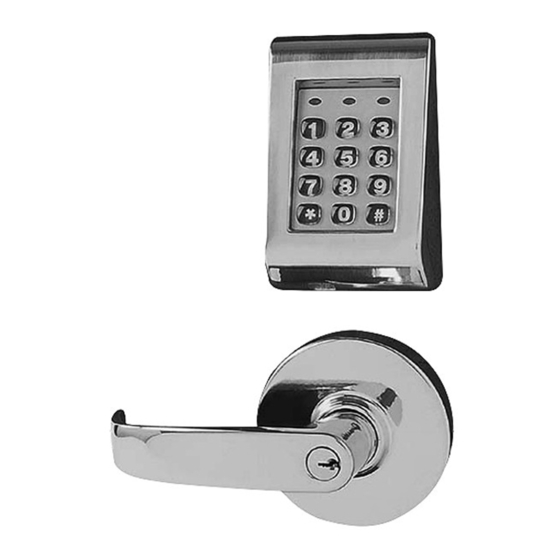
Keypad 10 Line Lock General Description The SARGENT Keypad 10 Line Lock is designed for areas which require authorized entry. It is a self-contained microprocessor-controlled keypad with non volatile solid-state memory. The keypad will hold a total of 100 different User Codes. User Codes “01” and “03” are utilized for Master Code and Supervisory Code, respectively. -
Page 4: Parts Breakdown
Keypad 10 Line Lock Parts Breakdown ITEM PART NUMBER DESCRIPTION NO. REQ’D *10-0523 “B” Inside lever/regular and 30- *10-2204 “J” Inside lever/regular and 30- *10-0503 “L” Inside lever/regular and 30- *10-0547 “P” Inside lever/regular and 30- *10-0536 “B” Inside lever/75 handicap warning *10-2247 “J”... -
Page 5: Parts Breakdown
Keypad 10 Line Lock Parts Breakdown (Continued) A7113E • 800-810-WIRE (9473) • www.sargentlock.com... -
Page 6: Features
• Flashing green and yellow LED’s indicate lock in passage mode • Infrared LED for transaction output. Indicates last 15 valid codes Items included in your KP10G77 Keypad Cylindrical Lock: • Outside Escutcheon with Keypad • Motorized Cylindrical Lock with cylinder •... -
Page 7: Installation Instructions
Keypad 10 Line Lock Installation Instructions Step #1 Verify Hand and Bevel of Door Stand on outside/locked side of the door when determining the door hand Left Hand Left Hand Right Hand Right Hand Left hand Left hand Right hand Right hand Hinges Left. - Page 8 Keypad 10 Line Lock Step #3 Frame Preparation for Strike Step #4 Latch and Fire Stop Plate Installation 1. Install latch with beveled bolt facing the strike 2. Attach with two screws, but DO NOT tighten completely at this time 3.
-
Page 9: Spacer Bushing
Keypad 10 Line Lock Step #5 Lock Installation Lock Preset to: • Through-bolt location– 12 & 6 o'clock • Door thickness– 1-3/4" thick- see below for other door conditions Adjustment for different through-bolt and door thickness: • Remove outside lever (usually keyed), scalp and spacer bushing •... - Page 10 Keypad 10 Line Lock Step #6 Securing the Lock to Door 1A. If wood door, feed wires up through the routed channel as shown 1B. If metal door, feed wire connector within the door core and out hole on inside of door 2.
- Page 11 Keypad 10 Line Lock Step #8 – Security of Outside Escutcheon • From the inside of the door, use the #8-32 x 1 1/4” round head screw with the flat washer to attach the escutcheon thru the lower lug • Straighten escutcheon and tighten the #8-32 round head screw Step #9 –...
- Page 12 Keypad 10 Line Lock Step #10 Securing of Inside Escutcheon • Remove black plastic battery cover with security hex wrench (provided) • Carefully tuck the wire into the routed groove in wood door. The remainder can fit within bottom portion of escutcheon. Make certain that wires are not pinched by obstructions in escutcheon •...
- Page 13 Keypad 10 Line Lock Step #12 – Battery Installation • Place (4) C batteries into the compartment as indicated inside escutcheon • Attach battery cover to inside escutcheon and secure with #8-32 x 3/8" security screw DO NOT OVER TIGHTEN How to Remove Outside Lever Only 1.Insert key, rotate 45°...
-
Page 14: Programming Instructions
Keypad 10 Line Lock How to Change Cylinder (if required) 1. With outside lever in hand- Cylinder use standard pliers; pull out retainer cylinder retainer Cylinder 2. Remove key and cylinder from lever spacer Outside 3. Insert new cylinder lever 4. - Page 15 Initial Set-Up Procedures: • The following are typical procedures to follow when setting up your KP10G77 Keypad. • If a mistake is made during any of procedures, depress the “*” several times until the yellow LED goes out.
- Page 16 Keypad 10 Line Lock All of the following procedures start with 99# (continued). If after the last “*” is depressed, the yellow LED does not go out, depress “*” once more. To Enter a User Code: • Supervisory or Master Code* (Yellow LED Begins to Blink Slowly) •...
- Page 17 Keypad 10 Line Lock Sargent also offers a Data Transfer Device (DTD) To Interrogate the lock. Go to WWW.SARGENTLOCK.COM for information. All of the following procedures start with 99# (continued). If after the last “*” is depressed, the yellow LED does not go out, depress “*”...
-
Page 18: Chain Programming
Keypad 10 Line Lock Chain Programming When programming multiple User Numbers and Codes into the 10 Line Keypad Lock, it is not necessary to leave and re-enter the programming mode (50) for each entry. Multiple entries may be chained together and the three different types of user codes (Standard, Passage and One Time) may be mixed. -
Page 19: Transaction Log
Use a QC2A Hinge. Remote ElectroLynx ® unlocking As part of their promise to provide innovative, fast and effective high security solutions to their customers, ASSA ABLOY Group companies connector offer ElectroLynx , a universal quick-connect system that simplifies the ® placement electrification of the door opening. -
Page 20: Guide De Progammation (French)
Keypad 10 Line Lock Serrure à clavier KP10G77 Guide de programmation La serrure à clavier KP10G77 peut accomoder 100 utilisateurs. On doit assigner à chacun un numéro d’utilisateur, en plus de son code d’entrée. Example: Type d’usager Numéro d’usager Code d’usager (2 à... - Page 21 Keypad 10 Line Lock Pour commencer : Le code maître établi en usine est “1234’’. Appuyer sur 1234* déverrouille la serrure, permettant au levier de retirer le pêne. Codification initiale : Dans une séquence typique de programmation, le voyant jaune clignotera doucement après l’entrée du code maître ou superviseur suivi de “...
- Page 22 Keypad 10 Line Lock Pour entrer un code servant une fois seulement : Entrer : 99 # Code maître ou superviseur suivi de * 50 # 3 # Numéro d’utilisateur suivi du # et code d’utilisateur suivi de * Code d’utilisateur suivi de * * Pour annuler la tonalité...
- Page 23 Keypad 10 Line Lock Pour fixer le temps de déverrouillage : Entrer : 99 # Code maître suivi de * 85 # Durée suivie de # 0 # * * * Remarque : Le temps de déverrouillage est réglable entre 01 et 99 secondes. On recommande 5 secondes pour prolonger la durée des piles.
- Page 24 Keypad 10 Line Lock Il n’est pas nécessaire d’entrer le numéro de type à chaque entrée si tout les codes d’utilisateurs sont du même type. Le numéro de type doit être entré avec le premier code d’utilisateur seulement. Le format sera donc simplifié: 99# Code maître ou superviseur* 50# Type# Numéro d’utilisateur a# Code d’utilisateur a* Code d’utilisateur a* Unb# Ucb* Ucb* Unc# Ucc* Ucc* ..
- Page 25 Keypad 10 Line Lock To output the last 15 entries, enter 99 # Supervisory or Master Code * 70 # 0 # 0 # **. Note: Seq. # 1 is the programming request to output the entries. Sequence numbers Transaction Log 2-6 are the actual entries.
- Page 26 The company’s customer base includes commercial construction, institutional, and industrial markets. Copyright © 2005, 2007,2008, SARGENT Manufacturing, an ASSA ABLOY Group company. All rights reserved. Reproduction in whole or in part without the express written permission of SARGENT Manufacturing is prohibited.
Need help?
Do you have a question about the KP10G77 and is the answer not in the manual?
Questions and answers
is the lockbody avalable for K P10G77 and if it is wat is the part number