Panasonic S-22KA1E5 Service Manual
Hide thumbs
Also See for S-22KA1E5:
- Service manual (287 pages) ,
- Operating instructions manual (108 pages) ,
- Operating instructions manual (112 pages)
Table of Contents
Advertisement
This service information is designed for experienced repair technicians only and is not designed for use by the general public.
It does not contain warnings or cautions to advise non-technical individuals of potential dangers in attempting to service a product.
Products powered by electricity should be serviced or repaired only by experienced professional technicians. Any attempt to
service or repair the products dealt with in this service information by anyone else could result in serious injury or death.
In order to avoid frostbite, be assured of no refrigerant leakage during the installation or repairing of refrigerant circuit.
WARNING
PRECAUTION OF LOW TEMPERATURE
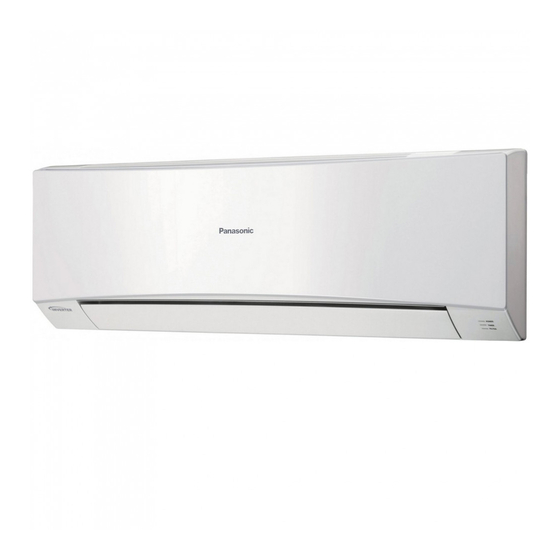
Indoor Unit
S-22KA1E5
S-28KA1E5
S-36KA1E5
S-45KA1E5
S-56KA1E5
S-63KA1E5
S-71KA1E5
S-22KA1E5S
S-28KA1E5S
S-36KA1E5S
S-45KA1E5S
S-22YA1E5
S-28YA1E5
S-36YA1E5
S-45YA1E5
S-56YA1E5
S-63UA1E5
S-71UA1E5
S-90UA1E5
S-22NA1E5
S-28NA1E5
S-32NA1E5
S-36NA1E5
S-45NA1E5
S-56NA1E5
S-45MA1E5
S-56MA1E5
S-63MA1E5
S-71MA1E5
S-90MA1E5
© Panasonic HA Air-Conditioning (M) Sdn. Bhd. 2009.
Unauthorized copying and distribution is a violation of law.
Order No: RAC1001001C8
Outdoor Unit
U-4LA1E5
U-5LA1E5
U-6LA1E5
U-4LA1E5-1
U-5LA1E5-1
U-6LA1E5-1
Advertisement
Table of Contents
Troubleshooting

Related Manuals for Panasonic S-22KA1E5


Summary of Contents for Panasonic S-22KA1E5
- Page 1 PRECAUTION OF LOW TEMPERATURE In order to avoid frostbite, be assured of no refrigerant leakage during the installation or repairing of refrigerant circuit. © Panasonic HA Air-Conditioning (M) Sdn. Bhd. 2009. Unauthorized copying and distribution is a violation of law.
-
Page 2: Table Of Contents
TABLE OF CONTENTS Slim Hide Away Type Indoor Unit – NA1E5 1. Safety Precautions ..........5 Series............63 Low Static Pressure Hide Away Type Indoor 2. Features...............7 Unit – MA1E5 Series ......... 65 3. Product Specification ........13 Outdoor Unit – LA1E5 Series ....67 Wall Mounted Type Indoor Unit –... - Page 3 12.3 Test Run Procedure .........213 19.4 Wired Remote Controller Thermistor Abnormality (F20-02)........245 13. Outdoor Unit Operation Control ....214 19.5 Indoor Pipe Temperature Sensor Abnormality (F21-01)........246 13.1 System Start Control ........214 19.6 Indoor Gas Temperature Sensor Abnormality 13.2 Compressor Startup control .....214 (F22-01)............247 13.3 Deice Control..........215...
- Page 4 23.6 Heating ............ 430 24. Exploded View and Replacement Parts List451 24.1 Indoor Unit ..........451...
-
Page 5: Safety Precautions
1. Safety Precautions • Read the following “SAFETY PRECAUTIONS” carefully before perform any servicing. • Electrical work must be installed or serviced by a licensed electrician. Be sure to use the correct rating of the power plug and main circuit for the model installed. •... - Page 6 19. During installation, before run the compressor, confirm the refrigerant pipes are fixed. Operation of compressor without fixing the piping, setting the valves at open condition, a burst may occur and cause injury. 20. After completion of installation or service, confirm there is no leakage or refrigerant gas. It may generate toxic gas when the refrigerant contacts with fire or spark.
-
Page 7: Features
2. Features • Highly Efficient Inverter Technology Uses Panasonic advanced inverter technology, intelligent and flexible control ability to achieve energy saving; Meanwhile, the outdoor unit is capable to drive multiple indoor units. • More Variety of Indoor Unit Types There are 6 different Indoor unit types available 2.2kW... - Page 8 Wired Remote Control CZ-RT1 1. Includes an easily-visible red pilot indicator. The power can be turned on and off at a single touch, without opening the cover. 2. The build-in thermistor allows indoor temperature detection in accordance with indoor conditions by switching with indoor unit thermistor.
- Page 9 Interface Module for External Control / Integration CZ-CAP1 • Demand Control With Demand Control, it is possible to limit maximum electrical current to air conditioner. This usually used to integrate with central control system, building automation system or etc. From external device, it is required to use a volt free contact (relay) for integration.
- Page 10 • Heat / Cool Mode selection Must use together with Cooling / Heating Selector Switch (CZ-RD1) With the heat cool selector switch, operation mode (Heat / Cool / Fan) can be set & fixed by higher authority user. If OFF selected, Unit will operate freely base on remote setting. If ON &...
- Page 11 Group control equipment Group Control by one remote Remote side control • Optional wired remote • All air conditioner units are Wired control. Remote controlled as a whole by the Control remote control. Indoor units Remote-side Local Side • All indoor units operate in the remote control •...
-
Page 13: Product Specification
3. Product Specification Wall Mounted Type Indoor Unit – KA1E5 / KA1E5S Series S-22KA1E5 S-28KA1E5 S-36KA1E5 Indoor Unit S-22KA1E5S S-28KA1E5S S-36KA1E5S Panel Wired CZ-RT1 Remote Control CZ-RWS1 (Heat-pump models) Wireless CZ-RWC1 (Cooling models) Performance Test Condition ISO 5151 Phase Power Supply... - Page 14 Gas side mm (inch) 12.70 (1/2) 12.70 (1/2) 12.70 (1/2) Diameter Liquid side mm (inch) 6.35 (1/4) 6.35 (1/4) 6.35 (1/4) Max Length m (ft) 15.0 (49.20) 15.0 (49.20) 15.0 (49.20) External diameter Drain hose Length Fin material Aluminium (Pre Coat) Aluminium (Pre Coat) Aluminium (Pre Coat) Fin Type...
- Page 15 S-45KA1E5 Indoor Unit S-56KA1E5 S-45KA1E5S Panel Wired CZ-RT1 Remote Control CZ-RWS1 (Heat-pump models) Wireless CZ-RWC1 (Cooling models) Performance Test Condition ISO5151 Phase Power Supply 220/230/240 220/230/240 4.50 5.60 Capacity BTU/h 15400 19100 Running Current 0.40 0.40 Input Power dB-A (H / L) 43 / 35 44 / 38 Noise level...
- Page 16 External diameter Drain hose Length Fin material Aluminium (Pre Coat) Aluminium (Pre Coat) Fin Type Slit Fin Slit Fin Indoor Heat Exchanger Row x Stage x FPI 2 x 15 x 21 2 x 15 x 19 Size (W x H x L) 610.0 x 315.0 x 25.4 810.0 x 315.0 x 25.4 Material...
- Page 17 Indoor Unit S-63KA1E5 S-71KA1E5 Panel Wired CZ-RT1 Remote Control CZ-RWS1 (Heat-pump models) Wireless CZ-RWC1 (Cooling models) Performance Test Condition ISO5151 Phase Power Supply 220/230/240 220/230/240 6.30 7.10 Capacity BTU/h 21500 24200 Running Current 0.45 0.50 Input Power dB-A (H / L) 46 / 39 48 / 40 Noise level...
- Page 18 External diameter Drain hose Length Fin material Aluminium (Pre Coat) Aluminium (Pre Coat) Fin Type Slit Fin Slit Fin Indoor Heat Exchanger Row x Stage x FPI 2 x 15 x 21 2 x 15 x 21 Size (W x H x L) 810.0 x 315.0 x 25.4 810.0 x 315.0 x 25.4 Fin material...
-
Page 19: 60 X 60 Cassette Type Indoor Unit - Ya1E5 Series
60 x 60 Cassette Type Indoor Unit – YA1E5 Series Indoor Unit S-22YA1E5 S-28YA1E5 S-36YA1E5 Panel CZ-KPY1 Wired CZ-RT1 Remote Control CZ-RWS1 (Heat-pump models) Wireless CZ-RWC1 (Cooling models) Performance Test Condition ISO 5151 Phase Power Supply 220/230/240 220/230/240 220/230/240 2.20 2.80 3.60 Capacity... - Page 20 Gas side mm (inch) 12.70 (1/2) 12.70 (1/2) 12.70 (1/2) Diameter Liquid side mm (inch) 6.35 (1/4) 6.35 (1/4) 6.35 (1/4) Max Length m (ft) 15.0 (49.20) 15.0 (49.20) 15.0 (49.20) External diameter Drain hose Length Fin material Aluminium (Pre Coat) Aluminium (Pre Coat) Aluminium (Pre Coat) Fin Type...
- Page 21 Indoor Unit S-45YA1E5 S-56YA1E5 Panel CZ-KPY1 Wired CZ-RT1 Remote Control CZ-RWS1 (Heat-pump models) Wireless CZ-RWC1 (Cooling models) Performance Test Condition ISO5151 Phase Power Supply 220/230/240 220/230/240 4.50 5.60 Capacity BTU/h 15400 19100 Running Current 0.35 0.35 Input Power dB-A (H / L) 39 / 35 40 / 36 Noise level...
- Page 22 External diameter Drain hose Length Fin material Aluminium (Pre Coat) Aluminium (Pre Coat) Fin Type Slit Fin Slit Fin Indoor Heat Exchanger Row x Stage x FPI 1285 x 210 x 12.7 1285 x 210 x 12.7 Size (W x H x L) 1225 x 210 x 12.7 1225 x 210 x 12.7 Material...
-
Page 23: 95 X 95 Cassette Type Indoor Unit - Ua1E5 Series
95 x 95 Cassette Type Indoor Unit – UA1E5 Series Indoor Unit S-63UA1E5 S-71UA1E5 S-90UA1E5 Panel CZ-BT03P Wired CZ-RT1 Remote Control CZ-RWS1 (Heat-pump models) Wireless CZ-RWC1 (Cooling models) Performance Test Condition ISO 5151 Phase Power Supply 6.30 7.10 9.00 Capacity BTU/h 21500 24200... - Page 24 Gas side mm (inch) 12.70 (1/2) 15.88 (5/8) 15.88 (5/8) Diameter Liquid side mm (inch) 6.35 (1/4) 9.52 (3/8) 9.52 (3/8) Max Length m (ft) 15.0 (49.20) 15.0 (49.20) 15.0 (49.20) External diameter Drain hose Length Fin material Aluminium (Pre Coat) Aluminium (Pre Coat) Aluminium (Pre Coat) Fin Type...
-
Page 25: Slim Hide-Away Type Indoor Unit - Na1E5 Series
Slim Hide-Away Type Indoor Unit – NA1E5 Series Indoor Unit S-22NA1E5 S-28NA1E5 Panel Wired CZ-RT1 Remote Control Wireless CZ-RWC1 (Cooling models) Performance Test Condition ISO 5151 Phase Power Supply 2.20 2.20 2.20 2.80 2.80 2.80 Capacity BTU/h 7500 7500 7500 9600 9600 9600... - Page 26 Gas side mm (inch) 12.70 (1/2) 12.70 (1/2) Diameter Liquid side mm (inch) 6.35 (1/4) 6.35 (1/4) Max Length m (ft) 15.0 (49.20) 15.0 (49.20) External diameter Drain hose Length Fin material Aluminium (Pre Coat) Aluminium (Pre Coat) Fin Type Slit Fin Slit Fin Indoor Heat...
- Page 27 Indoor Unit S-32NA1E5 S-36NA1E5 Panel Wired CZ-RT1 Remote Control CZ-RWS1 (Heat-pump models) Wireless CZ-RWC1 (Cooling models) Performance Test Condition ISO 5151 Phase Power Supply 3.20 3.20 3.20 3.60 3.60 3.60 Capacity BTU/h 10900 10900 10900 12300 12300 12300 Running Current 0.40 0.45 0.50...
- Page 28 Gas side mm (inch) 12.70 (1/2) 12.70 (1/2) Diameter Liquid side mm (inch) 6.35 (1/4) 6.35 (1/4) Max Length m (ft) 15.0 (49.20) 15.0 (49.20) External diameter Drain hose Length Fin material Aluminium (Pre Coat) Aluminium (Pre Coat) Fin Type Slit Fin Slit Fin Indoor Heat...
- Page 29 Indoor Unit S-45NA1E5 S-56NA1E5 Panel Wired CZ-RT1 Remote Control CZ-RWS1 (Heat-pump models) Wireless CZ-RWC1 (Cooling models) Performance Test Condition ISO 5151 Phase Power Supply 4.50 4.50 4.50 5.60 5.60 5.60 Capacity BTU/h 15400 15400 15400 19100 19100 19100 Running Current 0.45 0.50 0.55...
- Page 30 Gas side mm (inch) 12.70 (1/2) 12.70 (1/2) Diameter Liquid side mm (inch) 6.35 (1/4) 6.35 (1/4) Max Length m (ft) 15.0 (49.20) 15.0 (49.20) External diameter Drain hose Length Fin material Aluminium (Pre Coat) Aluminium (Pre Coat) Fin Type Slit Fin Slit Fin Indoor Heat...
-
Page 31: Low Static Pressure Hide-Away Type Indoor Unit - Ma1E5 Series
Low Static Pressure Hide-Away Type Indoor Unit – MA1E5 Series Indoor Unit S-45MA1E5 S-56MA1E5 Panel Wired CZ-RT1 Remote Control CZ-RWS1 (Heat-pump models) Wireless CZ-RWC1 (Cooling models) Performance Test Condition ISO 5151 Phase Power Supply 4.50 4.50 4.50 5.60 5.60 5.60 Capacity BTU/h 15400... - Page 32 Gas side mm (inch) 12.70 (1/2) 12.70 (1/2) Diameter Liquid side mm (inch) 6.35 (1/4) 6.35 (1/4) Max Length m (ft) 15.0 (49.20) 15.0 (49.20) External diameter Drain hose Length Fin material Aluminium (Pre Coat) Aluminium (Pre Coat) Fin Type Slit Fin Slit Fin Indoor Heat...
- Page 33 Indoor Unit S-63MA1E5 S-71MA1E5 Panel Wired CZ-RT1 Remote Control CZ-RWS1 (Heat-pump models) Wireless CZ-RWC1 (Cooling models) Performance Test Condition ISO 5151 Phase Power Supply 6.30 5.60 5.60 7.10 7.10 7.10 Capacity BTU/h 21500 19100 19100 24200 24200 24200 Running Current 0.55 0.60 0.75...
- Page 34 Gas side mm (inch) 12.70 (1/2) 15.88 (5/8) Diameter Liquid side mm (inch) 6.35 (1/4) 9.52 (3/8) Max Length m (ft) 15.0 (49.20) 15.0 (49.20) External diameter Drain hose Length Fin material Aluminium (Pre Coat) Aluminium (Pre Coat) Fin Type Slit Fin Slit Fin Indoor Heat...
- Page 35 Indoor Unit S-90MA1E5 Panel Wired CZ-RT1 Remote Control CZ-RWS1 (Heat-pump models) Wireless CZ-RWC1 (Cooling models) Performance Test Condition ISO 5151 Phase Power Supply 9.00 9.00 9.00 Capacity BTU/h 30700 30700 30700 Running Current 0.75 0.80 0.85 Input Power dB-A (H / L) 44 / 37 44 / 38 Noise level...
- Page 36 Gas side mm (inch) 15.88 (5/8) Diameter Liquid side mm (inch) 9.52 (3/8) Max Length m (ft) 15.0 (49.20) External diameter Drain hose Length Fin material Aluminium (Pre Coat) Fin Type Slit Fin Indoor Heat Exchanger Row x Stage x FPI 3 x 12 x 18 Size (W x H x L) 860 x 252 x 38.1...
-
Page 37: Outdoor Unit - La1E5 Series
Outdoor Unit – LA1E5 Series Outdoor Unit U-6LA1E5, U-6LA1E5- 1 U-5LA1E5, U-5LA1E5-1 U-4LA1E5, U-4LA1E5-1 Performance Test Condition ISO 5151 2 x S-32NA1E5 3 x S-32NA1E5 2 x S-32NA1E5 Indoor Unit Combination 1 x S-36NA1E5 1 x S-45NA1E5 1 x S-45NA1E5 1 x S-56NA1E5 Phase Power Supply... - Page 38 Gas side mm (inch) 15.88 (5/8) 15.88 (5/8) 15.88 (5/8) Diameter Liquid side mm (inch) 9.52 (3/8) 9.52 (3/8) 9.52 (3/8) Standard Length m (ft) 23 (75.4) 23 (75.4) 23 (75.4) Length Range (min – max) m (ft) 20 – 90 (65.6 – 295.2) 20 –...
-
Page 39: Dimensions
4. Dimensions Wall Mounted Type Indoor Unit 4.1.1 S-22KA1E5, S-28KA1E5, S-36KA1E5, S-45KA1E5, S-22KA1E5S, S-28KA1E5S, S-36KA1E5S, S-45KA1E5S... - Page 40 4.1.2 S-56KA1E5, S-63KA1E5, S-71KA1E5...
-
Page 41: 60 X 60 Cassette Type Indoor Unit
60 x 60 Cassette Type Indoor Unit 4.2.1 S-22YA1E5, S-28YA1E5, S-36YA1E5, S-45YA1E5, S-56YA1E5... -
Page 42: 95 X 95 Cassette Type Indoor Unit
95 x 95 Cassette Type Indoor Unit 4.3.1 S-63UA1E5, S-71UA1E5, S-90UA1E5... -
Page 43: Slim Hide-Away Type Indoor Unit
Slim Hide-Away Type Indoor Unit 4.4.1 S-22NA1E5, S-28NA1E5, S-32NA1E5, S-36NA1E5, S-45NA1E5, S-56NA1E5... -
Page 44: Low Static Pressure Hide-Away Type Indoor Unit
Low Static Pressure Hide-Away Type Indoor Unit 4.5.1 S-45MA1E5, S-56MA1E5... - Page 45 4.5.2 S-63MA1E5, S-71MA1E5, S-90MA1E5...
-
Page 46: Outdoor Unit
Outdoor Unit 4.6.1 U-4LA1E5, U-5LA1E5, U-6LE1E5, U-4LA1E5-1, U-5LA1E5-1, U-6LE1E5-1 or more or more Air intake side Space for piping, wiring and maintenance or more Air outlet side Gravity point... -
Page 47: Refrigeration Cycle Diagram
5. Refrigeration Cycle Diagram GAS BYPASS OUTDOOR VALVE UNIT PRESSURE SWITCH 4 WAY ACCUMULATOR VALVE OUTDOOR AIR TEMP. SENSOR HIGH PRESSURE SWITCH HEAT SUCTION EXCHANGER HEAT TEMP. SEPARATOR (EVAPORATOR) EXCHANGER SENSOR TEMP. SENSOR MUFFLER STRAINER PIPE TEMP. SENSOR COMP. (OFF) DIS. -
Page 48: Block Diagram
6. Block Diagram Wall Mounted Type Indoor Unit – KA1E5 Series FUSE100 AC220V - 240V ZNR100 50Hz ZNR101 ZNR102 URBAN - NET 60 x 60 Cassette Type Indoor Unit – YA1E5 Series FUSE100 SSR1 AC220 / 230 / 240V ZNR1 50Hz ZNR2 ZNR3... -
Page 49: 95 X 95 Cassette Type Indoor Unit - Ua1E5 Series
95 x 95 Cassette Type Indoor Unit – UA1E5 Series FUSE101 RY-H SSR1 RY-M AC220 / 230 / 240V 50Hz ZNR1 RY-L ZNR2 ZNR3 URBAN - NET Slim Hide Away Type Indoor Unit – NA1E5 Series FUSE101 RY-H RY-M AC220 / 230 / 240V 50Hz ZNR1 RY-L... -
Page 50: Low Static Pressure Hide Away Type Indoor Unit - Ma1E5 Series
Low Static Pressure Hide Away Type Indoor Unit – MA1E5 Series FUSE101 RY-H RY-M AC220 / 230 / 240V 50Hz RY-L URBAN - NET Outdoor Unit – LA1E5 Series... -
Page 51: Wiring Connection Diagram
7. Wiring Connection Diagram Wall Mounted Type Indoor Unit – KA1E5 Series... -
Page 52: 60 X 60 Cassette Type Indoor Unit - Ya1E5 Series
60 x 60 Cassette Type Indoor Unit – YA1E5 Series... -
Page 53: 95 X 95 Cassette Type Indoor Unit - Ua1E5 Series
95 x 95 Cassette Type Indoor Unit – UA1E5 Series... -
Page 54: Slim Hide Away Type Indoor Unit - Na1E5 Series
Slim Hide Away Type Indoor Unit – NA1E5 Series... -
Page 55: Low Static Pressure Hide Away Type Indoor Unit - Ma1E5 Series
Low Static Pressure Hide Away Type Indoor Unit – MA1E5 Series... -
Page 56: Outdoor Unit - La1E5 Series
Outdoor Unit – LA1E5 Series... -
Page 57: Electronic Circuit Diagram
8. Electronic Circuit Diagram Wall Mounted Type Indoor Unit – KA1E5 Series... -
Page 59: 60 X 60 Cassette Type Indoor Unit - Ya1E5 Series
60 x 60 Cassette Type Indoor Unit – YA1E5 Series... -
Page 61: 95 X 95 Cassette Type Indoor Unit - Ua1E5 Series
95 x 95 Cassette Type Indoor Unit – UA1E5 Series... -
Page 63: Slim Hide Away Type Indoor Unit - Na1E5 Series
Slim Hide Away Type Indoor Unit – NA1E5 Series... -
Page 65: Low Static Pressure Hide Away Type Indoor Unit - Ma1E5 Series
Low Static Pressure Hide Away Type Indoor Unit – MA1E5 Series... -
Page 67: Outdoor Unit - La1E5 Series
Outdoor Unit – LA1E5 Series... -
Page 69: Printed Circuit Board
9. Printed Circuit Board Wall Mounted Type Indoor Unit – KA1E5 Series 9.1.1 Main PCB 9.1.2 Power PCB CN-FM CN-DCV... - Page 70 9.1.3 Receiver PCB CN-DISP 9.1.4 Error Code Display PCB CN-CODE...
-
Page 71: 60 X 60 Cassette Type Indoor Unit - Ya1E5 Series
60 x 60 Cassette Type Indoor Unit – YA1E5 Series 9.2.1 Main PCB INDOOR OUTDOOR JEM-A CN-TH1 CN-TH2 CN-REM ADDRESS ADDRESS CN-FM CN-STM1 CN-STM2 CN-EV LED CN-DISP CN-OPT3 CN-UN CN-TIMER... -
Page 72: 95 X 95 Cassette Type Indoor Unit - Ya1E5 Series
95 x 95 Cassette Type Indoor Unit – YA1E5 Series 9.3.1 Main PCB INDOOR OUTDOOR CN-TIMER CN-TH1 CN-TH2 CN-REM ADDRESS ADDRESS CN-STM1 CN-STM2 CN-EV CN-DISP CN-OPT3 CN-UN Slim Hide Away Type Indoor Unit – NA1E5 Series 9.4.1 Main PCB INDOOR OUTDOOR CN-TIMER CN-TH1... -
Page 73: Low Static Pressure Hide Away Type Indoor Unit - Ma1E5 Series
Low Static Pressure Hide Away Type Indoor Unit – MA1E5 Series 9.5.1 Main PCB INDOOR OUTDOOR CN-TIMER CN-TH1 CN-TH2 CN-REM ADDRESS ADDRESS CN-STM1 CN-STM2 CN-EV CN-DISP CN-OPT3 CN-UN... -
Page 74: Outdoor Unit - La1E5 Series
Outdoor Unit – LA1E5 Series 9.6.1 Main PCB... - Page 75 9.6.2 Noise Filter PCB CN-TH1 CN-V1 CN-V2 CN-OPT3 CN-OPT4 CN-PWR CN-RY1 CN-HOT CN-OPT2 CN-OPT1...
- Page 76 9.6.3 Capacitor PCB DCN-IN DCN-OUT DCP-IN DCP-OUT...
-
Page 77: Remote Control Operating Instructions
10. Remote Control Operating Instructions 10.1 Wired remote control CZ-RT1 Name and function of each part REMOTE The OFF/ON button cannot be used. LOCAL All wired remote control buttons can be used. Timer/time setting display Check display Fan Speed display Operation mode selection display FILTER RESET display Appear after the cumulative running time reaches... -
Page 78: Wireless Remote Control Cz-Rws1 - Heat Pump Models / Cz-Rwc1 - Cooling Models
10.2 Wireless Remote Control CZ-RWS1 – Heat Pump models / CZ-RWC1 – Cooling models Name and Function of each part Address number display Operation mode selection display Infrared Transmitter Transmit the remote control signal. Airflow direction setting display Fan speed display Temperature setting display (16°C –... -
Page 79: Installation Instruction
11. Installation Instruction 11.1 Pipe Length Length Calculation U-4LA1E5, U-5LA1E5, U-6LA1E5 Model Length Piping connection example U-4LA1E5-1, U-5LA1E5-1, U-6LA1E5-1 Indoor / outdoor unit height difference 30m or less Allowable height different Indoor / Indoor unit height difference 15m or less Total piping length 20m ~ 90m Main1+Main2+Main3+Main4+Sub1+Sub2+Sub3+Sub4+Sub5... -
Page 80: Branch Pipe Connection Cz-P155Bk1
11.2 Branch Pipe Connection CZ-P155BK1 Liquid Branch Gas Branch Branch to Indoor Unit Liquid (Hi) Pipe Gas (Low) Pipe 2.2 ~ 6.3kW 0.8 ~ 2.5HP 6.35 mm (1/4”) 12.70 mm (1/2”) 7.1 ~ 9.0kW 3.0 ~ 3.5HP 9.52 mm (3/8”) 15.88 mm (5/8”) Branch to Outdoor (4,5,6HP) 9.52 mm (3/8”) -
Page 81: Capacity Correction
11.3 Capacity Correction Capacity correction according to the connecting pipe length is shown in figure below. The rated capacity (indicated on the name plate) is based on 7.5m connecting pipe and horizontal installation. capacity ratio 0.95 0.90 0.85 1.00 Cooling pipe length (m)... -
Page 82: Installation Instructions Fs Multi Wall Mounted Type
11.4 INSTALLATION INSTRUCTIONS FS MULTI WALL MOUNTED TYPE Cooling Cooling Model name HP Model name REFRIGERANT capacity capacity R 410A 2.2kW S-22KA1E5 2.2kW S-22KA1E5S 2.8kW S-28KA1E5 2.8kW S-28KA1E5S 3.6kW S-36KA1E5 3.6kW S-36KA1E5S 1.75 4.5kW S-45KA1E5 1.75 4.5kW S-45KA1E5S 5.6kW S-56KA1E5 6.3kW... - Page 83 Cautions Carry out Earthing work. Do not connect the Earth return to the gas pipe, water line pipe, lightning rod and telephone lines. Imperfection in Earth return may lead to electric shock Do not install the unit at the place where the possibility of inflammable gas leakage exists. If gas leakage should arise and the gas builds up around the unit, such situation may lead to ignition.
-
Page 84: Installation Of Indoor Unit
Note Thoroughly study the following installation locations ● 1. In such places as restaurants and kitchens, considerable amount of oil steam and flour adhere to the fan, the fin of the heat exchanger, resulting in heat exchange reduction, spraying, dispersing of water drops, etc. In these cases, take the following actions: •... - Page 85 2. Drill the piping plate hole with ø70mm hole-core drill. • Line according to the left and right side of the installation plate. The meeting point of the extended line is the center of the hole. Another method is by putting measuring tape at position as shown in the diagram above. The hole center is obtained by measuring the distance namely 128 mm for left and right hole respectively.
- Page 86 1. FOR THE RIGHT REAR PIPING Right Rear piping Step-1 Pull out the Indoor piping Tape it with piping in a position a s mentioned in Fig. below. Step-2 Install the Indoor Unit Piping Cover for the left piping Cover for the Cover for Drain bottom piping...
-
Page 87: Refrigerant Piping
Replace the drain hose Rear view forleft piping installation Connecting Drain hose cable Drain hose Piping Connecting cable Drain cap More than 1150 mm Drain hose Adjustthe piping slightlydownwards. Sleeve for piping hole In case of left piping how to insert the How to pull the piping and drain hose out, in case of the embedded piping connecting cable and drain hose. -
Page 88: Electrical Wiring
11.4.5 ELECTRICAL WIRING As to main power source and cable size of outdoor unit, read the installation manual attached to the outdoor unit. The units must be installed in accordance with applicable national and local regulations. The units installed by a professional installer must be supplied from a dedicated electrical circuit. Warning All electric work must be carried out by a qualified technician according to proper technical standards for electrical work and according to installation manual for installation work. - Page 89 CONNECTING THE WIRES TO THE CONTROL BOX You can see the power supply box on the right side after removing the front grille. HOW TO TAKE OUT FRONT GRILLE Please follow the steps below to take out front grille if necessary such as when servicing.
- Page 90 AUTO SWITCH OPERATION The below operations will be performed by pressing the “AUTO” switch. 1. AUTO OPERATION MODE The Auto operation will be activated immediately once the Auto Switch is pressed and release before 5 sec.. 2. COOLING TRIAL OPERATION The Test Run operation will be activated if the Auto Switch is pressed continuously for more than 5 sec.
-
Page 91: Hand Over
11.4.8 PRECAUTION IN TEST RUN For test run, refer to the “Precautions in test run” in the outdoor unit installation instructions manual. Test run is conducted using the wired controller, AUTO switch or by using the outdoor units. For the wired controller test run see the instructions below. -
Page 92: Installation Instructions Fs Multi Four-Way Mini Cassette
11.5 INSTALLATION INSTRUCTIONS FS MULTI FOUR-WAY MINI CASSETTE Cooling Cooling Model name HP Model name REFRIGERANT capacity capacity R 410A 2.2kW S-22YA1E5 1.75 4.5kW S-45YA1E5 2.8kW S-28YA1E5 2.0 5.6kW S-56YA1E5 3.6kW S-36YA1E5 Precautions in terms of safety Carry out installation work with reliability after thorough reading of this “Precaution in terms of safety”. •... - Page 93 Cautions Carry out Earthing work. Do not connect the Earth return to the gas pipe, water line pipe, lightning rod and telephone lines. Imperfection in Earth return may lead to electric shock. Do not install the unit at the place where the possibility of inflammable gas leakage exists. If gas leakage should arise and the gas builds up around the unit, such situation may lead to ignition.
- Page 94 Note Thoroughly study the following installation locations ● 1. In such places as restaurants and kitchens, considerable amount of oil steam and flour adhere to the turbo fan, the fin of the heat exchanger and the drain pump, resulting in heat exchange reduction, spraying, dispersing of water drops, drain pump malfunction, etc.
- Page 95 POSITIONS OF AIR CONDITIONER BODY AND CEILING SURFACE Hanging bolt (W3/8 or M10) (W3/8 or M10) Flat washer for M10 (accessory) M10 Spring washer Flat washer for M10 (accessory) (W3/8 or M10) Tighten the nut and bolt to prevent unit from falling Warning HANGING POSITION OF THE AIR CONDITIONER BODY Keep the length of the bolt...
-
Page 96: Indoor Unit Drain Piping
11.5.5 INDOOR UNIT DRAIN PIPING • Drain piping must have down-slope (1/50 to 1/100); be sure not to provide up-and-down slope to prevent reversal flow. • During drain piping connection, be careful not to exert extra force on the drain port at the indoor Upward routing unit. - Page 97 2. Precautions in high humidity circumstance. This air conditioner has been tested according to the “JIS Standard Conditions with Mist” and have been confirmed that there are no faults. However, if it is operated for a long time in high humid atmosphere (dew point temperature: more than 23°C), water drops are liable to fall.
- Page 98 • Use the standard power cord for Europe (such as H05RN-F or H07RN-F which conforms to CENELEC (HAR) rating specifications) or use the cables based on IEC standard. (245IEC57, 245IEC66) Power supply Power supply (ex. 1 ~ 230V) (ex. 1 ~ 230V) Earth leakage breaker Earth leakage breaker Infrared remote controller...
- Page 99 11.5.8 SETTINGS The automatic system settings can take up to 1 minute once power is supplied; do not operate the remote controller during this time. In the event that 1 remote controller group control is not used, do not set up the group control address (A/C No.). The wired remote control will not display when the settings for the A/C No.
-
Page 100: Installation Of Decorative Panel
11.5.9 INSTALLATION OF DECORATIVE PANEL The decorative panel has its installation direction. Confirm the direction by displaying the piping side. 1. Remove the air inlet grille by moving the catchers to center. Catcher Air inlet grill Hinge Air inlet grill * Hang the hinge on the hole of decorative panel. - Page 101 11.5.10 AS FOR TIMER OUTPUT • Connect the timer cord to connector (CN-TIMER) on print circuit board. CN-TIMER Contact Timer setting Relay contact Close: RUN Open: STOP Printed circuit Timer board Connector d.c. 5V • The connector must use XH-2 (housing) manufactured by J.S.T. Mfg. Co., Ltd. •...
- Page 102 11.5.13 HAND OVER • Teach the customer the operation and maintenance procedures, using the operation manual (air filter cleaning, temperature control, etc.) As to parts to be sold separately • With regards to installation of the parts sold separately, follow the installation manual which is provided with the parts sold separately.
-
Page 103: Installation Instructions Fs Multi Four-Way Cassette
11.6 INSTALLATION INSTRUCTIONS FS MULTI FOUR-WAY CASSETTE Cooling capacity Model name REFRIGERANT 6.3kW S-63UA1E5 R 410A 7.1kW S-71UA1E5 9.0kW S-90UA1E5 Precautions in terms of safety Carry out installation work with reliability after thorough reading of this “Precaution in terms of safety”. •... - Page 104 Cautions Carry out Earthing work. Do not connect the Earth return to the gas pipe, water line pipe, lightning rod and telephone lines. Imperfection in Earth return may lead to electric shock. Do not install the unit at the place where the possibility of inflammable gas leakage exists. If gas leakage should arise and the gas builds up around the unit, such situation may lead to ignition.
- Page 105 Note Thoroughly study the following installation locations ● 1. In such places as restaurants and kitchens, considerable amount of oil steam and flour adhere to the turbo fan, the fin of the heat exchanger and the drain pump, resulting in heat exchange reduction, spraying, dispersing of water drops, drain pump malfunction, etc.
- Page 106 POSITIONS OF AIR CONDITIONER BODY AND CEILING SURFACE Hanging bolt (W3/8 or M10) (W3/8 or M10) Flat washer for M10 (accessory) M10 Spring washer Flat washer for M10 (accessory) (W3/8 or M10) Tighten the nut and bolt to prevent unit from falling Warning HANGING POSITION OF THE AIR CONDITIONER BODY Air conditioner body gap setting...
- Page 107 11.6.5 INDOOR UNIT DRAIN PIPING • Drain piping must have down-slope (1/50 to 1/100); be sure not to provide up-and-down slope to prevent reversal flow. • During drain piping connection, be careful not to exert extra force on the drain port at the indoor Upward routing unit.
- Page 108 2. Precautions in high humidity circumstance. This air conditioner has been tested according to the “JIS Standard Conditions with Mist” and have been confirmed that there are no faults. However, if it is operated for a long time in high humid atmosphere (dew point temperature: more than 23°C), water drops are liable to fall.
- Page 109 • Use the standard power cord for Europe (such as H05RN-F or H07RN-F which conforms to CENELEC (HAR) rating specifications) or use the cables based on IEC standard. (245IEC57, 245IEC66) Power supply Power supply (ex. 1 ~ 230V) (ex. 1 ~ 230V) Earth leakage breaker Earth leakage breaker Infrared remote controller...
- Page 110 11.6.8 SETTINGS The automatic system settings can take up to 1 minute once power is supplied; do not operate the remote controller during this time. In the event that 1 remote controller group control is not used, do not set up the group control address (A/C No.). The wired remote control will not display when the settings for the A/C No.
- Page 111 11.6.9 INSTALLATION OF DECORATIVE PANEL The decorative panel has its installation direction. Confirm the direction by displaying the piping side. 1. Remove the air inlet grill from the decorative panel. Before installing the decorative panel, always remove 2. Remove the corner cover in 4 corner places. the paper template ○...
- Page 112 Good example Bad example Air conditioner unit Air conditioner unit Cool air leakage (no good) Ceiling Ceiling Decorative panel Decorative panel Fit the insulator (this part) and be careful for cool air leakage. 6. Adhere the cosmetic panel and ceiling wall together and confirm no gap in between.
- Page 113 11.6.11 PRECAUTION IN TEST RUN For test run, refer to the “Precautions in test run” in the outdoor unit installation instructions manual. Test run is conducted using the wired controller, emergency switch on the infrared receiver or by using the outdoor units.
-
Page 114: Cz-Rwru1 Infrared Receiver (For Cassette Only) Installation Manual
Attach the infrared receiver onto the decorative panel of the indoor unit as shown in the figure. Remove the “corner cover” to the left side of the “Panasonic” mark on the decorative panel as shown in the figure. Attach the infrared receiver in the same place where the corner cover was removed from. - Page 115 1. After attaching the infrared receiver to the decorative panel, route the receiver’s joint cord as shown in the diagram below and pass the cord through the hook located on the rear side of the decorative panel so it does not stick out.
- Page 116 11.7.3 EMERGENCY OPERATION • If you do not have the infrared remote controller (because the batteries are weak, or some other reason prevents the infrared remote controller from being used), the emergency operation can be carried out at the receiver. AUTO switch Infrared Receiver •...
-
Page 117: Installation Instructions Fs Multi Duct Type
11.8 INSTALLATION INSTRUCTIONS FS MULTI DUCT TYPE Cooling capacity Model name REFRIGERANT 2.2kW S-22NA1E5 R 410A 2.8kW S-28NA1E5 1.25 3.2kW S-32NA1E5 3.6kW S-36NA1E5 1.75 4.5kW S-45NA1E5 5.6kW S-56NA1E5 Precautions in terms of safety Carry out installation work with reliability after thorough reading of this “Precaution in terms of safety”. •... - Page 118 Cautions Carry out Earthing work. Do not connect the Earth return to the gas pipe, water line pipe, lightning rod and telephone lines. Imperfection in Earth return may lead to electric shock. Do not install the unit at the place where the possibility of inflammable gas leakage exists. If gas leakage should arise and the gas builds up around the unit, such situation may lead to ignition.
- Page 119 Note Thoroughly study the following installation locations ● 1. In such places as restaurants and kitchens, considerable amount of oil steam and flour adhere to the turbo fan, the fin of the heat exchanger and the drain pump, resulting in heat exchange reduction, spraying, dispersing of water drops, drain pump malfunction, etc.
- Page 120 INSTALLATION OF DUCT 1. There are three ways to install the duct for the air inlet as shown below; (a) ~ (c). 2. The bottom of the panel can be converted into an air inlet [as the case of diagram (c)] as shown below; 11.8.4 REFRIGERANT PIPING Refrigerant is charged to the outdoor unit.
- Page 121 11.8.5 INDOOR UNIT DRAIN PIPING • Drain piping must have down-slope (1/50 to 1/100); be sure not to provide up-and-down slope to prevent reversal flow. • During drain piping connection, be careful not to exert extra force on the drain port at the indoor Upward routing unit.
- Page 122 3. The duct connection of the air outlet thermal insulation. Thermal insulation Air outlet (Local supply) 11.8.7 ELECTRICAL WIRING As to main power source and cable size of outdoor unit, read the installation manual attached to the outdoor unit. The units must be installed in accordance with applicable national and local regulations. The units installed by a professional installer must be supplied from a dedicated electrical circuit.
- Page 123 • Power supply specifications Circuit breaker Power supply cable (Minimum capacity) Remote Leakage Control Controller Model Power current Minimum power Cable Cable name supply breaker cable supply Length Switch Fuse cables Indoor unit 220V-240V~ 2 mm 0.75 mm 0.5 ~ 2 mm 1.
- Page 124 • To set each indoor unit’s A/C No., use the manual setting method. However, if the wall type indoor unit is connected, then manual setting is not possible. ■ Automatic setting • By switching ON the indoor unit’s power supply with the DIP switch where the A/C No. is set to “01” (factory setting), the A/C No.
- Page 125 11.8.10 PRECAUTION IN TEST RUN For test run, refer to the “Precautions in test run” in the outdoor unit installation instructions manual. Test run is conducted using the wired controller, emergency switch on the infrared receiver or by using the outdoor units.
-
Page 126: Duct Type Air Conditioners Installation Instructions
11.9 DUCT TYPE AIR CONDITIONERS INSTALLATION INSTRUCTIONS Cooling capacity Model name REFRIGERANT 1.75 4.5kW S-45MA1E5 R 410A 5.6kW S-56MA1E5 6.3kW S-63MA1E5 7.1kW S-71MA1E5 9.0kW S-90MA1E5 Precautions in terms of safety Carry out installation work with reliability after thorough reading of this “Precaution in terms of safety”. •... - Page 127 Cautions Carry out Earthing work. Do not connect the Earth return to the gas pipe, water line pipe, lightning rod and telephone lines. Imperfection in Earth return may lead to electric shock Do not install the unit at the place where the possibility of inflammable gas leakage exists. If gas leakage should arise and the gas builds up around the unit, such situation may lead to ignition.
- Page 128 Note Thoroughly study the following installation locations ● 1. In such places as restaurants and kitchens, considerable amount of oil steam and flour adhere to the turbo fan, the fin of the heat exchanger and the drain pump, resulting in heat exchange reduction, spraying, dispersing of water drops, drain pump malfunction, etc.
- Page 129 INSTALLATION OF DUCT 1. The duct of the air inlet could be installed by the three situations as shown in the illustration below (a) ~ (c). Setting the filter: Case of (a): Reverse the filter and not install the duct of the air inlet. Case of (b): Remove the filter (local arrangement) and install the duct of the air inlet.
- Page 130 Vacuum drying After completing the piping connection, execute vacuum drying for the connecting piping and the indoor unit. The vacuum drying must be carried out by using the service ports of both the liquid and gas side valves. CAUTION Use two wrenches and tighten with regular torque. Flare nut fastening torque N•m (kgf•cm) ø6.35mm 18 (180)
- Page 131 Wall seal • When the outdoor unit is installed on a higher position than the indoor unit, install the trap so as not to instill rain water into the wall by transmitting in piping. • Stuff the space among piping, the electric wire, and the drain hose with “Putty” and seal the penetration wall hole.
- Page 132 • Power supply specifications Circuit breaker Power supply cable (Minimum capacity) Remote Leakage Control Controller Model Power current Minimum power Cable Cable name supply breaker cable supply Length Switch Fuse cables Indoor unit 220V-240V~ 2 mm 0.75 mm 0.5 ~ 2 mm 1.
- Page 133 ■ Automatic setting • By switching ON the indoor unit’s power supply with the DIP switch where the A/C No. is set to “01” (factory setting), the A/C No. will be automatically set. (After activating the power for all indoor units, the automatic setting takes approximately one minute.) •...
- Page 134 11.9.10 PRECAUTION IN TEST RUN For test run, refer to the “Precautions in test run” in the outdoor unit installation instructions manual. Test run is conducted using the wired controller, emergency switch on the infrared receiver or by using the outdoor units.
-
Page 135: Cz-Rwrm1 Infrared Receiver (For Ducted Series Only) Installation Manual
11.10 CZ-RWRM1 Infrared Receiver (For Ducted series only) Installation Manual • Before installing the infrared remote controller, be sure to thoroughly read the “Precautions in terms of safety” section of the installation manual provided with the indoor unit. Also, be sure to thoroughly read the infrared remote controller installation manual as well. - Page 136 Example of embedding into the wall Remove the decorative panel for the receiver and secure the outlet box with 2 screws so it is embedded. Control box Control box cover Control cable Screw Remove the control box cover by removing the screws and connect the joint cord for wiring to the P.C.B connector <CN-DISP>...
- Page 137 11.10.3 EMERGENCY OPERATION • If you do not have the infrared remote controller (because the batteries are weak, or some other reason prevents the infrared remote controller from being used), the emergency operation can be carried out at the receiver. AUTO switch Infrared Receiver •...
-
Page 138: Infrared Remote Controller Installation Manual
11.11 INFRARED REMOTE CONTROLLER INSTALLATION MANUAL CZ-RWS1 (Cooling/Heating) CZ-RWC1 (Cooling only) • Before installing the infrared remote controller, be sure to thoroughly read the “Precautions in terms of safety” section of the installation manual provided with the indoor unit. • After installing the infrared remote controller, carry out a test operation to check that the remote controller functions properly and also explain the operation and cleaning procedures to the customer in accordance with the details in the instruction manual. - Page 139 INSERTING THE BATTERIES • Remove the battery cover from the infrared remote controller, and then insert the two accessory R03 size batteries. (Be sure not to mistake the polarities.) • When inserting the batteries for the first time, or when replacing the batteries, the remote controller can not operating.
- Page 140 11.11.4 SETTINGS CONTROL USING TWO REMOTE CONTROLLERS • If both the infrared remote controller and the optional wired remote controller are being used together, either remote controller can be used to operate the indoor units. (The indoor unit can be used to operated with the last switch pressed having priority.) •...
- Page 141 SETTING OUTDOOR UNIT ADDRESS • Setting and clearing the outdoor unit address on the indoor unit can be performed. • It is possible to set the address value from “001” to “199”. Setting the address to “000” clears it. • Set the mode number to “06”...
-
Page 142: Wired Controller Installation Manual Cz-Rt1
11.12 WIRED CONTROLLER INSTALLATION MANUAL CZ-RT1 • Before installing the wired controller, be sure to thoroughly read the “Precautions in terms of safety” in the installation manual provided with the indoor unit. • After installing the wired controller, carry out a test operation to check that the remote controller functions properly, and also explain the operation and cleaning procedures to the customer in accordance with the details in the instruction manual. -
Page 143: Remote Controller Installation
• Use the lower case screws (2 pcs) provided in the Wall accessories. Lower case • Be sure to secure lower case until the head of the screw is flush. Failure to do so may cause the head of the screw to hit the control board and lead to control board damage. - Page 144 REMOTE CONTROLLER INSTALLATION PROCEDURE • Remove the remote controller lower case. Upper case (Insert a flat-tipped screw driver or similar 2 to 3 mm into one of the gaps at the bottom of the case, and then twist the screw driver to open. [Refer to the illustration on the right.]) Be careful not to damage the lower case.
- Page 145 Upper case Connector cord Notches Top feeding-out position Lower case Left feeding-out position Connector MASTER Remote control cable SLAVE Right feeding- Rear feeding-out position position (when cable is to be embedded) Ventilation holes Temperature sensor Setting switch • If controlling using two remote controllers, refer to the “Control using two remote controllers”...
- Page 146 If installing with the remote control cable exposed 1. Secure the remote controller base plate to the wall with the two accessory 4 mm screws. 2. The feeding-out direction for the remote control cable can be either up or to the left or the right. (Refer to the illustration above.) 3.
- Page 147 Model No. Item Setting Value Setting Remarks Clear address Indoor unit address Set address (Central control address) 001 ~ 200 [001] ~ [200] Not set (Clear) Low sound level 1 Low sound at night Low sound level 2 Low sound level 3 Clear address Outdoor unit address Set address...
- Page 148 LOW SOUND NIGHT MODE SETTING Perform the steps (1) through (5) from the local setting procedure. ○ For step (2), select “02”. For step (4), select from “001”, “002” or “003”. ○ Press the MODE (TIMER) switch to display the “start” time for low sound night mode. ○...
- Page 149 A/C No. Indoor unit printed circuit board DIP switch (SW2) Unnecessary 1-ON 2-ON 1,2-ON 3-ON 1,3-ON 2,3-ON 1,2,3-ON operation A/C No. Indoor unit printed circuit board DIP switch (SW2) 4-ON 1,4-ON 2,4-ON 1,2,4-ON 3,4-ON 1,3,4-ON 2,3,4-ON 1,2,3,4-ON 11.12.5 SELF-DIAGNOSIS FUNCTION •...
- Page 150 Example of the abnormality before previous display • • While the previous display still appears, Further details of the problem can be press UP (TIMER) displayed by pressing the SET switch. Problem display Problem details • The display can be switched between the previous problem and the one before that by pressing the UP / DOWN (TIMER) switches.
-
Page 151: Installation Instructions Fs Multi Outdoor Unit
11.13 INSTALLATION INSTRUCTIONS FS MULTI OUTDOOR UNIT MODEL NAME REFRIGERANT 4 HP U-4LA1E5 R 410A 5 HP U-5LA1E5 6 HP U-6LA1E5 Refer to the indoor unit installation instruction manual for the indoor unit installation. Note: Ensure to hand over this installation instruction manual to the person performing the installation and inform the customer to keep it properly stored. - Page 152 Warnings The appliance must be installed by technician, who takes into account the requirements given by ISO 5149 or eventual equivalent requirements. As to installation, request the distributor or vendor to perform it. Imperfection in installation caused by that having been carried out by the customer himself may leads to water leakage, electric shock, fire, etc.
- Page 153 11.13.1 ACCESSORIES SUPPLIED WITH OUTDOOR UNIT The following parts are supplied as accessories with each outdoor unit. Check that all accessory parts are present before installing the outdoor unit. Part name Q’ty Diagram Application Protective bushing For protecting electrical wires Banding strap For tying electrical wires together Band...
- Page 154 9. When installing the product in a place where it will be affected by typhoon or strong wind such as wind blowing between buildings, including the rooftop of a building and a place where there is no building in surroundings, fix the product with an overturn prevention wire, etc.
- Page 155 (C) If there are obstacles on both the intake and discharge Pattern 1 If there is an obstacle that is higher than the unit on the intake side. (There is no limit to the height of the obstacle above the discharge.) •...
- Page 156 • If there are obstacles above the unit (D) Stacking installation setup • Stack up to 2 tiers. • A dimension of approximately 400 mm is required for the second tier outdoor unit’s drain pipe and space for maintenance of the first tier outdoor unit. •...
- Page 157 11.13.4 TRANSPORT AND INSTALL THE OUTDOOR UNIT • Transporting 1. Transport the outdoor unit in its original packaging as close as possible to the installation location. 2. In the event that the unit needs to be lifted or suspended, use a rope or belt and use cloth or wood as padding to avoid damaging the unit.
- Page 158 [Allowable piping connection example] Example of piping connection Height difference between indoor and outdoor Allowable Less than 30 m units height difference Height difference between indoor units Less than 15 m Main pipe 1 + Main pipe 2 + Main pipe 3 + Main pipe 4 Total piping length 20 ~ 90 m + Branch pipe 1 + Branch pipe 2 + Branch pipe 3 +...
- Page 159 • Do not add additional force to the valve’s cover. • Using spanners on the cover or valve itself (other than the hexagonal parts) may cause gas leakage. Avoid using spanners on the cover or parts other than the hexagonal part of the valve. •...
- Page 160 Precautions for Insulation Installation Maximum temperature limit of gas or liquid piping exceeds 120 °C • In high humidity environment, reinforce the insulation material for the refrigerant piping. Failure to do so may result in condensation on the surface of the insulation material. •...
- Page 161 11.13.7 REGARDING REFRIGERANT FILLING This unit is charge-free and does not require additional filling of refrigerant. Exercise precaution during refilling due to refrigerant leakage. Precautions during refrigerant filling • • Ensure to fill only with liquid refrigerant when If using cylinders as shown in the bottom left refilling.
- Page 162 11.13.8 ELECTRICAL WIRING The units must be connected to the supply cables for fixed wiring by qualified technician. Feed the power source to the unit via a distribution switch board designed for this purpose, the switch should disconnected all poles with a contact separation of at least 3 mm. When the supply cable is damaged, it must be replaced by qualified technician.
- Page 163 Connection method for the power supply cable and indoor/outdoor unit connections Follow the installation instruction manual provided with the indoor unit to set up the indoor unit wiring and the indoor/outdoor connections. Provide separate power supplies for the indoor and outdoor units. This equipment complies with EN/IEC 31000-3-12 provided that the short-circuit power Ssc is greater than or equals to U-4LA:1850kVA, U-5LA:2200kVA, U-6LA:2200kVA at the interface point between the user’s supply and the public system.
- Page 164 Bus lines power Bus lines power Bus lines Outdoor unit main power supply supply switch – OFF supply switch – OFF power supply (220V-240V~) 50Hz Circuit switch - ON Circuit Earth Earth Circuit Breaker Breaker Breaker Earth c t i c t i Unit Switch...
- Page 165 • The indoor unit address is the number to distinguish the indoor unit. Never duplicate the number. If the number is duplicated, the unit will not operate properly. • There is an outdoor unit address for the indoor/outdoor unit and the address shows which outdoor and indoor unit is connected with the refrigerant pipes.
- Page 166 4. Follow these procedures to automatically reset the address. P.C.B After switching the power supply to ON for all the indoor and outdoor units by pressing and holding down SW6 on the control board of the outdoor unit for more than 4 seconds, the address will automatically reset.
- Page 167 11.13.9 PRECAUTIONS REGARDING TEST RUN The process flow shows the start of the test run Check Before Test Run • Always be sure to use properly insulated tool to operate the switch on the circuit board. (Do not use your finger or a metallic object) •...
- Page 168 • Switch the power supply ON at least 12 hours before the test run. • Removing a connector while the current is running can cause damage to the control board. Once the power supply is turned OFF, be sure to wait 5 minutes or more before starting to work on it. •...
-
Page 169: Checks After Installation Have Completed
11.13.10 REGARDING LOCAL SETTINGS ■ Local setting method using the remote controller • The settings can be performed at night with low sound by using the remote controller. Follow the instructions below regarding installation, service and repair, and perform local setting. (If there is a mistake with the settings, it will cause abnormal operations.) •... -
Page 170: Installation Instructions Fs Multi Outdoor Unit
11.14 INSTALLATION INSTRUCTIONS FS MULTI OUTDOOR UNIT MODEL NAME REFRIGERANT 4 HP U-4LA1E5-1 R 410A 5 HP U-5LA1E5-1 6 HP U-6LA1E5-1 Refer to the indoor unit installation instruction manual for the indoor unit installation. Note: Ensure to hand over this installation instruction manual to the person performing the installation and inform the customer to keep it properly stored. - Page 171 Warnings The appliance must be installed by technician, who takes into account the requirements given by ISO 5149 or eventual equivalent requirements. As to installation, request the distributor or vendor to perform it. Imperfection in installation caused by that having been carried out by the customer himself may leads to water leakage, electric shock, fire, etc.
- Page 172 11.14.1 ACCESSORIES SUPPLIED WITH OUTDOOR UNIT The following parts are supplied as accessories with each outdoor unit. Check that all accessory parts are present before installing the outdoor unit. Part name Q’ty Diagram Application Protective bushing For protecting electrical wires Banding strap For tying electrical wires together For connecting the drain pipe...
- Page 173 10. Ensure to assign several people or use a mechanical lift, etc. to transport the unit. 11.14.3 SELECTING THE LOCATION FOR INSTALLATION SERVICE When installing multiple units, allow enough space in between the units and the side of the building. (unit:mm) (A) If there are obstacles at the intake •...
- Page 174 (C) If there are obstacles on both the intake and discharge Pattern 1 If there is an obstacle that is higher than the unit on the intake side. (There is no limit to the height of the obstacle above the discharge.) •...
- Page 175 • If there are obstacles above the unit (D) Stacking installation setup • Stack up to 2 tiers. • A dimension of approximately 400 mm is required for the second tier outdoor unit’s drain pipe and space for maintenance of the first tier outdoor unit. •...
- Page 176 11.14.4 TRANSPORT AND INSTALL THE OUTDOOR UNIT • Transporting 1. Transport the outdoor unit in its original packaging as close as possible to the installation location. 2. In the event that the unit needs to be lifted or suspended, use a rope or belt and use cloth or wood as padding to avoid damaging the unit.
- Page 177 [Allowable piping connection example] Example of piping connection Height difference between indoor and outdoor Allowable Less than 30 m units height difference Height difference between indoor units Less than 15 m Main pipe 1 + Main pipe 2 + Main pipe 3 + Main pipe 4 Total piping length 20 ~ 90 m + Branch pipe 1 + Branch pipe 2 + Branch pipe 3 +...
- Page 178 • During the cooling mode operation under low ambient pressure, the low pressure side of the valve can be prone to freezing. Secure the flare nut. (shared gas side / liquid side) section of the valve with a silicone sealing agent to prevent this from occurring. Precautions for handling the cover Valve size Tightening torque...
- Page 179 Precautions for Insulation Installation Maximum temperature limit of gas or liquid piping exceeds 120 °C • In high humidity environment, reinforce the insulation material for the refrigerant piping. Failure to do so may result in condensation on the surface of the insulation material. •...
- Page 180 11.14.7 REGARDING REFRIGERANT FILLING This unit is charge-free and does not require additional filling of refrigerant. Exercise precaution during refilling due to refrigerant leakage. Precautions during refrigerant filling • • Ensure to fill only with liquid refrigerant when If using cylinders as shown in the bottom left refilling.
- Page 181 11.14.8 ELECTRICAL WIRING The units must be connected to the supply cables for fixed wiring by qualified technician. Feed the power source to the unit via a distribution switch board designed for this purpose, the switch should disconnected all poles with a contact separation of at least 3 mm. When the supply cable is damaged, it must be replaced by qualified technician.
- Page 182 Connection method for the power supply cable and indoor/outdoor unit connections Follow the installation instruction manual provided with the indoor unit to set up the indoor unit wiring and the indoor/outdoor connections. Provide separate power supplies for the indoor and outdoor units. This equipment complies with EN/IEC 31000-3-12 provided that the short-circuit power Ssc is greater than or equals to U-4LA:1850kVA, U-5LA:2200kVA, U-6LA:2200kVA at the interface point between the user’s supply and the public system.
-
Page 183: Address Setting
Bus lines power Bus lines power Bus lines Outdoor unit main power supply supply switch – OFF supply switch – OFF power supply (220V-240V~) 50Hz Circuit switch - ON Circuit Earth Earth Circuit Breaker Breaker Breaker Earth c t i c t i Unit Switch... - Page 184 • The indoor unit address is the number to distinguish the indoor unit. Never duplicate the number. If the number is duplicated, the unit will not operate properly. • There is an outdoor unit address for the indoor/outdoor unit and the address shows which outdoor and indoor unit is connected with the refrigerant pipes.
- Page 185 4. Follow these procedures to automatically reset the address. P.C.B After switching the power supply to ON for all the indoor and outdoor units by pressing and holding down SW6 on the control board of the outdoor unit for more than 4 seconds, the address will automatically reset.
- Page 186 11.14.9 PRECAUTIONS REGARDING TEST RUN The process flow shows the start of the test run Check Before Test Run • Always be sure to use properly insulated tool to operate the switch on the circuit board. (Do not use your finger or a metallic object) •...
- Page 187 • Switch the power supply ON at least 12 hours before the test run. • Removing a connector while the current is running can cause damage to the control board. Once the power supply is turned OFF, be sure to wait 5 minutes or more before starting to work on it. •...
- Page 188 11.14.10 REGARDING LOCAL SETTINGS ■ Local setting method using the remote controller • The settings can be performed at night with low sound by using the remote controller. Follow the instructions below regarding installation, service and repair, and perform local setting. (If there is a mistake with the settings, it will cause abnormal operations.) •...
-
Page 189: Terminal Module For Outdoor Unit Cz-Cap1 Installation Manual
11.15 Terminal Module For Outdoor Unit CZ-CAP1 Installation Manual • This module is used for cooling, heating and fanning operation settings. • This module is used to conduct a forced stop operation for the air conditioner. • This module is used for demand control on an outdoor unit. Before installing the terminal module, be sure to thoroughly read the “Precautions in terms of safety”... -
Page 190: Outside Dimensions
Accessories Check that you have the following accessories. Name Q’ty Diagram Remark For installing the demand controller Terminal module For installing the cooling/heating selector For the forced stop output Cord for connecting the control For connecting on the control board board Cord clamp For securing the cord... - Page 191 2. Connect the lead wires from the installed terminal module with the connection points found on the upper part of the noise filter P.C.B. Connect 10P to CN-OPT1, 2P to CN-OPT2 and 4P to CN-OPT3. 3. Use the cord provided for P.C.B to connect to CN-OPT4 on the main P.C.B and to CN-OPT4 on the noise filter P.C.B.
-
Page 192: Connection Procedure
11.15.3 CONNECTION PROCEDURE Be sure to always turn the power off first when setting up the wire and cable connections. Failure to do so may lead to electric shock or unit failure • Connecting cable to H05RN-F or H07RN-F which conforms to CENELEC (HAR) rating specifications, or use the cables based on IEC standard. - Page 193 WHEN CONNECTING TO THE COOLING / HEATING SELECTOR It is possible to secure the cooling, heating and fanning operation connection with the Cooling / Heating Selector. Follow the procedure for the connection set up below. 1. Connect the wiring (4-wire) to points 1 through 4 on the upper part of the terminal block. Secure the wiring with the cord clamp located on the right side of the terminal block.
- Page 194 WHEN CONNECTING THE DEMAND CONTROLLER INPUT It is possible to choose various demand levels for the operating current. Refer to the table shown on the right. Terminal no. for demand section Description Approx. 70% of rated current Approx. 40% of rated current Stop Connect the wiring (4-wire) to the Demand section (LV1, LV2, LV3, COM) on the terminal block.
- Page 196 11.15.4 WIRING PROCEDURE Follow the wiring procedure below for terminal connection. ○ Set up the wiring through the back side of the control panel. ○ Secure the wiring with the cord clamp located on the right side of the control panel. Set the wiring and cables for the power and signal lines to the outdoor unit together, and secure each wire and ○...
- Page 197 11.15.5 CHECK AFTER COMPLETING INSTALLATION Check the signals to make sure the unit operates properly using an external input device.
-
Page 198: Manual For Terminal Module
11.16 MANUAL FOR TERMINAL MODULE 11.16.1 CONNECTION PROCEDURE Be sure to always turn the power off first when setting up the wire and cable connections. Failure to do so may lead to electric shock or unit failure. • Connecting cable to H05RN-F or H07RN-F which conforms to CENELEC (HAR) rating specifications, or use the cables based on IEC standard. - Page 199 WHEN CONNECTING TO THE COOLING / HEATING SELECTOR It is possible to secure the cooling, heating and fanning operation connection with the Cooling / Heating Selector. Follow the procedure for the connection set up below. 1. Connect the wiring (4-wire) to points 1 through 4 on the upper part of the terminal block. Secure the wiring with the cord clamp located on the right side of the terminal block.
- Page 200 WHEN CONNECTING THE DEMAND CONTROLLER INPUT It is possible to choose various demand levels for the operating current. Refer to the table shown on the right. Terminal no. for demand section Description Approx. 70% of rated current Approx. 40% of rated current Stop Connect the wiring (4-wire) to the Demand section (LV1, LV2, LV3, COM) on the terminal block.
- Page 202 11.16.2 WIRING PROCEDURE Follow the wiring procedure below for terminal connection. ○ Set up the wiring through the back side of the control panel. ○ Secure the wiring with the cord clamp located on the right side of the control panel. Set the wiring and cables for the power and signal lines to the outdoor unit together, and secure each wire and ○...
- Page 203 11.16.3 CHECK AFTER COMPLETING INSTALLATION Check the signals to make sure the unit operates properly using an external input device.
-
Page 204: Cooling / Heating Selector Cz-Rd1 Installation Manual
11.17 Cooling / Heating Selector CZ-RD1 Installation Manual • This module is used for cooling, heating and fanning operation settings. Before installing the Cooling/Heating Selector, be sure to thoroughly read the “Precautions in terms of safety” section in the installation manual. Precautions in All important descriptions regarding safety are Always Observe Safety... -
Page 205: External Dimensions
Accessories Check that you have the following accessories. Name Q’ty Diagram Remark CZ -RD1 Cooling/Heating selector SW For setting the cooling/heating operation F AN M O D E C O O L H EA T Installation manual This manual 11.17.1 EXTERNAL DIMENSIONS (Unit: mm) CZ-RD1 F A N... - Page 206 Yellow cord Screws to secure case Orange cord Mount Red cord Brown cord 1: Brown cord 2: Red cord 3: Orange cord 4: Yellow cord Shown without the decorative panel Connect to the round terminals of the short wires No.1~4. Install securely using a crimp-type device for round terminals.
- Page 207 Install the decorative panel by matching the Earth screw directional arrow ↑UP for the decorative panel as shown in the illustration to the right. Install the case by matching it Case with the directional arrow. Hole Directional arrow Decorative panel CZ-RD1 M O D E F A N...
- Page 208 3. Choose either the cooling operation or the heating operation. ○ ○ Choose SW 5 or ○ ○ Choose 5 for the cooling operation, and choose 6 for the heating operation. ○ By choosing 5 , the wired controller indicates priority to the cooling operation. ○...
-
Page 209: Line Branch Pipe Installation Manual Cz-P155Bk1
11.18 LINE BRANCH PIPE INSTALLATION MANUAL CZ-P155BK1 • Prior to undertaking the installation work, read carefully through the “Installation Instructions” for the air conditioner and this “Installation Manual”. • This line branch pipe is used for the R410A refrigerant. • This line branch pipe is used where the connection of the MINI-VRF type indoor/outdoor pipes is to be branched. -
Page 210: Installation Precaution
11.18.2.1 Installation instructions Output (1) To next branch pipe or indoor unit Output (2) Refrigerant pipe pipe Refrigerant To the outdoor unit or Gas side / Liquid side Input next branch pipe branch pipe 11.18.2.2 Installation precaution Position the branch pipe on the appropriate horizontal and vertical plane so that branch flow is even. Horizontal line Horizontal line... - Page 211 11.18.3 Insulation directions Gas side / Liquid side branch pipe insulation. Note: Use insulating material that can tolerate 120°C on the gas side. 1) Insulate the gas side / liquid side of the branch pipe with thermal insulator. Thermal insulator Gas side / Liquid side of the branch pipe 2) Wrap tape all around the areas where the insulating materials are joined in order to seal it.
-
Page 212: Testing And Commissioning
12. Testing and Commissioning 12.1 Precautions Regarding Test Run 12.2 Check before Test Run Content check ● Is the wire set up and connected as described in the instructions? Check for any phase sequence. ● Are the wire connection’s screws loose? ●... -
Page 213: Test Run Procedure
12.3 Test Run Procedure Test operation can be performed from outdoor unit or indoor unit (1) Test operation from outdoor unit HEATING TEST (SW2) Press COOLING (SW3) or HEATING TEST (SW2) switch from outdoor PCB (main) for one second to start the test operation. Select cooling operation first for 20 minutes before select COOLING TEST (SW3) heating operation. -
Page 214: Outdoor Unit Operation Control
13. Outdoor Unit Operation Control 13.1 System Start Control 13.1.1 Outdoor unit operation mode judgment • When remote control, centralized control, or Cool/Heat Selector Switch (CZ-RD1) is turned ON, outdoor unit operation mode is set as shown in table below: Indoor Unit Operation Condition Outdoor Unit Operation Condition Cool or Soft Dry Mode... -
Page 215: Deice Control
13.3 Deice Control • This control will operate for 1 cycle after accumulation time for heating (Compressor ON) under low outdoor ambient environment as stated in table below: Outdoor Air Temperature (°C) Heat exchanger temperature (°C) Acc. Time (minutes) -5 to -7 -3 &... -
Page 216: Outdoor Unit Protection Control
14. Outdoor Unit Protection Control 14.1 Cooling Oil Return Control • Oil Return control will operate 1 cycle for every 3 hours of compressor accumulation run times (normal cooling operation mode continuously). • Cooling oil return control will take 5 minutes to complete. •... -
Page 217: Compressor Discharge Temperature Control
14.5 Compressor Discharge Temperature Control • This control will operate if compressor discharge temperature is detected hot at alert level. If Compressor Discharge Temperature ≥ 100°C, liquid bypass valve will open. If Compressor Discharge Temp ≥ 105°C, compressor frequency will reduce 10% if the compressor discharge temp still at down zone. -
Page 218: Cooling Low Outdoor Ambient Temperature Protection Control
14.10 Cooling Low Outdoor Ambient Temperature Protection Control • When outdoor is operating in Cool Mode if outdoor ambient temperature is below -15°C and compressor is operating for 15 minutes, compressor will stop. • When outdoor ambient temperature is less than -10°C, the system will restart. 14.11 Heating High Outdoor Ambient Temperature Protection Control •... -
Page 219: Indoor Unit Operation Control
15. Indoor Unit Operation Control 15.1 Operation Mode Priority Control • Operation modes available for remote control selection are: AUTO, COOL, DRY, HEAT and FAN • Types of operation mode which cannot be performed simultaneously at different indoor unit will be in standby condition. -
Page 220: Soft Dry Operation
15.3 Soft Dry Operation 15.3.1 Thermostat Control • Thermostat off point (ΔD) is determined using Indoor Intake Temperature - Remote Control Setting Temperature. Default thermostat off point is shown in table below: Low Static Hide-away (MA1-series) Wall Mounted 60 x 60 Cassette 95 x 95 Cassette Slim Hide-away Model... -
Page 221: Heating Operation
15.4 Heating Operation 15.4.1 Thermostat Control • Thermostat off point (ΔD) is determined using Indoor Intake Temperature - Remote Control Setting Temperature. Default thermostat off point is shown in table below: Low Static Hide-away (MA1-series) Wall Mounted 60 x 60 Cassette 95 x 95 Cassette Slim Hide-away Model... -
Page 222: Indoor Fan Motor Operation
15.6 Indoor Fan Motor Operation • Type of indoor fan motor are shown in below table: Wall Mounted Type (KA1E5 Series) DC Fan Motor 60 x 60 Cassette Type (MA1E5 Series) 95 x 95 Cassette Type (NA1E5 Series) Slim Hide-away Type AC Fan Motor (NA1E5 Series) Low Pressure Hide-away Type... - Page 223 • During Heat Mode DC fan motor Manual fan speed depends on indoor heat exchanger temperature and air swing setting. Min Me Min Me C for C for cassette) Remote control cassette) Remote control setting setting Reduced Reduced Stop Stop Indoor heat exchanger temperature Indoor heat exchanger temperature Automatic air swing...
- Page 224 AC fan motor Manual fan speed and Auto fan speed depends on indoor heat exchanger temperature. Min Me Remote control setting Reduced Reduced Stop Stop Indoor heat exchanger temperature Indoor heat exchanger temperature AC Fan motor control during Thermostat OFF and Compressor OFF. Temperature sampling during thermostat OFF, compressor ON and temperature between indoor intake temperature and setting temperature is below 30°C.
- Page 225 Temperature sampling during thermostat OFF, compressor ON and temperature between indoor intake temperature and setting temperature is above 30°C. Compressor Thermostat 240s Sampling signal from outdoor unit 120s 120s 120s 240s 240s Remote controller Sampling time fan speed setting Skip sampling Indoor fan DC fan motor: SLo AC fan motor: Lo...
-
Page 226: Airflow Direction
15.7 Airflow Direction 15.7.1 Wall Mounted Type (KA1E5 Series) Air swing direction setting Manual Automatic Mode Condition Step 1 Step 2 Step 3 Step 4 Normal 20° 32° 50° 68° Zone A 56° Indoor heat exchanger Zone B 56° temperature Zone C 20°... - Page 227 15.7.2 60 x 60 Cassette (YA1E5 Series) Air swing direction setting Manual Mode Condition Step 1 Step 2 Step 3 Step 4 Normal 20° 37° 53° 70° Deice 10° Heat Hot start 10° Heat removal control 20° Thermostat OFF 20° Normal 20°...
- Page 228 15.7.3 95 x 95 Cassette (UA1E5 Series) Air swing direction setting Manual Mode Condition Step 1 Step 2 Step 3 Step 4 Normal 20° 35° 50° 70° Deice 10° Heat Hot start 10° Heat removal control 20° Thermostat OFF 20° Normal 20°...
-
Page 229: Odor Cut Control
15.8 Odor Cut control • This control starts when Cool / Soft Dry Mode ON and indoor fan speed is Auto. • The Auto fan pattern during this control. 40 sec 40 sec 50 sec 50 sec 20 sec 20 sec 120 sec 120 sec 20 sec... -
Page 230: Filter Check Control
15.10 Filter Check Control • This control detects the contamination of filter from the accumulated operation time of indoor unit Model Filter check time (hour) Wall mounted Except above 1000 • Accumulated time will be multiplied by a correction factor Fan Number Group Correction factor (%) Below Lo... -
Page 231: Indoor Unit Protection Control
16. Indoor Unit Protection Control Protection controls applicable for Cool / Soft Dry Mode 16.1 Odor Remove control 16.2 Freeze Prevention control • This control starts when all below condition are satisfied Indoor thermostat ON and compressor ON for 4 minutes after startup. Indoor heat exchanger temperature less than 4°C. -
Page 232: Hot Start Control
Protection controls applicable for Heat Mode. 16.5 Hot Start Control • This control starts when all conditions below are satisfied Compressor ON after completion of deice operation. • During this control PRE HEAT will display on wired remote control LCD. Indoor unit POWER LED blinks. -
Page 233: Servicing Mode
17. Servicing Mode 17.1 Emergency Operation • Emergency operation can be performed in the event of misplaced of wireless remote controller. Press AC RESET Press AC RESET button for 5 second s button for 5 second s Emergency Operation 1. Press and hold the receptor's AUTO switch for less than 5s. -
Page 234: Pump Down
17.2 Pump down 1. Standby Electrical Power without switch on Operation. 2. Press (1sec) Pump Down Switch at outdoor PCB. 3. Compressor start pump down. (Operate max 10min). 4. Close Liquid Valve. 5. Wait for refrigerant collection until low pressure switch triggered, then countdown timer (40sec) started with LED indication. -
Page 235: Auto Restart Control
17.3 Auto Restart Control Auto Restart Switch (AUTO R/S) at outdoor main PCB is a setting to enable/disable AC system for auto restart back the operation when electrical power resume back from interruption. When electrical power on, the outdoor unit will send a signal about the auto restart switch setting to all connected indoor units. -
Page 236: Wired Remote Control Local Setting Mode
17.5 Wired Remote Control Local Setting Mode • During unit off, press the TEST RUN button for 5 seconds to enter LOCAL MODE. • Press Temperature Up / Down button to select Mode No. • Press Timer SELECT button to enter setting mode. •... - Page 237 17.5.2 Night Time Low Noise • This control turns down outdoor unit operation noise by limiting compressor and outdoor fan speed. Setting Value Description Remark Not set Normal Noise Level Level 1 Low Noise Level Level 2 Lower Noise Level Level 3 Lowest Noise Level •...
-
Page 238: Wireless Remote Control Local Setting Mode
17.6 Wireless Remote Control Local Setting Mode • Press the SET button (2) to enter Local Setting Mode • Press Temperature Up / Down button to select Mode No. • Press Timer Up / Down button to select setting value. •... -
Page 239: Ac Reset Control
17.6.2 Thermostat OFF Indoor Fan Control • During thermostat OFF and compressor OFF, indoor fan control can be alter to suit different application requirement. Setting Value Description Operation details Default control Fan control by EEPROM Fan OFF for 3 minutes, then ON for 10 10 seconds fan sampling seconds. -
Page 240: Troubleshooting Guide
18. Troubleshooting Guide Outdoor Unit Abnormality Control Areas to verify Error Code Indoor / outdoor unit communication line Indoor / outdoor unit communication line, lead F27-01 disconnection error wire terminal. Total quantity / capacity of connected indoor Total quantity / capacity of connected indoor F30-01 unit error unit is insufficient or over. - Page 241 Indoor Unit Abnormality Control Areas to verify Error Code Drain pump, float switch, drain pipe, indoor unit F15-01 Drain level error main PCB, connector CN-DRMTR, CN-TH2. F17-02 Indoor DC fan motor error Indoor DC fan motor, connector CN-FM. Indoor liquid pipe temperature sensor lead wire, F20-01 Indoor liquid pipe temperature sensor error indoor unit main PCB, connector CN-TH2.
-
Page 242: Troubleshooting Flowchart
19. Troubleshooting Flowchart 19.1 Drain Level Float Switch Problem (F15-01) Malfunction Decision Conditions • During operation of cooling and heating, the signal received from drain level float switch in indoor unit is checked whether it is normal. Malfunction Caused • Faulty connector connection. -
Page 243: Indoor Fan Motor (Dc Motor) Mechanism Locked (F17-02)
19.2 Indoor Fan Motor (DC Motor) Mechanism Locked (F17-02) Malfunction Decision Conditions • The rotation speed detected by the Hall IC of the fan motor during fan motor operation is used to determine abnormal fan motor (feedback of rotation > 2550rpm or < 50rpm). Malfunction Caused •... -
Page 244: Indoor Intake Air Temperature Sensor Abnormality (F20-01)
19.3 Indoor Intake Air Temperature Sensor Abnormality (F20-01) Malfunction Decision Conditions • During startup and operation of cooling and heating, the temperatures detected by the indoor intake air temperature sensor are used to determine sensor errors. Malfunction Caused • Faulty connector connection. •... -
Page 245: Wired Remote Controller Thermistor Abnormality (F20-02)
19.4 Wired Remote Controller Thermistor Abnormality (F20-02) Malfunction Decision Conditions • During startup and operation of cooling and heating, the temperatures detected by the wired remote controller thermistor are used to determine sensor errors. Malfunction Caused • Faulty wired remote controller. •... -
Page 246: Indoor Pipe Temperature Sensor Abnormality (F21-01)
19.5 Indoor Pipe Temperature Sensor Abnormality (F21-01) Malfunction Decision Conditions • During startup and operation of cooling and heating, the temperatures detected by the indoor pipe temperature sensor are used to determine sensor errors. Malfunction Caused • Faulty connector connection. •... -
Page 247: Indoor Gas Temperature Sensor Abnormality (F22-01)
19.6 Indoor Gas Temperature Sensor Abnormality (F22-01) Malfunction Decision Conditions • During startup and operation of cooling and heating, the temperatures detected by the indoor gas temperature sensor are used to determine sensor errors. Malfunction Caused • Faulty connector connection. •... -
Page 248: Indoor Address Double Registration (F25-01)
19.7 Indoor Address Double Registration (F25-01) Malfunction Decision Conditions • During standby, startup and operation of cooling and heating, the indoor unit detects the same address as that of its own. Malfunction Caused • Wrong indoor unit address setting. • Faulty indoor unit PCB (main). -
Page 249: Total Quantity & Capacity Of Connected Indoor Unit Abnormality (F30-01)
19.8 Total Quantity & Capacity of Connected Indoor Unit Abnormality (F30-01) Malfunction Decision Conditions • The total quantity & capacity of connected indoor units are used to determine abnormal system connectivity. Malfunction Caused • No power supply to indoor unit. •... -
Page 250: Low Pressure Protection (F31-01)
19.9 Low Pressure Protection (F31-01) Malfunction Decision Conditions • During operation of cooling and heating, when the outdoor unit low pressure switch is open (-0.03MPa and below). Malfunction Caused • Clogged air filter of indoor unit. • Dust accumulation on the indoor/outdoor unit heat exchanger. •... -
Page 251: High Pressure Protection (F31-02)
19.10 High Pressure Protection (F31-02) Malfunction Decision Conditions • During operation of cooling and heating, when the outdoor unit high pressure switch is open (4.15MPa and above). Malfunction Caused • Clogged air filter of indoor unit. • Dust accumulation on the indoor/outdoor unit heat exchanger. •... -
Page 252: Four Way Valve Abnormality (F31-06)
19.11 Four Way Valve Abnormality (F31-06) Malfunction Decision Conditions • During heating operation, when the indoor pipe temperature of thermostat ON indoor unit < 5°C. • During cooling operation, when the indoor pipe temperature of thermostat ON indoor unit > 45°C. Malfunction Caused •... -
Page 253: Indoor Unit Freezing Abnormality (F31-08)
19.12 Indoor Unit Freezing Abnormality (F31-08) Malfunction Decision Conditions • During operation of cooling, and when outdoor unit receive indoor unit freezing abnormal signal (indoor pipe temperature < 0°C) from thermostat OFF/standby indoor unit. Malfunction Caused • Faulty sensor. • Faulty indoor unit expansion valve. -
Page 254: Ipm Temperature Protection (F32-04)
19.13 IPM Temperature Protection (F32-04) Malfunction Decision Conditions • During operation of cooling and heating, when IPM temperature data (95°C) is detected by the IPM temperature sensor. Malfunction Caused • Air short circuit at outdoor unit. • Faulty outdoor unit fan motor. •... -
Page 255: Total Current Protection (F32-05)
19.14 Total Current Protection (F32-05) Malfunction Decision Conditions • During operation of cooling and heating, when an input over-current is detected by the current transformer (CT) in the outdoor unit PCB. Malfunction Caused • Excess refrigerant. • Faulty outdoor unit PCB (main). Abnormality Judgment •... -
Page 256: Compressor Discharge Temperature Protection (F32-06)
19.15 Compressor Discharge Temperature Protection (F32-06) Malfunction Decision Conditions • During operation of cooling and heating, when compressor discharge temperature data (110°C) is detected by the compressor discharge temperature sensor. Malfunction Caused • Faulty compressor discharge temperature sensor. • 3 way valve closed. •... -
Page 257: Power Factor Correction (Pfc) Abnormality (F32-08)
19.16 Power Factor Correction (PFC) Abnormality (F32-08) Malfunction Decision Conditions • During startup and operation of cooling and heating, when the PFC protection circuitry in the outdoor unit PCB (main) senses abnormal high DC voltage level. Malfunction Caused • Power supply surge. •... -
Page 258: Dc Peak Current Detection (F32-09)
19.17 DC Peak Current Detection (F32-09) Malfunction Decision Conditions • During operation of cooling and heating, when DC peak is detected by the inverter DC Peak sensing circuitry in the outdoor unit PCB (main). Malfunction Caused • Faulty outdoor unit PCB (main). •... -
Page 259: Compressor Rotation Failure (F32-10)
19.18 Compressor Rotation Failure (F32-10) Malfunction Decision Conditions • A compressor rotation failure is detected by checking the compressor running condition through the position detection circuitry in the outdoor unit PCB (main). Malfunction Caused • Compressor terminal disconnect. • Faulty outdoor unit PCB (main). •... -
Page 260: Outdoor Fan Motor (Dc Motor) Mechanism Locked (F35-02)
19.19 Outdoor Fan Motor (DC Motor) Mechanism Locked (F35-02) Malfunction Decision Conditions • The rotation speed detected by the Hall IC of the fan motor during fan motor operation is used to determine abnormal fan motor (feedback of rotation > 2550rpm or < 50rpm). Malfunction Caused •... -
Page 261: Outdoor Intake Air Temperature Sensor Abnormality (F40-01)
19.20 Outdoor Intake Air Temperature Sensor Abnormality (F40-01) Malfunction Decision Conditions • During startup and operation of cooling and heating, the temperatures detected by the outdoor intake air temperature sensor are used to determine sensor errors. Malfunction Caused • Faulty connector connection. •... -
Page 262: Compressor Suction Temperature Sensor Abnormality (F40-11)
19.21 Compressor Suction Temperature Sensor Abnormality (F40-11) Malfunction Decision Conditions • During startup and operation of cooling and heating, the temperatures detected by the compressor suction temperature sensor are used to determine sensor errors. Malfunction Caused • Faulty connector connection. •... -
Page 263: Outdoor Pipe Temperature Sensor Abnormality (F40-21)
19.22 Outdoor Pipe Temperature Sensor Abnormality (F40-21) Malfunction Decision Conditions • During startup and operation of cooling and heating, the temperatures detected by the outdoor pipe temperature sensor are used to determine sensor errors. Malfunction Caused • Faulty connector connection. •... -
Page 264: Outdoor Defrost Temperature Sensor Abnormality (F40-31)
19.23 Outdoor Defrost Temperature Sensor Abnormality (F40-31) Malfunction Decision Conditions • During startup and operation of cooling and heating, the temperatures detected by the outdoor defrost temperature sensor are used to determine sensor errors. Malfunction Caused • Faulty connector connection. •... -
Page 265: Compressor Discharge Temperature Sensor Abnormality (F40-51)
19.24 Compressor Discharge Temperature Sensor Abnormality (F40-51) Malfunction Decision Conditions • During startup and operation of cooling and heating, the temperatures detected by the compressor discharge temperature sensor are used to determine sensor errors. Malfunction Caused • Faulty connector connection. •... -
Page 266: Outdoor High Pressure Switch Disconnect Abnormality (F41-02)
19.25 Outdoor High Pressure Switch Disconnect Abnormality (F41-02) Malfunction Decision Conditions • During compressor stop, when the outdoor unit high pressure switch is open for 1 minute. Malfunction Caused • Faulty connector connection. • Faulty outdoor unit high pressure switch. •... -
Page 267: Outdoor Low Pressure Switch Disconnect Abnormality (F41-12)
19.26 Outdoor Low Pressure Switch Disconnect Abnormality (F41-12) Malfunction Decision Conditions • During compressor stop, when the outdoor unit low pressure switch is open for 1 minute. Malfunction Caused • Faulty connector connection. • Faulty outdoor unit high pressure switch. •... -
Page 268: Outdoor Current Transformer Open Circuit (F42-11)
19.27 Outdoor Current Transformer Open Circuit (F42-11) Malfunction Decision Conditions • A current transformer (CT) open circuit is detected by checking the compressor running frequency (> 50Hz) and CT detected input current (< 1.6A) for continuously 60 seconds. Malfunction Caused •... -
Page 269: Ipm Temperature Sensor Abnormality (F44-01)
19.28 IPM Temperature Sensor Abnormality (F44-01) Malfunction Decision Conditions • During startup and operation of cooling and heating, the temperatures detected by the IPM temperature sensor are used to determine sensor errors. Malfunction Caused • Faulty indoor unit PCB (main). Abnormality Judgment •... -
Page 270: Outdoor Address Double Registration (F45-01)
19.29 Outdoor Address Double Registration (F45-01) Malfunction Decision Conditions • During standby, startup and operation of cooling and heating, the outdoor unit detects the same address as that of its own on any other outdoor unit of same urban network. Malfunction Caused •... -
Page 271: Technical Data
20. Technical Data 20.1 Operation Characteristic • The numbers of indoor unit connectable to one outdoor unit is shown in tables below, but the total cooling capacity of indoor unit combination must be 50% to 130% of outdoor unit cooling capacity. 14.6 Total indoor capacity (kW) Rated... -
Page 272: Capacity And Power Input
20.2 Capacity and Power Input 20.2.1 U-4LAE5 cooling capacity curve cooling power input curve U-4LA1E5 U-4LA1E5 indoor air temperature(℃WB) 23℃ 19℃ 15℃ 23℃ 19℃ 15℃ indoor air temperature(℃WB) outdoor air temperature(℃DB) outdoor air temperature(℃DB) heating capacity curve heating power input curve U-4LA1E5 U-4LA1E5 indoor air temperature(℃DB) - Page 273 20.2.2 U-5LA1E5 cooling power input curve cooling capacity curve U-5LA1E5 U-5LA1E5 indoor air temperature(℃WB) 23℃ 19℃ 15℃ 23℃ 19℃ 15℃ indoor air temperature(℃WB) outdoor air temperature(℃DB) outdoor air temperature(℃DB) heating capacity curve heating power input curve U-5LA1E5 U-5LA1E5 indoor air temperature(℃DB) 16℃...
- Page 274 20.2.3 U-6LA1E5 cooling capacity curve cooling power input curve U-6LA1E5 U-6LA1E5 indoor air temperature(℃WB) 23℃ 19℃ 15℃ 23℃ 19℃ 15℃ indoor air temperature(℃WB) outdoor air temperature(℃DB) outdoor air temperature(℃DB) heating power input curve heating capacity curve U-6LA1E5 U-6LA1E5 indoor air temperature(℃DB) indoor air temperature(℃DB) 16℃...
-
Page 275: Sensible Heat Capacity Table
20.3 Sensible Heat Capacity Table 20.3.1 U-4LA1E5 Connection indoor units:S-28KA1E5 x 4 units (an example) TC:Total Capacity (kW)、PI:Power Input (kW) Combination 100% Outdoor Indoor Air Temperature (°CWB) 14.0 16.0 18.0 19.0 20.0 22.0 24.0 Temp. (°CDB) 7.56 0.71 9.02 0.95 10.5 1.20 11.2... - Page 276 20.3.2 U-5LA1E5 Connection indoor units:S-71KA1E5 x 2 units (an example) TC:Total Capacity (kW)、PI:Power Input (kW) Combination 100% Outdoor Indoor Air Temperature (°CWB) 14.0 16.0 18.0 19.0 20.0 22.0 24.0 Temp. (°CDB) 9.45 1.83 11.3 2.07 13.1 2.32 14.0 2.45 14.9 2.58 16.7 2.85...
- Page 277 20.3.3 U-6LA1E5 Connection indoor units:S-22KA1E5 x 2 units + S-56KA1E5 x 2 units (an example) TC:Total Capacity (kW)、PI:Power Input (kW) Combination 100% Outdoor Indoor Air Temperature (°CWB) 14.0 16.0 18.0 19.0 20.0 22.0 24.0 Temp. (°CDB) 10.5 2.66 12.5 2.90 14.5...
-
Page 278: Cooling Capacity Tables
20.4 Cooling Capacity Tables 20.4.1 U-4LA1E5 Combination 130% TC:Total Capacity (kW)、PI:Power Input (kW) Capacity index(kW) 14.56 Outdoor Indoor Air Temperature (°CDB) Air Temp. 14.0 16.0 18.0 19.0 20.0 22.0 24.0 (°CWB) 9.83 1.51 11.7 1.75 13.6 2.00 14.6 2.13 15.5 2.26 16.6 2.53... - Page 279 Combination 110% TC:Total Capacity (kW)、PI:Power Input (kW) Capacity index(kW) 12.32 Outdoor Indoor Air Temperature (°CDB) Air Temp. 14.0 16.0 18.0 19.0 20.0 22.0 24.0 (°CWB) 8.31 1.15 9.92 1.39 11.5 1.64 12.3 1.77 13.1 1.90 14.7 2.17 16.3 2.44 8.31 1.17 9.92 1.41...
- Page 280 Combination 90% TC:Total Capacity (kW)、PI:Power Input (kW) Capacity index(kW) 10.08 Outdoor Indoor Air Temperature (°CDB) Air Temp. 14.0 16.0 18.0 19.0 20.0 22.0 24.0 (°CWB) 6.80 0.65 8.11 0.80 9.42 0.89 10.1 0.95 10.7 1.00 12.0 1.11 13.4 1.22 6.80 0.68 8.11 0.83...
- Page 281 Combination 70% TC:Total Capacity (kW)、PI:Power Input (kW) Capacity index(kW) 7.84 Outdoor Indoor Air Temperature (°CDB) Air Temp. 14.0 16.0 18.0 19.0 20.0 22.0 24.0 (°CWB) 5.29 0.53 6.31 0.62 7.33 0.71 7.84 0.77 8.35 0.82 9.37 0.93 10.4 1.04 5.29 0.54 6.31 0.63...
- Page 282 Combination 50% TC:Total Capacity (kW)、PI:Power Input (kW) Capacity index(kW) 5.60 Outdoor Indoor Air Temperature (°CDB) Air Temp. 14.0 16.0 18.0 19.0 20.0 22.0 24.0 (°CWB) 3.78 0.42 4.51 0.51 5.24 0.60 5.60 0.66 5.96 0.71 6.69 0.82 7.42 0.93 3.78 0.42 4.51 0.52...
- Page 283 20.4.2 U-5LA1E5 Combination 130% TC:Total Capacity (kW)、PI:Power Input (kW) Capacity index(kW) 18.20 Outdoor Indoor Air Temperature (°CDB) Air Temp. 14.0 16.0 18.0 19.0 20.0 22.0 24.0 (°CWB) 12.3 2.44 14.7 2.68 17.0 2.93 18.2 3.06 19.1 3.19 19.6 3.46 20.0 3.73 12.3 2.48...
- Page 284 Combination 110% TC:Total Capacity (kW)、PI:Power Input (kW) Capacity index(kW) 15.40 Outdoor Indoor Air Temperature (°CDB) Air Temp. 14.0 16.0 18.0 19.0 20.0 22.0 24.0 (°CWB) 10.4 1.93 12.4 2.17 14.4 2.42 15.4 2.55 16.4 2.68 18.4 2.95 19.3 3.22 10.4 1.96 12.4 2.20...
- Page 285 Combination 90% TC:Total Capacity (kW)、PI:Power Input (kW) Capacity index(kW) 12.60 Outdoor Indoor Air Temperature (°CDB) Air Temp. 14.0 16.0 18.0 19.0 20.0 22.0 24.0 (°CWB) 8.50 1.63 10.1 1.96 11.8 2.05 12.6 2.11 13.4 2.16 15.1 2.27 16.7 2.38 8.50 1.69 10.1 1.99...
- Page 286 Combination 70% TC:Total Capacity (kW)、PI:Power Input (kW) Capacity index(kW) 9.80 Outdoor Indoor Air Temperature (°CDB) Air Temp. 14.0 16.0 18.0 19.0 20.0 22.0 24.0 (°CWB) 6.61 1.23 7.89 1.56 9.16 1.65 9.80 1.71 10.4 1.76 11.7 1.87 13.0 1.98 6.61 1.28 7.89 1.58...
- Page 287 Combination 50% TC:Total Capacity (kW)、PI:Power Input (kW) Capacity index(kW) 7.00 Outdoor Indoor Air Temperature (°CDB) Air Temp. 14.0 16.0 18.0 19.0 20.0 22.0 24.0 (°CWB) 4.72 0.85 5.63 0.94 6.54 1.03 7.00 1.09 7.46 1.14 8.37 1.25 9.28 1.36 4.72 0.85 5.63 0.95...
- Page 288 20.4.3 U-6LA1E5 Combination 130% TC:Total Capacity (kW)、PI:Power Input (kW) Capacity index(kW) 20.15 Outdoor Indoor Air Temperature (°CDB) Air Temp. 14.0 16.0 18.0 19.0 20.0 22.0 24.0 (°CWB) 13.6 3.02 16.2 3.26 18.8 3.51 20.2 3.64 20.4 3.77 20.9 4.04 21.4 4.31 13.6 3.04...
- Page 289 Combination 110% TC:Total Capacity (kW)、PI:Power Input (kW) Capacity index(kW) 17.05 Outdoor Indoor Air Temperature (°CDB) Air Temp. 14.0 16.0 18.0 19.0 20.0 22.0 24.0 (°CWB) 11.5 2.96 13.7 3.20 15.9 3.45 17.1 3.58 18.2 3.71 20.2 3.98 20.6 4.25 11.5 2.98 13.7 3.22...
- Page 290 Combination 90% TC:Total Capacity (kW)、PI:Power Input (kW) Capacity index(kW) 13.95 Outdoor Indoor Air Temperature (°CDB) Air Temp. 14.0 16.0 18.0 19.0 20.0 22.0 24.0 (°CWB) 9.41 2.36 11.2 2.46 13.0 2.55 14.0 2.61 14.9 2.74 16.7 3.01 18.5 3.28 9.41 2.40 11.2 2.50...
- Page 291 Combination 70% TC:Total Capacity (kW)、PI:Power Input (kW) Capacity index(kW) 10.85 Outdoor Indoor Air Temperature (°CDB) Air Temp. 14.0 16.0 18.0 19.0 20.0 22.0 24.0 (°CWB) 7.32 1.76 8.73 1.85 10.1 1.94 10.9 2.00 11.6 2.13 13.0 2.40 14.4 2.67 7.32 1.78 8.73 1.88...
- Page 292 Combination 50% TC:Total Capacity (kW)、PI:Power Input (kW) Capacity index(kW) 7.75 Outdoor Indoor Air Temperature (°CDB) Air Temp. 14.0 16.0 18.0 19.0 20.0 22.0 24.0 (°CWB) 5.23 1.18 6.24 1.27 7.25 1.36 7.75 1.42 8.25 1.47 9.26 1.58 10.3 1.69 5.23 1.18 6.24 1.28...
- Page 293 20.4.4 KA1E5 / KA1E5S Series Indoor Unit: S-22KA1E5, S-22KA1E5S TC:Total Capacity (kW)、SHC:Sensible Heat Capacity (kW) Nominal Capacity (kW) 2.2 Outdoor Indoor Air Temperature Air Temp. 14.0WB 16.0WB 18.0WB 19.0WB 20.0WB 22.0WB 24.0WB (°CDB) 20.0DB 23.0DB 26.0DB 27.0DB 28.0DB 30.0DB 32.0DB Indoor Unit: S-28KA1E5, S-28KA1E5S TC:Total Capacity (kW)、SHC:Sensible Heat Capacity (kW)
- Page 294 Indoor Unit: S-36KA1E5, S-36KA1E5S TC:Total Capacity (kW)、SHC:Sensible Heat Capacity (kW) Nominal Capacity (kW) 3.6 Outdoor Indoor Air Temperature Air Temp. 14.0WB 16.0WB 18.0WB 19.0WB 20.0WB 22.0WB 24.0WB (°CDB) 20.0DB 23.0DB 26.0DB 27.0DB 28.0DB 30.0DB 32.0DB Indoor Unit: S-45KA1E5, S-45KA1E5S TC:Total Capacity (kW)、SHC:Sensible Heat Capacity (kW) Nominal Capacity (kW) 4.5 Outdoor Indoor Air Temperature...
- Page 295 Indoor Unit: S-56KA1E5 TC:Total Capacity (kW)、SHC:Sensible Heat Capacity (kW) Nominal Capacity (kW) 5.6 Outdoor Indoor Air Temperature Air Temp. 14.0WB 16.0WB 18.0WB 19.0WB 20.0WB 22.0WB 24.0WB (°CDB) 20.0DB 23.0DB 26.0DB 27.0DB 28.0DB 30.0DB 32.0DB Indoor Unit: S-63KA1E5 TC:Total Capacity (kW)、SHC:Sensible Heat Capacity (kW) Nominal Capacity (kW) 6.3 Outdoor Indoor Air Temperature...
- Page 296 Indoor Unit: S-71KA1E5 TC:Total Capacity (kW)、SHC:Sensible Heat Capacity (kW) Nominal Capacity (kW) 7.1 Outdoor Indoor Air Temperature Air Temp. 14.0WB 16.0WB 18.0WB 19.0WB 20.0WB 22.0WB 24.0WB (°CDB) 20.0DB 23.0DB 26.0DB 27.0DB 28.0DB 30.0DB 32.0DB...
- Page 297 20.4.5 YA1E5 Series Indoor Unit: S-22YA1E5 TC:Total Capacity (kW)、SHC:Sensible Heat Capacity (kW) Nominal Capacity (kW) 2.2 Outdoor Indoor Air Temperature Air Temp. 14.0WB 16.0WB 18.0WB 19.0WB 20.0WB 22.0WB 24.0WB (°CDB) 20.0DB 23.0DB 26.0DB 27.0DB 28.0DB 30.0DB 32.0DB Indoor Unit: S-28YA1E5 TC:Total Capacity (kW)、SHC:Sensible Heat Capacity (kW) Nominal Capacity (kW) 2.8 Outdoor...
- Page 298 Indoor Unit: S-36YA1E5 TC:Total Capacity (kW)、SHC:Sensible Heat Capacity (kW) Nominal Capacity (kW) 3.6 Outdoor Indoor Air Temperature Air Temp. 14.0WB 16.0WB 18.0WB 19.0WB 20.0WB 22.0WB 24.0WB (°CDB) 20.0DB 23.0DB 26.0DB 27.0DB 28.0DB 30.0DB 32.0DB Indoor Unit: S-45YA1E5 TC:Total Capacity (kW)、SHC:Sensible Heat Capacity (kW) Nominal Capacity (kW) 4.5 Outdoor Indoor Air Temperature...
- Page 299 Indoor Unit: S-56YA1E5 TC:Total Capacity (kW)、SHC:Sensible Heat Capacity (kW) Nominal Capacity (kW) 5.6 Outdoor Indoor Air Temperature Air Temp. 14.0WB 16.0WB 18.0WB 19.0WB 20.0WB 22.0WB 24.0WB (°CDB) 20.0DB 23.0DB 26.0DB 27.0DB 28.0DB 30.0DB 32.0DB...
- Page 300 20.4.6 UA1E5 Series Indoor Unit: S-63UA1E5 TC:Total Capacity (kW)、SHC:Sensible Heat Capacity (kW) Nominal Capacity (kW) 6.3 Outdoor Indoor Air Temperature Air Temp. 14.0WB 16.0WB 18.0WB 19.0WB 20.0WB 22.0WB 24.0WB (°CDB) 20.0DB 23.0DB 26.0DB 27.0DB 28.0DB 30.0DB 32.0DB Indoor Unit: S-71UA1E5 TC:Total Capacity (kW)、SHC:Sensible Heat Capacity (kW) Nominal Capacity (kW) 7.1 Outdoor...
- Page 301 Indoor Unit: S-90UA1E5 TC:Total Capacity (kW)、SHC:Sensible Heat Capacity (kW) Nominal Capacity (kW) 9.0 Outdoor Indoor Air Temperature Air Temp. 14.0WB 16.0WB 18.0WB 19.0WB 20.0WB 22.0WB 24.0WB (°CDB) 20.0DB 23.0DB 26.0DB 27.0DB 28.0DB 30.0DB 32.0DB 10.8 11.8 10.8 11.7 10.8 11.5 10.8 11.4 10.8...
- Page 302 20.4.7 NA1E5 Series Indoor Unit: S-22NA1E5 TC:Total Capacity (kW)、SHC:Sensible Heat Capacity (kW) Nominal Capacity (kW) 2.2 Outdoor Indoor Air Temperature Air Temp. 14.0WB 16.0WB 18.0WB 19.0WB 20.0WB 22.0WB 24.0WB (°CDB) 20.0DB 23.0DB 26.0DB 27.0DB 28.0DB 30.0DB 32.0DB Indoor Unit: S-28NA1E5 TC:Total Capacity (kW)、SHC:Sensible Heat Capacity (kW) Nominal Capacity (kW) 2.8 Outdoor...
- Page 303 Indoor Unit: S-32NA1E5 TC:Total Capacity (kW)、SHC:Sensible Heat Capacity (kW) Nominal Capacity (kW) 3.2 Outdoor Indoor Air Temperature Air Temp. 14.0WB 16.0WB 18.0WB 19.0WB 20.0WB 22.0WB 24.0WB (°CDB) 20.0DB 23.0DB 26.0DB 27.0DB 28.0DB 30.0DB 32.0DB Indoor Unit: S-36NA1E5 TC:Total Capacity (kW)、SHC:Sensible Heat Capacity (kW) Nominal Capacity (kW) 3.6 Outdoor Indoor Air Temperature...
- Page 304 Indoor Unit: S-45NA1E5 TC:Total Capacity (kW)、SHC:Sensible Heat Capacity (kW) Nominal Capacity (kW) 4.5 Outdoor Indoor Air Temperature Air Temp. 14.0WB 16.0WB 18.0WB 19.0WB 20.0WB 22.0WB 24.0WB (°CDB) 20.0DB 23.0DB 26.0DB 27.0DB 28.0DB 30.0DB 32.0DB Indoor Unit: S-56NA1E5 TC:Total Capacity (kW)、SHC:Sensible Heat Capacity (kW) Nominal Capacity (kW) 5.6 Outdoor Indoor Air Temperature...
- Page 305 20.4.8 MA1E5 Series Indoor Unit: S-45MA1E5 TC:Total Capacity (kW)、SHC:Sensible Heat Capacity (kW) Nominal Capacity (kW) 4.5 Outdoor Indoor Air Temperature Air Temp. 14.0WB 16.0WB 18.0WB 19.0WB 20.0WB 22.0WB 24.0WB (°CDB) 20.0DB 23.0DB 26.0DB 27.0DB 28.0DB 30.0DB 32.0DB Indoor Unit: S-56MA1E5 TC:Total Capacity (kW)、SHC:Sensible Heat Capacity (kW) Nominal Capacity (kW) 5.6 Outdoor...
- Page 306 Indoor Unit: S-63MA1E5 TC:Total Capacity (kW)、SHC:Sensible Heat Capacity (kW) Nominal Capacity (kW) 6.3 Outdoor Indoor Air Temperature Air Temp. 14.0WB 16.0WB 18.0WB 19.0WB 20.0WB 22.0WB 24.0WB (°CDB) 20.0DB 23.0DB 26.0DB 27.0DB 28.0DB 30.0DB 32.0DB Indoor Unit: S-71MA1E5 TC:Total Capacity (kW)、SHC:Sensible Heat Capacity (kW) Nominal Capacity (kW) 7.1 Outdoor Indoor Air Temperature...
- Page 307 Indoor Unit: S-90MA1E5 TC:Total Capacity (kW)、SHC:Sensible Heat Capacity (kW) Nominal Capacity (kW) 9.0 Outdoor Indoor Air Temperature Air Temp. 14.0WB 16.0WB 18.0WB 19.0WB 20.0WB 22.0WB 24.0WB (°CDB) 20.0DB 23.0DB 26.0DB 27.0DB 28.0DB 30.0DB 32.0DB 10.8 11.8 10.8 11.7 10.8 11.5 10.8 11.4 10.8...
-
Page 308: Heating Capacity Tables
20.5 Heating Capacity Tables 20.5.1 U-4LA1E5 Combination 130% TC:Total Capacity (kW)、PI:Power Input (kW) Capacity index(kW) 16.25 Outdoor Indoor Air Temperature (°CDB) Air Temp. 16.0 18.0 20.0 21.0 22.0 24.0 (°CWB) 11.7 3.67 11.7 3.76 11.7 3.85 11.6 3.89 11.6 3.94 11.6 3.65 12.3... - Page 309 Combination 110% TC:Total Capacity (kW)、PI:Power Input (kW) Capacity index(kW) 13.75 Outdoor Indoor Air Temperature (°CDB) Air Temp. 16.0 18.0 20.0 21.0 22.0 24.0 (°CWB) 11.6 3.94 11.6 4.03 11.6 4.12 11.6 4.16 11.6 4.21 11.5 3.92 12.2 4.04 12.2 4.12 12.2 4.20 12.2...
- Page 310 Combination 90% TC:Total Capacity (kW)、PI:Power Input (kW) Capacity index(kW) 11.25 Outdoor Indoor Air Temperature (°CDB) Air Temp. 16.0 18.0 20.0 21.0 22.0 24.0 (°CWB) 11.6 4.24 11.5 4.32 11.3 4.23 10.9 4.15 10.5 4.08 9.80 3.94 12.2 4.18 12.0 4.04 11.3 3.96 10.9...
- Page 311 Combination 70% TC:Total Capacity (kW)、PI:Power Input (kW) Capacity index(kW) 8.75 Outdoor Indoor Air Temperature (°CDB) Air Temp. 16.0 18.0 20.0 21.0 22.0 24.0 (°CWB) 9.87 3.39 9.31 3.24 8.75 3.09 8.47 3.01 8.19 2.94 7.63 2.80 9.87 3.18 9.31 3.04 8.75 2.90 8.47...
- Page 312 Combination 50% TC:Total Capacity (kW)、PI:Power Input (kW) Capacity index(kW) 6.25 Outdoor Indoor Air Temperature (°CDB) Air Temp. 16.0 18.0 20.0 21.0 22.0 24.0 (°CWB) 7.05 2.38 6.65 2.23 6.25 2.08 6.05 2.00 5.85 1.93 5.45 1.79 7.05 2.24 6.65 2.10 6.25 1.96 6.05...
- Page 313 20.5.2 U-5LA1E5 Combination 130% TC:Total Capacity (kW)、PI:Power Input (kW) Capacity index(kW) 20.80 Outdoor Indoor Air Temperature (°CDB) Air Temp. 16.0 18.0 20.0 21.0 22.0 24.0 (°CWB) 12.7 5.38 12.7 5.47 12.6 5.56 12.6 5.60 12.6 5.65 12.6 5.36 13.4 5.47 13.3 5.55 13.3...
- Page 314 Combination 110% TC:Total Capacity (kW)、PI:Power Input (kW) Capacity index(kW) 17.60 Outdoor Indoor Air Temperature (°CDB) Air Temp. 16.0 18.0 20.0 21.0 22.0 24.0 (°CWB) 12.6 5.39 12.6 5.48 12.6 5.57 12.5 5.61 12.5 5.66 12.5 5.37 13.3 5.48 13.2 5.56 13.2 5.64 13.2...
- Page 315 Combination 90% TC:Total Capacity (kW)、PI:Power Input (kW) Capacity index(kW) 14.40 Outdoor Indoor Air Temperature (°CDB) Air Temp. 16.0 18.0 20.0 21.0 22.0 24.0 (°CWB) 12.5 4.90 12.5 4.75 12.5 4.60 12.5 4.52 12.4 4.45 12.4 4.31 13.2 4.95 13.2 4.81 13.1 4.67 13.1...
- Page 316 Combination 70% TC:Total Capacity (kW)、PI:Power Input (kW) Capacity index(kW) 11.20 Outdoor Indoor Air Temperature (°CDB) Air Temp. 16.0 18.0 20.0 21.0 22.0 24.0 (°CWB) 12.4 4.06 11.9 3.91 11.2 3.76 10.8 3.68 10.5 3.61 9.76 3.47 12.6 4.11 11.9 3.97 11.2 3.83 10.8...
- Page 317 Combination 50% TC:Total Capacity (kW)、PI:Power Input (kW) Capacity index(kW) 8.00 Outdoor Indoor Air Temperature (°CDB) Air Temp. 16.0 18.0 20.0 21.0 22.0 24.0 (°CWB) 9.03 2.78 8.51 2.63 8.00 2.48 7.74 2.40 7.49 2.33 6.97 2.19 9.03 2.64 8.51 2.50 8.00 2.36 7.74...
- Page 318 20.5.3 U-6LA1E5 Combination 130% TC:Total Capacity (kW)、PI:Power Input (kW) Capacity index(kW) 23.40 Outdoor Indoor Air Temperature (°CDB) Air Temp. 16.0 18.0 20.0 21.0 22.0 24.0 (°CWB) 13.0 5.90 12.9 5.99 12.9 6.08 12.9 6.12 12.8 6.17 12.8 5.88 13.6 5.99 13.6 6.07 13.6...
- Page 319 Combination 110% TC:Total Capacity (kW)、PI:Power Input (kW) Capacity index(kW) 19.80 Outdoor Indoor Air Temperature (°CDB) Air Temp. 16.0 18.0 20.0 21.0 22.0 24.0 (°CWB) 12.9 5.93 12.8 6.02 12.8 6.11 12.8 6.15 12.8 6.20 12.7 5.91 13.5 6.02 13.5 6.10 13.5 6.18 13.4...
- Page 320 Combination 90% TC:Total Capacity (kW)、PI:Power Input (kW) Capacity index(kW) 16.20 Outdoor Indoor Air Temperature (°CDB) Air Temp. 16.0 18.0 20.0 21.0 22.0 24.0 (°CWB) 12.7 5.58 12.7 5.43 12.7 5.28 12.7 5.20 12.7 5.13 12.6 4.99 13.4 5.63 13.4 5.49 13.4 5.35 13.3...
- Page 321 Combination 70% TC:Total Capacity (kW)、PI:Power Input (kW) Capacity index(kW) 12.60 Outdoor Indoor Air Temperature (°CDB) Air Temp. 16.0 18.0 20.0 21.0 22.0 24.0 (°CWB) 12.6 4.58 12.6 4.43 12.6 4.28 12.2 4.20 11.8 4.13 11.0 3.99 13.3 4.63 13.3 4.49 12.6 4.35 12.2...
- Page 322 Combination 50% TC:Total Capacity (kW)、PI:Power Input (kW) Capacity index(kW) 9.00 Outdoor Indoor Air Temperature (°CDB) Air Temp. 16.0 18.0 20.0 21.0 22.0 24.0 (°CWB) 10.2 3.11 9.58 2.96 9.00 2.81 8.71 2.73 8.42 2.66 7.84 2.52 10.2 2.97 9.58 2.83 9.00 2.69 8.71...
- Page 323 20.5.4 KA1E5 / KA1E5S Series Indoor Unit: S-22KA1E5, S-22KA1E5S Nominal Capacity (kW) 2.5 Outdoor Indoor Air Temperature (°CDB) Air Temp. 16.0 18.0 20.0 21.0 22.0 24.0 (°CDB) (°CWB) -14.7 -15.0 -12.6 -13.0 -10.5 -11.0 -9.5 -10.0 -8.5 -9.1 -7.0 -7.6 -5.0...
- Page 324 Indoor Unit: S-36KA1E5, S-36KA1E5S Nominal Capacity (kW) 4.2 Outdoor Indoor Air Temperature (°CDB) Air Temp. 16.0 18.0 20.0 21.0 22.0 24.0 (°CDB) (°CWB) -14.7 -15.0 -12.6 -13.0 -10.5 -11.0 -9.5 -10.0 -8.5 -9.1 -7.0 -7.6 -5.0 -5.6 -3.0 -3.7 -0.7 11.0 13.0 11.8...
- Page 325 Indoor Unit: S-56KA1E5 Nominal Capacity (kW) 6.4 Outdoor Indoor Air Temperature (°CDB) Air Temp. 16.0 18.0 20.0 21.0 22.0 24.0 (°CDB) (°CWB) -14.7 -15.0 -12.6 -13.0 -10.5 -11.0 -9.5 -10.0 -8.5 -9.1 -7.0 -7.6 -5.0 -5.6 -3.0 -3.7 -0.7 11.0 13.0 11.8 15.0...
- Page 326 Indoor Unit: S-71KA1E5 Nominal Capacity (kW) 8.0 Outdoor Indoor Air Temperature (°CDB) Air Temp. 16.0 18.0 20.0 21.0 22.0 24.0 (°CDB) (°CWB) -14.7 -15.0 -12.6 -13.0 -10.5 -11.0 -9.5 -10.0 -8.5 -9.1 -7.0 -7.6 -5.0 -5.6 -3.0 -3.7 -0.7 11.0 13.0 11.8 15.0...
- Page 327 20.5.5 YA1E5 Series Indoor Unit: S-22YA1E5 Nominal Capacity (kW) 2.5 Outdoor Indoor Air Temperature (°CDB) Air Temp. 16.0 18.0 20.0 21.0 22.0 24.0 (°CDB) (°CWB) -14.7 -15.0 -12.6 -13.0 -10.5 -11.0 -9.5 -10.0 -8.5 -9.1 -7.0 -7.6 -5.0 -5.6 -3.0 -3.7 -0.7 11.0...
- Page 328 Indoor Unit: S-36YA1E5 Nominal Capacity (kW) 4.2 Outdoor Indoor Air Temperature (°CDB) Air Temp. 16.0 18.0 20.0 21.0 22.0 24.0 (°CDB) (°CWB) -14.7 -15.0 -12.6 -13.0 -10.5 -11.0 -9.5 -10.0 -8.5 -9.1 -7.0 -7.6 -5.0 -5.6 -3.0 -3.7 -0.7 11.0 13.0 11.8 15.0...
- Page 329 Indoor Unit: S-56YA1E5 Nominal Capacity (kW) 6.4 Outdoor Indoor Air Temperature (°CDB) Air Temp. 16.0 18.0 20.0 21.0 22.0 24.0 (°CDB) (°CWB) -14.7 -15.0 -12.6 -13.0 -10.5 -11.0 -9.5 -10.0 -8.5 -9.1 -7.0 -7.6 -5.0 -5.6 -3.0 -3.7 -0.7 11.0 13.0 11.8 15.0...
- Page 330 20.5.6 UA1E5 Series Indoor Unit: S-63UA1E5 Nominal Capacity (kW) 7.1 Outdoor Indoor Air Temperature (°CDB) Air Temp. 16.0 18.0 20.0 21.0 22.0 24.0 (°CDB) (°CWB) -14.7 -15.0 -12.6 -13.0 -10.5 -11.0 -9.5 -10.0 -8.5 -9.1 -7.0 -7.6 -5.0 -5.6 -3.0 -3.7 -0.7 11.0...
- Page 331 Indoor Unit: S-90UA1E5 Nominal Capacity (kW) 10.0 Outdoor Indoor Air Temperature (°CDB) Air Temp. 16.0 18.0 20.0 21.0 22.0 24.0 (°CDB) (°CWB) -14.7 -15.0 -12.6 -13.0 -10.5 -11.0 -9.5 -10.0 -8.5 -9.1 -7.0 -7.6 -5.0 -5.6 -3.0 -3.7 -0.7 10.2 10.1 10.0 10.5...
- Page 332 20.5.7 NA1E5 Series Indoor Unit: S-22NA1E5 Nominal Capacity (kW) 2.5 Outdoor Indoor Air Temperature (°CDB) Air Temp. 16.0 18.0 20.0 21.0 22.0 24.0 (°CDB) (°CWB) -14.7 -15.0 -12.6 -13.0 -10.5 -11.0 -9.5 -10.0 -8.5 -9.1 -7.0 -7.6 -5.0 -5.6 -3.0 -3.7 -0.7 11.0...
- Page 333 Indoor Unit: S-32NA1E5 Nominal Capacity (kW) 3.6 Outdoor Indoor Air Temperature (°CDB) Air Temp. 16.0 18.0 20.0 21.0 22.0 24.0 (°CDB) (°CWB) -14.7 -15.0 -12.6 -13.0 -10.5 -11.0 -9.5 -10.0 -8.5 -9.1 -7.0 -7.6 -5.0 -5.6 -3.0 -3.7 -0.7 11.0 13.0 11.8 15.0...
- Page 334 Indoor Unit: S-45NA1E5 Nominal Capacity (kW) 5.1 Outdoor Indoor Air Temperature (°CDB) Air Temp. 16.0 18.0 20.0 21.0 22.0 24.0 (°CDB) (°CWB) -14.7 -15.0 -12.6 -13.0 -10.5 -11.0 -9.5 -10.0 -8.5 -9.1 -7.0 -7.6 -5.0 -5.6 -3.0 -3.7 -0.7 11.0 13.0 11.8 15.0...
- Page 335 20.5.8 MA1E5 Series Indoor Unit: S-45MA1E5 Nominal Capacity (kW) 5.1 Outdoor Indoor Air Temperature (°CDB) Air Temp. 16.0 18.0 20.0 21.0 22.0 24.0 (°CDB) (°CWB) -14.7 -15.0 -12.6 -13.0 -10.5 -11.0 -9.5 -10.0 -8.5 -9.1 -7.0 -7.6 -5.0 -5.6 -3.0 -3.7 -0.7 11.0...
- Page 336 Indoor Unit: S-63MA1E5 Nominal Capacity (kW) 7.1 Outdoor Indoor Air Temperature (°CDB) Air Temp. 16.0 18.0 20.0 21.0 22.0 24.0 (°CDB) (°CWB) -14.7 -15.0 -12.6 -13.0 -10.5 -11.0 -9.5 -10.0 -8.5 -9.1 -7.0 -7.6 -5.0 -5.6 -3.0 -3.7 -0.7 11.0 13.0 11.8 15.0...
- Page 337 Indoor Unit: S-90MA1E5 Nominal Capacity (kW) 10.0 Outdoor Indoor Air Temperature (°CDB) Air Temp. 16.0 18.0 20.0 21.0 22.0 24.0 (°CDB) (°CWB) -14.7 -15.0 -12.6 -13.0 -10.5 -11.0 -9.5 -10.0 -8.5 -9.1 -7.0 -7.6 -5.0 -5.6 -3.0 -3.7 -0.7 10.2 10.1 10.0 10.5...
-
Page 338: Combination Characteristic
20.6 Combination Characteristic • Calculation method of indoor unit capacity (an example) Outdoor unit:U-6LA1E5 Indoor unit:S-36KA1E5 x 2 + S-56KA1E5 + S-63KA1E5 Actual cooling capacity of S-56KA1E5: indoor rated cooling capacity(5.6kW) Cooling capacity(15.5kW)× = 4.54kW Total indoor rated cooling capacity(19.1kW) •... - Page 339 • Indoor heating capacity (kW) Indoor unit 0.8HP 1.0HP 1.25HP 1.5HP 1.75HP 2.0HP 2.5HP 3.0HP 3.5HP Heating capacity 2.5kW 3.2kW 3.6kW 4.2kW 5.1kW 6.4kW 7.1kW 8.0kW 10.0kW Wall mounted ○ ○ ○ ○ ○ ○ ○ Heating Mini cassette ○ ○...
- Page 340 6HP (an example of maximum kW) Outdoor unit: U-6LA1E5 (maximum combination capacity: 20.2kW) Indoor units: S-22KA1E5 (2.2kW) x 5 + S-28KA1E5 (2.8kW) x 2 + S-36KA1E5 (3.6kW) Total capacity of indoor units selected: 20.2kW 6HP (an example of maximum kW) Outdoor unit: U-6LA1E5 (maximum combination capacity: 7.8kW)
-
Page 341: Air Flow Volume
20.7 Air Flow Volume 20.7.1 Wall Mounted Type Indoor Unit S-22KA1E5 (S) S-28KA1E5 (S) S-36KA1E5 (S) S-45KA1E5 (S) /min 10.9 11.3 Cooling /min /min /min 10.3 10.9 11.6 12.1 Heating /min 10.2 10.6 /min S-56KA1E5 S-63KA1E5 S-71KA1E5 /min 15.3 16.0 17.4... - Page 342 S-22YA1E5 Airflow direction:20° 1. Cooling Hi Air velocity distribution 1m/sec over 0.5~1m/sec 0~0.5m/sec Reaching distance(m) 2. Cooling Me Air velocity distribution 1m/sec over 0.5~1m/sec 0~0.5m/sec Reaching distance(m) 3. Cooling Lo Air velocity distribution 1m/sec over 0.5~1m/sec 0~0.5m/sec Reaching distance(m)...
- Page 343 Airflow direction:70° 1. Heating Hi Air velocity distribution 1m/sec over 0.5~1m/sec 0~0.5m/sec Reaching distance(m) 2. Heating Me Air velocity distribution 1m/sec over 0.5~1m/sec 0~0.5m/sec Reaching distance(m) 3. Heating Lo Air velocity distribution 1m/sec over 0.5~1m/sec 0~0.5m/sec Reaching distance(m)...
- Page 344 S-28YA1E5 Airflow direction:20° 1. Cooling Hi Air velocity distribution 1m/sec over 0.5~1m/sec 0~0.5m/sec Reaching distance(m) 2. Cooling Me Air velocity distribution 1m/sec over 0.5~1m/sec 0~0.5m/sec Reaching distance(m) 3. Cooling Lo Air velocity distribution 1m/sec over 0.5~1m/sec 0~0.5m/sec Reaching distance(m)...
- Page 345 Airflow direction:70° 1. Heating Hi Air velocity distribution 1m/sec over 0.5~1m/sec 0~0.5m/sec Reaching distance(m) 2. Heating Me Air velocity distribution 1m/sec over 0.5~1m/sec 0~0.5m/sec Reaching distance(m) 3. Heating Lo Air velocity distribution 1m/sec over 0.5~1m/sec 0~0.5m/sec Reaching distance(m)...
- Page 346 S-36YA1E5 Airflow direction:20° 1. Cooling Hi Air velocity distribution 1m/sec over 0.5~1m/sec 0~0.5m/sec Reaching distance(m) 2. Cooling Me Air velocity distribution 1m/sec over 0.5~1m/sec 0~0.5m/sec Reaching distance(m) 3. Cooling Lo Air velocity distribution 1m/sec over 0.5~1m/sec 0~0.5m/sec Reaching distance(m)...
- Page 347 Airflow direction:70° 1. Heating Hi Air velocity distribution 1m/sec over 0.5~1m/sec 0~0.5m/sec Reaching distance(m) 2. Heating Me Air velocity distribution 1m/sec over 0.5~1m/sec 0~0.5m/sec Reaching distance(m) 3. Heating Lo Air velocity distribution 1m/sec over 0.5~1m/sec 0~0.5m/sec Reaching distance(m)...
- Page 348 S-45YA1E5 Airflow direction:20° 1. Cooling Hi Air velocity distribution 1m/sec over 0.5~1m/sec 0~0.5m/sec Reaching distance(m) 2. Cooling Me Air velocity distribution 1m/sec over 0.5~1m/sec 0~0.5m/sec Reaching distance(m) 3. Cooling Lo Air velocity distribution 1m/sec over 0.5~1m/sec 0~0.5m/sec Reaching distance(m)...
- Page 349 Airflow direction:70° 1. Heating Hi Air velocity distribution 1m/sec over 0.5~1m/sec 0~0.5m/sec Reaching distance(m) 2. Heating Me Air velocity distribution 1m/sec over 0.5~1m/sec 0~0.5m/sec Reaching distance(m) 3. Heating Lo Air velocity distribution 1m/sec over 0.5~1m/sec 0~0.5m/sec Reaching distance(m)...
- Page 350 S-56YA1E5 Airflow direction:20° 1. Cooling Hi Air velocity distribution 1m/sec over 0.5~1m/sec 0~0.5m/sec Reaching distance(m) 2. Cooling Me Air velocity distribution 1m/sec over 0.5~1m/sec 0~0.5m/sec Reaching distance(m) 3. Cooling Lo Air velocity distribution 1m/sec over 0.5~1m/sec 0~0.5m/sec Reaching distance(m)...
- Page 351 Airflow direction:70° 1. Heating Hi Air velocity distribution 1m/sec over 0.5~1m/sec 0~0.5m/sec Reaching distance(m) 2. Heating Me Air velocity distribution 1m/sec over 0.5~1m/sec 0~0.5m/sec Reaching distance(m) 3. Heating Lo Air velocity distribution 1m/sec over 0.5~1m/sec 0~0.5m/sec Reaching distance(m)...
- Page 352 20.7.3 90 x 90 Cassette Type Indoor Unit S-63UA1E5 S-71UA1E5 S-90UA1E5 /min 21.0 22.0 22.0 /min 19.0 20.0 20.0 /min 17.0 18.0 18.0 S-63UA1E5 Airflow direction:20° 1. Cooling Hi Air velocity distribution 1m/sec over 0.5~1m/sec 0~0.5m/sec Reaching distance(m) 2. Cooling Me Air velocity distribution 1m/sec over 0.5~1m/sec...
- Page 353 Airflow direction:70° 1. Heating Hi Air velocity distribution 1m/sec over 0.5~1m/sec 0~0.5m/sec Reaching distance(m) 2. Heating Me Air velocity distribution 1m/sec over 0.5~1m/sec 0~0.5m/sec Reaching distance(m) 3. Heating Lo Air velocity distribution 1m/sec over 0.5~1m/sec 0~0.5m/sec Reaching distance(m)...
- Page 354 S-71UA1E5 Airflow direction:20° 1. Cooling Hi Air velocity distribution 1m/sec over 0.5~1m/sec 0~0.5m/sec Reaching distance(m) 2. Cooling Me Air velocity distribution 1m/sec over 0.5~1m/sec 0~0.5m/sec Reaching distance(m) 3. Cooling Lo Air velocity distribution 1m/sec over 0.5~1m/sec 0~0.5m/sec Reaching distance(m)...
- Page 355 Airflow direction:70° 1. Heating Hi Air velocity distribution 1m/sec over 0.5~1m/sec 0~0.5m/sec Reaching distance(m) 2. Heating Me Air velocity distribution 1m/sec over 0.5~1m/sec 0~0.5m/sec Reaching distance(m) 3. Heating Lo Air velocity distribution 1m/sec over 0.5~1m/sec 0~0.5m/sec Reaching distance(m)...
- Page 356 S-90UA1E5 Airflow direction:20° 1. Cooling Hi Air velocity distribution 1m/sec over 0.5~1m/sec 0~0.5m/sec Reaching distance(m) 2. Cooling Me Air velocity distribution 1m/sec over 0.5~1m/sec 0~0.5m/sec Reaching distance(m) 3. Cooling Lo Air velocity distribution 1m/sec over 0.5~1m/sec 0~0.5m/sec Reaching distance(m)...
- Page 357 Airflow direction:70° 1. Heating Hi Air velocity distribution 1m/sec over 0.5~1m/sec 0~0.5m/sec Reaching distance(m) 2. Heating Me Air velocity distribution 1m/sec over 0.5~1m/sec 0~0.5m/sec Reaching distance(m) 3. Heating Lo Air velocity distribution 1m/sec over 0.5~1m/sec 0~0.5m/sec Reaching distance(m)...
- Page 358 20.7.4 Slim Hide-Away Type Indoor Unit S-22NA1E5 3mmAq(29Pa) Standard air flow volume:H10.0、M9.0、L7.0m3/min 0mmAq(0Pa) 3mmAq(29Pa) 標準 10.0 29.4 20.6 14.7 下限 43.8 32.2 26.6 センター 10.0 29.4 20.6 14.7 上限 11.0 11.3 H 0mmAq(0Pa) M 標準 10.0 L 下限 23.2 17.2 16.2 センター...
- Page 359 S-32NA1E5 3mmAq(29Pa) Standard air flow volume:H11.0、M9.0、L7.0m3/min 0mmAq(0Pa) 3mmAq(29Pa) 標準 11.0 29.4 20.6 14.7 下限 43.8 32.1 26.6 センター 11.0 29.4 20.6 14.7 上限 12.1 11.4 H 0mmAq(0Pa) M 標準 11.0 L 下限 23.2 17.2 16.2 センター 11.0 上限 11.0 H L...
- Page 360 S-45NA1E5 3mmAq(29Pa) Standard air flow volume:H12.0、M10.0、L8.0m3/min 0mmAq(0Pa) 3mmAq(29Pa) 標準 12.0 29.4 10.0 20.6 14.7 下限 10.8 43.8 32.1 26.7 センター 12.0 29.4 10.0 20.6 14.7 上限 13.2 11.3 10.8 H 0mmAq(0Pa) M 標準 12.0 10.0 下限 10.8 23.2 17.2 16.2 L...
- Page 361 20.7.5 Low Static Pressure Hide-away Type Indoor Unit S-45MA1E5 Standard air flow volume:H15、M13、L11m3/min 5mmAq(49Pa) 5mmAq(49Pa) 7mmAq(69Pa) 標準 15.0 49.0 13.0 32.1 11.0 25.6 下限 13.5 74.1 12.0 57.2 10.2 47.8 センター 15.0 49.0 13.0 32.1 11.0 25.6 H 上限 16.5 11.1 14.0 11.6...
- Page 362 S-63MA1E5 Standard air flow volume:H17、M14、L12m3/min 5mmAq(49Pa) 5mmAq(49Pa) 7mmAq(69Pa) 標準 17.0 49.0 14.0 35.8 12.0 26.6 下限 15.3 77.4 13.0 59.2 11.2 49.8 センター 17.0 49.0 14.0 35.8 12.0 26.6 上限 18.7 12.1 15.0 12.6 H M 7mmAq(69Pa) H L M 標準...
- Page 363 S-90MA1E5 Standard air flow volume:H19、M17、L14m3/min 5mmAq(49Pa) 5mmAq(49Pa) 7mmAq(69Pa) 標準 19.0 49.0 17.0 39.5 14.0 26.9 下限 17.1 80.7 15.6 69.9 13.0 54.4 センター 19.0 49.0 17.0 39.5 14.0 26.9 上限 20.9 18.4 14.7 H M 7mmAq(69Pa) H L 標準 19.0 69.0 17.0 57.0...
-
Page 364: Sound Data
20.8 Sound Data 20.8.1 Wall Mounted Type Indoor Unit H ○━━○ S-28KA1E5、S-28KA1E5S H ○━━○ S-22KA1E5、S-22KA1E5S M △━━△ M △━━△ Octave Band Central Frequency(Hz) Octave Band Central Frequency(Hz) L □━━□ L □━━□ Frequency 50Hz Frequency 50Hz Fan Speed Fan Speed A-scale(dB) 40 33 A-scale(dB) C-scale(dB) C-scale(dB) C-scale(dB) - Page 365 H ○━━○ S-56KA1E5 S-63KA1E5 H ○━━○ M △━━△ M △━━△ Octave Band Central Frequency(Hz) Octave Band Central Frequency(Hz) L □━━□ L □━━□ Frequency 50Hz Frequency 50Hz Fan Speed Fan Speed A-scale(dB) 40 38 A-scale(dB) C-scale(dB) C-scale(dB) C-scale(dB) Back Ground Noise12dB Back Ground Noise12dB NC-60 NC-60 NC-50 NC-50 NC-40 NC-40...
- Page 366 20.8.2 60 x 60 Cassette Type Indoor Unit H ○━━○ S-22YA1E5 H ○━━○ S-28YA1E5 M △━━△ Octave Band Central Frequency(Hz) M △━━△ Octave Band Central Frequency(Hz) L □━━□ L □━━□ Frequency 50Hz Frequency 50Hz Fan Speed Fan Speed A-scale(dB) 40 33 A-scale(dB) C-scale(dB) C-scale(dB) C-scale(dB) Back Ground Noise12dB Back Ground Noise12dB NC-60 NC-60...
- Page 367 S-56YA1E5 H ○━━○ M △━━△ Octave Band Central Frequency(Hz) L □━━□ Frequency 50Hz Fan Speed A-scale(dB) 40 36 C-scale(dB) C-scale(dB) Back Ground Noise12dB NC-60 NC-50 NC-40 NC-30 NC-20 125 250 500 1000 2000 4000 8000 Frequency(Hz)
- Page 368 20.8.3 95 x 95 Cassette Type Indoor Unit H ○━━○ H ○━━○ S-63UA1E5(230V) S-71UA1E5(230V) M △━━△ M △━━△ Octave Band Central Frequency(Hz) Octave Band Central Frequency(Hz) L □━━□ L □━━□ Frequency 50Hz Frequency 50Hz Fan Speed Fan Speed A-scale(dB) 40 35 A-scale(dB) C-scale(dB) C-scale(dB) C-scale(dB) Back Ground Noise12dB Back Ground Noise12dB NC-60 NC-60...
- Page 369 20.8.4 Slim Hide-Away Type Indoor Unit H ○━━○ H ○━━○ S-28NA1E5(230V) S-22NA1E5(230V) M △━━△ M △━━△ Octave Band Central Frequency(Hz) Octave Band Central Frequency(Hz) L □━━□ L □━━□ Frequency 50Hz Frequency 50Hz Fan Speed Fan Speed A-scale(dB) 40 30 A-scale(dB) C-scale(dB) C-scale(dB) C-scale(dB) Back Ground Noise12dB Back Ground Noise12dB NC-60 NC-60...
- Page 370 H ○━━○ S-56NA1E5(230V) H ○━━○ S-45NA1E5(230V) M △━━△ M △━━△ Octave Band Central Frequency(Hz) Octave Band Central Frequency(Hz) L □━━□ L □━━□ Frequency 50Hz Frequency 50Hz Fan Speed Fan Speed A-scale(dB) 40 32 A-scale(dB) C-scale(dB) C-scale(dB) C-scale(dB) Back Ground Noise12dB Back Ground Noise12dB NC-60 NC-60 NC-50 NC-50 NC-40 NC-40...
- Page 371 20.8.5 Low Static Pressure Type Indoor Unit H ○━━○ H ○━━○ S-45MA1E5(230V) S-56MA1E5(230V) M △━━△ M △━━△ Octave Band Central Frequency(Hz) Octave Band Central Frequency(Hz) L □━━□ L □━━□ Frequency 50Hz Frequency 50Hz Fan Speed Fan Speed A-scale(dB) 40 35 A-scale(dB) C-scale(dB) C-scale(dB) C-scale(dB) Back Ground Noise12dB Back Ground Noise12dB NC-60 NC-60...
- Page 372 H ○━━○ S-90MA1E5(230V) M △━━△ Octave Band Central Frequency(Hz) L □━━□ Frequency 50Hz Fan Speed A-scale(dB) 40 37 C-scale(dB) C-scale(dB) Back Ground Noise12dB NC-60 NC-50 NC-40 NC-30 NC-20 125 250 500 1000 2000 4000 8000 Frequency(Hz)
- Page 373 20.8.6 Outdoor Unit H ○━━○ H ○━━○ U-4LA1E5(Heating) U-4LA1E5(Cooling) Frequency 50Hz Octave Band Central Frequency(Hz) Frequency 50Hz Octave Band Central Frequency(Hz) Fan Speed Fan Speed A-scale(dB) A-scale(dB) C-scale(dB) C-scale(dB) Back Ground Noise12dB Back Ground Noise12dB NC-60 NC-60 NC-50 NC-50 NC-40 NC-40 NC-30 NC-30 NC-20 NC-20...
- Page 374 H ○━━○ U-6LA1E5(Cooling) U-6LA1E5(Heating) H ○━━○ Frequency 50Hz Octave Band Central Frequency(Hz) Frequency 50Hz Octave Band Central Frequency(Hz) Fan Speed Fan Speed A-scale(dB) A-scale(dB) C-scale(dB) C-scale(dB) Back Ground Noise12dB Back Ground Noise12dB NC-60 NC-60 NC-50 NC-50 NC-40 NC-40 NC-30 NC-30 NC-20 NC-20 125 250 500 1000 2000 4000 8000 125 250 500 1000 2000 4000 8000 Frequency(Hz)
- Page 375 ※ 3 S-56KA1E5 44/38 44/38 microphone S-63KA1E5 46/39 46/39 S-71KA1E5 48/40 48/40 1・・・The external static pressure of sound measurement is 0mmAq (0Pa). ※ 2・・・The external static pressure of sound measurement is 5mmAq (49Pa). ※ 3・・・(for example) S-22KA1E5:white color、S-22KA1E5S:silver color. ※...
- Page 376 20.8.8 Outdoor Unit Measurement Specification 【dB(A)】 Cooling Heating microphone position 220/230/240V – 50Hz U-4LA1E5 1.0m U-5LA1E5 microphone 1.5m U-6LA1E5...
-
Page 377: Operation Range
21. Operation range Cooling Heating indoor air temperature(℃WB) indoor air temperature(℃DB) -
Page 378: Allowable Pipe Length
22. Allowable Pipe Length U-4LA1E5/5LA1E5/6LA1E5 Pipe connection example IN/OUT Allowable height 30m or less height difference difference IN/IN height 15m or less difference Total pipe Main1+Main2+Main3+Main4+Sub1+Sub2 20m~90m length +Sub3+Sub4+Sub5 Total pipe length of 40m or less Main1+Main2+Main3+Main4 Main pipe Total pipe length of Sub 50m or less Sub1+Sub2+Sub3+Sub4+Sub5... -
Page 379: Combination Catalogue
23. Combination Catalogue 23.1 Cooling 23.1.1 4HP(U-4LA1E5) Combination criteria 14.6 Total indoor capacity Rated 11.2 (kW) Total indoor unit number Combination (%) 50 ~ 130 Indoor 1.25 1.75 unit Wall ○ ○ ○ ○ ○ ○ ○ mounted Mini Total ○... - Page 380 12.8 12.6 12.4 12.2 11.6 14.6 14.6 14.5 14.5 14.5 14.5 14.4 14.4 14.4 14.3 14.3 14.2 14.1 14.1 14.1 13.9 13.9 13.8 13.7 13.7 13.7 13.6 13.6 13.6 13.5 13.5 13.4 13.4 13.3 13.2 13.2 13.2 13.1 13.1 12.9 12.9 12.8 12.8...
- Page 381 12.7 12.6 12.5 12.4 12.4 12.3 12.2 12.2 12.2 12.1 11.8 11.8 11.7 11.6 11.6 11.4 11.4 11.2 11.2 11.1 10.8 10.8 10.6 10.4 10.2 14.6 14.6 14.4 14.4 14.4 14.4 14.3 14.1 13.9 13.8 13.7 13.6 13.5 13.5 13.5 13.5 13.4 13.4...
- Page 382 13.3 13.1 13.1 12.9 12.9 12.8 12.7 12.7 12.7 12.6 12.5 12.4 12.3 12.3 12.2 12.1 12.1 11.9 11.8 11.7 11.7 11.6 11.5 11.4 11.3 11.3 11.2 11.2 10.9 10.9 10.8 10.7 10.6 10.5 10.4 10.3 10.1...
- Page 383 14.6 14.2 13.5 13.4 12.7 12.6 12.6 12.2 11.9 11.8 11.6 11.2 11.2 10.8 10.7 10.3 10.1...
-
Page 384: Heating
23.2 Heating 23.2.1 4HP(U-4LA1E5) Indoor 1.25 1.75 unit Wall ○ ○ ○ ○ ○ ○ ○ mounted Mini Total ○ ○ ○ ○ ○ Total cassette indoor indoor unit ○ ○ ○ capacity cassette number Duct D4 ○ ○ ○ ○... - Page 385 16.4 16.7 16.5 16.3 16.4 16.8 16.2 16.3 16.1 15.9 16.1 15.9 16.2 15.7 15.7 15.5 15.7 15.5 15.8 15.6 15.6 15.3 15.4 15.2 15.3 15.1 15.2 14.8 15.1 14.6 14.7 14.6 14.8 14.4 14.6 14.4 14.5 14.3 14.2 13.9 13.9 14.1 13.7...
- Page 386 13.3 13.5 13.3 13.4 13.2 13.1 12.9 12.8 12.8 12.6 12.5 12.4 12.2 12.1 11.8 11.7 11.4 11.1 10.7 16.4 16.6 16.1 16.3 16.4 16.4 16.4 15.7 15.8 15.8 15.6 15.7 15.4 15.4 15.2 15.5 15.3 15.3 15.1 14.9 14.8 14.7 14.7 14.7...
- Page 387 14.2 13.9 13.8 13.8 13.7 13.8 13.6 13.5 13.4 13.2 13.5 13.2 13.1 12.8 12.9 12.7 12.8 12.5 12.5 12.3 12.6 12.1 12.1 11.9 11.8 11.5 11.4 11.6 11.4 11.2 10.8 10.8 10.9 10.6 10.4 10.3 10.1 16.4...
- Page 388 15.1 15.1 14.4 14.2 14.2 13.6 13.5 13.2 13.1 12.5 12.8 12.2 12.2 11.6 11.5 11.3 11.2 10.7 10.5 10.6 10.3 10.2...
-
Page 389: Cooling
23.3 Cooling 23.3.1 5HP(U-5LA1E5) Combination criteria 18.2 Total indoor capacity Rated 14.0 (kW) Total indoor unit number Combination (%) 50 ~ 130 Indoor 1.25 1.75 unit Wall ○ ○ ○ ○ ○ ○ ○ mounted Mini Total ○ ○ ○ ○... - Page 390 17.9 17.9 17.9 17.8 17.8 17.8 17.8 17.8 17.7 17.6 17.6 17.6 17.6 17.6 17.5 17.4 17.4 17.4 17.3 17.3 17.2 17.2 17.2 17.2 17.2 17.1 16.9 16.8 16.8 16.8 16.7 16.6 16.6 16.6 16.5 16.4 16.4 16.2 16.2 16.2 16.1 15.8 15.8...
- Page 391 15.2 15.2 14.8 14.6 14.4 14.2 13.8 13.2 18.2 18.2 18.1 18.1 18.1 18.1 17.9 17.9 17.8 17.7 17.7 17.7 17.7 17.6 17.6 17.6 17.5 17.5 17.4 17.4 17.3 17.3 17.3 17.2 17.2 17.2 17.1 17.1 16.9 16.9 16.9 16.8 16.8 16.8 16.7...
- Page 392 16.4 16.4 16.3 16.3 16.2 16.1 16.1 15.9 15.8 15.7 15.6 15.6 15.6 15.6 15.6 15.5 15.4 15.4 15.4 15.3 15.3 15.2 15.2 15.2 15.1 15.1 14.9 14.8 14.8 14.8 14.7 14.6 14.6 14.5 14.4 14.4 14.4 14.4 14.3 14.2 13.9 13.8...
- Page 393 13.8 13.6 13.6 13.4 13.4 13.3 13.2 12.8 12.6 12.4 12.2 11.6 18.2 18.1 17.9 17.8 17.8 17.6 17.6 17.6 17.6 17.5 17.3 17.2 17.2 17.2 17.1 16.9 16.8 16.7 16.7 16.7 16.7 16.6 16.6 16.5 16.3 16.3 16.2 16.1 16.1 15.9 15.9...
- Page 394 15.9 15.8 15.7 15.6 15.6 15.6 15.6 15.5 15.5 15.5 15.5 15.4 15.4 15.3 15.3 15.3 15.2 15.2 15.2 15.1 15.1 15.1 14.9 14.9 14.9 14.9 14.8 14.8 14.8 14.7 14.7 14.6 14.6 14.5 14.5 14.5 14.5 14.4 14.4 14.4 14.3 14.3 14.2...
- Page 395 13.9 13.9 13.8 13.7 13.7 13.7 13.6 13.6 13.6 13.5 13.5 13.4 13.4 13.3 13.2 13.2 13.2 13.1 13.1 12.9 12.9 12.8 12.8 12.8 12.8 12.7 12.6 12.5 12.4 12.4 12.3 12.2 12.2 12.2 12.1 11.8 11.8 11.7 11.6 11.6 11.4 11.4 11.2...
- Page 396 10.8 10.8 10.6 10.4 10.2 17.8 17.4 16.7 16.6 15.9 15.8 15.8 15.6 15.5 15.5 15.4 15.4 15.4 15.3 15.2 15.1 14.9 14.8 14.8 14.8 14.8 14.7 14.6 14.6 14.4 14.4 14.4 14.4 14.3 14.1 13.9 13.8 13.7 13.6 13.5 13.5...
- Page 397 13.5 13.5 13.4 13.4 13.3 13.1 13.1 12.9 12.9 12.8 12.7 12.7 12.7 12.6 12.5 12.4 12.3 12.3 12.2 12.1 12.1 11.9 11.8 11.7 11.7 11.6 11.5 11.4 11.3 11.3 11.2 11.2 10.9 10.9 10.8 10.7 10.6 10.5 10.4 10.3 10.1...
- Page 398 15.3 14.6 14.2 13.5 13.4 12.7 12.6 12.6 12.2 11.9 11.8 11.6 11.2 11.2 10.8 10.7 10.3 10.1...
-
Page 399: Heating
23.4 Heating 23.4.1 5HP(U-5LA1E5) Indoor 1.25 1.75 unit Wall ○ ○ ○ ○ ○ ○ ○ mounted Mini Total ○ ○ ○ ○ ○ Total cassette indoor indoor unit ○ ○ ○ capacity cassette number Duct D4 ○ ○ ○ ○... - Page 400 20.1 20.2 20.2 19.8 20.1 19.7 19.9 19.6 19.7 19.6 19.6 19.4 19.8 19.6 19.4 19.5 19.5 19.3 19.3 19.2 19.2 18.9 18.9 18.9 18.7 18.8 18.6 18.5 18.3 18.5 18.3 18.4 18.2 17.9 18.1 17.8 17.8 17.6 17.5 17.4 17.2 17.1 16.8...
- Page 401 20.9 20.6 20.5 20.7 20.4 20.6 20.5 20.6 20.4 20.3 20.2 20.3 20.1 20.1 20.3 20.4 19.9 19.8 19.9 19.9 19.7 19.6 19.5 19.7 19.8 19.5 19.6 19.6 19.3 19.3 19.1 19.1 19.3 19.2 19.4 19.2 18.9 18.8 18.9 18.7 18.6 18.6 18.8...
- Page 402 18.4 18.1 17.9 17.6 17.7 17.8 17.8 17.6 17.5 17.5 17.7 17.3 17.5 17.2 17.6 17.4 17.1 17.2 17.1 16.9 17.3 17.1 16.9 16.8 16.8 16.5 16.7 16.5 16.4 16.6 16.4 16.4 16.2 16.3 15.8 15.8 15.9 15.7 15.4 15.6 15.3 15.3 15.1...
- Page 403 14.6 14.3 14.2 13.9 13.6 13.2 12.5 20.4 20.5 20.3 20.3 20.6 20.3 20.3 20.2 19.9 19.7 19.6 19.3 19.6 19.4 19.4 19.2 19.3 18.8 19.1 18.9 18.6 18.9 18.7 18.5 18.4 18.3 18.3 18.3 18.4 17.9 18.1 17.7 17.5 17.8 17.8 17.6...
- Page 404 17.5 17.7 17.6 17.4 17.6 17.4 17.7 17.3 17.2 17.4 17.2 17.1 17.2 17.2 17.3 16.8 17.1 16.9 16.9 16.8 16.6 16.7 16.7 16.6 16.4 16.5 16.7 16.5 16.3 16.4 16.8 16.2 16.3 16.1 16.3 15.9 16.1 16.2 15.9 15.7 15.7 15.5 15.5...
- Page 405 15.6 15.8 15.6 15.4 15.3 15.2 15.3 15.1 15.2 14.8 15.1 14.6 14.7 14.4 14.8 14.6 14.6 14.4 14.5 14.3 14.2 13.9 14.1 13.9 13.7 13.6 13.8 13.3 13.5 13.3 13.4 13.2 12.9 13.1 12.8 12.8 12.6 12.5 12.2 12.4 12.1 11.8 11.7...
- Page 406 10.7 19.6 18.7 18.7 17.8 17.8 17.6 17.7 17.6 17.2 17.4 17.4 17.3 17.3 17.1 16.8 16.9 16.7 16.7 16.7 16.7 16.4 16.6 16.1 16.4 16.3 16.4 16.4 15.8 15.7 15.8 15.6 15.7 15.4 15.2 15.4 15.5 15.3 15.3 15.1 14.9 14.8 14.7...
- Page 407 14.7 14.7 14.8 14.3 14.4 14.5 14.4 14.1 14.2 13.9 13.8 13.8 13.7 13.6 13.8 13.5 13.4 13.2 13.5 13.2 13.1 12.9 12.8 12.7 12.8 12.5 12.3 12.5 12.6 12.1 12.1 11.9 11.8 11.5 11.4 11.6 11.4 11.2 10.8 10.8 10.9 10.4 10.6...
- Page 408 17.1 16.4 15.1 15.1 14.4 14.2 14.2 13.6 13.5 13.2 13.1 12.5 12.8 12.2 12.2 11.6 11.5 11.3 11.2 10.7 10.5 10.6 10.3 10.2...
-
Page 409: Cooling
23.5 Cooling 23.5.1 6HP(U-6LA1E5) Combination criteria 20.2 Total indoor capacity Rated 15.5 (kW) Total indoor unit number Combination (%) 50 ~ 130 Indoor 1.25 1.75 unit Wall ○ ○ ○ ○ ○ ○ ○ mounted Mini Total ○ ○ ○ ○... - Page 410 19.7 19.7 19.6 19.6 19.6 19.6 19.5 19.5 19.4 19.4 19.4 19.4 19.4 19.3 19.2 19.2 19.1 18.9 18.8 18.8 18.8 18.8 18.7 18.6 18.6 18.4 18.4 18.4 18.3 18.2 18.2 17.8 17.8 17.7 17.6 17.4 17.4 17.2 16.8 16.6 16.4 15.4 20.2...
- Page 411 20.1 20.1 20.1 20.1 20.1 20.1 20.1 20.1 20.1 19.9 19.9 19.9 19.9 19.9 19.9 19.8 19.8 19.8 19.8 19.8 19.7 19.7 19.7 19.7 19.7 19.6 19.6 19.6 19.6 19.6 19.6 19.6 19.5 19.5 19.5 19.5 19.5 19.4 19.4 19.4 19.4 19.4 19.3...
- Page 412 19.3 19.3 19.3 19.3 19.2 19.2 19.2 19.2 19.2 19.2 19.2 19.1 19.1 19.1 18.9 18.9 18.9 18.9 18.9 18.8 18.8 18.8 18.8 18.8 18.8 18.7 18.7 18.7 18.7 18.6 18.6 18.6 18.6 18.6 18.5 18.5 18.5 18.5 18.4 18.4 18.4 18.4 18.4...
- Page 413 18.2 18.2 18.1 18.1 18.1 17.9 17.9 17.9 17.8 17.8 17.8 17.8 17.8 17.7 17.6 17.6 17.6 17.6 17.6 17.5 17.5 17.4 17.4 17.4 17.3 17.3 17.2 17.2 17.2 17.2 17.2 17.1 16.9 16.8 16.8 16.8 16.7 16.6 16.6 16.6 16.6 16.5 16.4...
- Page 414 16.2 16.2 16.1 15.8 15.8 15.6 15.6 15.5 15.4 15.2 15.2 14.8 14.6 14.4 14.2 13.8 13.2 20.2 20.2 20.2 20.2 20.2 20.2 20.2 20.2 20.2 20.1 20.1 20.1 20.1 20.1 20.1 19.9 19.9 19.9 19.9 19.9 19.9 19.9...
- Page 415 19.9 19.9 19.8 19.8 19.8 19.8 19.8 19.8 19.8 19.8 19.7 19.7 19.7 19.7 19.7 19.6 19.6 19.6 19.6 19.6 19.6 19.5 19.5 19.5 19.5 19.5 19.5 19.5 19.4 19.4 19.4 19.4 19.4 19.4 19.3 19.3 19.3 19.3 19.3 19.3 19.3 19.2 19.2...
- Page 416 19.1 19.1 19.1 19.1 19.1 19.1 18.9 18.9 18.9 18.9 18.9 18.9 18.8 18.8 18.8 18.8 18.8 18.8 18.7 18.7 18.7 18.7 18.7 18.7 18.6 18.6 18.6 18.6 18.5 18.5 18.5 18.5 18.5 18.5 18.5 18.5 18.4 18.4 18.4 18.4 18.4 18.4 18.4...
- Page 417 18.3 18.3 18.3 18.3 18.2 18.2 18.2 18.2 18.1 18.1 18.1 18.1 18.1 18.1 17.9 17.9 17.9 17.9 17.9 17.9 17.8 17.8 17.8 17.8 17.8 17.7 17.7 17.7 17.7 17.7 17.7 17.6 17.6 17.6 17.6 17.6 17.5 17.5 17.5 17.5 17.4 17.4 17.4...
- Page 418 17.3 17.3 17.3 17.3 17.3 17.2 17.2 17.2 17.2 17.2 17.1 17.1 17.1 17.1 16.9 16.9 16.9 16.9 16.8 16.8 16.8 16.8 16.8 16.7 16.7 16.7 16.7 16.6 16.6 16.6 16.5 16.5 16.5 16.5 16.4 16.4 16.4 16.4 16.4 16.3 16.3 16.3 16.2...
- Page 419 16.1 15.9 15.9 15.9 15.8 15.8 15.8 15.7 15.7 15.7 15.6 15.6 15.6 15.6 15.6 15.5 15.4 15.4 15.4 15.3 15.3 15.2 15.2 15.2 15.1 15.1 14.9 14.8 14.8 14.8 14.7 14.6 14.6 14.5 14.4 14.4 14.4 14.4 14.3 14.2 14.2...
- Page 420 13.9 13.8 13.8 13.6 13.6 13.4 13.4 13.3 13.2 12.8 12.6 12.4 12.2 11.6 20.2 20.2 20.2 20.2 20.2 20.1 19.9 19.9 19.9 19.9 19.8 19.8 19.8 19.8 19.8 19.8 19.7 19.7 19.7 19.6 19.6 19.6 19.6 19.5 19.5...
- Page 421 19.4 19.4 19.4 19.4 19.3 19.3 19.3 19.3 19.2 19.2 19.2 19.1 19.1 19.1 19.1 19.1 18.9 18.9 18.9 18.9 18.8 18.8 18.7 18.7 18.6 18.6 18.6 18.6 18.6 18.5 18.5 18.5 18.5 18.4 18.4 18.4 18.4 18.4 18.3 18.3 18.3 18.3 18.2...
- Page 422 18.2 18.2 18.2 18.1 18.1 17.9 17.9 17.9 17.9 17.8 17.8 17.8 17.7 17.7 17.6 17.6 17.6 17.6 17.6 17.6 17.6 17.5 17.5 17.5 17.4 17.4 17.4 17.3 17.3 17.2 17.2 17.2 17.2 17.2 17.1 17.1 17.1 17.1 17.1...
- Page 423 16.9 16.9 16.8 16.8 16.8 16.8 16.7 16.7 16.7 16.7 16.6 16.6 16.6 16.6 16.5 16.5 16.5 16.4 16.4 16.3 16.3 16.3 16.3 16.3 16.3 16.2 16.2 16.2 16.2 16.1 16.1 15.9 15.9 15.9 15.9 15.8 15.8 15.7 15.7 15.7 15.7 15.7 15.6...
- Page 424 15.5 15.5 15.4 15.4 15.3 15.3 15.3 15.2 15.2 15.2 15.1 15.1 15.1 14.9 14.9 14.9 14.9 14.8 14.8 14.8 14.7 14.7 14.6 14.6 14.5 14.5 14.5 14.5 14.4 14.4 14.4 14.3 14.3 14.2 14.2 14.1 14.1 14.1 13.9 13.9 13.8 13.7 13.7...
- Page 425 13.6 13.6 13.5 13.5 13.4 13.4 13.3 13.2 13.2 13.2 13.1 13.1 12.9 12.9 12.8 12.8 12.8 12.8 12.7 12.6 12.5 12.4 12.4 12.3 12.2 12.2 12.2 12.1 11.8 11.8 11.7 11.6 11.6 11.4 11.4 11.2 11.2 11.1 10.8 10.8 10.6 10.4 10.2...
- Page 426 20.2 20.2 19.8 19.8 19.7 19.7 19.3 19.1 18.9 18.9 18.9 18.7 18.5 18.3 18.3 18.2 18.2 18.1 17.9 17.8 17.8 17.5 17.5 17.4 17.4 17.2 17.1 17.1 16.8 16.8 16.7 16.6 16.4 16.4 16.3 16.3 16.2 16.2 16.2 16.1 15.9 15.8 15.8...
- Page 427 15.6 15.5 15.5 15.4 15.4 15.4 15.3 15.2 15.1 14.9 14.8 14.8 14.8 14.8 14.7 14.6 14.6 14.4 14.4 14.4 14.4 14.3 14.1 13.9 13.8 13.7 13.6 13.5 13.5 13.5 13.5 13.4 13.4 13.3 13.1 13.1 12.9 12.9 12.8 12.7 12.7 12.7 12.6...
- Page 428 12.3 12.3 12.2 12.1 12.1 11.9 11.8 11.7 11.7 11.6 11.5 11.4 11.3 11.3 11.2 11.2 10.9 10.9 10.8 10.7 10.6 10.5 10.4 10.3 10.1 16.1 15.3...
- Page 429 14.6 14.2 13.5 13.4 12.7 12.6 12.6 1000 12.2 1001 11.9 1002 11.8 1003 11.6 1004 11.2 1005 11.2 1006 10.8 1007 10.7 1008 10.3 1009 10.1 1010 1011 1012 1013 1014 1015 1016 1017 1018 1019 1020 1021...
- Page 430 23.6 Heating 23.6.1 6HP(U-6LA1E5) Indoor 1.25 1.75 unit Wall ○ ○ ○ ○ ○ ○ ○ mounted Mini Total ○ ○ ○ ○ ○ Total cassette indoor indoor unit ○ ○ ○ capacity cassette number Duct D4 ○ ○ ○ ○...
- Page 431 21.9 22.1 22.3 22.1 21.9 21.8 21.8 21.7 21.5 21.7 21.5 21.4 21.4 21.6 21.4 21.2 21.1 21.3 20.8 20.8 20.7 20.9 20.4 20.6 20.3 20.3 20.1 19.9 19.7 19.6 19.3 19.2 18.9 18.6 18.2 17.5 23.1 23.5 22.7 22.9 22.7 22.9 22.8...
- Page 432 22.7 22.8 22.8 22.8 23.2 22.5 22.8 22.5 22.6 22.8 22.6 22.6 22.7 22.9 22.4 22.6 22.5 22.7 22.3 22.3 22.7 22.4 22.4 22.4 22.2 22.4 22.2 22.2 22.4 22.3 22.1 22.2 22.2 22.4 22.3 22.1 22.5 22.3 22.1 21.8 21.9 21.9 22.1...
- Page 433 22.2 21.6 21.8 21.7 21.7 21.9 21.7 21.6 21.7 21.4 21.5 21.5 21.7 21.5 21.3 21.4 21.2 21.8 21.4 21.6 21.2 21.2 21.3 21.4 21.1 21.3 21.1 21.5 21.3 21.1 20.9 21.1 21.2 20.8 21.2 20.7 20.8 20.7 20.7 20.9 20.5 20.5 20.5...
- Page 434 20.6 20.3 20.4 20.4 20.3 20.1 20.2 20.5 20.3 20.1 20.2 20.2 19.8 19.7 20.1 19.9 19.6 19.7 19.6 19.4 19.6 19.6 19.8 19.4 19.5 19.3 19.5 19.3 19.2 19.2 18.9 19.1 18.9 18.9 18.7 18.6 18.8 18.5 18.3 18.5 18.3 18.2 18.4...
- Page 435 17.8 17.6 17.5 17.2 17.4 17.1 16.8 16.7 16.4 16.1 15.7 22.8 22.8 22.8 23.1 23.1 22.9 22.8 22.9 23.1 23.1 22.6 22.9 22.8 22.5 22.7 22.8 22.6 23.2 22.6 22.7 22.8 22.7 22.9 22.6 22.5 22.4 22.8 22.7 22.6 22.7 22.5 22.2...
- Page 436 22.4 22.7 22.5 22.3 22.5 22.3 22.4 22.2 22.6 22.3 22.3 22.1 22.4 22.1 22.2 22.3 22.1 22.1 22.4 21.9 21.8 22.1 22.2 22.1 21.9 22.2 21.9 22.1 21.9 22.1 21.7 22.2 21.7 21.7 21.8 21.8 21.6 21.5 21.9 21.7 21.7 21.7 21.8...
- Page 437 21.8 21.4 21.6 21.7 21.6 21.5 21.4 21.5 21.3 21.9 21.1 21.4 21.4 21.4 21.6 21.3 21.2 21.1 21.4 21.3 21.4 21.2 21.2 21.5 21.1 21.3 20.9 21.1 21.2 21.1 20.8 20.8 21.1 21.2 20.7 20.8 20.7 20.8 20.8 20.9 20.9 20.6 20.6...
- Page 438 20.5 20.7 20.4 20.9 20.7 20.6 20.5 20.6 20.4 20.4 20.5 20.3 20.2 20.4 20.3 20.4 20.2 20.3 20.3 20.5 20.1 20.1 20.3 20.2 20.1 20.4 19.9 20.1 20.2 19.8 19.9 20.2 19.9 19.7 19.9 19.7 19.8 19.6 19.5 19.7 19.9 19.7 19.7...
- Page 439 19.6 19.6 19.3 19.4 19.5 19.3 19.4 19.5 19.1 19.1 19.3 19.2 19.2 19.4 19.2 19.1 19.2 18.9 19.2 18.8 18.9 19.3 18.7 18.7 18.8 18.9 18.6 18.6 18.8 18.8 18.4 18.5 18.6 18.7 18.4 18.5 18.2 18.5 18.3 18.2 18.2 18.4 18.2...
- Page 440 18.1 18.3 18.1 17.9 17.8 17.9 17.6 17.7 17.8 17.8 17.6 17.5 17.5 17.7 17.3 17.5 17.2 17.6 17.4 17.1 17.2 17.1 16.9 17.3 17.1 16.9 16.8 16.8 16.5 16.7 16.5 16.4 16.6 16.4 16.4 16.2 16.1 16.3 15.8 15.8 15.9 15.7 15.4...
- Page 441 15.3 15.1 14.7 14.9 14.6 14.3 14.2 13.9 13.6 13.2 12.5 22.9 22.8 22.7 22.8 22.7 22.5 22.7 22.7 22.8 22.8 22.3 22.8 22.5 22.5 22.6 22.6 22.4 22.3 22.4 22.5 22.4 22.1 22.4 22.1 22.2 22.1 22.4 21.9 22.2 21.9 21.8 21.8...
- Page 442 21.8 21.7 21.8 21.6 21.8 21.9 21.5 21.7 21.4 21.4 21.5 21.6 21.6 21.4 21.7 21.2 21.5 21.4 21.5 21.2 21.5 21.2 21.3 20.8 21.1 20.9 21.1 20.8 21.1 20.9 20.8 20.9 20.9 21.2 20.7 20.9 20.7 20.8 20.4 20.6 20.6 20.8 20.5...
- Page 443 20.3 20.5 20.6 20.4 20.3 20.6 20.1 20.4 20.2 20.1 20.1 20.2 19.9 19.7 19.9 19.9 20.2 19.8 19.9 19.8 19.6 19.8 19.6 19.9 19.3 19.6 19.4 19.5 19.6 19.4 19.6 19.7 19.5 19.4 19.2 19.2 19.2 19.5 19.3 19.2 18.9 19.1 19.2...
- Page 444 19.1 18.9 18.6 18.9 18.8 18.9 18.7 18.9 18.9 18.6 18.5 18.7 18.5 18.5 18.4 18.6 18.3 18.6 18.2 18.5 18.3 18.3 18.4 18.1 17.9 18.2 18.1 17.9 17.7 17.9 17.8 17.9 17.5 17.8 17.8 17.6 17.5 17.7 17.6 17.4 17.6 17.4 17.7...
- Page 445 17.4 17.2 17.1 17.2 17.2 17.3 16.8 17.1 16.9 16.9 16.8 16.6 16.7 16.7 16.6 16.4 16.5 16.7 16.5 16.3 16.4 16.8 16.2 16.3 16.1 16.3 15.9 16.1 16.2 15.9 15.7 15.7 15.5 15.5 15.7 15.6 15.8 15.6 15.4 15.3 15.2 15.3 15.1...
- Page 446 15.2 14.8 15.1 14.6 14.7 14.4 14.8 14.6 14.6 14.4 14.5 14.3 14.2 13.9 14.1 13.9 13.7 13.6 13.8 13.3 13.5 13.3 13.4 13.2 12.9 13.1 12.8 12.8 12.6 12.5 12.2 12.4 12.1 11.8 11.7 11.4 11.1 10.7 22.5 22.8 22.2 22.4 22.2...
- Page 447 21.5 21.5 21.2 21.3 21.3 21.1 20.7 20.5 20.8 20.6 20.6 20.3 20.2 20.2 20.2 19.6 19.9 19.6 19.6 19.5 19.3 19.3 19.2 19.3 18.9 19.2 18.7 18.7 18.5 18.6 18.3 18.6 18.3 18.4 18.4 18.2 17.8 17.8 17.6 17.9 17.6 17.7 17.6...
- Page 448 17.1 16.8 16.9 16.7 16.7 16.7 16.7 16.4 16.6 16.1 16.3 16.4 16.4 16.4 15.7 15.8 15.8 15.6 15.7 15.4 15.4 15.5 15.3 15.2 15.3 15.1 14.9 14.8 14.7 14.7 14.7 14.8 14.4 14.5 14.3 14.4 14.1 14.2 13.9 13.8 13.8 13.7 13.8...
- Page 449 13.4 13.5 13.2 13.2 13.1 12.8 12.9 12.7 12.8 12.5 12.5 12.3 12.6 12.1 12.1 11.9 11.8 11.5 11.6 11.4 11.4 11.2 10.8 10.8 10.9 10.6 10.4 10.3 10.1 17.1 16.4 15.1 15.1 14.4 14.2 14.2 1000 13.6...
- Page 450 1001 13.5 1002 13.2 1003 13.1 1004 12.5 1005 12.8 1006 12.2 1007 12.2 1008 11.6 1009 11.5 1010 11.3 1011 11.2 1012 10.7 1013 10.5 1014 10.6 1015 10.3 1016 10.2 1017 1018 1019 1020 1021...
-
Page 451: Exploded View And Replacement Parts List
24. Exploded View and Replacement Parts List 24.1 Indoor Unit 24.1.1 S-22KA1E5 S-22KA1E5S S-28KA1E5 S-28KA1E5S S-36KA1E5 S-36KA1E5S S-45KA1E5 S-45KA1E5S CWH55025J CWH55051AJ Note The above exploded view is for the purpose of parts disassembly and replacement. The non-numbered parts are not kept as standard service parts. - Page 452 REF. PART NAME & DESCRIPTION S-22KA1E5 S-22KA1E5S REMARK CHASSY COMPLETE CWD50C1653 CWD50C1666 FAN MOTOR L6CBYYYL0058 L6CBYYYL0058 CROSS FLOW FAN COMPLETE CWH02C1076 CWH02C1076 BEARING ASS’Y CWH64K007 CWH64K007 SCREW - CROSS FLOW FAN CWH551146 CWH551146 EVAPORATOR CWB30C3135 CWB30C3135 FLARE NUT (LIQUID) CWT251030...
- Page 453 REF. PART NAME & DESCRIPTION S-28KA1E5 S-28KA1E5S REMARK CHASSY COMPLETE CWD50C1653 CWD50C1666 FAN MOTOR L6CBYYYL0058 L6CBYYYL0058 CROSS FLOW FAN COMPLETE CWH02C1076 CWH02C1076 BEARING ASS’Y CWH64K007 CWH64K007 SCREW - CROSS FLOW FAN CWH551146 CWH551146 EVAPORATOR CWB30C3136 CWB30C3136 FLARE NUT (LIQUID) CWT251030 CWT251030 FLARE NUT (GAS) CWT251032...
- Page 454 REF. PART NAME & DESCRIPTION S-36KA1E5 S-36KA1E5S REMARK CHASSY COMPLETE CWD50C1653 CWD50C1666 FAN MOTOR L6CBYYYL0058 L6CBYYYL0058 CROSS FLOW FAN COMPLETE CWH02C1076 CWH02C1076 BEARING ASS’Y CWH64K007 CWH64K007 SCREW - CROSS FLOW FAN CWH551146 CWH551146 EVAPORATOR CWB30C3136 CWB30C3136 FLARE NUT (LIQUID) CWT251030 CWT251030 FLARE NUT (GAS) CWT251032...
- Page 455 REF. PART NAME & DESCRIPTION S-45KA1E5 S-45KA1E5S REMARK CHASSY COMPLETE CWD50C1653 CWD50C1666 FAN MOTOR L6CBYYYL0058 L6CBYYYL0058 CROSS FLOW FAN COMPLETE CWH02C1076 CWH02C1076 BEARING ASS’Y CWH64K007 CWH64K007 SCREW - CROSS FLOW FAN CWH551146 CWH551146 EVAPORATOR CWB30C3136 CWB30C3136 FLARE NUT (LIQUID) CWT251030 CWT251030 FLARE NUT (GAS) CWT251032...
- Page 456 24.1.2 S-56KA1E5 S-63KA1E5 S-71KA1E5 CWH55025J CWH55051AJ Note The above exploded view is for the purpose of parts disassembly and replacement. The non-numbered parts are not kept as standard service parts.
- Page 457 REF. PART NAME & DESCRIPTION S-56KA1E5 S-63KA1E5 S-71KA1E5 REMARK CHASSY COMPLETE CWD50C1665 CWD50C1665 CWD50C1665 FAN MOTOR L6CBYYYL0057 L6CBYYYL0057 L6CBYYYL0057 CROSS FLOW FAN COMPLETE CWH02C1077 CWH02C1077 CWH02C1077 BEARING ASS’Y CWH64K007 CWH64K007 CWH64K007 SCREW - CROSS FLOW FAN CWH551146 CWH551146 CWH551146 EVAPORATOR CWB30C3141 CWB30C3151 CWB30C3160...
- Page 458 V-COIL COMPLETE CWA43C2371 CWA43C2371 CWA43C2371 DRAIN PAN CWH401062 CWH401062 CWH401062 (Note) All parts are supplied from PHAAM, Malaysia (Vendor Code: 00029488) “O” marked parts are recommended to be kept in stock.
- Page 459 24.1.3 S-22YA1E5 S-28YA1E5 S-36YA1E5 S-45YA1E5 S-56YA1E5 Note The above exploded view is for the purpose of parts disassembly and replacement. The non-numbered parts are not kept as standard service parts.
- Page 460 Note The above exploded view is for the purpose of parts disassembly and replacement. The non-numbered parts are not kept as standard service parts.
- Page 461 REF. PART NAME & DESCRIPTION S-22YA1E5 S-28YA1E5 S-36YA1E5 REMARK BASE PAN ASS’Y CWD52K1100 CWD52K1100 CWD52K1100 INNER POLYSTYRENE COMPLETE CWG07C1067 CWG07C1067 CWG07C1067 CABINET SIDE PLATE ASS’Y CWE041121 CWE041121 CWE041121 CABINET SIDE PLATE ASS’Y CWE041122 CWE041122 CWE041122 FAN MOTOR,DC 40W 3 PH L6CBYYYL0048 L6CBYYYL0048 L6CBYYYL0048...
- Page 462 REF. PART NAME & DESCRIPTION S-45YA1E5 S-56YA1E5 REMARK BASE PAN ASS’Y CWD52K1100 CWD52K1100 INNER POLYSTYRENE COMPLETE CWG07C1067 CWG07C1067 CABINET SIDE PLATE ASS’Y CWE041121 CWE041121 CABINET SIDE PLATE ASS’Y CWE041122 CWE041122 FAN MOTOR,DC 40W 3 PH L6CBYYYL0048 L6CBYYYL0048 ANTI-VIBRATION BUSHING CWH501105 CWH501105 CORD HOLDER CWD741024...
- Page 463 Note The above exploded view is for the purpose of parts disassembly and replacement. The non-numbered parts are not kept as standard service parts.
- Page 464 REF. PART DESCRIPTION PART NO. REMARK FRONT GRILLE - COMPLETE CWE11C4526 A.S MOTOR DC SINGLE 12V 250 OHM CWA981105J BRACKET - A.S.MOTOR CWD932522 VANE CWE241159 SHAFT CWH631038 SHAFT CWH631045 CONNECTOR - SHAFT CWH081007 BEARING CWH641008 PLATE COVER FOR A.S.MOTOR CWD911459 PLATE COVER FOR CONNECTING SHAFT CWD911460 PLATE COVER FOR END SHAFT...
- Page 465 24.1.4 S-63UA1E5 S-71UA1E5 S-90UA1E5 Note The above exploded view is for the purpose of parts disassembly and replacement. The non-numbered parts are not kept as standard service parts.
- Page 466 Note The above exploded view is for the purpose of parts disassembly and replacement. The non-numbered parts are not kept as standard service parts.
- Page 467 REF. PART NAME & DESCRIPTION S-63UA1E5 S-71UA1E5 S-90UA1E5 REMARK BASE PAN ASS'Y D52K1111 D52K1111 D52K1111 INNER POLYSTYRENE COMPLETE G07C1060 G07C1060 G07C1060 CABINET SIDE PLATE E041139 E041139 E041139 CABINET SIDE PLATE E041140 E041140 E041140 FAN MOTOR L6LAJYF00017 L6LAJYF00017 L6LAJYF00017 ANTI-VIBRATION BUSHING H501016 H501016 H501016...
- Page 468 RAY RECEIVER COMPLETE CWD91C0134 CWD91C0134 CWD91C0134 EXPANSION VALVE CWB051049 CWB051049 CWB051049 V-COIL COMPLETE A43C2388 A43C2388 A43C2388 CORD HOLDER D741022 D741022 D741022 OPERATING INSTRUCTION F567158 F567158 F567158 OPERATING INSTRUCTION F567159 F567159 F567159 INSTALLATION INSTRUCTION F614112 F614112 F614112 (Note) All parts are supplied from PHAAG, China. “O”...
- Page 469 24.1.5 S-22NA1E5 S-28NA1E5 S-32NA1E5 S-36NA1E5 S-45NA1E5 S-56NA1E5 Note The above exploded view is for the purpose of parts disassembly and replacement. The non-numbered parts are not kept as standard service parts.
- Page 470 REF. PART NAME & DESCRIPTION S-22NA1E5 S-28NA1E5 S-32NA1E5 REMARK CABINET TOP PLATE CWE03K1029 CWE03K1029 CWE03K1029 EVAPORATOR COMPLETE CWB30C3146 CWB30C3179 CWB30C3148 PIPE BRANCH (G ) CWT07K1364 CWT07K1364 CWT07K1376 PIPE BRANCH (L ) CWT01C5132 CWT01C5132 CWT01C5133 EXPANSION VALVE CWB051029 CWB051029 CWB051029 PARTICULAR PLATE(LEFT) CWD91C0016 CWD91C0016 CWD91C0016...
- Page 471 REF. PART NAME & DESCRIPTION S-36NA1E5 S-45NA1E5 S-56NA1E5 REMARK CABINET TOP PLATE CWE03K1029 CWE03K1029 CWE03K1029 EVAPORATOR COMPLETE CWB30C3148 CWB30C3148 CWB30C3148 PIPE BRANCH (G ) CWT07K1376 CWT07K1376 CWT07K1376 PIPE BRANCH (L ) CWT01C5133 CWT01C5133 CWT01C5133 EXPANSION VALVE CWB051029 CWB051029 CWB051029 PARTICULAR PLATE(LEFT) CWD91C0016 CWD91C0016 CWD91C0016...
- Page 472 24.1.6 S-45MA1E5 S-56MA1E5 S-63MA1E5 S-71MA1E5 S-90MA1E5 Note The above exploded view is for the purpose of parts disassembly and replacement. The non-numbered parts are not kept as standard service parts.
- Page 473 QUANTITY PER 1 UNIT REMARK REF. PART NAME PARTS NUMBER S-45MA1E5 S-56MA1E5 PANEL BOTTOM P42-T04150 DRAIN PAN ASSY P42-T04460 STAY DRAIN PAN ASSY P45-T09250 PANEL SIDE L ASSY P42-T04390 PANEL TOP ASSY P42-T03740R PANEL SIDE R ASSY P42-T04280 FAN BASE P45-T07690R FAN BRACKET L P02-T07890R...
- Page 474 QUANTITY PER 1 UNIT REMARK REF. PART NAME PARTS NUMBER S-63MA1E5 S-71MA1E5 S-90MA1E5 PANEL BOTTOM P42-T04160 DRAIN PAN ASSY P42-T04470 STAY DRAIN PAN ASSY P45-T08740 PANEL SIDE L ASSY P42-T04290 PANEL TOP ASSY P42-T03750R PANEL SIDE R ASSY P42-T04280 FAN BASE ASSY P45-T08850 FAN BRACKET L P02-T07890R...
- Page 475 24.1.7 U-4LA1E5-1 U-5LA1E5-1 U-6LA1E5-1 U-4LA1E5 U-5LA1E5 U-6LA1E5 Note The above exploded view is for the purpose of parts disassembly and replacement. The non-numbered parts are not kept as standard service parts.
- Page 476 Note The above exploded view is for the purpose of parts disassembly and replacement. The non-numbered parts are not kept as standard service parts.
- Page 477 Note The above exploded view is for the purpose of parts disassembly and replacement. The non-numbered parts are not kept as standard service parts.
- Page 478 REF. PART NAME & DESCRIPTION U-4LA1E5-1 U-5LA1E5-1 U-6LA1E5-1 REMARK BASE PAN ASS'Y CWD52K1164A CWD52K1164A CWD52K1164A COMPRESSOR CWB092390 CWB092390 CWB092390 ANTI-VIBRATION BUSHING CWH50055 CWH50055 CWH50055 CWH561049 CWH561049 CWH561049 PARTICULAR PLATE CWD911471 CWD911471 CWD911471 HEATER CWA341037 CWA341037 CWA341037 FIN & TUBE CONDENSER COMPLETE CWB32C2896 CWB32C2887 CWB32C2887...
- Page 479 ELECTRONIC CONTROLLER- CWA73C4043 CWA73C4044 CWA73C4045 COMPLETE(MAIN)) CABINET REAR PLATE-COMPLETE CWE02C1045 CWE02C1045 CWE02C1045 L-SHAPED PLATE CWD601123A CWD601123A CWD601123A REACTOR G0C123J00005 G0C123J00005 G0C123J00005 PARTICULAR PLATE-A'SSY CWD90K1030 CWD90K1030 CWD90K1030 LEAD WIRE-COMPLETE CWA67C8373 CWA67C8373 CWA67C8373 TERMINAL COVER CWH171032 CWH171032 CWH171032 CW7080300J CW7080300J CW7080300J SOUND PROOF MATERIAL CWG302420 CWG302420 CWG302420...
- Page 480 REF. PART NAME & DESCRIPTION U-4LA1E5 U-5LA1E5 U-6LA1E5 REMARK BASE PAN ASS'Y CWD52K1164A CWD52K1164A CWD52K1164A COMPRESSOR CWB092390 CWB092390 CWB092390 ANTI-VIBRATION BUSHING CWH50055 CWH50055 CWH50055 CWH561049 CWH561049 CWH561049 PARTICULAR PLATE CWD911471 CWD911471 CWD911471 HEATER CWA341037 CWA341037 CWA341037 FIN & TUBE CONDENSER COMPLETE CWB32C2896 CWB32C2887 CWB32C2887...
- Page 481 ELECTRONIC CONTROLLER- CWA73C4043 CWA73C4044 CWA73C4045 COMPLETE(MAIN)) CABINET REAR PLATE-COMPLETE CWE02C1045 CWE02C1045 CWE02C1045 L-SHAPED PLATE CWD601123A CWD601123A CWD601123A REACTOR G0C123J00005 G0C123J00005 G0C123J00005 PARTICULAR PLATE-A'SSY CWD90K1030 CWD90K1030 CWD90K1030 LEAD WIRE-COMPLETE CWA67C8373 CWA67C8373 CWA67C8373 TERMINAL COVER CWH171032 CWH171032 CWH171032 CW7080300J CW7080300J CW7080300J SOUND PROOF MATERIAL CWG302421 CWG302421 CWG302421...