
Related Manuals for Digital Watchdog VMAX HD


Summary of Contents for Digital Watchdog VMAX HD
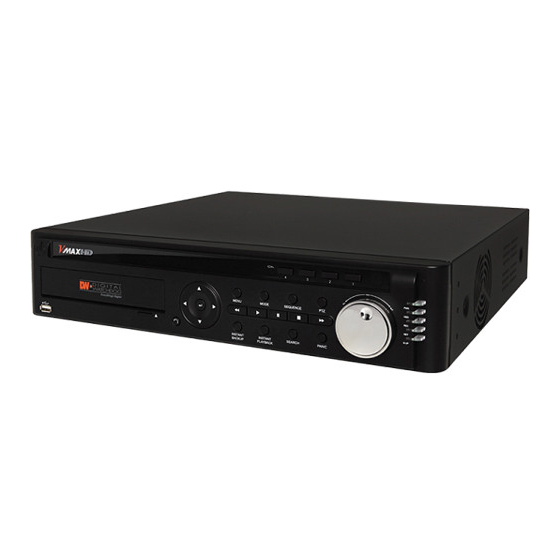
- Page 1 H.264 HD-SDI 1080P Resolution Digital Video Recorder User’s Manual VER. 2.0 Future of Digital Video Recording at Hand...
-
Page 2: Safety Information
User Manual | 2 Safety Information The safety information is provided for the wellness of the equipment and for the safety of the operator. Please review and observe all instructions and warnings in this manual. Note : Keep this manual handy every time you operate this equipment. Also, check with your dealer for further assistance and for the latest revision of this manual. -
Page 3: Table Of Contents
3 | H.264 HD Digital Video Recorder TABLE OF CONTENTS 1 : DVR U HAPTER ANUAL 1. GETTING STARTED ....................# 1.1 Checking Supplied Items ................... # 1.2 DVR Features ......................# 1.3 System Startup and Shutdown .................. # 1.1.1 System Startup ....................# 1.1.2 System Login ..................... - Page 4 User Manual | 4 2.7.6 Event Log ......................# 3. SETTINGS ........................# 3.1 System ........................# 3.1.1 System Info ......................# 3.1.2 User ........................# 3.1.3 Export/ Import ....................# 3.1.4 HDD ........................# 3.1.5 Factory Default ....................# 3.2 D ........................
-
Page 5: H.264 Hd Digital Video Recorder
5 | H.264 HD Digital Video Recorder 3 : C HAPTER LIENT OFTWARE ANUAL 5. CLIENT SOFTWARE USER GUIDE ..............# 5.1 PC Requirements ......................# 5.2 Install ........................# 5.3 Uninstall ........................# 5.4 Basic Operation ......................# 5.4.1 Network Connection ................... # 5.4.2 Screen Layout for Live Mode ................ - Page 6 User Manual | 6 Chapter 1 DVR U ANUAL...
-
Page 7: Getting Started
Getting Started 1.1 Checking Supplied Items Verify you have the following items supplied with your DVR. If any of these items are missing or damaged, notify your vendor immediately. Do not dispose of the packing utilities in case of moving or storage purposes. Items Photo Quantity... -
Page 8: Dvr Features
User Manual | 8 1.2 DVR Features H.264 Video Compression Recording & Playback at 1280x720 or 1920 x 1080 Full HD Display - HDMI Output (1920 x 1080) Digital Zoom Function on LIVE & PLAYBACK Multi-Channel Audio Recording ... -
Page 9: System Startup And Shutdown
9 | Chapter 1 : DVR User Manual 1.3 System Startup and Shutdown 1.1.1 System Startup Make sure all necessary devices are properly connected to the back of the DVR (See section 1.5 REAR PANEL for additional information). Connect the power cord to the power jack on the rear panel of the DVR. -
Page 10: Front Panel
User Manual | 10 1.4 Front Panel Front panel allows the user to operate the DVR without having to use the IR remote or a mouse. I- Backup (Instant Backup) In playback mode, the user can press the [I-BACKUP] button on the front keypad to configure both Start and End time. -
Page 11: Rear Panel
11 | Chapter 1 : DVR User Manual 1.5 Rear Panel Buttons Functions Video In Video input terminal HDMI Out 1920X1080 Main Monitor VGA (Video Graphics Array) output terminal. Connects to the PC VGA monitor. Audio In Four connectors for audio input. Audio Out One connector for audio output. -
Page 12: Ir Remote Control
User Manual | 12 1.6 IR Remote Control The IR remote controller allows you to control the DVR without the mouse or front panel buttons. To use IR Remote Controller, the ID of the IR Controller must be the same as the ID of the DVR. Default ID # for DVR and IR Remote Controller is “1”. -
Page 13: Live Display Mode
13 | Chapter 1 : DVR User Manual Operation 2.1 Live Display Mode 2.1.1 Channel Selection The images can be seen on real-time by in single channel or 4-channel mode as seen below. To switch from a single-channel view to a multi-channel view and vice versa, choose one of the following options: [1 Channel] [4 Channel]... -
Page 14: Icons Description
User Manual | 14 2.1.2 Icons Description The DVR can be set to different recording modes, identified by an icon on each channel screen. Icon Shown on Upper Right Corner Icon Shown on Lower Right Side Continuous Record Using Emergency Recording Motion Detection Record PTZ control is activated Sensor input Record... -
Page 15: Pop-Up Menu
15 | Chapter 1 : DVR User Manual If you do not see any icon on the top right corner of the live screen mode; it means that the system is not recording. In this case, you need to check the [RECORD] settings in the main setup menu. -
Page 16: Digital Zoom
User Manual | 16 2.3 Digital Zoom VMAX HD supports Digital Zoom feature during live and playback mode 1. Double click the target channel. 2. Click the left button of the mouse and drag to make rectangular shape. 3. The smaller the rectangle you draw, the bigger the zoom. -
Page 17: Pan/ Tilt
GO. Make sure the preset you select has been set before selecting it. The number of presets varies for each PTZ camera based on make and model. The VMAX HD supports a maximum of 255 presets. Please consult your PTZ camera’s manual for more... -
Page 18: Tour
OSD menu, under “Property”. REMEMBER! If you have more than one of Digital Watchdog’s HD-SDI cameras you wish to setup, you will have to assign each camera a different ID number. Then, match that ID number with the ID section in the DVR’s Setup menu (Device... - Page 19 19 | Chapter 1 : DVR User Manual ii. Press the channel number in the top right corner of the DVR’s Front Panel/ iii. Press the channel number using the remote control’s numeric pad. b. Right-click anywhere on the screen and select “PTZ”. The PTZ icon will appear at the bottom right of the screen.
-
Page 20: Instant Playback Of Recorded Video
User Manual | 20 2.5 Instant Playback of Recorded Video To go to Playback mode, select one of the following options: Click the button in the virtual menu bar or, right click on the screen and select “INSTANT PLAYBACK” from the pop-up menu. [Playback Screen &... -
Page 21: Backup & Instant Backup
21 | Chapter 1 : DVR User Manual 2.6 Backup & Instant Backup Connect an appropriate USB flash drive or insert an empty DVD to the DVD-RW and press start the instant playback, or to start the remote backup. 2.6.1 Backup You can backup video from your DVR to an external storage device. -
Page 22: Backup Video Player
2.6.3 Backup Video Player [NSF] When backing up video in NSF format, VMAX HD player will be saved with the video file. User can find it in the [DvrPlayer] folder in the USB flash drive. This function allows the user to play the video clip without having to install additional software on the computer. -
Page 23: Search Recording Image
23 | Chapter 1 : DVR User Manual 2.7 Search Recording Image There are four (4) ways to access the search features on the VMAX HD 1. Right click on the screen and select SEARCH in the pop-up menu. 2. Press the SEARCH button on the front panel. -
Page 24: First Data
User Manual | 24 2.7.2 Date/Time Search The calendar displays dates with recorded video data in gray color. The month and year by clicking on the arrows in the top right side of the window. Then select the desired dates. The selected date will be highlighted with orange color. -
Page 25: System Log
25 | Chapter 1 : DVR User Manual 2.7.5 System Log The System Log Search finds particular system log information, quickly and easily. The System Log Report can be save to a USB memory device as a .txt file. 1. Select a Date. 2. -
Page 26: Event Log
User Manual | 26 2.7.6 Event Log The Event Log Search finds particular events, quickly and easily. 1. Select a Date. 2. Select type of data you want to include in the log report. a. Motion: Video recorded when motion was detected. b. -
Page 27: Settings
27 | Chapter 1 : DVR User Manual Settings General setting structure consists of System, Device, Record, Network, and Quick Setup as shown below. There are several ways to access the DVR’s setup menu: 1. Right click on the screen and select MENU. 2. -
Page 28: System
User Manual | 28 3.1 System The SYSTEM Setup menu allows you to view the DVR’s general information, modify user access to the DVR, export and import settings, manage the DVR’s HDDs or set the DVR to its factory default settings. - Page 29 29 | Chapter 1 : DVR User Manual Select DAYLIGHT SAVING and select the appropriate daylight saving time zone. The options are: OFF: Daylight saving is turned off. USA: Applies the USA daylight saving time. EU: Applies the EU daylight saving time. OTHERS: If the time zone is neither USA nor EU, set the date and time of the daylight saving period.
-
Page 30: User
User Manual | 30 Plug in the USB flash drive on the front panel. d. Select SYSTEM UPGRADE. e. Select ‘SCAN.’ The DVR will automatically begin the upgrade process. The progress of the upgrade will be displayed in the percentage bar. When Upgrade is complete, system will reboot to apply the new upgrade. - Page 31 31 | Chapter 1 : DVR User Manual Selected Checkbox: The DVR will ask for a password when the function is selected for all users. b. Blank Checkbox: The DVR will not ask for a password when the function is selected for all users.
-
Page 32: Export/Import
User Manual | 32 3.1.3 Export/Import Users can copy and paste the system configuration values in this menu. 1. EXPORT SETUP TO USB enables user to copy the settings for the DVR to any USB memory devices. a. Click Export. b. -
Page 33: Hdd
33 | Chapter 1 : DVR User Manual 3.1.4 HDD [HDD] tab displays the information of HDD that is mounted on the VMAXHD. 1. [FORMAT] Formats the entire HDD installed in the DVR. 2. [HEALTH INFO] Displays the information of HDD. 3. -
Page 34: Factory Default
User Manual | 34 3.1.5 Factory Default Users can set the system back to factory default configuration. If you select to return the DVR to its factory default settings, the system will reboot to make sure changes have been applied. Once you click the [FACTORY DEFAULT] button and enter the admin password, previous configuration values may be deleted. -
Page 35: Device
35 | Chapter 1 : DVR User Manual 3.2 DEVICE The Device setup menu allows the administrator to configure the Camera, Audio, Sensor, Alarm, Controller and PTZ. 3.2.1 Camera The [CAMERA] tab enables user to change camera settings. Users can change Title, Covert and Motion Area Setting for each camera. -
Page 36: Audio
User Manual | 36 a. Enter the motion zone setup. b. The motion zone setup grid will appear on the camera’s display. Select the motion detection area by clicking on the desired area of the camera’s view. You can also click on the screen and hold, dragging the mouse to select a large area. -
Page 37: Sensor
37 | Chapter 1 : DVR User Manual 3.2.3 Sensor The VMAX HD supports four (4) sensor connectors. Select from OFF, Normally Open [N.O], and Normally Closed [N.C]. 1. Make sure all cables are properly connected to the back of the DVR (See 1.5 Rear Panel for... -
Page 38: Controller
User Manual | 38 3.2.5 Controller If a Joystick controller is used, select a controller protocol from Controller menu. Set SPEED (Baud Rate) and ID number. To setup a joystick controller: 1. Connect an RS-485 cable from the controller to the back of the DVR (See section 1.5 Rear Panel for more information). -
Page 39: Ptz
39 | Chapter 1 : DVR User Manual 3.2.6 PTZ If you wish to connect a PTZ camera to the VMAX HD, use this setup menu to connect it. To setup a PTZ Camera: 1. Connect an RS-485 cable from the camera’s board to the back of the DVR (See section 1.5 Rear Panel for more information). -
Page 40: Record
User Manual | 40 3.3 Record Configure various record settings such as Continuous, Motion, Sensor and Schedule for each individual camera channel. 3.3.1 Record Setup Configure record settings such as Resolution, FPS, Quality, Pre/Post Record and Record Type (Continuous, Motion, Schedule and Sensor). Configure for each channel or use the [APPLY ALL] button to apply the same settings to all cameras. - Page 41 41 | Chapter 1 : DVR User Manual 1. CHANNEL Select a channel from CH1 to CH4 to configure the recording setup. 2. RESOLUTION Select a specific resolution. 1280x720 (HD) / 640x360 (D1) / 1920x1080 (FULL HD) / 1920x540 (Half of FULL HD). The higher the resolution, the better the image quality will be.
-
Page 42: Schedule
User Manual | 42 3.3.2 Schedule You can set the cameras to record at different modes based on a preset schedule. To set the Recording Schedule: 1. Select CHANNEL (by default it will be CH1). 2. Select a recording mode you want to set to the schedule. a. -
Page 43: Network
43 | Chapter 1 : DVR User Manual 3.4 Network The Network menu allows you to configure the DVR’s network settings, including IP configuration, DDNS, and E-mail notifications. 3.4.1 Network 1. NETWORK TYPE Select the type of IP address you want to assign the DVR. Select [STATIC] for fixed or [DHCP] for dynamic IP Address. - Page 44 User Manual | 44 a. [DHCP] An IP address is automatically assigned by the DHCP server, which automatically assigns the IP address and other parameters to new devices. b. [STATIC] The user manually assigns IP address, Subnet Mask, Gateway, and DNS. 2.
-
Page 45: Ddns
45 | Chapter 1 : DVR User Manual It is highly recommended that you contact you Network Administrator and Internet Service Provider for information on correct Network setup. 13. HD APPLY ALL Apply the setting value to other channels. 3.4.2 DDNS DDNS (Dynamic Domain Name System) allows a DNS name to be constantly synchronized with a dynamic IP address. - Page 46 User Manual | 46 3. SERVER3 Auto DDNS. This is an easy auto DDNS setup feature. If selected, the DVR will automatically register itself with the okddns.com server. This feature will setup DDNS automatically for you. In addition, unlike in Server1 option, this option will provide you with DVR health checking and additional features such as UPnP, at no cost to you.
-
Page 47: Network Setup For Internal Use
Enter the appropriate email address to enable sending e-mail reports. Current version is limited to one email address. 3.4.4 Network Setup for Internal Use The VMAX HD can be setup to be accessed remotely either from within the network or... -
Page 48: Network Setup For External Use
If the bandwidth is low, the resolution should be set as 640x360. 3.4.5 Network Setup for External Use To connect to the VMAX HD externally via the internet, you will need to setup the DVR’s ports in your router. Contact your Network Administrator & Internet Service Provider for proper network configuration. -
Page 49: Quick Setup
49 | Chapter 1 : DVR User Manual 4. Enter the command ipconfig and press enter. Write down the following information: a. subnet mask b. Gateway (This is your router’s IP address). 5. Open an internet explorer webpage and enter the gateway address in the address bar. Enter user ID and password to access your router. - Page 50 User Manual | 50 Chapter 2 ROWSER...
-
Page 51: Chapter 2 : Web Viewer
With an ordinary web-browser over the network, users can stay connected to the system for monitoring, playback, or remote configuration. In order to connect to the VMAX HD remotely, Network configuration must be setup in the DVR. Please see section 3.4 Network for more information. - Page 52 User Manual | 52 If all the information has been entered correctly, the page will display your DVR’s cameras as seen below. Description Item Information Display current date and time with connected IP address. Mode Status Display options. “Connect” or “Disconnect”. Display Panel Display camera’s image in live and search modes.
-
Page 53: Web Playback
53 | Chapter 1 : DVR User Manual 4.2 Web Playback Click on the SEARCH button to search recorded video. 4.2.1 Screen Layout for Search Mode Description Item Calendar Days with video recorded on them will be displayed in color. Backup Capture image, Start &... -
Page 54: Image Capture
User Manual | 54 4.3 Image Capture The VMAX HD’s Web Viewer allows you to capture still screen shots of video you’re currently watching. To do so: 1. Go to search mode. 2. Select the date & time you want to view in playback. -
Page 55: Web Backup
55 | Chapter 1 : DVR User Manual 4.4 Web Backup The VMAX HD’s web viewer allows you to create backup files to be saved on your computer. To do so: 1. Select Start Time and End Time from the calendar. -
Page 56: Web Setup
User Manual | 56 4.5 Web Setup User can remotely setup all of the DVR’s configuration. The Setup button on the Web Viewer allows complete access to the DVR’s complete Setup menu. To access the DVR’s Setup remotely, enter the password. 4.5.1 System For more information, see section 3.1.1 SYSTEM 4.5.2 User... -
Page 57: Device
57 | Chapter 1 : DVR User Manual 4.5.3 Device For more information, see sections 3.2 DEVICE and 3.3.2 SCHEDULE 4.5.4 Record For more information, see section 3.3.1 RECORD SETUP... -
Page 58: Network
User Manual | 58 4.5.5 Network 4.5.6 Upgrade 1. Check current firmware version 2. Search the upgrade file that you want to upgrade 3. Click on UPGRADE to start the upgrade 4.5.7 Information User can check current firmware version and IP information... -
Page 59: Client S Um
59 | Chapter 1 : DVR User Manual Chapter 3 LIENT OFTWARE ANUAL... -
Page 60: Client Software User Guide
User Manual | 60 Client Software User Guide 5.1 PC Requirements Recommended PC Requirements Windows XP, Vista, 7 Pentium Dual Core 1.8GHz or higher 1024*768, 256MB Supporting DirectX 20MB for installation, 10GB for Remote Backup Minimum PC Requirement Windows XP, Vista Pentium 4, 2GHz 1024*768, 64MB 24Bit Color Graphic Card 20MB Free Space... -
Page 61: Install
61 | Client Software Manual 5.2 Install 1. Run the CD included with the VMAX HD. 2. Double click on the VMAX Client software icon. 3. A Setup Window will appear as below. Follow the instructions to complete the installation. -
Page 62: Basic Operation
User Manual | 62 5.4 Basic Operation Click on icon on Desktop or click on link in the start menu. 5.4.1 Network Connect 1. Click on [CONNECT] to add a device to the remote viewer software. - Page 63 63 | Client Software Manual 1. Enter all the corresponding information. When you are finished press OK to save. 2. If all information was entered correctly, the main window will display the DVR’s cameras in live view.
-
Page 64: Screen Layout For Live Mode
User Manual | 64 5.4.2 Screen Layout for Live Mode Item Description Information Display current date and time with connected IP address. Mode Status Display current “connected” or “Disconnected” with Search. Search/ Live Display camera’s image in live and search modes. Select the viewing mode. -
Page 65: Screen Layout For Search Mode
65 | Client Software Manual 5.4.3 Screen Layout for Search Mode Description Item Calendar Days with video recorded on them will be displayed in color. Backup and Capture image, Start & End time for Backup and Setup Setup buttons. Time Bar Time bar shows recorded section. -
Page 66: Ptz Control Panel
User Manual | 66 5.4.4 PTZ Control Panel PTZ Camera Control in Live Mode Button Description Directional Arrows Move PTZ Cameras in 8 directions. Zoom In (+) & Zoom Out (-),Focus In (+) & ZOOM & FOCUS Focus Out (-) Scan &... -
Page 67: Search Panel
67 | Client Software Manual 5.4.6 Search Panel Search Panel is only available in search mode. The Search Panel shows recorded data for each channel. Record Mode is distinguished by color. In the Search Panel, click the time or move the bar to the time you want to playback. Button Description 1 Minute playback... -
Page 68: Setup
User Manual | 68 5.5 Setup Select the Setup menu to control the DVR’s settings as well as the remote software. 5.5.1 General The General Setup tab provides you with general settings for the remote client software. 1. Security Option If selected, the remote client software will require a password for the following options: a. -
Page 69: Site
69 | Client Software Manual 5.5.2 Site From this window you can add, modify or delete a site, or organize multiple sites. The remote viewer software supports up to 999 sites. 1. To add a site a. Click on Addition to add a site. A new window will appear. b. -
Page 70: Event
User Manual | 70 5.5.3 Event Check the boxes of the events you wish to enable. Select whether they will be recorded in the event log, display an icon on the channel, and or be added to the event list. 5.5.4 Event Search Search for events by setting the beginning and ending time. -
Page 71: Record
71 | Client Software Manual 5.5.5 Record You can setup the recording settings for the DVR remotely from the client software. 1. Recording Conditions Select the record mode from: Always- Continuous Recording. Event- Record when an event is detected. Auto Record- Local Recording. If selected, the video streaming from the DVR will be recorded to a directory on your PC based on the recording mode you select. -
Page 72: Disk
User Manual | 72 5.5.6 Disk You can modify the location where backup files will be automatically saved in your computer. 1. Disk Space Select the destination for backup files. 2. Disk Info The system will display how much free space you have in your selected directory. If necessary, you can adjust your memory before backing up. -
Page 73: Display
73 | Client Software Manual 5.5.7 Display Use this option only when you are using multi-monitors and have an abnormal image on the secondary monitor. 5.5.8 About “About” section will display the software’s current version and license. - Page 74 User Manual | 74 Chapter 4 OBILE HONE OFTWARE ANUAL...
-
Page 75: Mobile Phone Software User Guide
6.1 iPhone Application Software Installation VMAXHD Click ‘App Store’ and click ‘search’ to locate the ‘VMAXHD’ application in the App Store Type in ‘VMAXHD’ and click ‘Search’, to locate the ‘VMAXHD’ application icon on the screen. vmaxhd vmaxhd vmaxhd VMAX HD... - Page 76 Now you can view detailed information about the ‘VMAX HD’ application. Click ‘FREE’ button. It will change to ‘INSTALL’ button. Select it to proceed. VMAX HD VMAX HD Input your User ID and Password. The ‘VMAX HD’ icon will appear on your Apple Device.
-
Page 77: How To Connect And View
77 | Appendix: Specification How to connect and view. VMAX HD application displays as below. Press the ’+’ button. Input the site information that you want to connect and press the ’Save’ button. VMAX HD Select ‘Live’ mode and press ‘Connect’ to view the split live image. - Page 78 User Manual | 78...
- Page 79 79 | Appendix: Specification Select ‘Playback’ mode and press ‘Connect’. Select the date that you want to search and press ‘Play’. Select time and playback speed. Pan and Tilt control is possible when Live mode and Digital Zoom are available in Live and Playback...
-
Page 80: Android Application Software
Installation VMAXHD Installation VMAXHD Google Play Store. locate Click ‘Market’ and click ‘search’ to locate the ‘VMAX HD’ application in the Google Play Click ‘Market’ and click ‘search’ to locate the ‘VMAX HD’ application in the Google Play Store Store. - Page 81 Installation VMAXHD view detailed Now you can view detailed information about the ‘VMAX HD’ application. Click the ‘Install’ the ‘Install‘ button. When the installation is complete, the DW App will appear in your main button. When the installation is complete, the DW App will appear in your main menu.
-
Page 82: How To Connect And View
To add a device, type in all the required information and press the ‘ADD’ button. The site you have added will appear on the device list page. VMAX HD Select up to four (4) channels to view simultaneously and press ‘Live View’. -
Page 83: How To Ptz Control And Capture
Can you please replace with screen shot in English? View the VMAX HD firmware version through the ‘Help’ button at the main menu page. View the VMAX HD firmware version through the ‘Help’ button at the main menu page. - Page 84 User Manual | 84 Appendix : Specification ITEM VMAXHD4 Video Input Channel Input Level 4CH HD-SDI (720p25/30/50/60, 1080p25/30, 1080i50/60) Output Main Monitor HDMI (1280x720) Sub Monitor VGA (1280x1024) CVBS Audio Input 4CH Line Input Output 1CH Line Output Audio Codec G.711 Alarm Sensor Input...
- Page 85 85 | Appendix: Specification Interface Input Method Front Buttons, IR Remote Control, Mouse, Keyboard Controller Serial 1 RS-232C PTZ & Controller 2 RS-485 Network Ethernet RJ-45, 10/100/1000Base-T, Auto MDI/MDIX Network Web Viewer Live, Search/Playback, Backup, PTZ, Remote Setup/Upgrade Access Single-site monitoring software Live, Search/Playback, Backup, PTZ, Remote Setup/Upgrade Multi-sites monitoring software Live, Search/Playback, Backup, PTZ, Remote Setup/Upgrade...
Need help?
Do you have a question about the VMAX HD and is the answer not in the manual?
Questions and answers