Table of Contents
Advertisement
Advertisement
Table of Contents

Subscribe to Our Youtube Channel
Related Manuals for Precisa XB series


Summary of Contents for Precisa XB series
- Page 1 Precisa Balances Series XB Operating Instructions 350-8105-000c1...
-
Page 3: Customer Service
Identification and copyright ■ Identification The present operating instructions apply to Precisa balance of the XB-Series with five-key control panel and multifunction display. Customer service Precisa Instruments AG Moosmattstrasse 32 CH-8953 Dietikon Tel. +41-44-744 28 28 Fax. +41-44-744 28 38 email service@precisa.ch... - Page 4 • For the labelling of dangers and advice, please see Chapter 1 “Safe- ty”. Guarantee-card A guarantee-card, which was filled in by your Precisa dealer before handing over the balance, is enclosed with the instruction manual. NOTE Check, if the guarantee-card is enclosed with these operating...
-
Page 5: Table Of Contents
Contents ■ Safety............7 Representations and symbols ........7 Safety recommendations ..........7 Your balance ..........9 Construction and functions........... 9 2.1.1 Construction of the balance .......... 9 2.1.2 Functions of the balance ..........10 Application, conformity, labelling......... 12 2.2.1 Correct use of the balance.......... - Page 6 ■ Contents 4.5.2 Activating the application menu........23 How the menu control operates........24 4.6.1 Control panel ............25 4.6.2 Operating in the weighing mode......... 26 4.6.3 Display..............27 Password protection of the menus....... 27 Anti-theft encoding ............ 28 Working with the configuration menu .....
- Page 7 Contents ■ Data transfer to peripheral devices ....47 Connection to peripheral devices ......... 48 Data-transfer ............49 Remote control-commands ......... 50 Examples for the remote control of the balance ..... 51 Error messages and correction of faults..52 Notes on correcting faults .......... 52 Practical examples........
- Page 8 ■ Contents 14.2.3 Internal calibration ............. 66 14.2.4 Automatic calibration ..........67 Configuration menu tree ....... 68 Application menu tree ........71 Configuration menu tree ....... 71...
-
Page 9: Safety
• The balance may only be used with the power adaptor (stamped: Precisa) supplied exclusively for use with the Precisa balance. • Before inserting the power adaptor, make sure that the operating voltage stated on the power adaptor agrees with the mains voltage. - Page 10 The balance may be operated after it has first been re-checked by a Precisa Service technician. • The operating instructions must be read by each operator of the balance and must be available at the workplace at all times.
-
Page 11: Your Balance
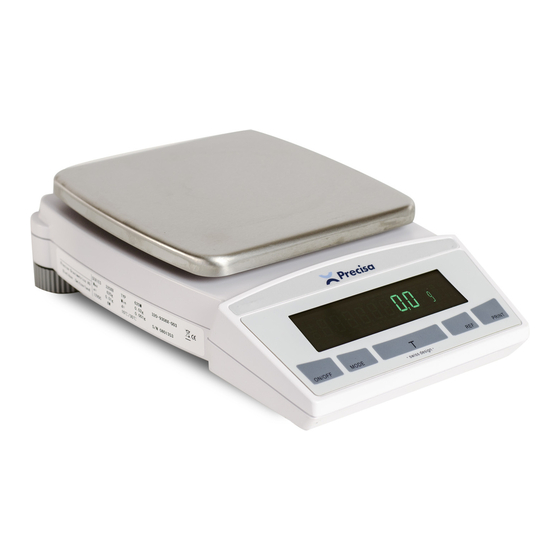
2 Your balance ■ Your balance Construction and functions 2.1.1 Construction of the balance The balance consists of the balance body (1), the scale-pan holder (4) and the pan (5), which depending on the model may be square (fig. 2.1, right) or round (fig. 2.1, left). Depending on the model (see Chapter 2.3 “Data and parameters”) the balance additionally has a simple windshield (fig. -
Page 12: Functions Of The Balance
Within the XB-Series, both Dual-Range Balances and Floating-Range Balances (with a relocatable area with a 10-fold increase in precision) are available. In addition, in the XB series of balances, Precisa also offers balances protected against water and dust to the international 1P65 standard. - Page 13 2 Your balance ■ " " & Fig. 2.2 Construction of the balance Cover of the device for under-floor weighings Nameplate Adjustable feet (for levelling) Weighing pan Multifunction display 5-key control panel Serial No. plate Connecting socket for power adaptor RS232-Interface 10 Bubble level 11 Eyelet for attaching a safety chain...
-
Page 14: Application, Conformity, Labelling
In using the balance in combination with other appliances made by Precisa as well as with appliances produced by other manufacturers, the current regulations for the safe use of the relevant attachments and their application in accordance with instructions must be obser- ved. -
Page 15: Data And Parameters
Balance labels Data and parameters The Precisa balances of Series XB are divided into five main-groups A, C, D, G and M. The letter in the name corresponds to the design specification (e.g. A = analytical balance, M = MilIigramme balance) the number before it corresponding in each case to the maximum allowable load (in grammes). -
Page 16: Technical Data
– also available as Floating-Range version – also available with dust and water splash protection to IP65 • Precisa XB-D (e.g. XB 3200 D) and XB-G (e.g. XB 10200 G) – square weighing pan, 200 x 200 mm – Fluorescent- or LCD-Display –... -
Page 17: Starting Up
(see Chapter 12 “Transport, storage and disposal”). • Read through these operating instructions, even if you already have experience with Precisa-balances, before you work with the balance and pay attention to the Safety recommendations (see Chapter 1 “Safety”). -
Page 18: Scope Of Delivery
■ 3 Starting up Scope of delivery Inspect delivery for completeness immediately on unpacking all com- ponents. D, G Fig. 3.1 Scope of delivery (broken down by groups) Component delivered present yes / no Balance Scale-pan support Weighing pan Power adaptor Protection-cover for the display Windshield BASIC (group A) Windshield simple (group M) -
Page 19: Assembly Of The Balance
NOTE A screwdriver is required for assembly. All parts must fit together easily. Do not apply force. Precisa Customer Service will be pleased to help you with any problems. Choice of a suitable location The balance location must be chosen in such a way as to guarantee perfect functioning of your balance, so that the allowable ambient conditions (see Chapter 2.3.1 “Technical data”) are maintained and,... -
Page 20: Checking The Mains Voltage
If the operating voltage is not the same as the mains voltage, the power adaptor must on no account be connected to the mains supply. Contact the Precisa-Customer Service. Levelling the balance To function properly, the balance must be precisely horizontal. -
Page 21: Calibration Of The Balance
500 g steps, depending on implementation). Dual Range and Floating Range balances With the Precisa Dual Range balances, weighing is always first carried out in the small, more exact range. Only when the small range is exceeded will the balance switch automatically into the bigger range. -
Page 22: Standardized Balance
In balances of class (1) the circle also stands for the warm-up phase. Your Precisa Customer Service will be happy to assist you at any time if you have any questions on the standardization of the balan- ce or on working with standardized balances of the XB-Series. - Page 23 3 Starting up ■ • Hang the object to be weighed on the hook and carry out the weighing. Fig. 3.3 Setting up the balance for under-floor weighings CAUTION Take care that the hooks used for the under-floor weighing are stable enough to hold the goods which you wish to weigh.
-
Page 24: Modes Of Operation And Operating
■ 4 Modes of operation and operating Modes of operation and operating Switching on the balance • Press «ON/OFF» to switch on the balance. The balance carries out a self-diagnosis in order to check the most im- portant functions. After completion of the start-up process (approxi- mately ten seconds) “Zero”... -
Page 25: Significance Of The Two Main Menus
4 Modes of operation and operating ■ Significance of the two main menus The balance has two main menus available: the configuration menu and the application menu. The basic-program of the balance is defined in the configuration menu. With this, you can either work with the basic-configuration programmed ex-works, or define and store a user-configuration adapted to your specific needs. -
Page 26: How The Menu Control Operates
■ 4 Modes of operation and operating How the menu control operates The configuration menu and the application menu each have a main path and up to two sub-paths in which the parameters for the different function programs of the balance are defined. Moving in the menu path: •... -
Page 27: Control Panel
4 Modes of operation and operating ■ 4.6.1 Control panel Four of the five keys of the Multifunctional Control Panel serve multi- ple functions (functions for the weighing mode and for the programming mode respectively). ultifunction display ON / OFF PRINT wi made Fig. -
Page 28: Operating In The Weighing Mode
■ 4 Modes of operation and operating 4.6.2 Operating in the weighing mode. Name Function during weighing • Switching the balance on and «ON/OFF» ON/OFF • Calling up the configuration menu and the application menu «MODE» • Switches between the Basic MODE program and the chosen application... -
Page 29: Display
4 Modes of operation and operating ■ 4.6.3 Display The balance display has two lines (1 and 2). Fig. 4.2 Display The upper display-line (1) includes the 8-figure measurement display (3) as well as various symbols (4). The lower line (2) serves as a 20-character info-line in connection with the cursor keys for controlling the working programs. -
Page 30: Anti-Theft Encoding
The password protection is deactivated at the works. The pre-programed password set in the works is: 7 9 1 4 This password is the same for all Precisa balances and is always valid, in parallel with a self-selected password. Make a note of your personal password. -
Page 31: Working With The Configuration Menu
5 Working with the configuration menu ■ Working with the configuration menu This chapter describes the configuration menu and its functions. To activate the menu, see Chapter 4.5 “Activating the two main me- nus” and Chapter 4.6 “How the menu control operates”. Structure of the configuration menu The basic adjustment of the balance is defined in the configuration menu:... -
Page 32: Language-Function
■ 5 Working with the configuration menu Printing conventions used in this document: • The settings in the sub-paths pre-programmed in the works are prin- ted in bold in these operating instructions. • For greater clarity, only that part of the menu tree which corre- sponds to the function is shown with each description of the function. -
Page 33: Selecting The Weight Unit
5 Working with the configuration menu ■ Selecting the weight unit To activate the menu see Chapter 4.5 “Activating the two main me- nus” and Chapter 4.6 “How the menu control operates”. • UNIT-1 UNIT-1 Gramme Kilogramme ----- ----- Baht The balance can show results in different units, although with some balances display is not possible in milligrammes or kilogrammes because of the corresponding weight range. -
Page 34: Print Functions
■ 5 Working with the configuration menu Print functions To activate the menu see Chapter 4.5 “Activating the two main me- nus” and Chapter 4.6 “How the menu control operates”. • SET DATA PRINT AUTO-START ON/OFF Start print automatically on switching on/off MODE UNSTABLE Individual print, each value... -
Page 35: Calibration Functions
5 Working with the configuration menu ■ • with “PRODUCTMODE DELETE” it is deleted after each expression, • with “PRODUCTMODE COUNT” a counter, which is incremented by 1 after each expression, • “OPERATOR ttt...” is the alphanumeric input of the operator. When a peripheral device (for example a printer) is connected, the balance interface must be configured in the submenu “SET INTER- FACE”... -
Page 36: Weighing Mode
■ 5 Working with the configuration menu Weighing mode To activate the menu see Chapter 4.5 “Activating the two main me- nus” and Chapter 4.6 “How the menu control operates”. • SET WEIGH- ING MODE FLOATINGDISPLAY 0.04 Input lntegration time FLOATINGDISPLAY 0.08 (in seconds) FLOATINGDISPLAY 0.16... -
Page 37: Interface-Functions
5 Working with the configuration menu ■ Interface-functions To activate the menu see Chapter 4.5 “Activating the two main me- nus” and Chapter 4.6 “How the menu control operates”. • SET INTERFACE BAUDRATE Select baud-rate BAUDRATE BAUDRATE 1200 BAUDRATE 2400 BAUDRATE 4800 BAUDRATE... -
Page 38: Date And Time
The date and time display continues in the event of a power failure. If this is not the case, the balance backup battery is exhausted and must be replaced by Precisa Customer Service. 5.10 Password protection To activate the menu see Chapter 4.5 “Activating the two main me- nus”... -
Page 39: Anti-Theft Encoding
5 Working with the configuration menu ■ 5.11 Anti-theft encoding To activate the menu see Chapter 4.5 “Activating the two main me- nus” and Chapter 4.6 “How the menu control operates”. • THEFTCODE THEFTCODE THEFT-PROTECTION ON/OFF Switch encoding –––– on/off NEW CODE ––––... -
Page 40: Working With The Application Menu
■ 6 Working with the application menu Working with the application menu This chapter explains which working programs the balance has and how these are operated (see also Chapter 4.5 “Activating the two main menus” and Chapter 4.6 “How the menu control operates”). If «PRINT»... -
Page 41: Selecting A Working Program
6 Working with the application menu ■ Selecting a working program See Chapter 4.5 “Activating the two main menus” and Chapter 4.6 “How the menu control operates” for the activation of the application menu. • SELECT APPLICATION SET APP. Normal weighing UNITS Different units COUNT... -
Page 42: Application "Units
■ 6 Working with the application menu Application “UNITS” See Chapter 4.5 “Activating the two main menus” and Chapter 4.6 “How the menu control operates” for the activation of the application menu. • SETUP APPLICATION UNITS UNIT-2 kg kilogramme UNIT-2 mg milligramme UNIT-2 ----- -----... -
Page 43: Application "Count
6 Working with the application menu ■ Application “COUNT” See Chapter 4.5 “Activating the two main menus” and Chapter 4.6 “How the menu control operates” for the activation of the application menu. • SETUP APPLICATION COUNT REFERENCE 10 PCS Reference-number of pieces = 10 With the aid of the “COUNT”... -
Page 44: Application "Percent
■ 6 Working with the application menu Application “PERCENT” See Chapter 4.5 “Activating the two main menus” and Chapter 4.6 “How the menu control operates” for the activation of the application menu. • SETUP APPLICATION PERCENT DECIMALS AUTO Enter number of decimal places With the aid of the “PERCENT”... - Page 45 6 Working with the application menu ■ Functions of the application: «Sto n»: - Take stable value and add to the sum of the components. - Tare balance. - Short confirmation with display „StorEd n“. «rESEt»: - Reset «InFo»: - Display of: - Total weight „TOT“...
- Page 46 ■ 6 Working with the application menu • Press the «REF»-button until the desired function appears on the display. Release the «REF»-button.
-
Page 47: Special Operating Keys
7 Special operating keys ■ Special operating keys The Tare key «T» • Effects taring – Ensure that the balance is in the weighing mode – Briefly press «T» – The balance performs a tare operation. • Effects a calibration –... -
Page 48: The Print Key «Print
■ 7 Special operating keys The Print key «PRINT» • Print out an individual value or a report – Ensure that the balance is in the weighing mode – Briefly press «PRINT» – The individual value or report will be printed out. •... -
Page 49: Data Transfer To Peripheral Devices
8 Data transfer to peripheral devices ■ Data transfer to peripheral devices For data-transfers to peripheral devices, the balance is equipped with an RS232/V24-interface. Before the data-transfer, the RS232 interface must be matched with the one in the peripheral device in the balance's configuration menu (see Chapter 5.8 “Interface-functions”). -
Page 50: Connection To Peripheral Devices
■ 8 Data transfer to peripheral devices Connection to peripheral devices • Standard, duplex connection Balance RJ 45 D25 / D9 Peripheral device RS 232 out 3 / 2 RS 232 in RS 232 in RS 232 out 2 / 3 7 / 5 •... -
Page 51: Data-Transfer
8 Data transfer to peripheral devices ■ Data-transfer • Display S D7 D6 D5 D4 D3 D2 D1 D0 U U U The data-transfer takes place in ASCII code: 1 2 3 4 5 6 7 8 9 10 11 12 13 14 15 ..S D7 D6 D5 D4 D3 D2 D1 DP D0 B U ... -
Page 52: Remote Control-Commands
■ 8 Data transfer to peripheral devices Remote control-commands Command Function ACKn Handshake n=0 off; n = 1 on Start calibration (only where INT or EXT selected) Reset weight display D..Describe weight display (right-aligned) Reset Info display @..Describe Info display Set FLOATINGDISPLAY time n=0 t=0.04 s t=0.08 s... -
Page 53: Examples For The Remote Control Of The Balance
8 Data transfer to peripheral devices ■ Command Function Set stability n n=0 low n=1 medium n=2 high SDTttmmjj Set date and time (German) (Tag, Monat, Jahr, hhmmss Stunde, Minute, Sekunde) SDTmmdyy Set Date and Time (English) (Month, Day, Year, hhmmss Hour, Minutes, Seconds) T (ttt) -
Page 54: Error Messages And Correction Of Faults
The balance shows a description of the fault in the info-line. NOTE If an error occurs without a description of the error in the info-line, a Precisa Service Engineer must be called. Notes on correcting faults The following table shows faults and their possible causes. If you cannot clear the fault on the basis of the table, please contact a Pre- cisa Service Engineer. - Page 55 9 Error messages and correction of faults ■ Fault Possible cause Results of • The balance was not correctly tared weighing are • The balance is not correctly levelled clearly incor- • The calibration is no longer correct rect • There are strong temperature variations There is no •...
-
Page 56: Practical Examples
■ 10 Practical examples Practical examples 10.1 Changing the configuration menu See Chapter 4.5.1 “Activating the configuration menu”, for the acti- vation of the configuration menu. 10.1.1 Setting the choice of language In order to alter the display language, proceed as follows: •... -
Page 57: Setting The Print Functions
10 Practical examples ■ 10.1.3 Setting the Print functions In order to alter the print parameters proceed as follows: • Press «MODE» and hold down SET DATA PRINT until “SET DATA PRINT” appears. • Release the «MODE»-button. AUTO-START OFF • Press «MODE» briefly. “AUTO- START ...”... -
Page 58: Activation Of Password Protection
■ 10 Practical examples 10.1.4 Activation of password protection The possibilities for setting the password protection are described in Chapter 5.10 “Password protection”. In order to activate password protection, proceed as follows: • Press «MODE» and hold down PASSWORd –––– button until “PASSWORD ––––”... -
Page 59: Selection Of An Application Program
10 Practical examples ■ 10.2 Selection of an application program See Chapter 4.5.2 “Activating the application menu” for the activati- on of the application menu. 10.2.1 Setting for Counting by weighing For Setup, see Chapter 6.5 “Application “COUNT”” To count uniformly heavy objects such as coins, screws or similar things, proceed as follows: •... - Page 60 ■ 10 Practical examples • In the same way enter the third Reference 025 pcs digit of the reference quantity. • Hold down «MODE» until input is complete (no digit flashing). • Press «PRINT» twice to exit menu. By briefly depressing the «MODE»-button you can change to “COUNT”.
-
Page 61: Maintenance And Servicing
If liquid is spilt on the balance, the latter must immedia- tely be disconnected from the electricity supply. The balance may only be used again after it has first been checked by a Precisa Service Engineer. The connections on the rear of the appliance and the power adaptor may not come into contact with liquids. -
Page 62: Transport, Storage And Disposal
■ 12 Transport, storage and disposal Transport, storage and disposal 12.1 Transportation and shipping of the balance Your balance is a precision instrument. Treat it carefully. Avoid shaking, severe impacts and vibration during the transportation. Take care that there are no marked temperature fluctuations during the transportation and that the balance does not become damp (condensation). -
Page 63: Accessories
13 Accessories ■ Accessories 13.1 Accessories Accessory Article-number Second display, free-standing 350-8504 Second display, built-in 350-8505 Second display, wall mounted 350-8516 Interface RS232 350-8506 Interface 20 mA current loop passive 350-8526 Analog output 350-8508 -10 V... + 10 V (Resolution 10 mV) Smartbox Module for various applications: Parts counting with stored values and part 350-8511-001... - Page 64 ■ 13 Accessories Accessory Article-number Density determination kit 350-8515 Windshield for M- and C-balances Heighth 180 mm 350-8518 Heighth 260 mm 350-8519 Dust cover for display 350-4096 Night cover 350-4097 Hooks for under-floor weighing 350-8527...
-
Page 65: Further Information
14 Further information ■ Further information 14.1 Notes on the Weighing mode 14.1.1 Set Weighing mode: FLOATINGDISPLAY The value set for FLOATINGDISPLAY defines the period, after which each new measurement is displayed. For the definition of this period, the quality of the balance-location is crucial. -
Page 66: Set Weighing Mode: Auto-Standby
■ 14 Further information 14.1.3 Set Weighing mode: Auto-Standby The Auto-Standby mode turns off the balance automatically, if: • the balance is tared and has shown “Zero” for at least 5 minutes • the balance has received no remote control command via the inter- face for at least 5 minutes, •... -
Page 67: External Calibration By Means Of Icm
14 Further information ■ 14.2.1 External calibration by means of ICM Depending on the type of balance, calibration weights in steps of 10 g, 50 g, 100 g and 500 g can be used, where the calibration weight must correspond to the precision of the balance. For an external calibration by means of ICM, “SET CALIBRATION MODE EXTERNAL”... -
Page 68: Internal Calibration
■ 14 Further information Then proceed as follows: • Switch to “BALANCING” with the «MODE»-key cALIBRation • Press «T» until “CALIBRATION” appears. • The balance carries out a Zero - - 0000 measurement (0000 g is shown flashing) • After the zero measurement the - - 372 display flashes with the previous- ly entered calibration weight... -
Page 69: Automatic Calibration
14 Further information ■ 14.2.4 Automatic calibration For an automatic calibration with the built-in calibration weight “SET CALIBRATION MODE AUTO” must be selected in the configuration menu (see Chapter 5.6 “Calibration functions”). The balance now calibrates itself automatically every 24 hours and/or after each temperature change of 3 degrees Celsius, depending on the definition in the configuration menu “SET CALIBRATION AUTOCAL”. -
Page 70: Configuration Menu Tree
■ 15 Configuration menu tree Configuration menu tree «MODE»-button pressed on switching on: • LANGUAGE LANGUAGE ENGLISH SPRACHE DEUTSCH LANGUE FRANCAISE • CONTRAST CONTRAST 6 • UNIT-1 UNIT-1 • SET DATA PRINT AUTO-START ON/OFF MODE UNSTABLE MODE STABLE MODE LOADCHANGE MODE CONTINUOUS MODE... - Page 71 15 Configuration menu tree ■ SET PRINTFORMAT DATE AND TIME ON/OFF BALANCE-ID ON/OFF PRODUCT-ID ON/OFF GROSS AND TARE ON/OFF UNITS ON/OFF OPERATOR-ID ON/OFF PRODUCT ttt... PRODUCTMODE HOLD PRODUCTMODE DELETE PRODUCTMODE COUNT OPERATOR ttt... • SET CALI- BRATION MODE MODE EXTERNAL MODE EXT.-DEF.
- Page 72 ■ 15 Configuration menu tree • SET INTERFACE BAUDRATE BAUDRATE BAUDRATE 1200 BAUDRATE 2400 BAUDRATE 4800 BAUDRATE 9600 BAUDRATE 19200 PARITY 7-EVEN-1STOP PARITY 7-ODD-1STOP PARITY 7-NO-2STOP PARITY 8-NO-1STOP HANDSHAKE HANDSHAKE XON-XOFF HANDSHAKE HARDWARE • SET DATE AND TIME DATE [DD.MM.YY] TIME [HH.MM.SS] FORMAT...
-
Page 73: Application Menu Tree
16 Application menu tree ■ Application menu tree Press «MODE»-button in operation: • SET APP. UNITS COUNT PERCENT • SETUP APPLICATION Division depends on the current application, see Chapter 6 “Wor- king with the application menu” • AUTO-START AUTO-START ON/OFF Configuration menu tree «MODE»- and «T»-button pressed on switching on: FACTORY CONFIG.
Need help?
Do you have a question about the XB series and is the answer not in the manual?
Questions and answers
What is the tolerance of XB6200D. Can't find it on the manual