Table of Contents
Advertisement
Advertisement
Table of Contents

Subscribe to Our Youtube Channel
Related Manuals for Precisa LX 321


Summary of Contents for Precisa LX 321
- Page 1 LX 321 PREMIUM Operating Instructions 350-8162-000 --...
- Page 2 These operating instructions are protected by copyright. All rights reserved. No part of the operating instructions may be reproduced, processed, duplicated or published in any form by photocopying, microfilming, reprinting or other process, in particular electronic means, without the written agreement of Precisa Gravimetrics AG. © Precisa Gravimetrics AG, 8953 Dietikon, Switzerland, 2011...
-
Page 3: Overview
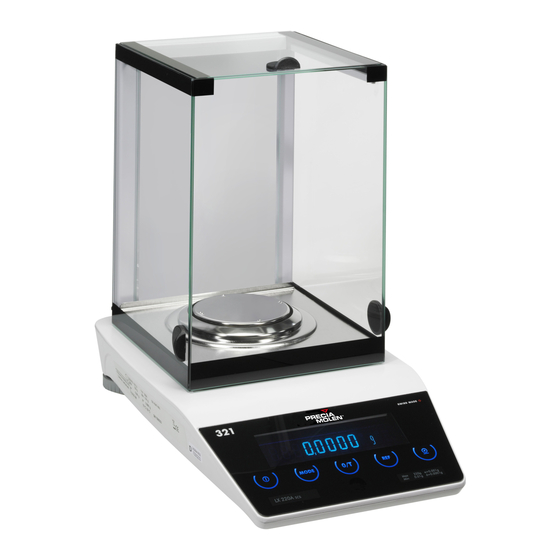
■ 1 Overview Overview Max 220g e= 0.001g X 220A Min 0.01g d= 0.0001g & Description Description Draft shield PRINT key Weighing pan Info display 5-key control panel Measurement display Display see chapter 3 "Below-balance weighing" Levelling bubble see chapter 3 "Below-balance weighing" Adjustable feet see chapter 3 "Below-balance weighing"... -
Page 4: Inspection And Assembly
2 Inspection and assembly ■ Inspection and assembly Inspect delivery for complete supply immediately on unpacking all components. Components supplied, depending on balance type • Weighing pan • Pan holder • Protective ring for A, M and C balances • Draft shield for A or M balances C, D, G •... -
Page 5: Below-Balance Weighing
■ 3 Below-balance weighing Below-balance weighing Objects which, because of their size or shape, cannot be put on the scale, can be weighed by means of be- low-balance weighing. Proceed as follows: • Turn off the balance. • Remove the weighing pan and the pan holder than turn the balance up side down. •... -
Page 6: Acessories
Dust cover for the whole balance, set of 20 pieces 350-8686 Data cable DB9 Male / DB9 Female (PC), 1.5m 350-8672 Data cable DB9 Male / DB25 Male (Printer), 1.5m 350-8673 Additional SmartBox® Applications, Precisa BUS accessories, further special accessories and options on de- mand. -
Page 7: Table Of Contents
9.10 Anti-theft encoding ......23 9.11 Keyboard settings......23 Your balance ......8 9.12 Precisa BUS ........23 Introduction ........8 Correct use of the balance ....8 Working with the application menu Conformity ........8 Technical data........8 10.1 Structure of the application menu .. - Page 8 Contents ■ 16.1 Calibration ........38 16.1.1 External calibration by means of ICM ..38 16.1.2 External calibration with freely selectable weight ..........38 16.1.3 Internal calibration ......39 16.1.4 Automatic calibration ......39 16.2 Software update ......39 16.3 Cleaning..........39 16.4 Error messages ........40 16.4.1 Notes on correcting faults ....40 Menu trees ......
-
Page 9: Your Balance
Virtually all models can be delivered in weights and measures approved. The most important basic production features of the Precisa balances include: • Simple-to-use multifunction control panel • Large and bright display with multi-lines •... - Page 10 5 Your balance ■ optimal use of the full potential and the diverse possibilities of the balance in your daily work. These operating instructions contain guidance in the form of pictograms and keyboard diagrams, which should help you in finding the required information: •...
-
Page 11: Safety
■ 6 Safety Safety Representations and symbols Important instructions, which involve safety, are highlighted with the appropriate action: DANGER Warning of a possible danger, which can lead to death or to serious injuries. WARNING Warning of a possibly dangerous situation, which can lead to less severe injuries or damage. NOTE Tips and important rules on the correct operation of the balance. -
Page 12: Set Up
7 Set up ■ Set up Unpacking the balance The balances are delivered in an environmentally-friendly package, specifically developed for this precision instrument, which provides optimum protection for the balance during transportation. NOTE Retain the original packaging in order to avoid transportation damages when shipping or transporting the balance and to allow the balance to be stored in the best conditions if it is out of operation for an extended period. -
Page 13: Connecting The Balance To The Mains
■ 7 Set up that the allowable ambient conditions and prerequisites are met and maintained: • Put the balance on a solid, firm and preferably vibration-proof, horizontal base • Make sure that the balance cannot be shaken or knocked over •... -
Page 14: Dual Range And Floating Range Balances13
7 Set up ■ Calibration is effected in the configuration menu. Depending on the balance model, this may be done exter- nally, internally or automatically (see chapter 9.5 "Calibration functions" and see chapter 20.1 "Calibra- tion"). With the aid of the “Intelligent Calibration Mode” the balance can itself determine the size of the calibration weight, which enables an exact calibration with different size weights (in 10 g, 50 g, 100 g and 500 g steps, depending on implementation). -
Page 15: Modes Of Operation And Operating
■ 8 Modes of operation and operating Modes of operation and operating Switching on the balance • Press «ON/OFF» to switch on the balance. The balance carries out a self-diagnosis in order to check the most important functions. After completion of the start-up process (approximately ten seconds) “Zero”... -
Page 16: Activating The Application Menu
8 Modes of operation and operating ■ 8.5.2 Activating the application menu • After the start-up process has finished, press «MODE» until “SET APP..” appears on the display. You are now in the application menu. How the menu control operates The configuration menu and the application menu each have a main path and up to two sub-paths in which the parameters for the different function programs of the balance are defined. -
Page 17: Display
■ 8 Modes of operation and operating Name Function during weighing «0/T» • Initiate Tare Function and/or Calibration Function • Run application (see Chapter 10 “Working with the «REF» application menu”) • Start print function «PRINT» • Exit the menu NOTE For the operation of the «0/T»... - Page 18 8 Modes of operation and operating ■ • With anti-theft encoding deactivated, the balance can be switched on again and operated after interruption of the power supply without entering a code. • With anti-theft encoding activated, the balance requires the entry of the four-figure code after each inter- ruption to the power supply.
-
Page 19: Working With The Configuration Menu
Password protection for defining the menus. SET KEYBOARD Activation of the keypad sound Enables disables Precisa BUS accessories Printing conventions used in this document: • The settings in the sub-paths pre-programmed in the works are printed in bold in these operating instruc- tions. -
Page 20: Selecting The Weight Unit
9 Working with the configuration menu ■ Selecting the weight unit To activate the menu see Chapter 8.5 “Activating the two main menus” and Chapter 8.6 “How the menu control operates”. • UNIT-1 UNIT-1 Gram Kilogram ----- ----- Baht The balance can show results in different units, although with some balances display is not possible in mil- ligrammes or kilogrammes because of the corresponding weight range. -
Page 21: Calibration Functions
■ 9 Working with the configuration menu PRODUCTMODEHOLD DELETE COUNT OPERATORttt... With “SET PRINTFORMAT”, elements which are switched on are printed in each case: • with “UNITS” all momentarily active units are printed out, • with “LINEFEED” the specified numbers of lines are printed out or a formfeed is performed the end of each printout, •... - Page 22 9 Working with the configuration menu ■ FLOATINGDISPLAY 0.08 Input integration time (in seconds) 0.16 0.32 STABILITY Setting the stability control (instability of the MEDIUM balance location) HIGH AUTO-STANDBY Auto-Standby not active or active after nn min- 0.5 MIN. utes 1 MIN.
-
Page 23: Interface-Functions
■ 9 Working with the configuration menu Interface-functions To activate the menu see Chapter 8.5 “Activating the two main menus” and Chapter 8.6 “How the menu control operates”. • SET INTERFACE BAUDRATE Select baud rate 1200 2400 4800 9600 19200 38400 57600 PARITY... -
Page 24: Anti-Theft Encoding
9.12 Precisa BUS To activate the menu see Chapter 8.5 “Activating the two main menus” and Chapter 8.6 “How the menu control operates”. • BUS ON/OFF Enables the Precisa BUS functionality, mandatory if Precisa BUS accessories are con- nected... -
Page 25: Working With The Application Menu
■ 10 Working with the application menu Working with the application menu This chapter explains which working programs the balance has and how these are operated (see also Chapter 8.5 “Activating the two main menus” and Chapter 8.6 “How the menu control operates”). If «PRINT»... -
Page 26: Application "Units
10 Working with the application menu ■ (If “SET. APP. OFF” appears immediately, no application has yet been selected.) • Release the «MODE» button. • The balance has now switched over to the application and you can run the application with the «REF» but- ton. -
Page 27: Application "Percent
■ 10 Working with the application menu 10.6 Application “PERCENT” See Chapter 8.5 “Activating the two main menus” and Chapter 8.6 “How the menu control operates” for the activation of the application menu. • SETUP APPLICATION PERCENT DECIMALS AUTO Enter number of decimal places. The number of places that can be selected after the decimal point depends on the balance model. -
Page 28: Application «Sum
10 Working with the application menu ■ «INF»: - Display of: - Total weight - Residual capacity - Individual components - Exit info with «MODE»-button. Operation: Start the application (see Chapter 10.3 “Changing application / weighing mode”). • Place something on the weighing pan. •... -
Page 29: Application "Density
■ 10 Working with the application menu Operation: Start the application (see Chapter 10.3 “Changing application / weighing mode”). • Place the animal on the weighing pan. • Press the «REF»-button until the desired function appears on the display. • Release the «REF»-button. 10.11 Application “DENSITY”... -
Page 30: Density Determination "Solid In Air Mode
10 Working with the application menu ■ From the weights, the balance determines the density of the solid. 10.11.2 Density determination “Solid in air mode” With this weighing method, the solid is weighed with the aid of under-floor weighing (see Chapter 3 “Below- balance weighing”). -
Page 31: Statistics
■ 11 Statistics Display Step - - 0000 The balance carries out a Zero measurement again. measurement 2 EXIt - - iNT / LLLL The internal weight is applied and measured again or place the same ex- ternal weight again. measurement 1 EXIt The balance repeates this measurements for 10 cycles. - Page 32 11 Statistics ■ «INF»: - Change the display to the info display. Displayed information: - „Average value (MEAN)" - „Standard deviation (STDE.)" - „Relative standard deviation (STDE.-%)" - „Maximum (MAX.)" - „Minimum (MIN.)“ - „Total (TOT.)" - „individual values" - Exit info with «MODE»-button. Operation: Start the application (see Chapter 10.3 “Changing application / weighing mode”).
-
Page 33: Check-Weighing
■ 12 Check-Weighing Display Step Clear measurements: + 3,4775 Press «REF» until „RES“ flashes. A acoustic signal sounds and the measurement counter is reset. sto 3 + 3,4775 Measurement cleared, balance ready for new statistics. sto 0 «PRINT» A statistics log is printed by pressing the key. -
Page 34: Special Operating Keys
13 Special operating keys ■ Special operating keys 13.1 The Tare key «0/T» • Effects taring – Ensure that the balance is in the weighing mode – Briefly press «0/T» – The balance performs a tare operation. • Effects a calibration –... -
Page 35: Data Transfer
■ 14 Data transfer Data transfer For data-transfers to peripheral devices, the balance is equipped with an RS232/V24-interface. Before the data-transfer, the RS232 interface must be matched with the one in the peripheral device in the balance configuration menu (see chapter 8.3.6 "Interface functions"). •... -
Page 36: Remote Control-Commands
14 Data transfer ■ 14.2 Remote control-commands Command Function ACKn Acknowledge n=0 off; n = 1 on Start calibration D..Describe weight display (right-aligned) Reset weight display @..Describe Info display Reset Info display Set FLOATINGDISPLAY time n n=0 t=0.08 s t=0.16 s t=0.32 s Reset balance... -
Page 37: Practical Examples
■ 15 Practical examples Practical examples 15.1 Changing the configuration menu See Chapter 8.5.1 “Activating the configuration menu”, for the activation of the configuration menu. 15.1.1 Setting the choice of language In order to alter the display language, proceed as follows: •... -
Page 38: Activation Of Password Protection
15 Practical examples ■ 15.1.4 Activation of password protection The possibilities for setting the password protection are described in Chapter 9.9 “Password protection”. In order to activate password protection, proceed as follows: • Press «MODE» and hold down button until “PASSWORD ––––” appears. PASSWORd ––––... -
Page 39: Maintenance And Servicing
■ 16 Maintenance and servicing Maintenance and servicing 16.1 Calibration The calibration of the balance is fixed in the configuration menu (see Chapter 7.7 “Calibration of the balan- ce” and Chapter 9.5 “Calibration functions”). Possible types of calibration, depending on the model of balance: •... -
Page 40: Internal Calibration
16 Maintenance and servicing ■ • After the zero measurement the display flashes with the previously en- - - 372 tered calibration weight • Place the calibration weight on the pan • The display flashes first rapidly than slowly - - 372 •... -
Page 41: Error Messages
■ 16 Maintenance and servicing Regularly dismantle the weighing pan and the weighing pan holder and remove any dirt or dust from under the weighing pan and on the balance housing with a soft brush or a soft, lint-free cloth, moistened with a mild soap solution. -
Page 42: Menu Trees
17 Menu trees ■ Menu trees 17.1 Configuration menu tree • LANGUAGE LANGUAGE ENGLISH SPRACHE DEUTSCH LANGUE FRANCAISE • UNIT-1 UNIT-1 • SET DATA PRINT AUTOSTART ON/OFF MODE UNSTABLE STABLE LOADCHANGE CONTINUOUS TIMEBASE TIMEBASE SET PRINTFORMAT DATE AND TIME ON/OFF BALANCE-ID ON/OFF PRODUCT-ID... - Page 43 ■ 17 Menu trees QUICK-TARE ON/OFF ZERO-RANGE 0.000 g • SET INTERFACE BAUDRATE 1200 2400 4800 9600 19200 38400 57600 PARITY 7-EVEN-1STOP 7-ODD-1STOP 7-NO-2STOP 8-NO-1STOP 8-EVEN-1STOP 8-ODD-1STOP HANDSHAKE XON-XOFF HARDWARE PC DIRECT MODE ON/OFF CHARACTER SET FORMAT LINES TABLE • SET DATE AND TIME TIME [HH.MM.SS] DATE...
-
Page 44: Application Menu Tree
17 Menu trees ■ 17.2 Application menu tree • SET APP. UNITS COUNT PERCENT CALCULATOR Other applications available, Chapter 9 “Application”. NET-TOTAL ANIMAL DENSITY DIAGNOSTIC • SETUP APPLICATION Division depends on the current application, Chapter 9 “Application”. • SET STATISTIC MODE STATISTIC RECORDER...
Need help?
Do you have a question about the LX 321 and is the answer not in the manual?
Questions and answers