Table of Contents
Advertisement
Quick Links
Advertisement
Table of Contents

Related Manuals for Precisa 490 IB Series


Summary of Contents for Precisa 490 IB Series
- Page 1 Precisa Balances Series 490 IB/IT/IS Operating Instructions 350-8114-000a3...
-
Page 3: Identification
These operating instructions are protected by copyright. All rights reserved. No part of the operating instructions may be reproduced, processed, duplicated or published in any form by photocopying, microfilming, reprinting or other process, in particular electronic means, without the written agreement of Precisa Gravimetrics AG. © Precisa Gravimetrics AG, 8953 Dietikon, Switzerland, 2006. -
Page 4: Overview
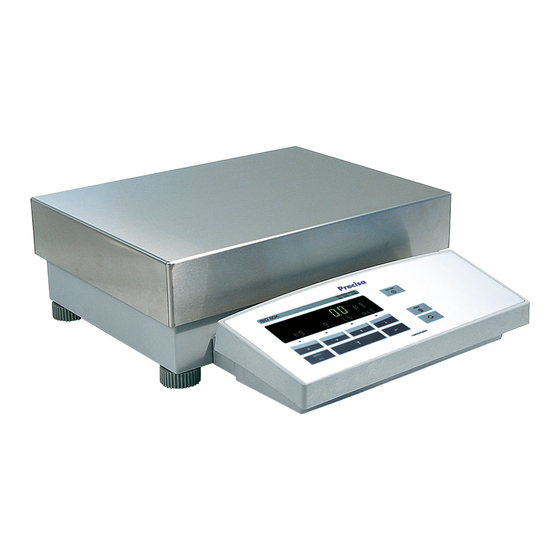
■ 1 Overview Overview 15 16 Description Section / Page Description Section / Page Weighing pan 2 / 3 Serial interface, RJ45 socket 13.1 / 34 Levelling bubble 7.6 / 11 Power connection socket Display Mechanical anti-theft protection Control panel IB 8.1 / 13 Prefix display 7.9 / 12... -
Page 5: Inspection And Assembly
• Insert the power cable (D) into the socket at the rear of the balance(9). NOTE A screwdriver is required for assembly. All parts must fit together easily. Do not apply force. Precisa Customer Service will be pleased to help you with any problems. -
Page 6: Below-Balance Weighing
■ 3 Below-balance weighing Below-balance weighing Objects which, because of their size or shape, cannot be put on the scale, can be weighed by means of be- low-balance weighing. The necessary parts are available as accessories (see chapter 4 "Accessories"). -
Page 7: Accessories
4 Accessories ■ Accessories Accessorie Article number Post for rear mounted display series 490 350-8655 Device for wall-mounted terminal (Cable in terminal 1.5m) 350-8654 Cable to terminal, 3m 350-8623 Cable to terminal, 5m 350-8624 Second display, free-standing, Cable 1.5m 350-8504 Second display, wall-mounted, Cable 3m 350-8516 350-8531... -
Page 8: Table Of Contents
■ Contents Identification ........1 8.5.1 Activating the application menu ..21 8.5.2 Selecting an application program ..21 Overview ........ 2 Application ......23 Inspection and assembly ... 3 Units..........23 Count ..........23 Below-balance weighing ... 4 Percent .......... 24 Accessories ...... - Page 9 Contents ■...
-
Page 10: Introduction
Virtually all models can be delivered in weights and measures approved. The most important basic production features of the Precisa balances include: • Simple-to-use 10-key multifunction control panel •... -
Page 11: Safety
6 Safety ■ Safety Representations and symbols Important safety instructions are highlighted with the appropriate symbol: DANGER Warning of a possible danger which can lead to death or to serious injuries. CAUTION Warning of a possibly dangerous situation which can lead to less severe injuries or damage. NOTE Tips and important rules on the correct operation of the balance. -
Page 12: Set Up
■ 7 Set up Set up Unpacking the balance The balances are delivered in an environmentally-friendly package, specifically developed for this precision instrument, which provides optimum protection for the balance during transportation. NOTE Retain the original packaging in order to avoid transportation damages when shipping or transporting the balance and to allow the balance to be stored in the best conditions if it is out of operation for an extended period. -
Page 13: Choosing A Suitable Location
7 Set up ■ Choosing a suitable location The balance location must be chosen in such a way as to guarantee perfect operation of your balance, so that the allowable ambient conditions and prerequisites are met and maintained: • Put the balance on a solid, firm and preferably vibration-proof, horizontal base •... -
Page 14: Dual Range And Floating Range Balances
■ 7 Set up The balance must be calibrated on initial installation and after every relocation. If you work in accordance with “Good Laboratory Practice GLP” observe the prescribed intervals between calibrations (adjustments). Calibration is effected in the configuration menu. Depending on the balance model, this may be done exter- nally, internally or automatically (see chapter 8.3.5 "Calibration functions"... -
Page 15: Operation
8 Operation ■ Operation The balance has two main menus available: the configuration menu and the application menu. The basic program of the balance is defined in the configuration menu. With this, you can either work with the basic configuration programmed ex-works, or define and store a user configuration adapted to your spe- cific needs. -
Page 16: Operation In The Programming Mode
■ 8 Operation 8.1.2 Operation in the programming mode Keys type 1 Keys type 2 Designation Function in programming mode «A», «B» • Changes within the menu level « » • Up/Down movements within the menu • Changes selected parameters «... -
Page 17: Activating The Configuration Menu
8 Operation ■ 8.3.1 Activating the configuration menu • Press «ON/OFF» to switch the balance on. • Hold down the «MENU» key continuously during the start-up process (which takes about ten seconds) until „UNIT-1“ appears in the display. • You can now change the configuration menu. 8.3.2 Language function •... -
Page 18: Print Functions
■ 8 Operation Procedure for changing the weight unit: Display Step - - - - - - - - « » Press repeatedly, until „UNIT-1“ is displayed. UNIT-1 9 - - - - - - - - « » The unit now flashes unit-1 - - - - - - - - «... -
Page 19: Calibration Functions
8 Operation ■ Calibration functions 8.3.5 • SET CALIBRATION MODE Closed EXTERNAL External EXT.-DEF. External with user-defined weight („DEF. n.nnn g“) INTERNAL with internal weight AUTO Automatic (AUTOCAL) DEF. 0.000 g Calibration weight for EXT.-DEF. mode AUTOCAL. TIME/TEMP. Auto-calibration on time and temperature TEMPERATURE Auto-calibration on temperature TIME... -
Page 20: Interface Functions
■ 8 Operation „STABILITY“ The value set for the stability control depends on the quality of the balance location and must be correctly chosen in order to obtain optimum, reproducible results. Choose: – Optimum balance location: „STABILITY LOW“ – Good balance location: „STABILITY MEDIUM“... -
Page 21: Anti-Theft Encoding
8 Operation ■ 8.3.9 Anti-theft encoding The balance can be protected against theft by using a freely selectable, four-digit numerical code: • If the anti-theft code is deactivated, the instrument can be re-started and operated after a power outage without having to enter a code. •... -
Page 22: Key Tone
■ 8 Operation 8.3.10 Key tone • KEY TONE KEY TONE ON/OFF Switch key tone on and off If the key tone is switched on, a short audio signal sounds each time a key is pressed. 8.3.11 Contrast • CONTRAST CONTRAST Set the contrast, only in LCD displays The display contrast can only be set in instruments with an LCD display. -
Page 23: The Change Key
8 Operation ■ – Release «PRINT» – The balance status will be printed out. • Print out the application-setup – Ensure that the balance is in the Weighing mode – Hold down «PRINT» until „PRINT APPLICATIONS” is displayed – Release «PRINT» –... - Page 24 ■ 8 Operation Add weighing results without intermediate tare ANIMAL Animal weighing etc. Other functions available. Refer to the Application Operating Instructions for the description In this function-field, select the desired application program. If an application program is selected in the „SET APP.” menu, then only those sub-menus, which contain functions and parameters necessary to define the chosen application program are shown in the „SETUP APPLICATION”...
-
Page 25: Application
9 Application ■ Application Units • SETUP APPLICATION UNITS UNIT-2 Milligram ----- ----- not active UNIT-3 Grain ----- ----- not active UNIT-4 Carat ----- ---- not active Assigning the function keys: Function «g» Show measurement in unit 1, e.g. Gram «mg»... -
Page 26: Percent
■ 9 Application Working without Tare value: Display Step 0,0000 « » Press until „COUNT“ appears. Count 12,1596 apply (or remove) e.g 25 pieces is re The weight calculated in pieces (PCS) and displayed. « » The reference quantity is set. «PRINT»... -
Page 27: Calculator
9 Application ■ Display Step 10,0000 «A» „SET“ is flashing. The point of reference is measured 30,0000 apply e.g. 20.0000g 130,000 The weight is recalculated in percent (%) and displayed. «A» The reference quantity is set. All subsequent measurements will now be shown as percentages of the reference weight so defined. «PRINT»... -
Page 28: Paper
■ 9 Application „PRINTER TEXT“ Unit being printed, max. 8 characters. In the program operation, the previously defined names of the keys appear over the function keys. After pressing a function key, the current measurement is converted in accordance with the factor assigned and the result shown or printed out after pressing the Print key. -
Page 29: Sum
9 Application ■ Display Step + 3,4770 Store the stable weight applyed and add it to the sum of the «A» components; the balance is tared. sto 1 + 0,0000 «A» Add further weights sto 2 Retrieve the parameters: + 0,0000 Show the info display. -
Page 30: Animal
■ 9 Application Display Step Retrieve the parameters: + 8,58962 Show the info display. « » Display the total of the added component. TOTAL 8.58962 9 + 8,58962 « » Display the remaining capacity. res. cap. 396.41038 9 + 8,58962 «... -
Page 31: Statistics
10 Statistics ■ Statistics • SET STATISTIC STATISTIC MODE Statistics program off STATISTIC Statistics only RECORDER Data storage only STAT./RECORDER Statistics and storage COUNT Number of values to be stored automatically (1..500). RECORDING MANUAL With «STO i» function key TIMEBASE on a time basis LOADCHANGE after every weight change... - Page 32 ■ 10 Statistics Display Step 3,4770 « » Press until „STATISTIC“ appears. statistic + 3,4770 «A» Record a stable measurement. sto 0 + 3,4785 «A» Record a second measurement. sto 1 + 3,4775 «Ai» Record a third measurement. sto 2 Retrieve the parameters: + 0,0000 Show info display.
-
Page 33: Check-Weighing
11 Check-Weighing ■ Check-Weighing • SET CHECK +/- CHECK +/- MODE ON/OFF Switch application on/off NOM. 100.000 g Enter nominal weight 120.000 g Define over limit 80.000 g Define under limit With the aid of the „CHECK +/-“ program you can check each measurement for its agreement with a defined reference-value plus/minus allowable deviations. -
Page 34: User Profiles (Mum, Multiuser Memory)
■ 12 User profiles (MUM, Multiuser Memory) User profiles (MUM, Multiuser Memory) 10 different user profiles can be saved. They can be protected against changes by means of a personal 4- digit password. A profile consists of the configuration and application settings. Anyone who does not wish to create a personal user profile can work with the balance as a “guest“. -
Page 35: Changing The Password And Password Protection
12 User profiles (MUM, Multiuser Memory) ■ The user is defined. Press «esc» to exit the menu. If there is a password set, it must be entered before making changes in the configuration and application menus. NOTE Make a note of your personal password. If a user loses his password, he can be enabled again using the password 7 9 1 4. -
Page 36: Data Transfer
■ 13 Data transfer Data transfer For data-transfers to peripheral devices, the balance is equipped with an RS232/V24-interface. Before the data-transfer, the RS232 interface must be matched with the one in the peripheral device in the balance configuration menu (see chapter 8.3.7 "Interface functions"). •... -
Page 37: Remote Control-Commands
13 Data transfer ■ Balance RJ 45 D25 / D9 Peripheral device RS 232 in RS 232 out • Pin configuration of the RJ45 socket Balance RJ 45 Remark n.c. not connected RS 232 out Out (V24) In (V24) Out (9..16V) RS 232 in In (V24) Out (V24) -
Page 38: Examples For The Remote Control
■ 13 Data transfer Command Function SDTttmmjj Set date and time (German) (Tag, Monat, Jahr, Stunde, Minute, Sekunde) hhmmss SDTmmddyy Set Date and Time (English) (Month, Day, Year, Hour, Minutes, Seconds) hhmmss T (ttt) Tare or set tare to a specific value Uxnn Set unit x (1...4) of the balance with nn (0=g, 1=mg, 2=kg, ...) Switch balance to unit x (1...4) -
Page 39: Service
14 Service ■ Service 14.1 Maintenance and servicing The balance must be treated carefully and cleaned regularly. It is a precision instrument. DANGER For maintenance work, the balance must be separated from the power supply (remove power adaptor plug from socket). Also ensure that the balance cannot be reconnected to the power supply during the work by a third party. -
Page 40: Calibration
■ 14 Service Fault Possible cause The weight • The draft is too strong at the balance location display • The balance support is vibrating or varying fluctuates • The scale pan is touching a foreign body continuously • The time chosen for FLOATINGDISPLAY is too short •... -
Page 41: External Calibration With Freely Selectable Weight
14 Service ■ Display Step - - 100 After the zero measurement the display flashes with the rec- ommended calibration weight. - - 100 Place the calibration weight on the weighing pan. The display continous to flash. +100,0000 Calibration is complete when the display stops flashing 14.3.2 External calibration with freely selectable weight For external calibration with user-definable weight, „SET CALIBRATION MODE EXT. -
Page 42: Automatic Repeatability Test (Art)
■ 14 Service AUTOCAL. -TIME n h“. (e.g. 6 h for 06.00 o'clock in the morning) NOTE For automatic calibration by time and by time/temp. the date and time of the balance must first be cor- rectly set (see chapter 8.3.8 "Date and time"). Calibration can also be effected manually at any time when auto-calibration is activated. - Page 43 14 Service ■ • Start the software update. • The software has been updated once the message „Download successful“ appears.
-
Page 44: Menu Trees
■ 15 Menu trees Menu trees 15.1 Configuration menu tree • UNIT-1 UNIT-1 • SET DATA PRINT AUTOSTART ON/OFF MODE UNSTABLE STABLE LOADCHANGE CONTINUOUS TIMEBASE TIMEBASE SET PRINTFORMAT DATE AND TIME ON/OFF BALANCE-ID ON/OFF PRODUCT-ID ON/OFF GROSS AND TARE ON/OFF UNITS ON/OFF USER... - Page 45 15 Menu trees ■ • SET INTERFACE BAUDRATE 1200 2400 4800 9600 19200 PARITY 7-EVEN-1STOP 7-ODD-1STOP 7-NO-2STOP 8-NO-1STOP HANDSHAKE XON-XOFF HARDWARE • SET DATE AND TIME TIME [HH.MM.SS] DATE [DD.MM.YY] FORMAT STANDARD/US • THEFTCODE THEFTCODE –––– THEFT-PROTECTION OFF/ON NEW CODE –...
-
Page 46: Application Menu Tree
■ 15 Menu trees 15.2 Application menu tree • SET APP. UNITS COUNT PERCENT CALCULATOR Other applications available. PAPER Refer to the Application Operating Intructions for the description. NET-TOTAL ANIMAL etc. • SETUP APPLICATION Division depends on the current application. (see chapter 8.5 "Application menu") •...
Need help?
Do you have a question about the 490 IB Series and is the answer not in the manual?
Questions and answers