
Related Manuals for Powerline PAB-139X


Summary of Contents for Powerline PAB-139X
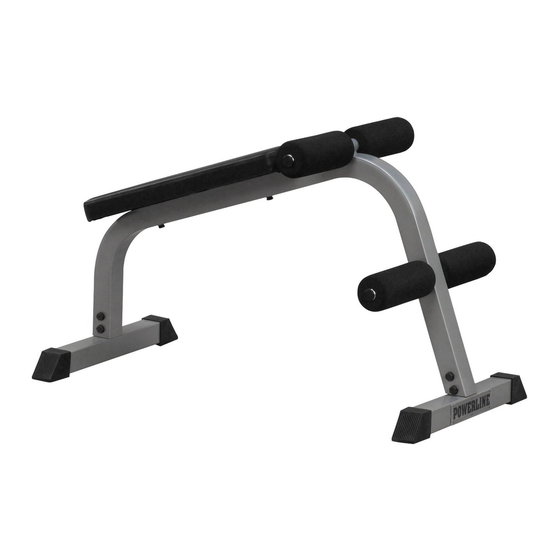
- Page 1 PAB-139X AB BOARD Owner’s Manual WWW.BODYSOLID.COM WWW.BODYSOLID.COM ¡ ¢ ¢ £ ¢ ¢ ¤ ¥...
- Page 2 THERE IS A RISK ASSUMED BY INDIVIDUALS WHO USE THIS TYPE OF EQUIPMENT. TO MINIMIZE RISK, YOU MUST FOLLOW THESE RULES: Inspect equipment before each workout. Check that all nuts, bolts, screws and pop pins are in place and fully tightened. Also, before use, check cables for sign of wear. Replace all worn parts immediately.
-
Page 3: Table Of Contents
PAB-139X TABLE OF CONTENTS • SAFETY INSTRUCTIONS....... PAGE 4 • PREPARATION........PAGE 5 • HARDWARE LIST........PAGE 6 • HARDWARE ILLUSTRATION....PAGE 7 • PART LIST / ILLUSTRATION....PAGE 9 • ASSEMBLY INSTRUCTIONS....PAGE 10 • EXPLODED VIEW........PAGE 14 •... -
Page 4: Safety Instructions
Part numbers damaged the equipment are required when ordering parts. • Assemble and operate the PAB-139X on a solid, level surface. Locate the unit a few feet from the walls or furniture to provide easy access. -
Page 5: Preparation
The bottles that are marked “Poison” is your touch up paint. Keep away from children. Set up the PAB-139X on a solid, fl at surface. A smooth, fl at surface under the machine helps keep it level. : Obtain assistance! If you feel like you can’t assemble the PAB-139X by yourself then do Provide ample space around the machine. -
Page 6: Hardware List
PAB-139X HARDWARE LIST PART # SIZE DESCRIPTION QUANTITY... -
Page 7: Hardware Illustration
PAB-139X HARDWARE ILLUSTRATION Part #1 M10X16 Hex Head Bolt) Qty. 8 Part #2 M8X70 Hex Head Bolt Qty. 2 Part #3 M10 Washer Qty. 8 Part #4 M8 Washer Qty. 2... - Page 8 PAB-139X HARDWARE ILLUSTRATION CONT. Part #5 M8 Spring Washer Qty. 2 Part #6 Foot Cap Qty. 4 Part #7 Round End Cap Qty. 4 Part #8 Foam Roller Qty. 4...
-
Page 9: Part List / Illustration
PAB-139X PART LIST Part A Part B Part C mainframe right lower frame left lower frame [1pcs] [1pcs] [1pcs] Part D Part E roller bar seat pad [2pcs] [1pcs]... -
Page 10: Assembly Instructions
PAB-139X STEP 1 BE CAREFUL TO ASSEMBLE ALL COMPONENTS IN THE SEQUENCE THAT THEY ARE PRESENTED. NOTE: finger tighten all hardware in this step. DO NOT wrench tighten until the last step. some components may be pre-assembled. nylon lock nuts will not fully screw onto bolts, must wrench tighten. - Page 11 PAB-139X STEP 1 Above shows STEP 1 assembled and completed...
- Page 12 PAB-139X STEP 2 BE CAREFUL TO ASSEMBLE ALL COMPONENTS IN THE SEQUENCE THAT THEY ARE PRESENTED. NOTE: finger tighten all hardware in this step. DO NOT wrench tighten until the last step. some components may be pre-assembled. nylon lock nuts will not fully screw onto bolts, must wrench tighten.
- Page 13 PAB-139X STEP 2 Above shows STEP 2 assembled and completed...
-
Page 14: Exploded View
PAB-139X EXPLODED VIEW... - Page 15 PAB-139X NOTES...
-
Page 16: Contact Page
PAB-139X please write your serial number in the boxes below S/N # Body-Solid ® Built for Life 1900 S. Des Plaines Ave. Forest Park, IL 60130 Phone:(708)427-3555 Fax:(708)427-3556 Hours: M-F 8:30 - 5:00 CST www.bodysolid.com Copyright 2011. Body-Solid. All rights reserved. Body-Solid reserves the right to change design and speci cations when we feel it will improve the product.
Need help?
Do you have a question about the PAB-139X and is the answer not in the manual?
Questions and answers